background image

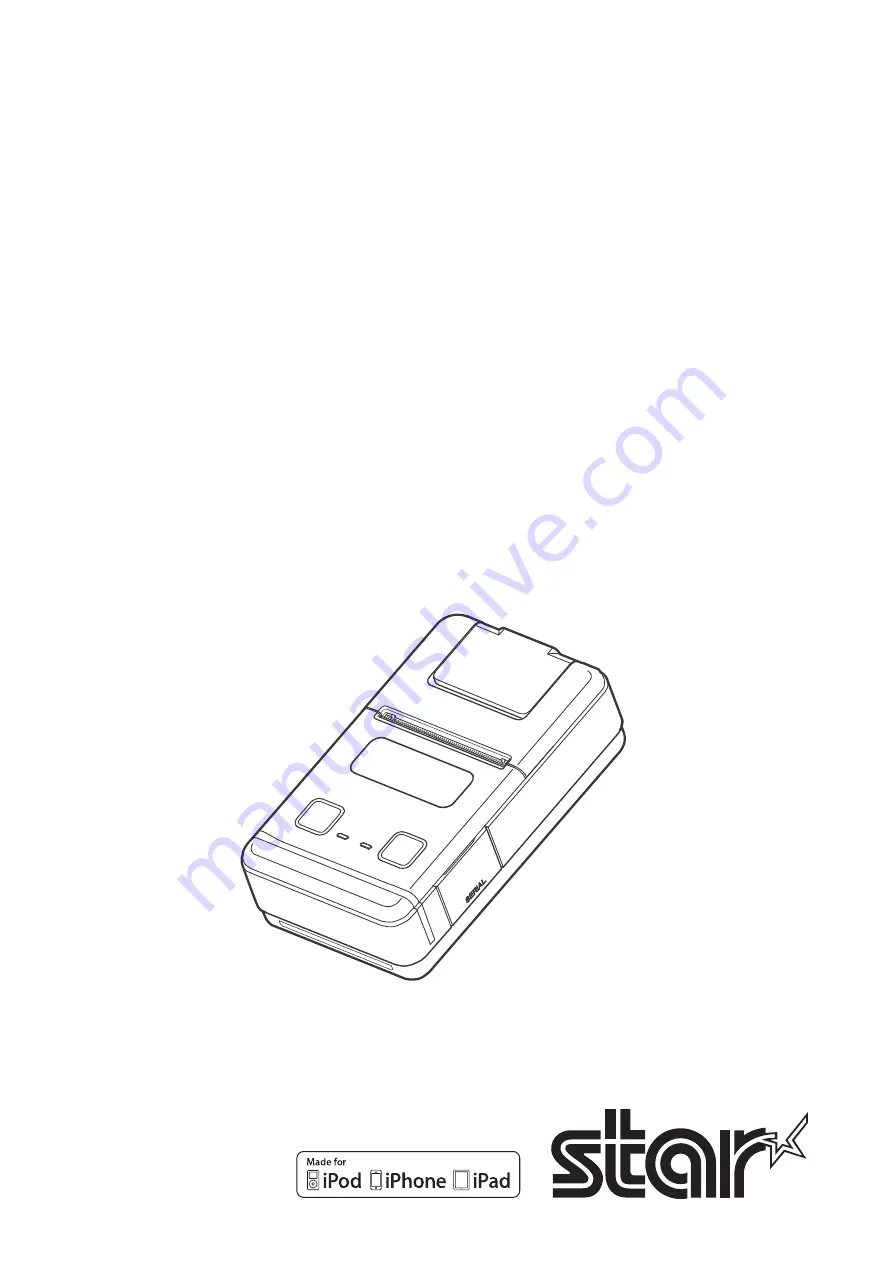
Mobile Printer

SM-S220

I

 SERIES


Hardware Manual

Summary of Contents for SM-S220I SERIES

Page 1: ...Mobile Printer SM S220I SERIES Hardware Manual ...

Page 2: ...sential requirements and other relevant provisions of Directive 1999 5 EC Deutsch Hiermit erklärt STAR MICRONICS CO LTD dass sich das Gerät Wireless Device in Übereinstimmung mit den grundlegenden German Anforderungen und den übrigen einschlägigen Bestimmungen der Richtlinie 1999 5 EG befindet Svenska Härmed intygar STAR MICRONICS CO LTD att denna Wireless Device står I överensstämmelse med de väs...

Page 3: ...mus ir kitas 1999 5 EB Direktyvos Lithuanian nuostatas Norsk STAR MICRONICS CO LTD erklærer herved at utstyret Wireless Device er i samsvar med de grunnleggende krav og øvrige Norwegian relevante krav i direktiv 1999 5 EF Íslenska Hér með lýsir STAR MICRONICS CO LTD yfir Því að Wireless Device er í samræmi við grunnkröfur og aðrar kröfur sem gerðar eru í Icelandic tilskipun 1999 5 EC This is a cla...

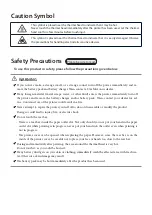
Page 4: ...or battery pack Then contact your dealer for ad vice Continued use of the printer could result in a fire P Never attempt to repair the printer yourself Also do not disassemble or modify the product Doing so could lead to injury fire or electric shock P Do not touch the tear bar There is a tear bar inside the paper outlet slot Not only should you not put your hand in the paper outlet slot while pri...

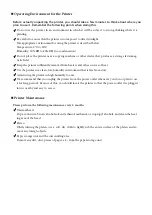
Page 5: ...aged Do not touch them with metal objects sandpaper etc P Printing quality may suffer if the thermal head heating element becomes soiled by being touched with your hands Do not touch the thermal head heating element P There is a risk of damage to the driver IC of the thermal head from static electricity Never directly touch the IC P Do not operate the printer if there is moisture on the front surf...

Page 6: ...d from heaters and other sources of heat P Use the printer in a clean low humidity environment that is free from dust P Avoid using the printer in high humidity rooms P We recommend that you unplug the printer from the power outlet whenever you do not plan to use it for long periods Because of this you should locate the printer so that the power outlet it is plugged into is nearby and easy to acce...

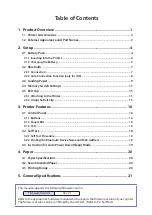
Page 7: ... 3 Printer Features 16 3 1 Control Panel 16 3 1 1 Buttons 16 3 1 2 Panel LEDs 16 3 1 3 LCD 16 3 2 Self Test 18 3 2 1 Self Test Procedure 18 3 2 2 Printing the Bluetooth Device Name and MAC Address 18 3 3 Instruction for Auto Power Down Sleep Mode 19 4 Paper 20 4 1 Paper Specifications 20 4 2 Recommended Paper 20 4 3 Printing Range 20 5 General Specifications 21 This manual supports the following f...

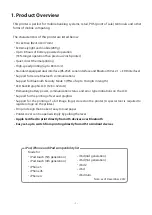
Page 8: ...inting High speed printing up to 80 mm s Standard equipped dual interface RS 232C serial interface and Bluetooth Ver 2 1 EDR interface Support for secure Bluetooth communications Support for Bluetooth Security Mode 3 PINs of up to 16 digits in length LED backlit graphic LCD 128 32 dots Remaining battery power communication status and error type indications on the LCD Support for the printing of te...

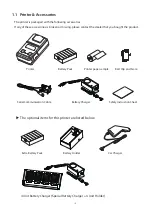
Page 9: ... contact the dealer that you bought the product u The optional items for this printer are listed below Battery Pack Serial Communication Cable Printer paper sample Printer Battery Charger Safety Instruction Sheet Extra Battery Pack Battery Holder Belt Clip and Score Car Charger 4 Unit Battery Charger Special Battery Charger 4 Unit Holder ...

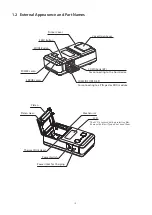
Page 10: ...ecting to a PIN pad or RFID module COM2 NFC PED 8P Cover Open Lever ERROR Lamp POWER Lamp FEED Button MODE Button Printer Cover LCD Mechanism Platen Platen Gear Power Inlet for Charging Power Switch Thermal Print Head The LCD is covered with a protective film Remove the films if you do not need them ...

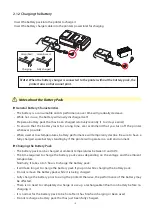
Page 11: ...back of the printer as in the figure shown below following the direc tion of the arrow 3 To remove the battery back pull back the hook and use the opposite procedure from the one you used to insert the battery pack 4 The battery pack install into External Battery Cradle Insert the battery pack in the direction of the arrow OFF ON Push the battery pack until the hock clicks into place Hook ...

Page 12: ...ing on the voltage and the ambient temperature Normally it takes 4 to 5 hours to charge the battery pack It will take longer to charge the battery pack if you print while charging the battery pack Do not remove the battery pack while it is being charged Fully charge the battery prior to using the printer Otherwise the performance of the battery may be affected There is no need to completely discha...

Page 13: ...attery pack Do not short the terminals of the battery pack or get it wet Do not place the battery pack in a bag with a small metal object such as a key If any battery fluid gets on your skin or clothing immediately wash the affected area with fresh water Otherwise skin damage may result uNotes about Storing the Battery Pack The characteristics of the battery pack may degrade if you store it in a c...

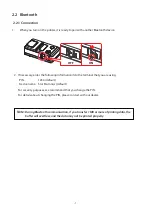
Page 14: ...to the terminal that you are using PIN 1234 default Device name Star Micronics default For security purposes we recommend that you change the PIN For details about changing the PIN please contact with our dealer Note During Bluetooth communication if you transfer 1 MB or more of printing data the buffer will overflow and the data may not be printed properly OFF ON ...

Page 15: ...fter powered on the printer automatically connects to the Host that it previously connected How to change the Host Turn the printer on and tap the printer name on the Bluetooth setting screen of the iOS device you want to use Turn the Bluetooth function off on the Bluetooth setting screen of the host that the printer is currently connected and then tap the printer name on the Bluetooth setting scr...

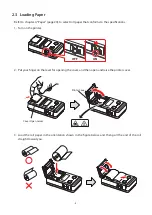
Page 16: ...he specifications 1 Turn on the printer 2 Put your finger on the lever for opening the cover and then open and raise the printer cover 3 Load the roll paper in the orientation shown in the figure below and then pull the end of the roll straight toward you OFF ON Cover Open Lerver Printer Cover ...

Page 17: ...rmal head immediately after the printer has been used Also even when the thermal head is not hot do not touch it because static electricity can damage the devices inside the thermal head WARNING 1 Do not touch the tear bar There is a tear bar inside the paper outlet slot Not only should you not put your hand in the paper outlet slot while printing is in progress never put your hand into the outlet...

Page 18: ...the baud rate to the parity bit type The current parity bit type will appear on the display 3 Press MODE twice to set the parity bit type to even NO PARITY g ODD PARITY g EVEN PARITY 4 Press FEED once to switch the displayed setting from the parity bit type to the number of stop bits The current number of stop bits will appear on the display 4 Press MODE once to switch the number of stop bits from...

Page 19: ...om the black mark sensor mode to the black mark sensor sensitivity The current black mark sensor sensitinity will appear on the display 5 Press MODE twice to set the black mark sensor sensitivity to medium2 SENSOR LOW g SENSOR MIDIUM1 g SENSOR MIDIUM2 9 Press FEED once to switch the displayed setting from the black mark sensor sensitivity to the power down The current power down will appear on the...

Page 20: ...ty Low DENSITY LOW Density Medium DENSITY MEDIUM Density High DENSITY HIGH 6 Print Speed Low 50mm s LOW SPEED High 80mm s HIGH SPEED 7 Black Mark Sensor v2 No use MARK NO USE Use MARK USE 8 Black Mark Sensor Sensitivity Low SENSOR LOW Medium 1 SENSOR MEDIUM1 Medium 2 SENSOR MEDIUM2 High SENSOR HIGH 9 Power Down No use PWDN NO USE 1 Minute Sleep PWDN 1 min v3 2 Minute Sleep PWDN 2 min v3 3 Minute S...

Page 21: ...UART Mode At the RS 232C mode the printer can communicate with a device using the serial communication cable supplied with the printer When you connect the serial cable the printer is automatically switched to serial communication from Bluetooth com munication v2 When the black mark sensor is set to Use the printer cannot detect the paper end status v3 Auto sleep function at iOS mode Bluetooth iAP...

Page 22: ... the screw that comes with the belt clip into the designated screw hole to attach the belt clip to the printer 2 Use a screwdriver to firmly screw in the screw 2 5 2 Using the Belt Clip When the printer is attached to your belt you can use it like the picture below Hold the printer firmly with your hand when you cut paper If it is not held firmly you may cannot cut paper smoothly with the tear bar...

Page 23: ...acters 2 Content Mode Status Indicates the currently specified printer mode or error status Data communication status The image shown on the left indicates that the data com munication status is good Remaining battery power There is sufficient remaining battery power The remaining battery power is low Please charge the bat tery pack Flashing The remaining battery power is extremely low Stop using ...

Page 24: ...ng and OFF Nothing Receiving Data ON ON Status of Antenna Icon is changed No displayed Back Light OFF Nothing On Line Busy Printing Data ON OFF Display Working Back Light ON Nothing Stored Terminal Setting Flickering Flickering No displayed Nothing Setup Mode ON OFF Setup Mode g Print Status Get out Setup Mode Display Setup Mode Back Light ON Nothing Test Printing ON OFF Display Print Test g Worki...

Page 25: ...ttings 3 The self test will finish automatically The printer will be ready to receive data after the self test finishes 3 2 2 Printing the Bluetooth Device Name and MAC Address 1 Follow the procedure in section 3 2 1 to perform a self test 2 Before the self test finishes press and hold FEED and MODE at the same time 3 The printer will print the Bluetooth device name and MAC address and the self te...

Page 26: ...be sure to recover it to the Print Ready Mode before sending print data How to Recover to Print Ready Mode How to Check 1 Send the Status command DLE EOT EOT and try to resend it until the printer receives the returned status value any value from 30H to 37H 1 Or 2 Press the FEED button or the MODE button the Power button for SM T300 series and con firm that the Power lamp Green LED is turned on 1 ...

Page 27: ... not use roll paper whose end is glued to its core because the printer will be unable to prop erly detect the end of the paper Also we recommend that you use roll paper that has a roll end mark at its end 2 Chemicals and oil may cause the roll paper to change color or cause the printed characters to become lighter 3 The roll paper starts changing color at approximately 70 C Please be aware that th...

Page 28: ...7 5 0 5 mm wide with a diameter of Ф40 mm Barcode 1D JAN EAN UPC ITF Code39 Code93 Code128 CODABAR NW 7 2D PDF417 QR Code DATA Matrix Communication packet size Maximum 8K byte Emulation ESC POS LCD 128 32 dots LED backlight Battery pack Lithium ion 7 4 V DC rechargeable 1130 mAh Battery operating time Approximately 8 hours normal mode Approximately 45 minutes continuous printing Battery charger In...

Page 29: ...ications External dimensions Approximately 82 mm W 140 mm D 47 mm H Weight 289 g printer battery pack The weight of the roll paper is not included Body color Front g Shiny black Back g Black Side g Blue silver 47 140 82 42 ...

Page 30: ... HP13 7DL U K Type of Equipment Thermal Printer Model Name SM S220 Ref R TTE Radio Report No ETLE121018 1220 Ref R TTE EMC Report No ETLE121018 1217 ETLE121018 1218 Ref R TTE Safety Report No ETLE121018 1220 ETLS121018 0154 I the undersigned hereby declare that the equipment specified above conforms to the above Directive s and Standard s Place Signature Date Full Name Year of 1st CE mark Position...

Page 31: ...URL http www starmicronics com support Rev 1 1 ...

Reviews: