background image

Manual Revision: 08/25/2017

For the latest information, technical specifications, and support for 

this product, please visit www.StarTech.com/USBDUPE17.

FR:

 Guide de l’utilisateur - fr.startech.com

DE:

 Bedienungsanleitung - de.startech.com

ES:

 Guía del usuario - es.startech.com

NL:

 Gebruiksaanwijzing - nl.startech.com

PT:

 Guia do usuário - pt.startech.com

IT:

 Guida per l’uso - it.startech.com

USBDUPE17

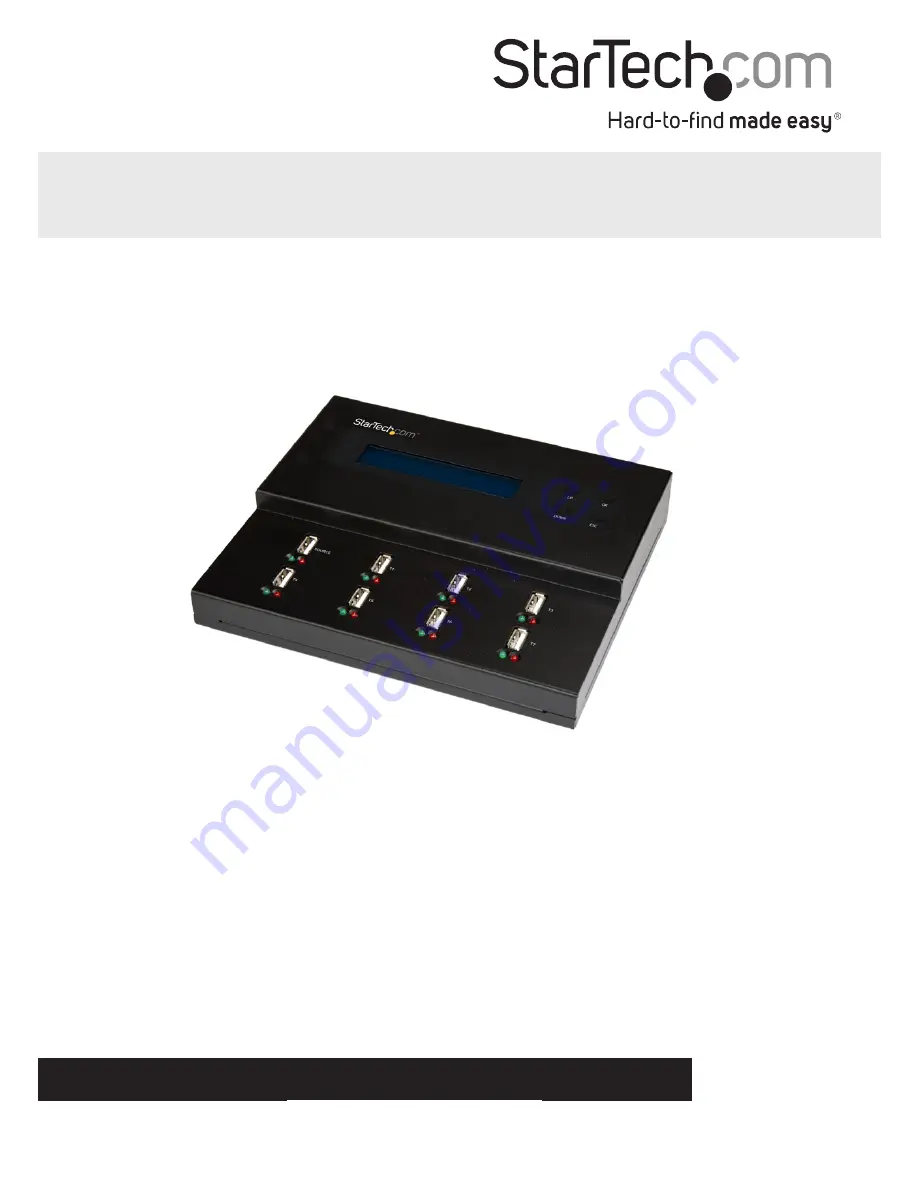
1:7 Standalone USB Duplicator  

and Eraser

*actual product may vary from photos

Summary of Contents for USBDUPE17

Page 1: ...Tech com USBDUPE17 FR Guide de l utilisateur fr startech com DE Bedienungsanleitung de startech com ES Guía del usuario es startech com NL Gebruiksaanwijzing nl startech com PT Guia do usuário pt startech com IT Guida per l uso it startech com USBDUPE17 1 7 Standalone USB Duplicator and Eraser actual product may vary from photos ...

Page 2: ...FCC Rules Operation is subject to the following two conditions 1 This device may not cause harmful interference and 2 this device must accept any interference received including interference that may cause undesired operation Changes or modifications not expressly approved by StarTech com could void the user s authority to operate the equipment Industry Canada Statement This Class B digital appara...

Page 3: ...e 3 Change the LCD display language 4 Restore the default factory settings 4 Copying USB flash drive data 4 Change the copy area 4 Check the flash drive capacity 5 Set the target tolerance 5 Change the copying speed 6 Change the time between copy and compare 6 Set the device to automatically check the USB flash drive 7 Complete a synchronous copy 7 Complete an asynchronous copy 8 Interrupt the cop...

Page 4: ...ze 12 Erasing USB flash drives 12 Perform a quick erase 12 Perform a full erase 13 Perform a DoD erase 13 Update the system firmware 14 Calculate the checksum number 14 Measure read and write speeds 14 Analyzing the quality of a USB flash drive 15 Perform a media check 15 Change the range limit percentage 15 Change the MB range limit 16 Change the error limit 16 View information about a USB flash ...

Page 5: ... LCD display 2 UP button 3 DOWN button 4 OK button 6 Source USB flash drive port 7 Source USB flash drive LED indicators 8 Destination USB flash drive port 9 Destination USB flash drive LED indicators 5 ESC button Back view 10 11 10 Power switch 11 Power adapter port ...

Page 6: ... drive ports Requirements are subject to change For the latest requirements please visit www StarTech com USBDUPE17 About the LED indicators Each of the eight USB flash drive ports feature a detection activity LED and an error LED LED behavior Significance Green LED is blinking Command is being executed Warning Do not remove the USB flash drive when the green LED is blinking Green LED is illuminat...

Page 7: ...raser and press the OK button Turn off the audio feedback feature By default the audio feedback feature is enabled 1 Highlight Setup and press the OK button 2 Highlight Button Sound and press the OK button 3 Highlight OFF and press the OK button Set up the duplicator and eraser 1 Connect the universal power adapter to the Power adapter port on the duplicator and eraser and to a power source 2 Use ...

Page 8: ...f the source USB flash drive including any empty space This type of copy is also known as quick copy Whole Media If you select Whole Media as the copy area the system copies the entire source USB flash drive including files and empty space This option is useful if you re copying the entire source USB flash drive or if you don t know the format of the USB flash drive Copying the whole media area of...

Page 9: ...s Tip This feature supports asynchronous operation which means that the system checks each USB flash drive separately You can remove a USB flash drive after it has been checked and insert a different USB flash drive and the check will continue Set the target tolerance You can set the capacity tolerance range between the source USB flash drive and the target USB flash drive and if the capacity of t...

Page 10: ... 0 and 50 and press the OK button To set the minimum capacity difference highlight No Limit or a numeric value between 0 and 50 and press the OK button Change the copying speed For most types of USB flash drives you should set the copy speed to Normal 1 Highlight Setup and press the OK button 2 Highlight Working Mode and press the OK button 3 Highlight one of the following and press the OK button ...

Page 11: ...ors the source USB flash drive should be larger than or the same size as the destination USB flash drive 1 Use the Power switch to turn on the duplicator and eraser 2 If the asynchronous copy feature is enabled disable the feature For more information about how to do this see the Disable the asynchronous feature section of the manual 3 If necessary change any of the copying settings for example co...

Page 12: ...4 Insert up to seven destination USB flash drives into the Destination USB flash drive ports 5 Highlight Copy and press the OK button 6 If you re copying to less than seven destination USB flash drives when the confirmation message appears press the OK button 7 When the green LED indicator stops blinking you can remove the destination USB flash drive and insert another USB flash drive and the proc...

Page 13: ... the OK button 4 Highlight Set HDD Mode and press the OK button 5 Highlight Active and press the OK button Compare USB flash drives After you have copied USB flash drives you can use the compare feature to make sure that the data was copied successfully 1 When the copying process is complete highlight Compare and press the OK button 2 Use the UP and DOWN buttons to navigate through the USB flash d...

Page 14: ...nge to format NTFS Linux multi partition FAT equal to or greater than 2GB FAT32 NTFS Linux multi partition FAT less than 2GB FAT16 1 Use the Power switch to turn on the duplicator and eraser 2 To auto format a USB flash drive insert up to seven USB flash drives into the Destination USB flash drive ports 3 Highlight Utility and press the OK button 4 Highlight Do Format and press the OK button 5 Hig...

Page 15: ... Highlight Utility and press the OK button 4 Highlight Do Format and press the OK button 5 Highlight FAT32 Format and press the OK button 6 When the confirmation message appears press the OK button 7 To check the formatting status progress and information about the USB flash drives use the UP and DOWN arrows to navigate through the USB flash drive ports Set the FAT16 cluster size 1 Use the Power s...

Page 16: ...rase the entire contents of the USB flash drive are erased and the USB flash drive is left unformatted This type of erase process is the fastest Warning When you complete the following steps all of the data on your USB flash drive is deleted If your USB flash drive has data on it that you require you should create a backup file or use a different USB flash drive 1 Use the Power switch to turn on t...

Page 17: ...of the erase process use the UP and DOWN buttons to move through the list of the USB flash drive ports Perform a DoD erase When you perform a DoD erase the system completes a three pass overwrite and erases the entire contents and format of the USB flash drive This type of erase process can take longer to complete than the quick erase and full erase processes Warning When you complete the followin...

Page 18: ... number of the source USB flash drive The checksum area that is calculated is based on the copy area that is set 1 Use the Power switch to turn on the duplicator and eraser 2 Insert a USB flash drive into the Source USB flash drive port 3 Highlight Utility and press the OK button 4 Highlight Calc Checksum and press the OK button When the calculation is complete the checksum is displayed on the LCD...

Page 19: ...equire you should create a backup file or use a different USB flash drive 1 Use the Power switch to turn on the duplicator and eraser 2 Insert up to seven USB flash drives into the Destination USB flash drive ports 3 Highlight Utility and press the OK button 4 Highlight Media Check and press the OK button 5 Do one of the following Highlight H3 Safe and press the OK button Highlight H5 RW and press...

Page 20: ...n 4 Do one of the following Highlight Sector and press the OK button Highlight KB and press the OK button Highlight MB and press the OK button Highlight GB and press the OK button 5 Highlight a number and press the OK button View information about a USB flash drive You can use this feature to view information about a USB flash drive including drive type content size total capacity and port number ...

Page 21: ...ature to view information about the system including the model number and current firmware version 1 Highlight Information and press the OK button 2 Highlight System Info and press the OK button 3 Use the UP and DOWN buttons to move through the USB flash drive ports ...

Page 22: ...urned for repair or replacement with equivalent products at our discretion The warranty covers parts and labor costs only StarTech com does not warrant its products from defects or damages arising from misuse abuse alteration or normal wear and tear Limitation of Liability In no event shall the liability of StarTech com Ltd and StarTech com USA LLP or their officers directors employees or agents f...

Page 23: ...rts and we quickly deliver them wherever they need to go Just talk to one of our tech advisors or visit our website You ll be connected to the products you need in no time Visit www startech com for complete information on all StarTech com products and to access exclusive resources and time saving tools StarTech com is an ISO 9001 Registered manufacturer of connectivity and technology parts StarTe...

Reviews: