background image

User and Installation Instructions

Stoves

FS Electric

083116200 10/2010

Summary of Contents for 61EDO

Page 1: ...User and Installation Instructions Stoves FS Electric 083116200 10 2010 ...

Page 2: ...n Before Using Safety Using the Hob Using the Grill Using the Ovens Programmer clock Cleaning Installation Technical Customer Care Please keep this handbook for future reference or for anyone else who may use the appliance ...

Page 3: ...strict rotation as our Customer care representatives become available Please ensure that you have the product s model no and serial no available when you call These can be found on the silver data label on your product Alternatively general information spares and service information is available from our website www stoves co uk Warranty Your new appliance comes with our 12 month guarantee protect...

Page 4: ...l on for a short while This will burn off any residues left from manufacturing There may be a smell which accompanies this process but this is nothing to worry about and is harmless It is recommend that you wash the oven shelves baking tray grillpan and grillpan trivet before their first use in hot soapy water This will remove the protective oil coating Before Using the Product ...

Page 5: ...e been given supervision or instruction concerning use of the appliance by a person responsible for their safety WARNING Servicing should be carried out only by authorised personnel The appliance must never be disconnected from the mains supply during use as this will seriously affect the safety and performance particularly in relation to surface temperatures becoming hot and gas operated parts no...

Page 6: ...nd can lead to spillage or injury Always use the Minute Minder if fitted if you are leaving the oven unattended this reduces the risk of food burning Do not place items on the door while it is open Do not wrap foil around the oven shelves or allow foil to block the flue Do not drape tea towels near the oven while it is on this will cause a fire hazard Do not pull heavy items such as turkeys or lar...

Page 7: ... hob Never leave them close to or on top of the hob Never leave any cook zone on without a pan covering it This causes a fire hazard Do not use the hob surface as a chopping board or food preparation area as this may lead to it becoming damaged Do not put metal cooking utensils cutlery knives or other metal objects on the hob They could become hot if they are near a cooking area which is in use If...

Page 8: ...ut never lean over a pan to reach the controls 3 If you have a fire blanket put it over the pan 4 If you have put the fire out leave the pan to cool completely Deep fat frying presents more dangers in your kitchen 1 Never fill a chip pan or other deep fat fryer more than one third full of oil 2 Don t use a fire extinguisher on a pan of oil the force of the extinguisher can spread the fire and crea...

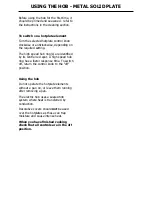
Page 9: ...power setting you wish to use To switch off turn the selected control knob to the off position Notes on use The power settings on the hob do not indicate any set temperature and cannot be used to judge one element against another During cooking the elements will cycle on and off This is to prevent the hob from overheating Hot hob indicator if fitted The hot hob light will come on when one of the h...

Page 10: ...s with highly polished bases may also reflect heat back into the element causing the hotplate to cycle on and off rapidly which slows down cooking Do not leave the element on without it being covered by a pan as this can cause overheating Energy Saving Position pans centrally over the elements Only heat the amount of liquid you need Once liquids have been brought to the boil reduce the heat settin...

Page 11: ...identified by its central red spot A high speed hob ring has a faster response time To switch off return the control knob to the off position Using the hob Do not operate the hotplate elements without a pan on or leave them running after removing a pan The electric hob uses a sealed hob system where heat is transferred by conduction Decorative covers should not be used over the hotplates as these ...

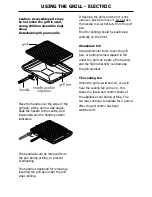
Page 12: ...ling If cleaning the grill pan when it is hot use oven gloves to move it Do not use the handle to pour hot fats from the grill pan Food for grilling should be positioned centrally on the trivet Aluminium foil Using aluminium foil to cover the grill pan or putting items wrapped in foil under the grill can create a fire hazard and the high reflectivity can damage the grill element The cooling fan Wh...

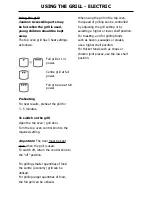
Page 13: ...itch off return the control knob to the off position For grilling smaller quantities of food the centre economy grill can be utilised For grilling larger quantities of food the full grill can be utilised When using the grill in the top oven the speed of grilling can be controlled by adjusting the grill setting or by selecting a higher or lower shelf position For toasting and for grilling foods suc...

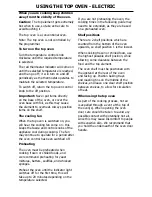
Page 14: ...g The oven must be preheated when cooking frozen or chilled foods and we recommend preheating for yeast mixtures batters soufflés and whisked sponges Preheat the oven until the indicator light switches off for the first time this will take up to 20 minutes depending on the temperature selected If you are not preheating the oven the cooking times in the following guide may need to be extended as th...

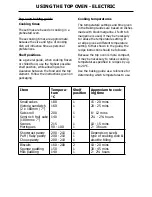
Page 15: ...o reduce the temperature setting If a recipe gives a different temperature setting to that shown in the guide the recipe instruction should be followed Because the top oven is more compact it may be necessary to reduce cooking temperatures specified in recipes by up to 20 C Use the baking guide as a reference for determining which temperatures to use Item Tempera ture C Shelf position Approxiamte ...

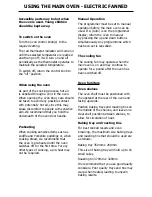
Page 16: ...for the first time For any other types of cooking a pre heat may not be required Manual Operation The programmer must be set to manual operation before the main oven can be used If A Auto is on the programmer display return the oven to manual by pressing the up and down buttons simultaneously Any programmme which has been set is cancelled The cooling fan The cooling fan may operate when the main o...

Page 17: ...s it is possible to cook 2 items per shelf eg 2 victoria sandwiches or 2 casseroles Although you need to keep in mind the points To help the air circulate freely with careful choice of dishes and tins it is possible to cook a complete meal and perhaps something else for the freezer in the oven at the same time When roasting meats you will notice that fat splashing is reduced which is due in part t...

Page 18: ... guide Cooking times temperatures The temperature settings and times given in the baking guide are based on dishes made with block margarine If soft tub margarine is used it may be necessary to reduce the temperature setting Allow enough space between shelves for food that will rise during cooking Do not place items on the oven base as this will prevent air circulating freely Defrosting and coolin...

Page 19: ...tures and gas marks For optimum results conventional temperatures need to be converted to A efficiency temperatures For example an item which would normally cook at a conventional temperature of 180 C will now cook at the A efficiency temperature of 160 C Conventional temperature C A Efficiency Oven C Gas Mark 100 110 130 140 150 160 180 190 200 220 230 250 100 110 120 130 140 150 160 170 180 190 ...

Page 20: ...fruit cake 205mm 8 Christmas cake 205mm 8 Dundee cake 205mm 8 160 160 170 160 160 160 130 depending on recipe 130 15 25 mins 15 20 mins 10 12 mins 20 30 mins 20 25 mins 1 1 hours 1 1 hours 2 3 hours depending on recipe 2 2 hours Pastry Flaky Puff Shortcrust Choux Plate tarts 2 x 180mm 7 180 170 170 170 depending on recipe and type of filling Biscuits Shortbread rounds Nut brownies Brandy snaps Fla...

Page 21: ... for rich fruit cakes unless specified in the recipe Always use the correct size and shape of tin for the recipe quantities Roast turkey Roasting turkey involves cooking two different types of meat the delicate light breast meat which must not be allowed to dry out and the darker leg meat which takes longer to cook The turkey must be roasted long enough for the legs to cook so frequent basting is ...

Page 22: ...es When cooking stuffed meat or poultry calculate the cooking time from the total weight of the meat plus the stuffing For joints cooked in foil or covered roasters and for lidded casseroles add 5 minutes per 450g 1lb to the calculated cooking time Smaller joints weighing less than 1 25kg 2 lb may require 5 minutes per 450g 1lb extra cooking time Position the oven shelf so that the meat or poultry...

Page 23: ...d Down buttons adjusts this accordingly This message and A symbol appear A Press once Minute Minder Press twice Cook Time Press three times End Time A Automatic symbol Minute Minder symbol A A Symbol Symbol What is it Down Used to decrease cook end time remove minutes from the minute minder and adjust the time of day Also for listening to and setting the alarm tone Up Used to increase cook end tim...

Page 24: ...n button to lis ten to the first tone Release the down button and press it again to listen to the second tone etc Releasing the down button after the tone has sounded will automatically select that tone Setting the minute minder To set the Minute Minder press the Function button once The bell symbol will appear and start flashing The flashing only lasts for 5 seconds so the time must be set within...

Page 25: ...he program is set then it cannot be adjusted Extra time cannot be added nor can the end time be extended To cancel the semi automatic programs press both the Up and Down buttons together This can be done at any time during the cooking process Then if necessary re program For the instructions on how to use both of these functions please see the following page Fully automatic cooking This function i...

Page 26: ...itself off at the time you have selected To switch off the alarm press any button 26 PROGRAMMER CLOCK 1 The Duration method 2 3 4 The End Time method 5 6 Semi automatic cooking The Duration method Press the Function button twice 1 which will skip past the Minute Minder The LED display will flash the word dur 2 and the A will flash on the left hand side of the display Use the Up and Down buttons to...

Page 27: ...oven The timer will calculate the appropriate start time To switch off the alarm press any button 27 PROGRAMMER CLOCK 7 8 9 10 11 12 Fully automatic cooking example This programming method is best suit ed for when a delayed start time is required Unlike the semi automatic methods this requires both the dura tion and the end time to be entered The timer will work out the start time and begin cookin...

Page 28: ... tone Setting the minute minder 1 Press and release the plus button to change the display from clock to minute minder the bell symbol will light 2 Use the plus and minus buttons to set the length of time before the alarm tone will sound The display will increase decrease in units of 10 seconds up to 99 minutes 50 seconds and in units of 1 minute from 1 hour 40 minutes upwards The maximum period wh...

Page 29: ...rchased from the Customer Care Centre Sharp objects can mark the surface of stainless steel but will become less noticeable with time Wipe any spillage immediately taking care to avoid burning your hands Some foods are corrosive eg vinegar fruit juices and especially salt they can mark or damage the metal if they are left on the surface Baby oil can be used to restore stainless steel finishes but ...

Page 30: ...nel correctly fitted For your safety glass door panels are made of toughened glass This ensures that in the unlikely event that a panel breaks it does so into small fragments to minimise the risk of injury Please take care when handling using or cleaning all glass panels as any damage to the surfaces or edges may result in the glass breaking without warning or apparent cause at a later date Should...

Page 31: ...ill prevent any build up of grease which may be a fire hazard Solid plate hobs Prime and Season this helps maintain the finish of the elements Use a damp clean cloth to wipe the solid plate making sure that you follow the circular grooves and avoid damaging the red spots Make sure that you allow the hotplate to dry before use by switching on the elements at a low heat You can restore the hotplates...

Page 32: ...ances without marking or damage Important Ensure that you route all mains cables well clear of any adjacent heat source Clearances This cooker may be fitted flush to base units However for models with side opening doors we recommend a side clearance of 60mm between the cooker and any side wall to allow the door to be opened fully The cooker should not be placed on a base No shelf or overhang or co...

Page 33: ...ply with the I E E and local regula tion 1 Access to the mains terminal is gained by opening the terminal block cover at the rear of the appliance use a small flat bladed screwdriver 2 Connection should be made with 6 0mm2 flexible twin and earth cable 3 First strip the wires then push the cable through the cable clamp in the terminal block cover 4 Connect the cable to the ter minal block and tigh...

Page 34: ...CTRIC PRODUCTS Electrical supply load 220 240V 50Hz 10665W Countries of destination GB Great Britain IE Ireland Warning This appliance must be earthed Databadge is located at the bottom of the front frame behind the door ...

Page 35: ...or the other Why is there condensation on the doors Condensation is caused by hot moist air meeting a cooler surface i e the oven door You cannot always prevent it but you can minimise it when it happens by doing the following o Pre heat the oven at a high temperature before putting food in the oven and cover the food you are cooking wherever possible o Whenever you can cook wet foods at higher te...

Page 36: ... features which are explained fully earlier in this book it allows you more flexibility when cooking The neon on my appliance keep going out and coming back on again is this right Yes In most cases the neon will cycle on and off to show that oven is maintaining your tem perature choice ...

Page 37: ...ulb with you Please remember that bulbs are not covered by your warranty No of Lamps Bulb location Oven Type Instructions 2 Side All Remove the oven shelves Grasp the lens cover on the light fitting and pull it away from the side of the oven Unscrew the bulb and replace Replace the lens cover 1 Rear Fanned Multifunction Remove the oven shelves Remove the loose oven back by unscrewing the 4 securin...

Page 38: ...e conditioner 082606783 1 All sealed solid plate hobs Stainless steel cleaner 082606764 1 All stainless steel parts Oven cleaner spray 082606786 1 All cookers inside cavities and on glass Multi purpose kitchen cleaner 082606782 1 General kitchen cleaner E cloth 082813300 1 All cookers for clean ing glass and stainless steel Purchasing Cleaning Products and Accesories To order or enquire about any ...

Page 39: ...Please keep this handbook for future reference or for anyone else who may use the appliance ...

Page 40: ...an be found on the silver data label on your product which is located Ovens Open the door adjacent to the oven cavity High level grill products Inside the base compartment Hobs On the underside of the product Enter appliance numbers here for future reference Model No Serial No SERVICE RECORD For customers outside the UK and Northern Ireland please contact your local supplier Glen Dimplex Home Appl...

Reviews: