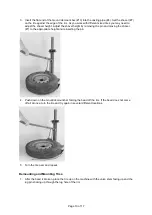
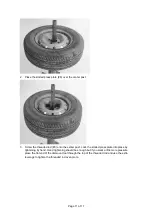
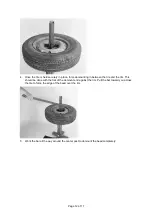
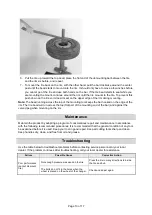
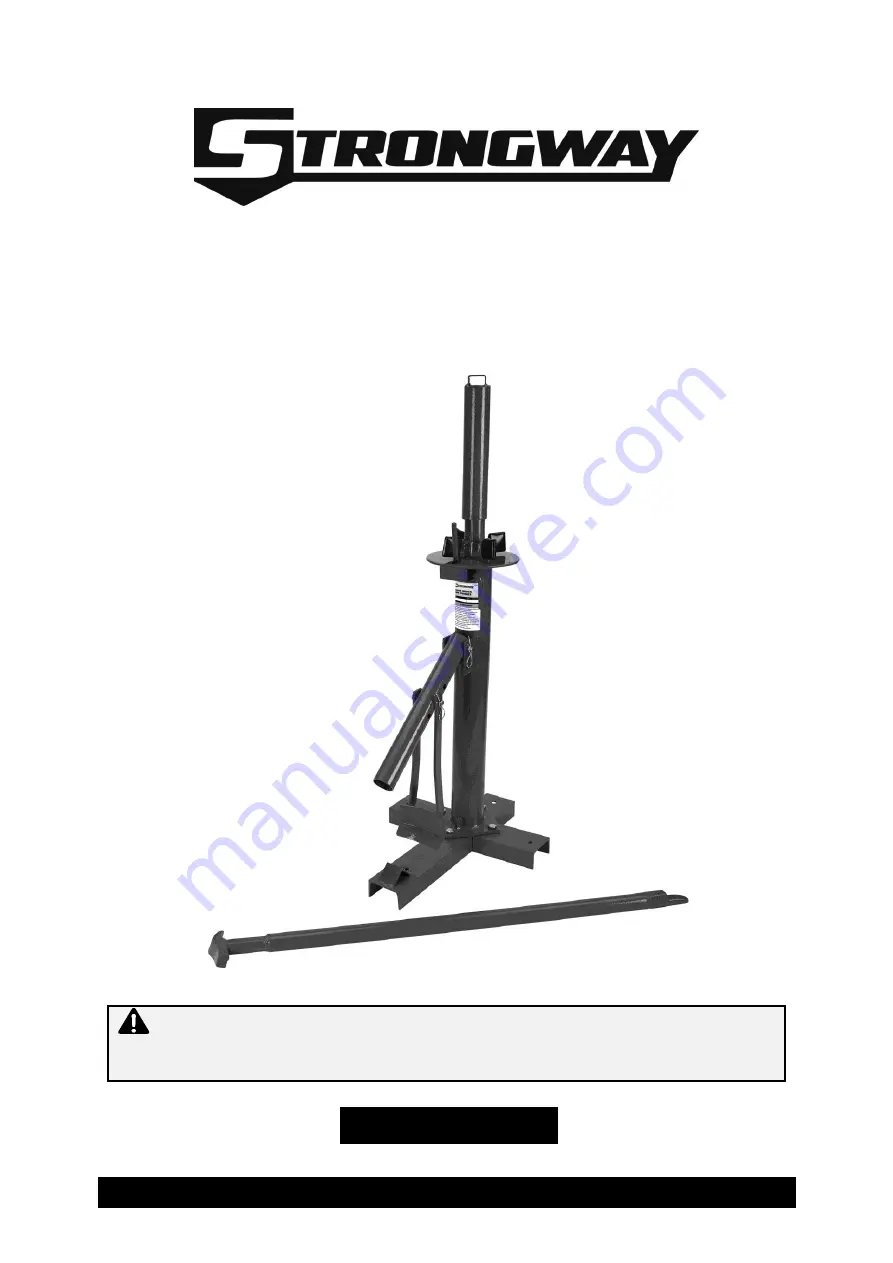
background image

SAVE THESE INSTRUCTIONS 


Large Manual Tire Changer


Owner’s Manual


WARNING:

 Read carefully and understand all ASSEMBLY AND OPERATION 

INSTRUCTIONS before operating. Failure to follow the safety rules and other basic safety 
precautions may result in serious personal injury. 


Item #54413 


Summary of Contents for 54413

Page 1: ...ire Changer Owner s Manual WARNING Read carefully and understand all ASSEMBLY AND OPERATION INSTRUCTIONS before operating Failure to follow the safety rules and other basic safety precautions may result in serious personal injury Item 54413 ...

Page 2: ...ant that you read the entire manual to become familiar with this product before you begin using it This tire changer is designed for certain applications only Northern Tool Equipment is not responsible for issues arising from modification or improper use of this product such as an application for which it was not designed We strongly recommend that this product not be modified and or used for any ...

Page 3: ...ded Use 4 Technical Specifications 4 Important Safety Information 4 Specific Operation Warnings 5 Assembly Instructions 6 Operating Instructions 8 Troubleshooting 13 Parts Diagram 14 Parts List 14 Replacement Parts 14 Limited Warranty 16 ...

Page 4: ...hey have read this manual and have developed a thorough understanding of how it works Do not modify this product in any way Unauthorized modification may impair the function and or safety and could affect the life of the product There are specific applications for which the product was designed Use the right tool for the job DO NOT attempt to force small equipment to do the work of larger industri...

Page 5: ...ion when appropriate This applies to all persons in the work area Do not overreach Keep proper footing and balance at all times Ensure the power switch is off prior to plugging in the tool Secure the work with clamps or a vise instead of your hand when practical This safety precaution allows for proper tool operation using both hands CAUTION TIRE CHANGER USE AND CARE Do not force the product Produ...

Page 6: ...ations shall be made to this product Only attachments and or adaptors supplied by the manufacturer shall be used Not for use by or around children Assembly Instructions 1 Bolt the long leg 1 to the center post 3 with bolts 11 nuts 12 lock washers 13 and flat washers 14 2 Bolt the two short legs 2 to the long leg base with bolts 11 nuts 12 lock washers 13 and flat washers 14 Note The user can bolt ...

Page 7: ...Page 7 of 17 3 Connect the casting pipe 4 into the post 3 with the lock pin 5 and hair pin 6 4 Connect the shovel 7 to the casting pipe 4 with the lock pin 5 and hair pin 6 ...

Page 8: ...8 into the top of the post 3 6 Rotate the threaded rod 9 into the top of post 3 Operating Instructions WARNING Release tire air pressure before using this tire changer Wear ANSI Z871 Compliant safety goggles Keep bystanders away during operation ...

Page 9: ...re beginning use a rubber lubricant not included It makes bead breaking mounting and demounting easier 1 Place one piece of the pad on the base of the product 2 To break the bead from the rim lay the tire flat on the long leg base 1 ...

Page 10: ...g the pin and moving the shovel 7 to the appropriate height and reinserting the pin 4 Push down on the mount demount bar forcing the bead off the rim If the bead does not come off all at once turn the tire and try again in several different locations 5 Turn the tire over and repeat Demounting and Mounting Tires 1 After the bead is broken place the tire up on the machine with the valve stem facing ...

Page 11: ... onto the center post Lock the slotted press plate into place by tightening by hand Hand tightening should be enough but if you want a little more pressure place the flat end of the dismount tool through the top of the threaded rod and use the extra leverage to tighten the threaded rod even more ...

Page 12: ...ting in between the tire and the rim This should be done with the flat of the demount end against the rim Pull the bar toward you across the tire to force the edge of the bead over the rim 5 Work the bar all the way around the center post to demount the bead completely ...

Page 13: ...the top flat part of the mounting end of the bar and against the curved peg when mounting on the rim Maintenance Maintain the product by adopting a program of conscientious repair and maintenance in accordance with the following recommended procedures It is recommended that the general condition of any tool be examined before it is used Keep your tool in good repair Keep all cutting tools sharp an...

Page 14: ...e 1 9 Threaded Rod 1 10 Crowbar 1 11 Bolt M10x25 4 12 Nut M10 4 13 Lock Washer 10 4 14 Flat Washer 10 4 Replacement Parts For replacement parts and technical questions please call Customer Service at 1 800 222 5381 Not all product components are available for replacement The illustrations provided are a convenient reference to the location and position of parts in the assembly sequence ...

Page 15: ...tion will be required item description item model number item serial number item lot date code and the replacement part reference number The distributor reserves the rights to make design changes and improvements to product lines and manuals without notice ...

Page 16: ...y claim contact Us at 1 800 222 5381 identify the product by make and model number and follow the claim instructions that will be provided The product and the purchase receipt must be provided to Us in order to process Your warranty claim Any returned product that is replaced or refunded by Us becomes our property You will be responsible for return shipping costs or costs related to Your return vi...

Page 17: ...Page 17 of 17 Distributed by Northern Tool Equipment Company Inc Burnsville Minnesota 55306 www northerntool com Made in China ...

Reviews: