background image


INSTRUCTION MANUAL 


ITEM NO.:


EP-1800 

18V 7" CORDLESS POWER POLISHER 


EP-1800-I-1403A-TE


Summary of Contents for EP-1800

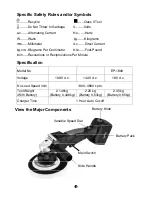
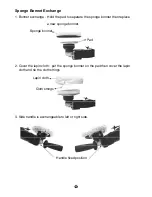
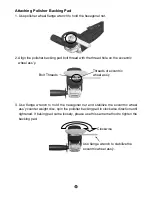
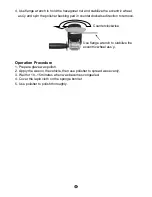
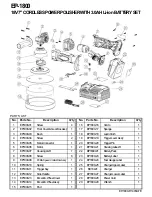
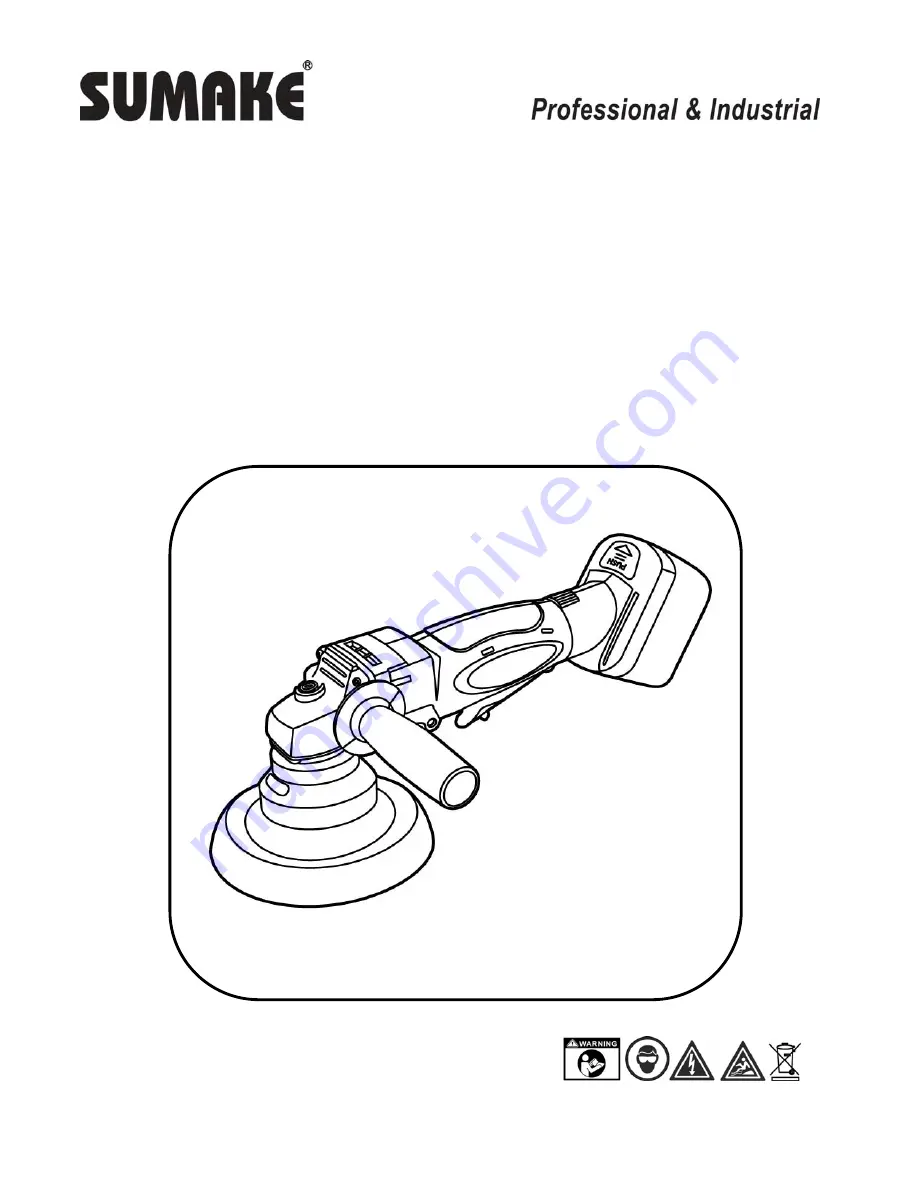
Page 1: ...INSTRUCTION MANUAL ITEM NO EP 1800 18V 7 CORDLESS POWER POLISHER EP 1800 I 1403A TE...

Page 2: ...parts mounting and any other condition that may affect its operation 8 A guard or other parts that is damaged should be properly repaired or replaced by an authorized service center unless otherwise i...

Page 3: ...lified service center while repair is required Incorrect reassembling may result in a risk of electric shock or fire Important Safety Instructions for Charger Battery Pack WARNING Additional Safety Ru...

Page 4: ...ort can use large current flow overheating possible burns and even a breakdown 9 Do not store the machine and battery pack in locations where the temperature may reach or exceed 50 C 122 F 10 Do not i...

Page 5: ...2 35 kg Battery 0 65kg Charger Time 1 Hour Auto Cut off Battery Pack Battery Knob Main Switch Side Handle Variable Speed Dial Specific Safety Rules and or Symbols Recycle Class II Tool Do Not Throw I...

Page 6: ...pack push the battery knob on the battery pack and pull the battery pack to remove the battery pack from the unit 2 To install the battery pack Push the battery pack into the unit until the battery pa...

Page 7: ...he remaining capacity RC and temperature protection status green LED indications 3 second when the SW button is momentarily pressed Remaining Capacity LED Indication RC Status LED 1 green 0 25 LED 1 2...

Page 8: ...e insert it and try to charge again 7 When you charge a new battery pack or a battery pack which has not been used for a long period it may not accept a full charge This is a normal condition and does...

Page 9: ...between 0 C 32 F and 50 C 122 F The charger will automatically begin charging 3 If both red and green indicator lights are ON the battery pack either does not comply or is defective Please contact yo...

Page 10: ...onge bonnet then replace a new sponge bonnet 2 Cover the lapin cloth put the sponge bonnet on the pad then cover the lapin cloth and tie the cloth strings 3 Side handle is exchangeable to left or righ...

Page 11: ...el ass y 3 Use flange wrench to hold the hexagonal nut and stabilize the eccentric wheel ass y counter weight disc spin the polisher backing pad in clockwise direction until tightened If baking pad ca...

Page 12: ...rection to remove Operation Procedure 1 Prepare glaze wax polish 2 Apply the wax on the vehicle then use polisher to spread wax evenly 3 Wait for 10 15 minutes when wax becomes congealed 4 Cover the l...

Page 13: ...ies with these normative documents Machinery Directive 2006 42 EC Electromagnetic Compatibility 2004 108 EC RoHS 2011 65 EU Applicable harmonized standard s EN 60745 1 EN 60745 2 3 EN 55014 1 EN 55014...

Page 14: ...ng Label R 1 7 EP1800 07 Housing L R 1 22 BP1830L01 Battery Pack 1 8 EP1800 08 Screw 6 23 EP1800 23 Battery Label 1 9 EP1800 09 PCB Speed Control Dial Ass y 1 24 EP1800 24 Fuel Gauge Label 1 10 EP1800...

Page 15: ...NOTE...

Page 16: ...NOTE...

Reviews: