
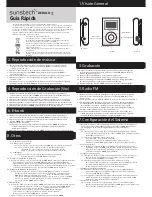
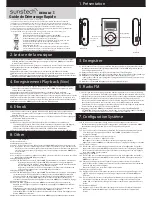
Quick Start Guide
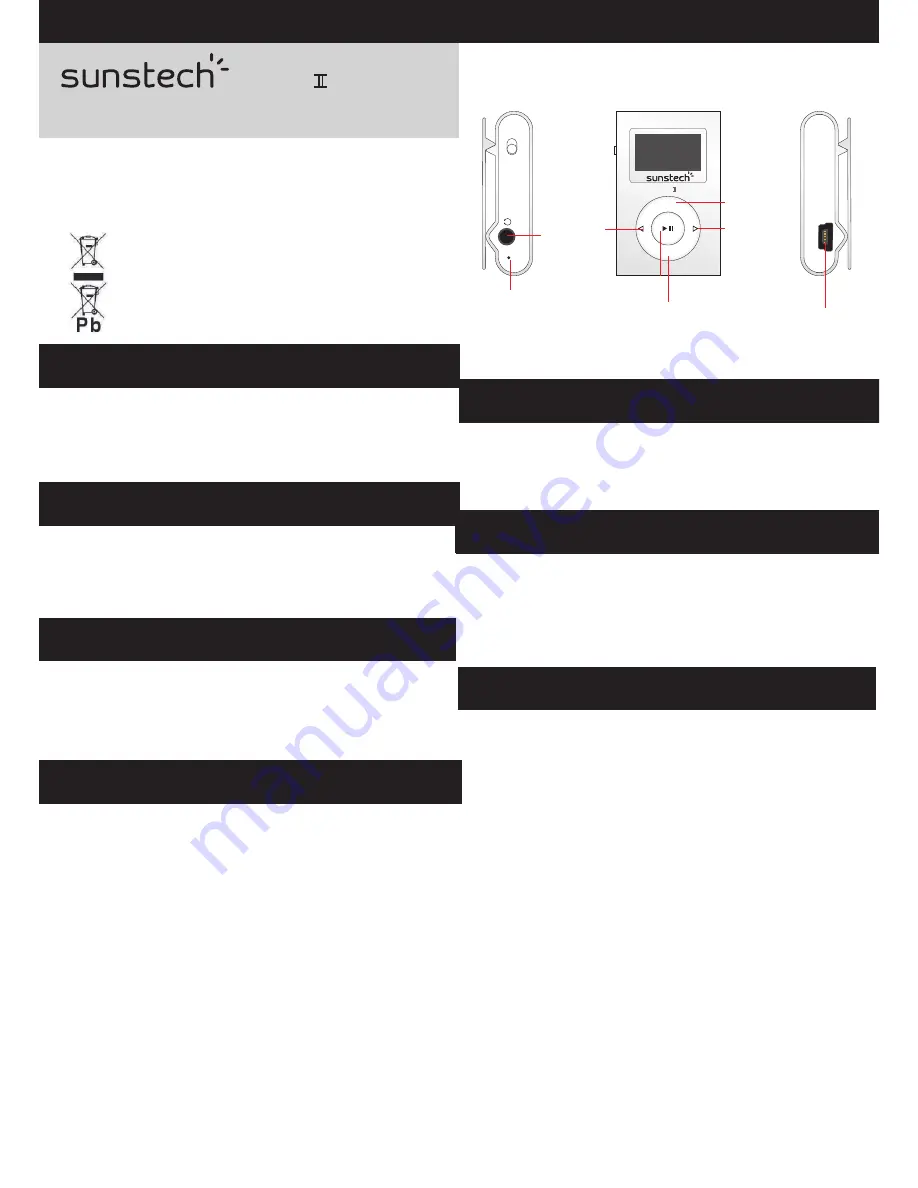
1. Overview
2. Music Play
2.1 Switch the On/Off switch to turn on the player . After entering Main Menu page,
select Music and press MODE button to enter Playing Song mode.
2.2 Press Play/Pause button to start playing the selected song.
2.3 Press MODE long to show the lyric and press MODE again to return it.
2.4 Press Previous / Next buttons to jump to the previous or next song.
2.5 Hold Previous / Next buttons long to
2.6 Press Vol buttons then to adjust the volume by pressing Previous/Next button .
2.7 Hold MODE button long to back to the Main Menu.
move your song forward or rewind it.
6. E-book
6.1 After entering Main Menu page, press Previous/Next buttons to select E-book,
and press MODE button to enter E-book menu page.
6.2 Press Previous/Next button to select a Text mode and press Mode button to confirm.
6.3 Replay mode setting:
6.3.1 When reading a Text file, press Mode button to enter the submenu, press the
Previous/Next button to select the Replay mode, press mode button to confirm,
and Press Previous/Next button to select the Manual Replay or Auto Reply.
6.4 Hold Mode button for 3 seconds to back to the main menu.
7. System Set
7.1 After entering Main Menu page, press
to select Setup.
And press MODE button to enter System Set Function menu page.
7.2 Clock
7.2.1 After entering System Set Function menu page, Select Clock and press
MODE button to enter the Clock Setting Screen.
7.2.2 Press Vol button to move among
Year : Month : Day : Hour : Minute : Second.
And press Previous / Next buttons to adjust their values.
Press MODE button to confirm after finish setting clock.
7.3 Language Selection
7.3.1 After entering System Set Function menu page, press Next then MODE to
enter the language options list. Press Previous / Next buttons to select
your preferred language and press MODE button to confirm.
7.4 Power Off Set
7.4.1 After entering System Set Function menu page, press Previous / Next
buttons to select Power of f. Press MODE button to confirm.
7.4.2 You can set the of f time and the sleep time. In the STOP mode, the player
will be of f or in Sleep Mode automatically based on the duration you set.
You may set “0” to disable these function.
7.5 Online Device Set
7.5.1 Press Previous / Next buttons to select Online device on the System Set
menu page, and press MODE button to confirm.
7.5.2 If you set the player as Media Device, then you can synchronize songs
from PC to the player. If you set the player as USB disk, then you can
drag and drop files from PC to the player .
7.6 Memory Information
7.6.1 Press Previous / Next buttons to select Memory Info, and press MODE
button to see the current memory information of the player .
Previous / Next but tons
8. Other
8.1 Files List
8 .1.1 Folder Management
8 .1.2 Folder N avigation
8.1.2.1 In the Stop mode, press the MODE button and se lect Local folder.
8.1.2.2 The crea ted folder names in the first layer are listed on the
d isplay. Choose your des ired folder name by pushing
P revious / Next buttons, a nd press ing M key, y ou will select the
folder,and press MODE button to select it.
8 .1.3 S ub-folder
8.1.3.1 You may e nter e ac h folder in order to loca te your desired sub-
f older. Then press MODE button for c onfirmation.
8.2 R epea t Mode S et
8 .2.1 In PLAY ING mode, press MODE button to e nter the sub-menu. Select
Repea t, and pres s MODE button to enter the repeat mode selection
screen. 7 repeat modes a re a vailable: Normal, Repea t One, Folder,
Repea t Folder, Repea t All, Random and Intro.
Press Previous / Next buttons to select your des ired Repeat mode,
and press MODE button to confirm.
8.3 E Q Mode Set
8 .3.1 In PLAY ING mode, press MODE button to enter the sub-menu. Then press
Next to select Equalizer, a nd press MODE button to enter the E Q mode
selection sc reen. 7 E Q modes are available: N atural, Rock, Pop, Classic,
Soft, Jazz a nd D B B . Press Previous / Next buttons to select an E Q mode
and press MODE button to confirm the setting.
8.4 Delete files
8 .4.1 In S TOP mode, press MODE button to enter the deletion function.
Press N ext to select Delete, and press MODE to confirm you selection.
Then press Previous / Next buttons to select the file you want to delete,
and press MODE button to confirm.
Select “Y E S ” or “No” by pressing Previous / Next buttons. Then press
MODE button to confirm.
8 .4.2 Exit this function by holding MODE button long.
Previous button
USB port
Microphone
Earphone jack
3.1 After entering Main Menu page,
select Record
and press MODE button to enter Recording Voice mode.
3.2 Press Play/Pause button to start recording.
3.3 Press Play/Pause button to pause or continue recording.
3.4 Hold MODE button long till “Saving” appear on the display to save the recorded
voice when you finish recording.
3.5 Hold MODE button long to back to the Main Menu.
press Previous / Next buttons to
3. Record
4. Voice Play
4.1 After entering Main Menu page,
select
Voice and press MODE button to enter Playing Recorded Voice mode.
4.2 Press Previous / Next buttons to select your desired voice.
4.3 Press Play/Pause button to start playing the selected voice file.
4.4 Press Previous / Next buttons to jump to the previous or next recorded voice.
4.5 Hold Previous / Next buttons long to
Press Vol buttons then to adjust the volume by pressing Previous/Next button
Hold MODE button long to back to the Main Menu.
press Previous / Next buttons to
move your voice forward or rewind it.
4.6
4.7
4. Recording Play Back(Voice)
DEDALO
5.1 After entering the main menu page, press Previous/Next button to select the
Radio menu and press Mode to enter the FM function
5.2 You can press Previous/Next button to change the frequency by 0.1MHZ.
5.3 Hold Previous/Next long to start the FM auto search function. It will stop when
an FM channel is detected.When you press PLAY key, your MP3 player will
advance through preset, but if you press the next key , your player will advance
till the next DIAL preset,either previosly preset or not.
5. Radio FM
5.4 Press MODE button to enter FM setting menu, AUT O SEARCH can be selected.
After auto search finish, press PLAY button to choose preset frequencies.
M
ON
OFF
MIC
VOL
M
USB
Play/Pause button
V
olumn
Next button
MODE button
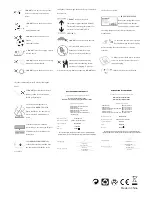
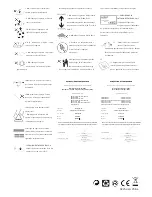
Correct disposal of this Product
(Waste Electrical & Electronic Equipment(WEEE)
Your product is designed and manufactured with high quality materials and
components which can be recycled and reused.
This symbol means that electrical and electronic equipment, at their end of-
life should be disposed of separately from your household waste.
Please dispose of this equipment at your local community waste collection/
recycling centre.
In the European Union there are separate collection systems for used
electrical and electronic products.Please help us to conserve the
environment we live in!
- The warranty of this product is for 2 years since the purchase date.
- The warranty will exclud e breakdowns caused by bad use of the product, wrong installation or
installation in not desirable places for a proper maintenance of the product, rips, updates of the
products that are not the supplied by the brand, pieces wore away for its use or for not domestic
or inappropriate use. Also are excluded breakdowns caused for manipulations of the products
by people or companies alien to our company.
- For any request regarding the warranty terms, the purchase receipt must be attached.
DEDALO 4GB


