background image


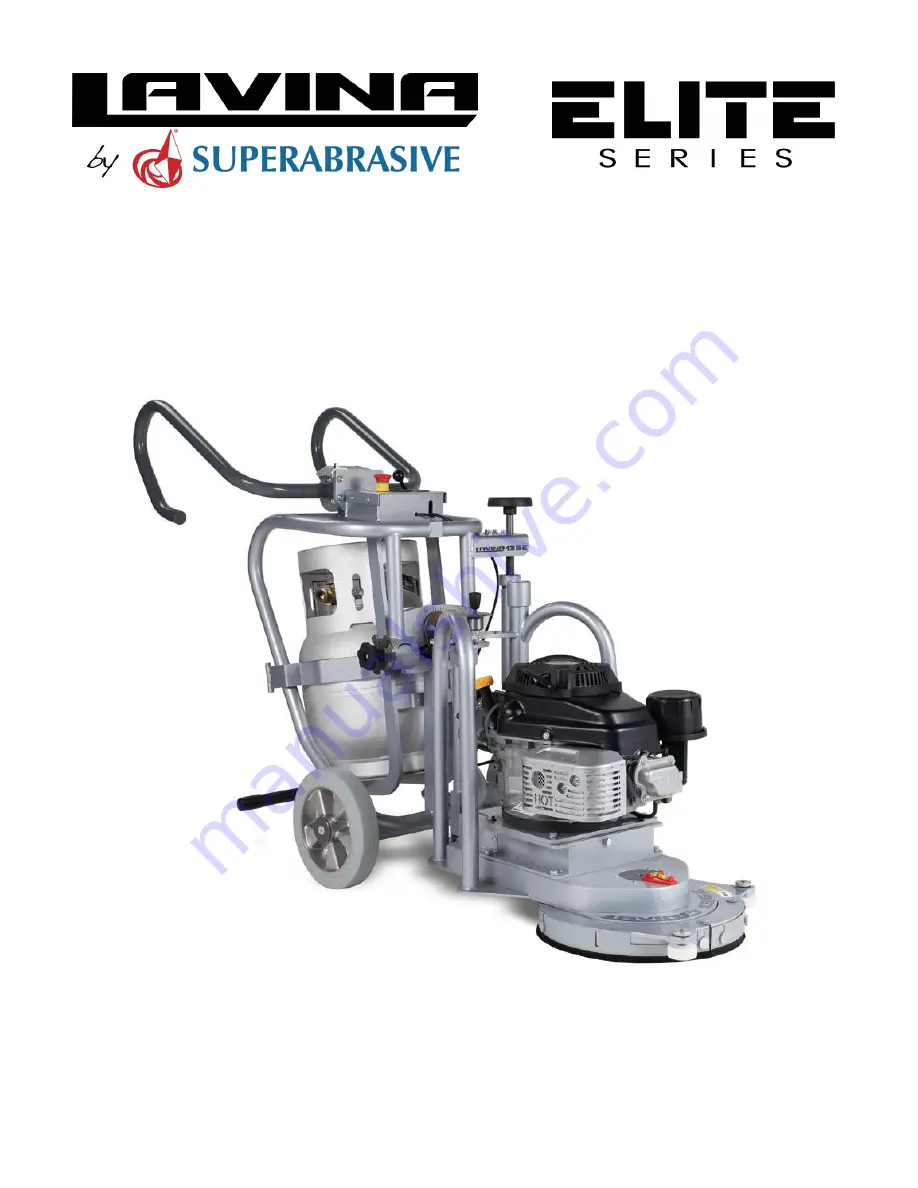
LAVINA ELITE L13GE 

User Manual


Tech Support Line: 800-987-8403 | www.superabrasive.com | info@superabrasive.us

Summary of Contents for LAVINA ELITE L13GE

Page 1: ...LAVINA ELITE L13GE User Manual Tech Support Line 800 987 8403 www superabrasive com info superabrasive us ...

Page 2: ...Superabrasive User Manual Original Language Lavina 13 S 2 2013 ...

Page 3: ...ts are not warranted Superabrasive is not liable for defects arising out of use of non OEM parts The Warranty is void if the purchaser has not followed the maintenance plan stipulated by the machine s manual and warranty card The warranty is void if the purchaser repairs said Goods himself or if repairs are conducted by a repair facility that is not approved by Superabrasive Superabrasive s liabil...

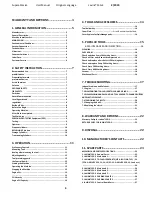
Page 4: ...ol holder key 14 Foam Plate Error Bookmark not defined Security plate for Quickchange pads 14 5 POPULAR TOOLS 15 6 MAINTENANCE AND INSPECTION 16 CLEANING 16 CHECK DAILY 16 Check and clean Every 10 Working Hours 16 Check air filter and clean with compressed air 16 Check and replace after the first 15 Working Hours 16 Check and replace Every 50 Working Hours 16 Check Every 200 Working Hours 16 Check...

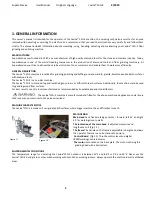
Page 5: ...d to grind polish edges corners or difficult to reach surfaces Additionally the machine could be used for grinding wood floor surfaces For best results use only tools manufactured or recommended by Superabrasive and its distributors The Lavina 13G E machine is manufactured and fitted for the above mentioned applications only Every other use may possess risks to the persons involved MACHINE CHARACT...

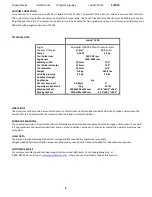
Page 6: ...vina E is operated with the recommended tools and in normal conditions However as previously stated the operator must wear ear protectors LABEL DATA The data on the label provides the correct voltage and kW needed for operational purposes Weight needed for transportation purposes production year and serial number needed for maintenance purposes CUSTOMER SERVICE For customer assistance and technica...

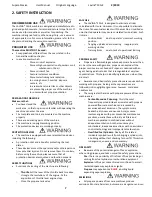
Page 7: ...owever it is not possible to eliminate the risks of an eventual accident with the machine Unskilled or uninstructed operator may cause correlated residual risks Such risks are Position Risks due to operator s incorrect working position Tangling up Risks due to wearing inappropriate working clothes Training Risks due to lack of operational training PROPANE SAFETY Propane is a flammable gas whose va...

Page 8: ...ransport liquid propane gas recommends that operators of propane powered floor care machines in public places be trained and certified as well With regard to operation of propane powered floor care equipment even though NFPA 58 8 4 5 says these machines shall be permitted to be used in buildings frequented by the public including the times when such buildings are occupied by the public suggests us...

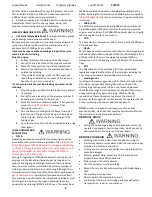
Page 9: ...me instruments are used to read ambient air and may be damaged if used to take readings in the muffler or tail pipe Selecting the proper instrument is an important part of meeting the testing requirements Generally speaking units capable of reading in ppm parts per million at ranges from 0 to 1000 are adequate for checking ambient air air in the breathing zone of the operator Instruments capable o...

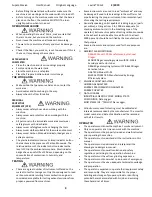
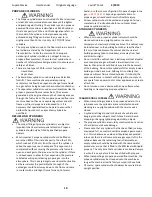
Page 10: ... gas could find its way down to the floor and come in contact with a pilot light from a furnace hot water heater or other source of ignition Propane changes into a gas is 44º F 42º C Exposing unprotected skin to propane gas or liquid could result in frostbite injury All new cylinders should be vented and purged of air per manufacturer s instructions before use Never bleed propane cylinders indoors...

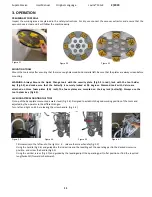
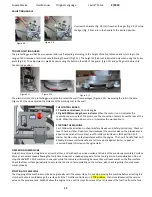
Page 11: ...on three foam plates 13 2 inch The foam plates are mounted on the key lock butterfly Always use the tool holder key Fig 4 2 LEVELING AFTER MOUNTING THE TOOL On top of the base plate is mounted a water level Fig 3 4 Designed to establish the good working position of the tools and adjusted by the operator in the different ranges Turn left and right on 45 by releasing the screw handle Fig 3 4 Tilt cr...

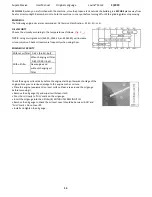
Page 12: ...nstructions Check oil level Check air filter Open counterclockwise the service valve on the propane tank about one and a half turns Next put Throttle control lever in IDLE position Pull starter handle until you feel resistance within the engine Then pull handle fast and steady Release starter handle and let it snap back against starter repeat as required Repeat this step until engine starts OPERAT...

Page 13: ...eck oil level more frequently when using them ENGINE OIL CAPACITY Check the engine oil level daily before the engine starting otherwise shortage of the engine oil may cause serious damage to the engine such as seizure Place the engine equipment on level surface Clean area around the oil gauge before removing it Remove the oil gauge A and wipe it with clean cloth Pour the oil slowly to FULL mark on...

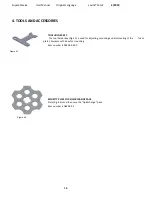
Page 14: ...HOLDER KEY The tool holder key Fig 4 1 is used for adjusting mounting and dismounting of the foam plates Always use the key for mounting Item number is A03 00 00 00 SECURITY PLATE FOR QUICKCHANGE PADS Plate Fig 4 2 used to ensure the Quickchange pads Item number is A64 00 01 Figure 4 1 Figure 4 2 ...

Page 15: ... soft and medium concrete NATO WITH QUICK CHANGE ATTACHMENT Superabrasive s Nato resin pucks are a great tool choice for soft and hard concrete polishing applications Among the thickest diamond pads on the market featuring a thick 12mm layer of resin and diamonds for extra long life Wide channels and a unique patented design allow for work on a cleaner surface ensuring a quality polish Offered in ...

Page 16: ...G CHECK AND REPLACE EVERY 50 WORKING HOURS Change engine oil while changing check for leakage of engine oil at the various seals Engine Oil Capacity is 0 8 L 0 9US qt with oil filter Change air filter with oil filter Recommended Oil Change Intervals Do not exceed the 50 hour oil change interval Oil changes more frequent than 25 hours will give even longer engine life In any case always use 30HD or...

Page 17: ...Call your dealer or the factory for instructions on where to have the service valve replaced Meanwhile to get by you can continue to open the service valve until you do not hear a click and then the engine will run normally If it does not call your customer service CHANGING OIL Hot engine oil can cause severe burns Allow engine temperature to drop Irom hot to warm level belore draining and handlin...

Page 18: ...spark plug from the cylinder head Note Replace a cracked fouled or dirty spark plug Do Not clean the electrodes because grit entering the cylinder can damage the engine Set the gap on the plug to 0 030 inch 0 76 mm Install the spark plug and the gasket seal Torque the plug to 17 ft lb 23 N m Connect the wire to the spark plug 7 2 DISMOUNTING TOOL HOLDER TO CHANGE V RINGS To check or replace the bu...

Page 19: ... Fig 7 3 12 are reliably tightened Mount the holder on the machine using the same socket as in 8 6 Fig 7 3 10 Fig 7 3 11 The retaining washer fits into the central hole C of adaptor and the four bolts into the thread holes Т Fig 7 3 12 The holder is centered on the outside diameter of the adaptor Ensure the holder is properly connected to the plate of the adaptor and then tight evenly the four bol...

Page 20: ...dle does not turn although the motor turns It is recommended to check the belts ATTENTION NEVER OVER TENSION THE BELT THE BELT WILL BE DISTROYED AND IT WILL NEVER RECOVER ITS ORIGINAL TENSION Remove the revision cover Figure 7 4 1 and turn the screw Figure 7 4 2 clockwise to tight the belt The tightening force of one belt is 207 N measured by OPTIKRIK 1 7 5 CHANGING THE BELTS Figure 7 4 2 Figure 7...

Page 21: ...lt TT3 TTmini with frequency 108 61 1 s Figure 7 5 10 Fix the pulley Figure 7 5 7 Tighten the V belt according to 7 4 ATTENTION NEVER OVER TENSION THE BELT THE BELT WILL BE DISTROYED AND IT WILL NEVER RECOVER ITS ORIGINAL TENSION This belt cannot be retightened To change the v belt unscrew the bolts shown on Figure 7 5 11 and change the belt Tighten the v belt initial tension is 269N OPTIKRIK I se...

Page 22: ...This warranty is limited to repair or replacement of covered components and reasonable labor expenses All warranty returns must be shipped freight prepaid The above warranty conditions may be changed only by Superabrasive Superabrasive reserves the right to inspect and make a final decision on any machine returned under this warranty This warranty applies to new used and demo machines Superabrasiv...

Page 23: ...ank 1 2 LAVINA 13G E MAIN HEAD 1 No Item No Description Pcs 1 A64 00 00 Tool Holder A64 1 2 L13GX10 00 01 Adaptor 1 3 TWVA00800 V Ring Type A 1 4 M5X12DIN912 Screw 6 5 М5DIN7980 Washer 6 6 L13GX10 40 00 Succer Cover 1 7 L13GX10 00 02 Strip Brush 1 8 M6X8ISO7380F Screw 2 9 РО 050 19 22 OG Roll РО 2 10 L13GX10 00 06 Axis Roll 2 11 L13GX10 00 07 Screw 6 12 L13GX10 00 11 Protecting Disc 1 13 M8DIN467 ...

Page 24: ... 00 Set of plates 1 4 М8х20DIN6921 Bolt 4 5 A41 20 01 Flange 1 4 LAVINA 13G E MAIN HEAD 2 No Item No Description Pcs 1 DWL K5 Double Water Level SOLA K5 1 2 M4X10DIN85A Screw 2 3 M8X50DIN933 Bolt 1 4 M8DIN127B Spring Washer 1 5 M8DIN125A Washer 1 6 L13GX10 80 00 Frame 1 7 M8X20DIN6921 Bolt 4 8 A21 Belt 1 9 L13GX10 00 09 Cover 1 10 М6X8ISO7380F Screw 6 11 M8X25DIN912 Screw 2 12 М8DIN7980 Spring Was...

Page 25: ...rew 4 16 M6DIN125A Washer 4 17 М6DIN985 Self Locking Nut 4 18 L13GX10 50 00 Tubular Axle 1 19 M6X14DIN912 Screw 3 20 М8X60DIN933 Bolt 1 21 М8DIN127B Spring Washer 1 22 M8DIN125A Washer 1 23 L13GX10 60 01 Pin 1 24 L13S 20 30 05 Spring 1 25 L13S 20 30 03 Nut 1 26 BO751107 Conical Handle 1 27 L13GX10 61 00 Wheel 1 28 M8DIN439B Nut 1 4 LAVINA 13G E MAIN HEAD 2 No Item No Description Pcs 1 M8X16DIN7991...

Page 26: ...3S 21 00 07 Washer 1 23 М16DIN125A Washer 1 7 L13S 21 10 00 1 Carnage Frame 1 24 M16DIN982 Self Locking Nut 2 8 L13S 20 00 32 Handle 1 25 M12DIN982 Self Locking Nut 2 9 M6DIN125A Washer 6 26 M12DIN125A Washer 2 10 M8DIN433 Washer 2 27 L13S 20 00 23 Washer 2 11 М6DIN127B Spring Washer 4 28 L13S 20 00 21 Axle 2 12 M8X16DIN912 Screw 2 29 L13X 20 00 23 Washer 1 13 M6X16DIN912 Screw 4 30 L13GX20 20 00 ...

Page 27: ...6DIN6921 Bolt 8 7 L20GX 23 00 01 Flange 2 8 M6X12ISO7380 1 Screw 2 9 М6DIN9021 Screw 2 10 L20GX 23 00 02 1 Axle 1 11 M8DIN985 Self Locking Nut 1 12 L13GX20 40 00 Frame 1 6 LAVINA 13G E Control Board Parts No Item No Description Pcs 1 W4110 Throttle 1 2 W4313 Hour Meter 1 3 30311000719 Emergency stop button 1 4 L13GX20 01 01 Cover 1 5 М6X20ISO7380F Screw 4 6 30301240114 Self Locking Nut 2 7 M4DIN12...

Reviews: