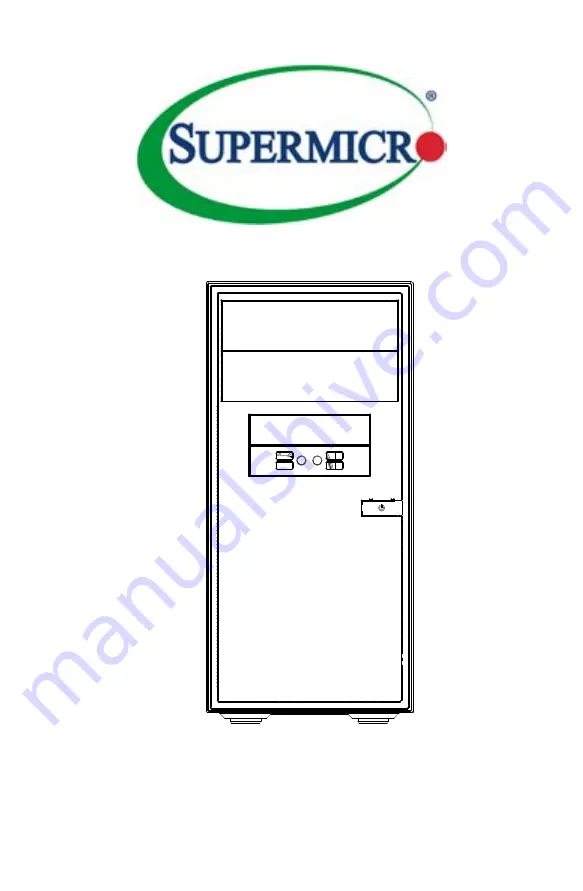
background image

SCDS3A-261B CHASSIS

USER’S MANUAL


1.0

Summary of Contents for SCDS3A-261B

Page 1: ...SCDS3A 261B CHASSIS USER S MANUAL 1 0 ...

Page 2: ...hout prior written consent IN NO EVENT WILL SUPERMICRO BE LIABLE FOR DIRECT INDIRECT SPECIAL INCIDENTAL SPECULATIVE OR CONSEQUENTIAL DAMAGES ARISING FROM THE USE OR INABILITY TO USE THIS PRODUCT OR DOCUMENTATION EVEN IF ADVISED OF THE POSSIBILITY OF SUCH DAMAGES IN PARTICULAR SUPERMICRO SHALL NOT HAVE LIABILITY FOR ANY HARDWARE SOFTWARE OR DATA STORED OR USED WITH THE PRODUCT INCLUDING THE COSTS O...

Page 3: ...tenance Follow the procedures given in this chapter when installing removing or reconfiguring your chassis Appendix A Power Supply Specifications Refer to this chapter for Contents Preface Chapter 1 Introduction 1 1 Overview 1 1 1 2 Shipping Lists 1 1 1 3 Contacting Supermicro 1 2 1 4 Returning Merchandise for Service 1 3 Chapter 2 Standardized Warning Statements for AC Systems 2 1 About Standardi...

Page 4: ... 3 Removing the Chassis Cover 5 2 5 4 Removing and Installing Hard Drives 5 3 5 5 Installing the I O Shield and Motherboard 5 6 I O Shield 5 6 Permanent Motherboard Standoffs 5 6 Motherboard Installation 5 7 5 6 Removing and Installing the Front Bezel 5 8 5 7 Installing an Peripheral Device 5 9 5 8 Installing Expansion Cards 5 11 5 9 Installing the System Fan 5 12 5 10 Power Supply 5 13 Appendix A...

Page 5: ... optimized cooling for the system Three internal drive bays and four external drive bays offer maximum storage capacity 1 2 Shipping Lists Please visit the following link for the latest shiping lists and part numbers for your particular chassis model http www supermicro com Chapter 1 Introduction 1 1 SCDS3A 261B Chassis Model Drives PCI Slots Power Supply SCDS3A 261B 2x 5 25 external HDD bays 1x 3...

Page 6: ... that it does not shift within the carton and become damaged during shipping This warranty only covers normal consumer use and does not cover damages in curred in shipping or from failure due to the alteration misuse abuse or improper maintenance of products During the warranty period contact your distributor first for any product problems 1 3 Contacting Supermicro Headquarters Address Super Micro...

Page 7: ...SCDS3A 261B Chassis Manual 1 4 Notes ...

Page 8: ... configuring components in the Supermicro chassis These warnings may also be found on our web site at http www supermicro com about policies safety_information cfm Warning This warning symbol means danger You are in a situation that could cause bodily injury Before you work on any equipment be aware of the hazards involved with electrical circuitry and be familiar with standard practices for preve...

Page 9: ...amment utilisées pour éviter les accidents Pour prendre connaissance des traductions des avertissements figurant dans les consignes de sécurité traduites qui accompagnent cet appareil référez vous au numéro de l instruction situé à la fin de chaque avertissement CONSERVEZ CES INFORMATIONS 안전을 위한 주의사항 경고 이 경고 기호는 위험이 있음을 알려 줍니다 작업자의 신체에 부상을 야기 할 수 있는 상태에 있게 됩니다 모든 장비에 대한 작업을 수행하기 전에 전기회로와 관련된 위험요소들...

Page 10: ... de voedingsbron aansluit サーキッ ト ブレーカー この製品は 短絡 過電流 保護装置がある建物での設置を前提としています 保護装置の定格が250 V 20 Aを超えないこ とを確認下さい Warnung Dieses Produkt ist darauf angewiesen dass im Gebäude ein Kurzschluss bzw Überstromschutz installiert ist Stellen Sie sicher dass der Nennwert der Schutzvorrichtung nicht mehr als 250 V 20 A beträgt Advertencia Este equipo utiliza el sistema de protección contra cortocircuitos o sobre...

Page 11: ...het beveiligde aparaat niet groter gedimensioneerd is dan 220V 20A Advertencia El sistema debe ser disconnected de todas las fuentes de energía y del cable eléctrico quitado de los módulos de fuente de alimentación antes de tener acceso el interior del chasis para instalar o para quitar componentes de sistema Attention Le système doit être débranché de toutes les sources de puissance ainsi que de ...

Page 12: ... רש בלבד מוסמך צוות את להחליף להתקין אי הציוד עבור שירות לתת או הציוד والمدربيه و لتزكيب استبدال أو خدمة الجهاس هذا يسمح أن يجب فقط المؤهليه للمىظفيه 경고 훈련을 받고 공인된 기술자만이 이 장비의 설치 교체 또는 서비스를 수행할 수 있습니다 Waarschuwing Deze apparatuur mag alleen worden geïnstalleerd vervangen of hersteld door geschoold en gekwalificeerd personeel Warnung Diese Einheit ist zur Installation in Bereichen mit beschränktem ...

Page 13: ...بها مناطق محظورة تم انىص َمكن ً إن ىل منطقت محظورة فقط استخذاو خالل من خاصت أداة أو ٌ أ نال أخري وسُهت مألما ومفتاح قفم 경고 이 장치는 접근이 제한된 구역에 설치하도록 되어있습니다 특수도구 잠금 장치 및 키 또는 기타 보안 수단을 통해서만 접근 제한 구역에 들어갈 수 있습니다 Waarschuwing Dit apparaat is bedoeld voor installatie in gebieden met een beperkte toegang Toegang tot dergelijke gebieden kunnen alleen verkregen worden door gebruik te maken van speciaal ger...

Page 14: ...sistema está en funcionamiento el voltaje del plano trasero es peligroso Tenga cuidado cuando lo revise Attention Lorsque le système est en fonctionnement des tensions électriques circulent sur le fond de panier Prendre des précautions lors de la maintenance Warning Hazardous voltage or energy is present on the backplane when the system is operating Use caution when servicing Redundant Power Suppl...

Page 15: ...لل يمتثل أن يجب قىاويه والىطىية المحلية المتعلقة بالكهرباء 경고 시스템이 동작 중일 때 후면판 Backplane 에는 위험한 전압이나 에너지가 발생 합니다 서비스 작업 시 주의하십시오 Waarschuwing Een gevaarlijke spanning of energie is aanwezig op de backplane wanneer het systeem in gebruik is Voorzichtigheid is geboden tijdens het onderhoud האחורי בפנל מתח אז הרה במהלך להיזהר יש המערכת תפעול בזמן האחורי בפנל מתח סכנת קיימת העבודה Attention L équipeme...

Page 16: ... 팬은 여전히 회전하고 있을 수 있습니다 팬 조림품 외관의 열려있는 부분들로부터 손가락 및 스크류드라이버 다른 물체들이 가까이 하지 않도록 배치해 주십시오 Waarschuwing Gevaarlijk bewegende onderdelen Houd voldoende afstand tot de bewegende ventilatorbladen Het is mogelijk dat de ventilator nog draait tijdens het verwijderen van het ventilatorsamenstel uit het chassis Houd uw vingers schroevendraaiers en eventuele andere voorwerpen uit de buurt van de openingen in ...

Page 17: ...en UL o CSA se muestra en el código de otros dispositivos eléctricos que los productos designados por Supermicro solamente 電源コードとACアダプター 製品を設置する場合 提供または指定された接続ケーブル 電源コードとACアダプター を使用下さい 他のケーブルやアダプタを使用すると故障や火災の原因になるこ とがあ り ます 電気用品安全法は ULまたはCSA認定のケーブル UL CSEマークがコードに表 記 を Supermicroが指定する製品以外に使用するこ とを禁止しています ומתא חשמליים מ י AC אזהרה ומתאמים ספקים בכבלים להשתמש יש המוצר את מתקינים כאשר AC אשר או לתקלה ...

Page 18: ...2 20 SCDS3A 261B Chassis Manual Notes ...

Page 19: ...5 25 external bays that can house additional hard drives removable media drives or other peripheral drives One 3 5 external bay that can house a card reader additional hard drives or other peripheral drives One 2 5 internal drive bay Hard drives must be purchased separately Motherboard Support The maximum motherboard size is 9 6 x 9 6 Micro ATX or Mini ITX supporting Intel and AMD single processor...

Page 20: ...f it was damaged If the chassis itself shows damage file a damage claim with the carrier 3 3 Where to Get Replacement Components Infrequently you may need replacement parts for your system To ensure the highest level of professional service and technical support we recommend purchasing ex clusively from our Supermicro Authorized Distributors System Integrators Resellers A list of Supermicro Author...

Page 21: ...erface 4 1 Overview The chassis includes a control panel on the front that includes a power button and status monitoring lights which are described in this chapter Figure 4 1 Chassis Front Bezel LEDs Peripheral Drive Bays Audio Mic USB 3 0 USB 2 0 Power ...

Page 22: ... keeps standby power supplied to the system Therefore you must unplug system before performing most maintenance tasks LEDs There are two LEDs that provide status information about the system These LEDs are located directly above the power button 4 2 Power Button and LEDs Power Button HDD Indicates activity on the hard drives or peripheral drive when flashing NIC Indicates network activity when fla...

Page 23: ...hillips screwdriver 5 2 Removing Power from the System Before performing setup or maintenance tasks use the following procedure to ensure that power has been removed from the system 1 Use the operating system to power down the system following the on screen prompts 2 After the system has completely shut down carefully grasp the head of the power cord and gently pull it out of the back of the power...

Page 24: ...r 1 3 Release Tab 5 4 Removing and Installing Hard Drives Removing and Installing Hard Drives 1 Power down the system and remove the power cord from the rear of the power supply as described in Section 5 2 and remove the chassis cover as described in Section 5 3 2 Disconnect all of the cables from the hard drive 3 Press the release tab on the side of the hard drive carrier that is to be re moved f...

Page 25: ... the power supply replace the chassis cover and power up the system 5 If a hard drive or dummy drive is present simultaneiously pull both sides of the hard drive carrier open and lift the drive out 6 Insert the new hard drive into the hard drive carrier by simultaneously pulling both sides of the drive carrier open and placing the drive into the carrier Figure 5 3 Removing the Hard Drive from the ...

Page 26: ...creating space between the motherboard and the chassis surface I O Shield Figure 5 5 I O Shield Placement Motherboard Installation Installing the Motherboard 1 Review the documentation that came with your motherboard Become familiar with component placement requirements precautions and cable connec tions 2 Power down the system and remove the power cord from the rear of the power supply as describ...

Page 27: ... so that the release tabs click into their locked positions on the left side of the chassis 1 2 Figure 5 7 Installing the Front Bezel 5 7 Installing a Peripheral Device The SCDS3A 261B chassis has two bays for optional peripheral devices such as a DVD drive Installing a Peripheral Device 1 Power down the system and remove the power cord from the rear of the power supply as described in Section 5 2...

Page 28: ...ystem and remove the power cord from the rear of the power supply as described in Section 5 2 and remove the chassis cover as described in Section 5 3 2 Pull back the release latch that holds the protective bracket over the PCI slots in the rear the chassis 3 Remove the PCI slot covers from the PCI slots 4 Simultaneously slide the expansion card into its slot on the motherboard and slide its brack...

Page 29: ...the power supply replace the chassis cover and power up the system Figure 5 11 Installing the System Fan The SCDS3A 261B chassis includes a 260 Watt power supply In the unlikely event that it becomes necessary to replace the power supply follow the instructions below 5 10 Power Supply Changing the Power Supply 1 Power down the system and remove the power cord from the rear of the power supply as d...

Page 30: ...SCDS3A 261B Chassis Manual 5 14 Notes ...

Page 31: ...supply specifications for your chassis system The SCDS3A 261B chassis includes a power supply rated at 80 Plus Bronze Level Operating temperature 0 50 degrees C SCDS3A 261B 260W MFR Part PWS 260 PQ Input 100 127V 6A 200 240V 3A 60 50Hz 5V 18 Amps 12V1 10 Amps 12V2 12 Amps 3 3V 10 Amps 12V 0 8 Amps 5Vsb 2 Amps ...

Page 32: ... be reasonably expected to result in significant injury or loss of life or catastrophic property damage Accordingly Supermicro disclaims any and all liability and should buyer use or sell such products for use in such ultra hazardous applications it does so entirely at its own risk Furthermore buyer agrees to fully indemnify defend and hold Supermicro harmless for and against any and all claims de...

Reviews: