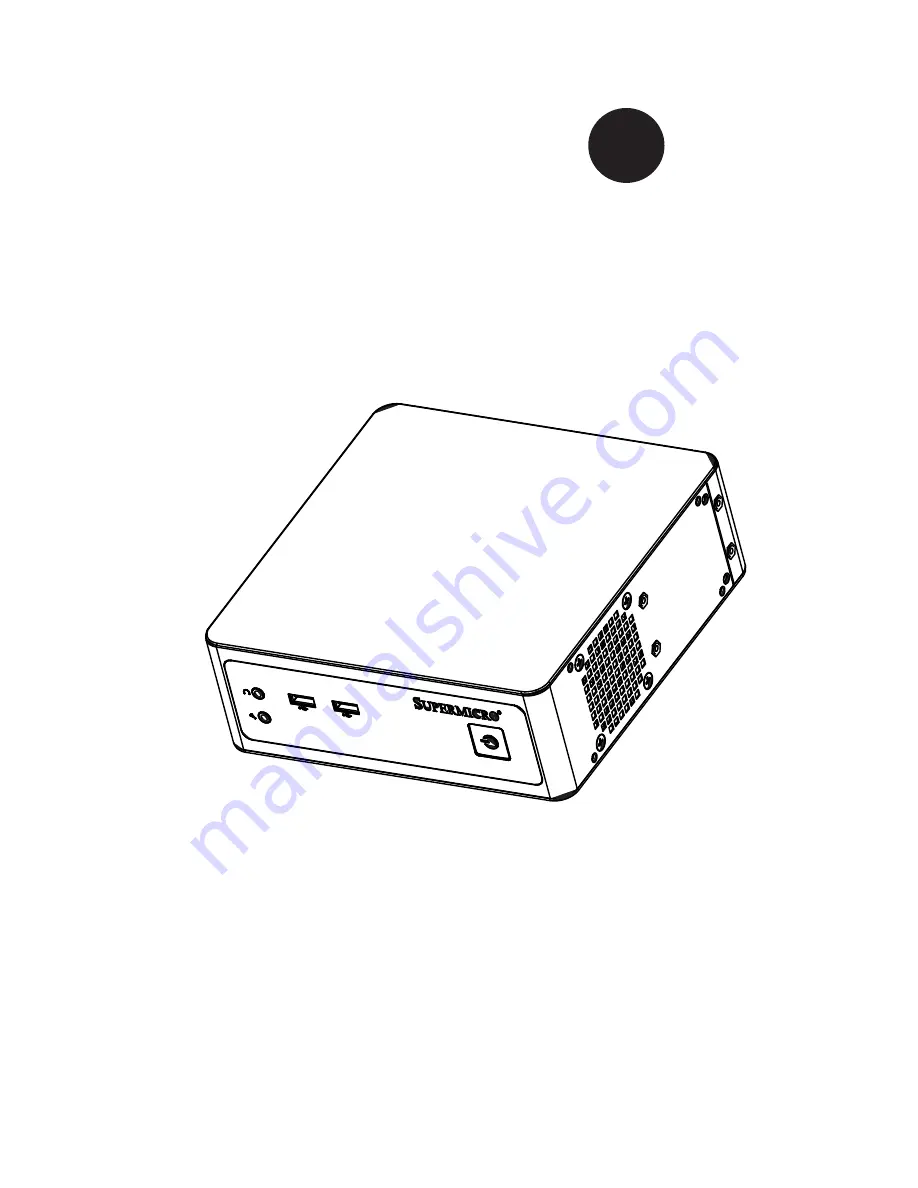
background image

SC101i Chassis


S

UPER

®

USER’S MANUAL

1.0

Summary of Contents for SC101i

Page 1: ...SC101i Chassis SUPER USER S MANUAL 1 0 ...

Page 2: ...TWARE OR DATA STORED OR USED WITH THE PRODUCT INCLUDING THE COSTS OF REPAIRING REPLACING INTEGRATING INSTALLING OR RECOVERING SUCH HARDWARE SOFTWARE OR DATA Any disputes arising between manufacturer and customer shall be governed by the laws of Santa Clara County in the State of California USA The State of California County of Santa Clara shall be the exclusive venue for the resolution of any such...

Page 3: ...It provides information for the installation and use of the SC101i chassis Installation and maintenance should be performed by experienced technicians only This document lists compatible parts available when this document was published Always refer to the our Web site for updates on supported parts and configurations ...

Page 4: ...this chassis safety precautions Chapter 3 Chassis Components Refer here for general information on the chassis components including the fans airflow shields and other equipment Chapter 4 System Interface This chapter provides information on the system interface Refer here for explana tions of the LED indicators and responses Chapter 5 Chassis Setup and Installation Follow the procedures given in t...

Page 5: ... 9 Battery Handling 2 10 Redundant Power Supplies 2 12 Backplane Voltage 2 13 Comply with Local and National Electrical Codes 2 14 Product Disposal 2 15 Hot Swap Fan Warning 2 16 Power Cable and AC Adapter 2 18 Chapter 3 Chassis Components 3 1 Overview 3 1 3 2 Components 3 1 3 3 Where to get Replacement Components 3 1 Chapter 4 System Interface 4 1 Overview 4 1 Chapter 5 Chassis Setup and Maintena...

Page 6: ...vi 5 8 Installing a Power Converter Board 5 8 Appendix A Cables Screws and other Accessories A 1 Overview A 1 A 2 Optional Cables Included with SC101i Chassis A 1 ...

Page 7: ...cord or an optional 60W or 80W DC to ATX power converter board 1 2 Shipping List Part Numbers Please visit the following link for the latest shiping lists and part numbers for your particular chassis model http www supermicro com Chapter 1 Introduction 1 1 SC101i Mini ITX Box Chassis Model HDD Cooling Front I O Power Supply SC101i 1x 2 5 internal HDD 1x 6cm fan 2x USB 2 0 2x Audio Optional 60W 80W...

Page 8: ...m To en sure the highest level of professional service and technical support we strongly recommend purchasing exclusively from our Supermicro Authorized Distributors System Integrators Resellers A list of Supermicro Authorized Distributors System Integrators Reseller can be found at http www supermicro com Click the Where to Buy link ...

Page 9: ...ess Super Micro Computer B V Het Sterrenbeeld 28 5215 ML s Hertogenbosch The Netherlands Tel 31 0 73 6400390 Fax 31 0 73 6416525 Email sales supermicro nl General Information support supermicro nl Technical Support rma supermicro nl Customer Support Asia Pacific Address Super Micro Computer Inc 3F No 150 Jian 1st Rd Zhonghe Dist New Taipei City 23511 Taiwan R O C Tel 886 2 8226 3990 Fax 886 2 8226...

Page 10: ...SC101i Chassis Manual 1 4 Notes ...

Page 11: ... configuring components in the Supermicro chassis These warnings may also be found on our web site at http www supermicro com about policies safety_information cfm Warning This warning symbol means danger You are in a situation that could cause bodily injury Before you work on any equipment be aware of the hazards involved with electrical circuitry and be familiar with standard practices for preve...

Page 12: ...o que le ayudará a encontrar el texto traducido en el apartado de traducciones que acompaña a este dispositivo GUARDE ESTAS INSTRUCCIONES IMPORTANTES INFORMATIONS DE SÉCURITÉ Ce symbole d avertissement indique un danger Vous vous trouvez dans une situation pouvant entraîner des blessures ou des dommages corporels Avant de travailler sur un équipement soyez conscient des dangers liés aux circuits é...

Page 13: ... aan enige apparatuur gaat werken dient u zich bewust te zijn van de bij een elektrische installatie betrokken risico s en dient u op de hoogte te zijn van de standaard procedures om ongelukken te voorkomen Gebruik de nummers aan het eind van elke waarschuwing om deze te herleiden naar de desbetreffende locatie BEWAAR DEZE INSTRUCTIES ً ف اًك أى ٌوكي حالة ً ف تتسبب اصابة جسذٌة الزهز هذا ًٌ ٌع خطز ...

Page 14: ...ación antes de conectar el sistema a la red de alimentación Attention Avant de brancher le système sur la source d alimentation consulter les directives d installation 設置手順書 システムを電源に接続する前に 設置手順書をお読み下さい ال إرشادات اقر تركيب توصيل قبل إلى النظام للطاقة مصدر לקרוא יש למקור המערכת חיבור לפני התקנה הוראות את מתח 시스템을 전원에 연결하기 전에 설치 안내를 읽어주십시오 Waarschuwing Raadpleeg de installatie instructies voordat u ...

Page 15: ...liza el sistema de protección contra cortocircuitos o sobrecorrientes del edificio Asegúrese de que el dispositivo de protección no sea superior a 250 V 20 A Attention Pour ce qui est de la protection contre les courts circuits surtension ce produit dépend de l installation électrique du local Vérifiez que le courant nominal du dispositif de protection n est pas supérieur à 250 V 20 A על מסתמך זה ...

Page 16: ...r es auf den Chassisinnenraum zurückgreift um Systemsbestandteile anzubringen oder zu entfernen Warning The system must be disconnected from all sources of power and the power cord removed from the power supply module s before accessing the chassis interior to install or remove system components 경고 이 제품은 전원의 단락 과전류 방지에 대해서 전적으로 건물의 관련 설비에 의존합니다 보호장치의 정격이 반드시 250V 볼트 20A 암페어 를 초과하지 않도록 해야 합니다 Waars...

Page 17: ... ou enlever des composants de systéme חשמלי ניתוק מפני אזהרה אזהרה החשמל מקורות מכל המערכת את לנתק יש להסיר ויש מהספק החשמלי כבל את התקנ לצורך המארז של הפנימי לחלק גישה לפני ת הסר או ת רכיבים فصم يجب اننظاو جميع من مصادر انطاقت وإزانت انكهرباء سهك من وحدة امداد انطاقت قبم إنى انىصىل انداخهيت انمناطق ن ههيكم إزانت أو نتثبيج مكىناث الجهاز 경고 시스템에 부품들을 장착하거나 제거하기 위해서는 섀시 내부에 접근하기 전에 반드시 전원 공급장치로부터 연결...

Page 18: ...et werden Advertencia Solamente el personal calificado debe instalar reemplazar o utilizar este equipo Attention Il est vivement recommandé de confier l installation le remplacement et la maintenance de ces équipements à des personnels qualifiés et expérimentés אזהרה רש בלבד מוסמך צוות את להחליף להתקין אי הציוד עבור שירות לתת או הציוד والمدربيه و لتزكيب استبدال أو خدمة الجهاس هذا يسمح أن يجب فقط ا...

Page 19: ... in Bereichen mit beschränktem Zutritt vorgesehen Der Zutritt zu derartigen Bereichen ist nur mit einem Spezialwerkzeug Schloss und Schlüssel oder einer sonstigen Sicherheitsvorkehrung möglich Advertencia Esta unidad ha sido diseñada para instalación en áreas de acceso restringido Sólo puede obtenerse acceso a una de estas áreas mediante la utilización de una herramienta especial cerradura con lla...

Page 20: ...ىص َمكن ً إن ىل منطقت محظورة فقط استخذاو خالل من خاصت أداة أو ٌ أ نال أخري وسُهت مألما ومفتاح قفم 경고 이 장치는 접근이 제한된 구역에 설치하도록 되어있습니다 특수도구 잠금 장치 및 키 또는 기타 보안 수단을 통해서만 접근 제한 구역에 들어갈 수 있습니다 Waarschuwing Dit apparaat is bedoeld voor installatie in gebieden met een beperkte toegang Toegang tot dergelijke gebieden kunnen alleen verkregen worden door gebruik te maken van speciaal gereedschap slot en sleut...

Page 21: ...ipo o el equivalente recomendado por el fabricante Desechar las baterías gastadas según las instrucciones del fabricante אזהרה סכנת קיימת פיצוץ תקינה לא בדרך והוחלפה במידה הסוללה של להחליף יש בסוג הסוללה את מ התואם חברת מומל יצרן צת הסוללות סילוק המשומשות לבצע יש היצרן הוראות לפי خطر هناك من اسحبذال حالة في انفجار البطارية صحيحة غير بطريقة فعليل البطارية اسحبذال فقط النىع بنفس يعادلها ما أو مما أو...

Page 22: ...ité peut avoir plus d une connexion d alimentation Pour supprimer toute tension et tout courant électrique de l unité toutes les connexions d alimentation doivent être débranchées Redundant Power Supplies Warning This unit might have more than one power supply connection All connections must be removed to de energize the unit 冗長電源装置 このユニッ トは複数の電源装置が接続されている場合があります ユニッ トの電源を切るためには すべての接続を取り外さなければなりま...

Page 23: ...idado cuando lo revise Attention Lorsque le système est en fonctionnement des tensions électriques circulent sur le fond de panier Prendre des précautions lors de la maintenance Warning Hazardous voltage or energy is present on the backplane when the system is operating Use caution when servicing قد لهذا يكون ال جهاز اتصاالت عدة بوحدات الطاقة امداد إزالة يجب االتصاالت كافة لعسل ال وحدة عن الكهرباء...

Page 24: ...be cumplir con las normas de electricidad locales y nacionales هناك خطز مه الكهزبائي التيار على المىجىدة أوالطاقة اللىحة يكىن عندما النظام يعمل عند حذرا كه خدمة الجهاس هذا 경고 시스템이 동작 중일 때 후면판 Backplane 에는 위험한 전압이나 에너지가 발생 합니다 서비스 작업 시 주의하십시오 Waarschuwing Een gevaarlijke spanning of energie is aanwezig op de backplane wanneer het systeem in gebruik is Voorzichtigheid is geboden tijdens het onderhou...

Page 25: ...اويه والىطىية المحلية المتعلقة بالكهرباء Attention L équipement doit être installé conformément aux normes électriques nationales et locales 경고 현 지역 및 국가의 전기 규정에 따라 장비를 설치해야 합니다 Waarschuwing Bij installatie van de apparatuur moet worden voldaan aan de lokale en nationale elektriciteitsvoorschriften 製品の廃棄 この製品を廃棄処分する場合 国の関係する全ての法律 条例に従い処理する必要が あります 警告 本产品的废弃处理应根据所有国家的法律和规章进行 警告 本產品的廢棄處理應根據所有國家的法律和規...

Page 26: ...ent Renseignez vous auprès de l organisme compétent Warning The fans might still be turning when you remove the fan assembly from the chassis Keep fingers screwdrivers and other objects away from the openings in the fan assembly s housing Hot Swap Fan Warning המוצר סילוק אזהרה ו להנחיות בהתאם להיות חייב זה מוצר של סופי סילוק המדינה חוקי النهائي التخلص من المنتج هذا معه التعامل ينبغي ل وفقا جميع ال...

Page 27: ...rde à ce que doigts tournevis et autres objets soient éloignés du logement du bloc ventilateur אזהרה חלקי את מסירים כאשר יש עובדים עדיין והמאווררים יתכן מהמארז המאוורר להרחיק ל המאוורר בתוך מהפתחים שונים עבודה וכלי האצבעות את בטוח מרחק انممكه مه انمراوح أن تسال ال إزانة تدورعند كتهة انمروحة انهيكم مه يجب إبقاء األصابع و انبراغي مفكات األشياء مه وغيرها بعيدا عه انفتحات في كتهة انمروحة 경고 섀시로부터 팬 조립...

Page 28: ...r Code für alle anderen elektrischen Geräte als Produkte von Supermicro nur bezeichnet gezeigt haben Advertencia Al instalar el producto utilice los cables de conexión previstos o designados los cables y adaptadores de CA La utilización de otros cables y adaptadores podría ocasionar un mal funcionamiento o un incendio Aparatos Eléctricos y la Ley de Seguridad del Material prohíbe el uso de UL o CS...

Page 29: ...צוין שלא تركيب عىذ استخذام يجب الجهاز و التىصيل كابالث الكهربائيت الكابالث ومحىالث المتردد التيار أن أي استخذام كابالث ومحىالث أخري يتسبب في عطل حذوث حريق أو التي لك تىفيرها تم المىتج مع UL أو CSA الكهربائيت األجهسة ومىاد قاوىن السالمت استخذام يحظر الكابالث قبل مه معتمذة Supermicro أجهسة أخري كهربائيت غير المىتجاث المعيىت قبل مه ألي UL CSA تحمل التي عالمت 경고 제품을 설치할 때에는 제공되거나 지정된 연결케이블과 전원케이블 AC어댑...

Page 30: ...2 20 SC101i Chassis Manual Notes ...

Page 31: ...80W DC DC power converter board If your motherboard supports simple DC input power a power cord with an inline power adapter is sufficent If your motherboard accepts only ATX power a power converter board is requred For the latest shipping lists visit our Web site at http www supermicro com 3 3 Where to get Replacement Components Though not frequently you may need replacement parts for your system...

Page 32: ...SC101i Chassis Manual 3 2 Notes ...

Page 33: ...ton that displays a multicolored LED The colors indicate server activity LED colors blue Power on red Power off white HDD activity The power switch applies or removes power from the power supply to the server system Turning off power with this button removes the main power but keeps standby power supplied to the system Therefore before servicing the system unplug the power cord ...

Page 34: ...SC101i Chassis Manual 4 2 Notes ...

Page 35: ...hassis These include information in Chapter 2 System Safety and the warning precautions listed in the setup instructions 5 2 Removing the Power Cord Before performing most setup or maintenance tasks use the following procedure to ensure that power has been disconnected from the system 1 Use the operating system to power down the system following the on screen prompts 2 After the system has complet...

Page 36: ...later use 3 Slide the cover sideways as illlustrated above to release the front and rear cover hooks from the chassis 4 Lift the cover up and off the chassis Caution Except for short periods of time do not operate the server without the cover in place The chassis cover must be in place to allow proper airflow and prevent overheating Figure 5 1 Removing the Chassis Cover 3 2 4 Cover Hook Cover Hook...

Page 37: ...ion that came with your motherboard Become familiar with component placement requirements precautions and cable connec tions 2 Remove the chassis cover 3 If installed remove the hard drive tray by removing the two screws that se cure it to the chassis bracket 4 Remove the chassis bracket that supports the drive tray 5 Place the motherboard into the chassis Figure 5 2 Removing the Hard Drive Tray S...

Page 38: ...chassis using the rounded Phillips head screws Do not exceed eight inch pounds of torque when tightening down the motherboard 7 Connect the cables to the motherboard as needed 8 Replace the drive tray support bracket and the drive tray 9 Reinstall the chassis cover and power up the system ...

Page 39: ...or later use Lift the tray out 3 Place the hard drive into the tray and secure it to the tray with the screws provided with hard drive 4 Return the hard drive tray assembly into the chassis aligning the tabs of the tray with the slots in the chassis Secure the tray to the chassis support bracket with the screws previously set aside 5 Reinstall the chassis cover and power up the system 5 5 Installi...

Page 40: ...r 2 Remove the failed fan power cable from motherboard 3 Remove the four screws securing the fan to the chassis wall and set these aside for later use 4 Lift the fan out of the chassis 5 Align the replacement fan with the holes in the wall of the chassis 6 Secure the fan to the chassis wall using the screws previously set aside 7 Reconnect the fan cable to motherboard 8 Reinstall the chassis top c...

Page 41: ...stem as described in section 5 2 2 Choose the desired bracket mounting configuration from the two options below Configuration A Configuration B Figure 5 7 Mounting Bracket Configuration Options Figure 5 8 Installing Mounting Brackets Configuration A Shown 3 Align the holes in the mounting bracket with those in the chassis 4 Secure the mounting bracket to the chassis in the desired configuration wi...

Page 42: ...s use the 80W converter board Figure 5 9 Installing the 60W Power Converter Board 1 Remove the chassis cover the hard drive tray and support bracket and the motherboard if they are already installed 2 Position the power converter board as shown in the drawing and secure it with four screws 3 Attach the cable from the standard power input receptacle in the rear of the chassis to the converter board...

Page 43: ...able and receptacle supplied with the 80W converter board 4 Position the power converter board as shown in the drawing and secure it with four screws 5 Connect the specialized power cable to the converter board 6 Install the motherboard and connect the power cable 7 Reinstall the hard drive and the chassis cover The 80W power converter board uses an alternate power input receptacle and interior ca...

Page 44: ...SC101i Chassis Manual 5 10 Notes ...

Page 45: ...t commonly used components and configurations For more compatible cables refer to the manufacturer of the motherboard you are using and our Web site at www supermicro com A 2 Optional Cables Included with SC101i Chassis SC101i Part Type Length Description CBL 0080L Ribbon 9 SATA extension power cable CBL 0296L Cable 9 4 pin fan extension cord for fan guide pin at 1 3 or 1 4 ...

Page 46: ... reasonably expected to result in significant injury or loss of life or catastrophic property damage Accordingly Supermicro disclaims any and all liability and should buyer use or sell such products for use in such ultra hazardous applications it does so entirely at its own risk Furthermore buyer agrees to fully indemnify defend and hold Supermicro harmless for and against any and all claims deman...

Reviews: