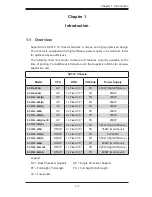
Supero SC512-260B, User Manual
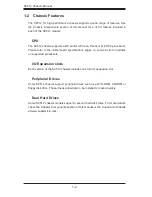
The Supero SC512-260B User Manual is a comprehensive guide providing detailed instructions for optimal use of this exceptional product. Download this free manual from our website to access a wealth of valuable information designed to enhance your experience with the Supero SC512-260B.
Share
Download


Reviews:
No comments
Related manuals for SC512-260B

SC836A-R1200B
Brand: Supermicro Pages: 146

HTCA-6200
Brand: Lanner Pages: 81

HPC-8208
Brand: Advantech Pages: 48

PAC-400AI
Brand: IEI Technology Pages: 7

Total Access 850
Brand: ADTRAN Pages: 292

ACE-COM L1
Brand: ADC Pages: 34

ACP-2010MB
Brand: Advantech Pages: 44

KIMBA 2231
Brand: Otto Bock Pages: 20

FL10.1
Brand: FUNAI Pages: 72

RSC-2KT
Brand: AIC Pages: 24

RSC-3M
Brand: AIC Pages: 27

RSC-1R
Brand: AIC Pages: 25

RSC-1C
Brand: AIC Pages: 25

RSC-1AT
Brand: AIC Pages: 25

RSC-3ETS
Brand: AIC Pages: 31

RSC-2ET
Brand: AIC Pages: 34

RSC-2ETS
Brand: AIC Pages: 36

RSC-4BT
Brand: AIC Pages: 49


