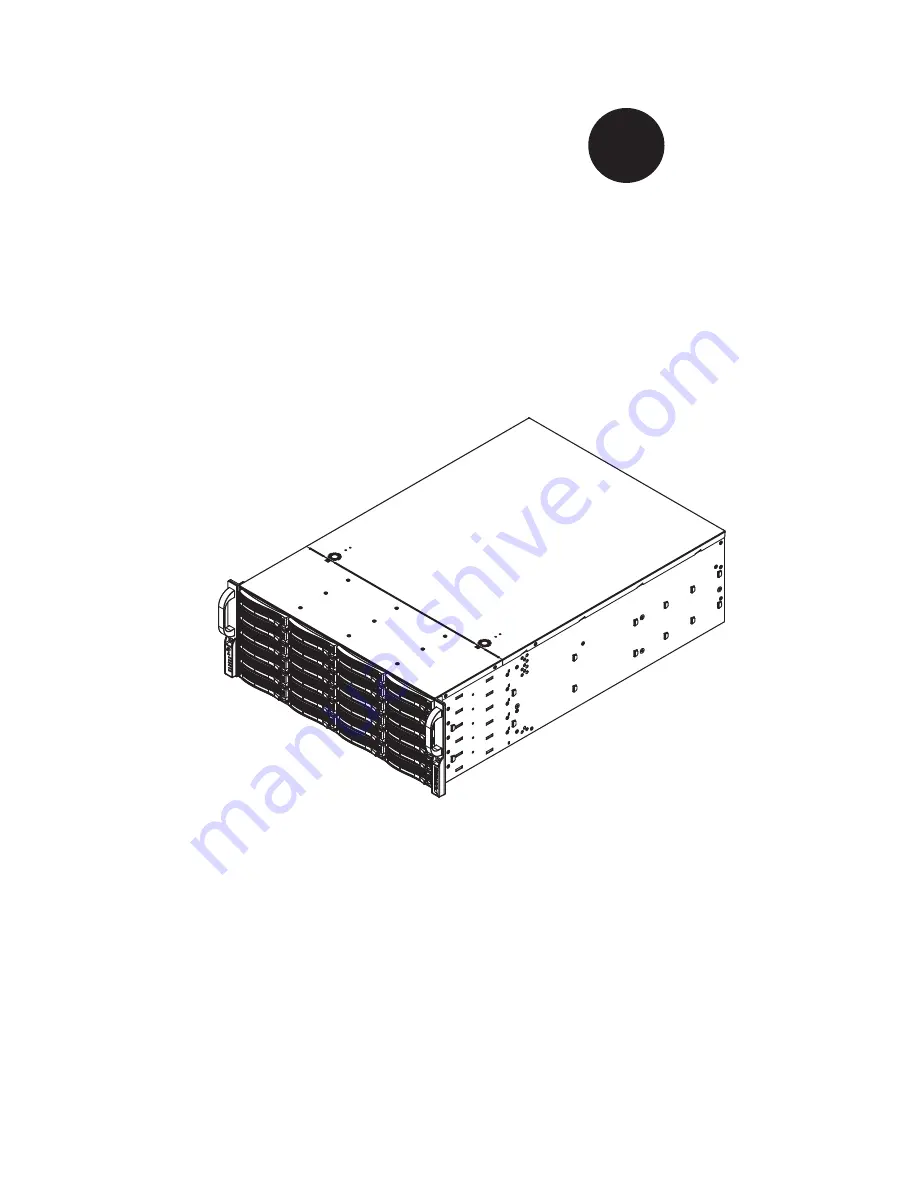
background image

SC846 CHASSIS SERIES

USER’S MANUAL 


1.0c

SC846TQ-900B

SC846TQ-900B

SC846E1-R900

SC846E2-R900


S

UPER

®

Summary of Contents for SC846E1-R900

Page 1: ...SC846 CHASSIS SERIES USER S MANUAL 1 0c SC846TQ 900B SC846TQ 900B SC846E1 R900 SC846E2 R900 SUPER...

Page 2: ...ive venue for the resolution of any such disputes Super Micro s total liability for all claims will not exceed the price paid for the hardware product FCC Statement This equipment has been tested and...

Page 3: ...t provides information for the installation and use of the SC846 chassis Installation and maintenance should be performed by experienced technicians only This document lists compatible parts available...

Page 4: ...details on this chassis model including the fans bays air ow shields and other components Chapter 4 System Interface Refer to this chapter for details on the system interface which includes the funct...

Page 5: ...endix B Power Supply Speci cations This chapter lists the speci cations of the power supply provided with your chas sis For additional information refer to the Supermicro website at www supermicro com...

Page 6: ...utions 2 3 2 6 System Safety 2 3 Chapter 3 System Interface 3 1 Overview 3 1 3 2 Control Panel Buttons 3 2 3 3 Control Panel LEDs 3 2 3 4 Drive Carrier LEDs 3 4 SAS SATA Drives 3 4 SCSI Drives 3 4 Cha...

Page 7: ...5 2 General Server Precautions 5 2 Rack Mounting Considerations 5 3 Ambient Operating Temperature 5 3 Reduced Air ow 5 3 Mechanical Loading 5 3 Circuit Overloading 5 3 Reliable Ground 5 3 5 4 Rack Mou...

Page 8: ...mized cooling for FB DIMM memory modules and twenty four hot swap drive bays offer maximum storage capacity 1 2 Shipping List Part Numbers Please visit the following link for the latest shiping lists...

Page 9: ...To en sure the highest level of professional service and technical support we strongly recommend purchasing exclusively from our Supermicro Authorized Distributors System Integrators Resellers A list...

Page 10: ...dress Super Micro Computer B V Het Sterrenbeeld 28 5215 ML s Hertogenbosch The Netherlands Tel 31 0 73 6400390 Fax 31 0 73 6416525 Email sales supermicro nl General Information support supermicro nl T...

Page 11: ...must be mailed when service is complete For faster service RMA authorizations may be requested online http www supermicro com support rma Whenever possible repack the chassis in the original Supermicr...

Page 12: ...for the rack unit that will hold that chassis It should be situated in a clean dust free area that is well venilated Avoid areas where heat electrical noise and eletromagnetic elds are generated You...

Page 13: ...working with powered on electrical equipment This is to avoid making a complete circuit which will cause electrical shock Use extreme caution when using metal tools which can easily damage any electri...

Page 14: ...ensuring that all connections have been made 2 6 System Safety Electrostatic discharge ESD is generated by two objects with different electrical charges coming into contact with each other An electri...

Page 15: ...or contacts When handling chips or modules avoid touching their pins Put the serverboard and peripherals back into their antistatic bags when not in use For grounding purposes make sure your computer...

Page 16: ...ve carriers to keep you constantly informed of the overall status of the system as well as the activity and health of speci c components Most SC846 models are two buttons on the chassis control panel...

Page 17: ...e servicing Reset The reset button is used to reboot the system 3 2 Control Panel Buttons There are two push buttons located on the front of the chassis These are in order from left to right a reset b...

Page 18: ...e illuminated when the system is operating HDD Indicates IDE channel activity SAS SATA drive SCSI drive and or DVD ROM drive activity when ashing NIC1 Indicates network activity on GLAN1 when ashing N...

Page 19: ...is being accessed Red The red LED to indicate an SAS SATA drive failure If one of the SAS SATA drives fail you should be noti ed by your system management software SCSI Drives Each SCSI drive carrier...

Page 20: ...assis The only tool you will need to install components and perform maintenance is a Phillips screwdriver Print this chapter to use as a reference while setting up your chassis Review the warnings and...

Page 21: ...op cover is released from the locked position slide the cover toward the rear of the chassis Lift the cover off the chassis 1 2 3 Warning Except for short periods of time do NOT operate the server wit...

Page 22: ...ce 4 3 Installing Hard Drives Removing Hard Drive Trays from the Chassis Press the release button on the drive tray This extends the drive bay handle Use the handle to pull the drive out of the chassi...

Page 23: ...e Tray Installing a Hard Drive to the Hard Drive Tray Remove the two screws securing the dummy drive to the drive tray and remove the dummy drive Place the hard drive tray on a at surface such as a de...

Page 24: ...holes in both the drive tray and the hard drive Secure the hard drive to the tray using six screws Replace the drive tray into the chassis Make sure to close the drive tray handle to lock the drive t...

Page 25: ...ling the I O Shield Review the documentation that came with your motherboard Become familiar with component placement requirements and precautions Open the chassis cover With the illustrations facing...

Page 26: ...The SC846 chassis includes permanent standoffs in locations used by most motherboards These standoffs accept the rounded Phillips head screws included in the SC846 accessories packaging Some motherboa...

Page 27: ...cure the CPU s heatsinks and other components to the motherboard as described in the motherboard documentation 7 Connect the cables between the motherboard backplane chassis front panel and power supp...

Page 28: ...s Installing Add on and Expansion Cards in the SC846 Chassis Disconnect the power supply lay the chassis on a at surface and open the chassis cover Remove the screw holding the cover in place for each...

Page 29: ...ssis air shroud does not require screws to set up Figure 4 12 Air Shroud for SC846LP Chassis Installing the Air Shroud Con rm that your air shroud matches your chassis model Each shroud is labeled SC8...

Page 30: ...he server without drives or drive trays in the drive bays Use only recommended server parts 3 Make sure no wires or foreign objects obstruct air ow through the chassis Pull all excess cabling out of t...

Page 31: ...ime with the chassis open 2 Turn off the power to the system and unplug the system from the outlet 3 Remove the failed fan s power cord from the serverboard 4 Press the fan release tab to lift the fai...

Page 32: ...4 13 Chapter 4 Chassis Setup and Maintenance Figure 4 15 Placing the Front System Fan Figure 4 16 Placing the Rear System Fan...

Page 33: ...ly sense and operate at a 100v to 240v input voltage An amber light will be illuminated on the power supply when the power is off An illuminated green light indicates that the power supply is operatin...

Page 34: ...ply at least two power mod ules you can leave the server running and remove only one power supply If your server has only one power supply you must power down the server and unplug the power cord 2 Pu...

Page 35: ...the handle provided 4 Change the failed power module with the same model 5 Push the new power supply module into the power bay until you hear a click 6 Plug the AC power cord back into the module and...

Page 36: ...the power distributor do following Changing the Power Distributor Power down the server and remove the plug from the wall socket or power strip Remove all cable connections to the power supply from th...

Page 37: ...power distributor and houseing from the chassis Carefully guide all the cables through the power distributor housing Remove the power distributor from the housing Slide the new power distributor modu...

Page 38: ...ppy DVD or CD ROM drive Not available Open for later use Option Four Open for later use if no drive is in position B Open for later use if no drive is in position A 3 5 xed hard drive After selecting...

Page 39: ...e drive into the HDD tray and set them aside These will be needed later to mount the replacement drive into the HDD tray Lift the drive tray up and out of the chassis 4 Figure 4 22 Remove the HDD Tray...

Page 40: ...essary also unscrew the four screws and mylar washers holding the drive tray to the chassis and set them aside for later use when mounting the replacement HDD tray Remove the drive tray from the chass...

Page 41: ...ne it may be necessary to remove the backplane from the chassis Removing the Backplane Power down and unplug the system from any power source Remove the chassis cover Disconnect the cabling to the bac...

Page 42: ...ane housing to the chassis oor and set these aside for later use 5 Gently ease the backplane up and out of the chassis 6 5 Figure 4 26 Removing the Lower Backplane Housing Screws Figure 4 27 Removing...

Page 43: ...ng back into position in the chassis 1 Replace the four lower screws which secure the backplane housing to the chassis oor 2 2 1 Slide the Backplane into the Chassis Replace the Four Lower Screws Figu...

Page 44: ...Setup and Maintenance Replace the three upper screws which secure the backplane housing to the chassis Reconnect the cabling to the backplane 3 4 Replace the Three Upper Screws 3 Figure 4 30 Replacing...

Page 45: ...SC846 Chassis Manual 4 26 Notes...

Page 46: ...area that is well ventilated Avoid areas where heat electrical noise and electromagnetic elds are generated You will also need it placed near a grounded power outlet Be sure to read the Rack and Serv...

Page 47: ...rack You should extend only one component at a time extending two or more si multaneously may cause the rack to become unstable General Server Precautions Review the electrical and general safety prec...

Page 48: ...at the amount of air ow required for safe operation is not compromised Mechanical Loading Equipment should be mounted into a rack so that a hazardous condition does not arise due to uneven mechanical...

Page 49: ...edure will differ slightly You should also refer to the installation instructions that came with the rack unit you are using NOTE This rail will t a rack between 26 and 33 5 deep Identifying the Inner...

Page 50: ...side of the chassis aligning the hooks of the chas sis with the inner rail holes Make sure the rail faces outward so that it will t with the rack s mounting bracket Slide the rail toward the front of...

Page 51: ...the short and long brackets to the proper distance so that the rail ts snugly into the rack Secure the long bracket to the front side of the outer rail with two M5 screws and the short bracket to the...

Page 52: ...5 7 Chapter 5 Rack Installation Figure 5 4 Installing the Outer Rails to the Server Rack 3 3 2...

Page 53: ...n the rack Line chassis rails A and B with the front of the rack rails C Slide the chassis rails into the rack rails keeping the pressure even on both sides you may have to depress the locking tabs wh...

Page 54: ...r Web site at www supermicro com A 2 Cables Included with SC846TQ Chassis SAS SATA SC846TQ R900 Part Type Length Description CBL 0157L Cable 9 8 pin to 8 pin ribbon cable for SGPIO PB free CBL 0087 Ri...

Page 55: ...0175L Alt Name Big Four Alternate SAS SATA Cables Some compatible motherboards have different connectors If your motherboard has only one SAS connector that the SAS SATA cables must share use one of t...

Page 56: ...0 pin CBL 0059 7 9 20 CM 8 pin CBL 0062 7 9 20 CM 4 pin CBL 0060 7 9 20 CM Front Panel to the Motherboard The SCxxx chassis includes a cable to connect the chassis front panel to the motherboard If yo...

Page 57: ...M4 x 4 mm 0 157 RAIL Round head M4 x 4 mm 0 157 Flat head M5 x 12 mm 0 472 Washer for M5 DVD ROM CD ROM and FLOPPY DRIVE Flat head 6 32 x 5 mm 0 197 Pan head 6 32 x 5 mm 0 197 Round head M3 x 5 mm 0...

Page 58: ...6 Power Supply Speci cations This appendix lists power supply speci cations for your chassis system SC846TQ SC846E1 and SC846E2 900W MFR Part PWS 902 1R Rated AC Volt age 100 240V 50 60Hz 3 4 Amp 5V s...

Page 59: ...SC846 Chassis Manual B 2 Notes...

Page 60: ...d to prevent static discharge Touch a grounded metal object before removing a component from the antistatic bag Handle the RAID card by its edges only do not touch its components peripheral chips memo...

Page 61: ...to Users All images and layouts shown in this user s guide are based upon the latest PCB Revision available at the time of publishing The card you have received may or may not look exactly the same a...

Page 62: ...CT_IN JP26 JP47 and JP108 I2 C Connector 1 JP37 and 2 JP95 I2 C Connector 3 JP52 and 4 JP96 I2 C Connector 5 JP116 and 6 JP117 1 2 3 4 5 6 SideBand Connector 1 JP66 and 2 JP68 SideBand Connector 3 JP7...

Page 63: ...22 SAS Port 10 J30 SAS Port 11 J42 SAS Port 12 J8 SAS Port 13 J23 SAS Port 14 J32 SAS Port 15 J46 SAS Port 16 J10 SAS Port 17 J24 SAS Port 18 J38 SAS Port 19 J47 SAS Port 20 J12 SAS Port 21 J25 SAS Po...

Page 64: ...D Header The activity LED header designated JP26 JP47 and JP108 is used to indicate the activ ity status of each SAS drive The Activity LED Header is located on the front panel For the Activity LED He...

Page 65: ...Each port is also compatible with SATA drives 7 8 9 Sideband Headers The sideband headers are designated JP66 JP68 JP75 JP77 JP112 and JP114 For SES 2 to work properly you must connect an 8 pin sideb...

Page 66: ...o modify the operation of the backplane jumpers can be used to choose between optional settings Jumpers create shorts between two pins to change the function of the connector Pin 1 is identi ed with a...

Page 67: ...ult 2 3 No Fan FAN 1 JP62 1 2 With Fan Default 2 3 No Fan FAN 2 JP98 1 2 With Fan Default 2 3 No Fan FAN 2 JP63 1 2 With Fan Default 2 3 No Fan FAN 3 JP99 1 2 With Fan Default 2 3 No Fan FAN 3 JP64 1...

Page 68: ...PIO is the default mode and can be used without making changes to your jumper The following information details which jumper must be con gured to use SGPIO mode or restore your backplane to I2 C mode...

Page 69: ...Failure in Fan 3 D51 ON Failure in Fan 4 D3 ON Alarm 1 Overheat Drive Failure in Chan nel 1 D36 ON Alarm 2 Overheat Drive Failure in Chan nel 2 D89 ON Alarm 3 Overheat Drive Failure in Chan nel 3 D53...

Page 70: ...SAS SATA HDD 15 SAS 4 SAS SATA HDD 4 SAS 16 SAS SATA HDD 16 SAS 5 SAS SATA HDD 5 SAS 17 SAS SATA HDD 17 SAS 6 SAS SATA HDD 6 SAS 18 SAS SATA HDD 18 SAS 7 SAS SATA HDD 7 SAS 19 SAS SATA HDD 19 SAS 8 SA...

Page 71: ...D37 SAS 3 D102 D107 SAS 4 D13 D6 SAS 5 D24 D29 SAS 6 D41 D38 SAS 7 D104 D108 SAS 8 D14 D7 SAS 9 D25 D30 SAS 10 D42 D39 SAS 11 D106 D109 SAS 12 D15 D8 SAS 13 D26 D31 SAS 14 D87 D88 SAS 15 D111 D110 SAS...

Page 72: ...ap designed to prevent static discharge Touch a grounded metal object before removing a component from the antistatic bag Handle the RAID card by its edges only do not touch its components peripheral...

Page 73: ...Note to Users All images and layouts shown in this user s guide are based upon the latest PCB Revision available at the time of publishing The card you have received may or may not look exactly the s...

Page 74: ...IL1 FANFAIL1 BUZZER_ENB1 REMOTE_FAN_FAIL_SOCKET1 PWR6 PWR4 PWR5 PWR3 PWR2 PWR1 BAR CODE 2 A C A C A C A C 5V 12V GND GND 5V 12V GND GND 5V 12V GND GND 5V 12V GND GND 5V 12V GND GND 5V 12V GND GND WWN...

Page 75: ...nector Pin De nition 1 12V 2 and 3 Ground 4 5V 3 Backplane Main Power Connectors The 4 pin connectors designated PWR1 PWR2 PWR3 PWR4 PWR5 and PWR6 provide power to the backplane See the table on the r...

Page 76: ...N3 provide power to the fans See the table on the right for pin de nitions Fan Connectors Pin De nition 1 Ground 2 12V 3 Tachometer 8 13 SAS Ports The Primary and Secondary sets of SAS ports provide e...

Page 77: ...BUZZER1 5V_LED1 OVERHEATFAIL1 FANFAIL1 BUZZER_ENB1 REMOTE_FAN_FAIL_SOCKET1 PWR6 PWR4 PWR5 PWR3 PWR2 PWR1 BAR CODE 2 A C A C A C A C 5V 12V GND GND 5V 12V GND GND 5V 12V GND GND 5V 12V GND GND 5V 12V...

Page 78: ...tor Optional General Jumper Settings Jumper Jumper Settings Note PRI_MODE1 1 2 Factory Setting Do not change SEC_MODE1 1 2 Factory Setting Do not change BUZZER_ENB1 Open Disable Closed Enable Buzzer E...

Page 79: ...5 D 3 6 D 3 7 D 6 8 D 3 2 D 3 1 D 3 0 D 2 9 D 2 8 D 2 7 D 2 6 A C T 1 6 A C T 1 7 A C T 1 8 A C T 1 9 A C T 2 0 A C T 2 1 A C T 2 2 A C T 2 3 F A I L 1 8 F A I L 1 9 F A I L 2 0 F A I L 2 1 F A I L 2...

Page 80: ...4 SAS 5 ACT 5 FAIL 5 SAS 6 ACT 6 FAIL 6 SAS 7 ACT 7 FAIL 7 SAS 8 ACT 8 FAIL 8 SAS 9 ACT 9 FAIL 9 SAS 10 ACT 10 FAIL 10 SAS 11 ACT 11 FAIL 11 SAS 12 ACT 12 FAIL 12 SAS 13 ACT 13 FAIL 13 SAS 14 ACT 14...

Page 81: ...D 10 SC846 Chassis Manual Notes...

Page 82: ...ers Single Ports SAS 846EL1 backplanes have a single port expander that access all 24 drives and supports cascading Dual Ports SAS 846EL2 backplanes have dual port expanders that access all 24 drives...

Page 83: ...dapter Failover If the Expander or data path in Port A fails the system automatically switches to Port B Figure 3 4 Single HBA Failover PRI_J0 PRI_J1 PRI_J2 SEC_J0 SEC_J1 SEC_J2 J17 WWN SAS HBA Port A...

Page 84: ...on guration the rst chassis includes a motherboard and at least one Host Bus Adapter HBA Other servers in this enclosed system include a power card This section describes the supported power card for...

Page 85: ...l HBA Cables Use the following listed cables to create connections between the internal HBA and SAS 846EL backplane The cables required depend on the HBA connector HBA Host Bus Adapter PRI_J0 PRI_J1 P...

Page 86: ...has an ipass SFF 8087 mini sas connector 36 pins at each end It connects from the HBA to the SAS 846EL backplane Cable Name IPASS mini SAS TO IPASS mini SAS Part CBL 0108L 02 Length 39 cm 15 inches Pa...

Page 87: ...nch Of Drives con guration from an existing system HBA Host Bus Adapter Power Card HBA Host Bus Adapter Dual External Host Bus Adapter CBL 0200L External HBA Cables HBA Host Bus Adapter Power Card CBL...

Page 88: ...following cable if your external HBA has an In niBand connector Description This cable has an In niBand connector SFF 8470 on one end and an SFF 8088 1X 26 pins at the other end Cable Name SAS In niB...

Page 89: ...B Expander 2 Power Card PRI_J0 PRI_J1 PRI_J2 SEC_J0 SEC_J1 SEC_J2 J17 WWN Port B Expander 2 Port A Expander 1 Connecting Multiple Backplanes in a Single Channel Environment This section describes the...

Page 90: ...088 1x to SFF 8088 x1 Ports Single or Dual Placement External cable Description Internal cable Connects the backplane to the Host Bus Adapter HBA or external port Used in single port environments Cabl...

Page 91: ...Card PRI_J0 PRI_J1 PRI_J2 SEC_J0 SEC_J1 SEC_J2 J17 WWN Port A Expander 1 Port B Expander 2 Cable 0168L with Single Port Assembly internal cable Connecting Multiple Backplanes in a Dual Channel Enviro...

Page 92: ...0168L Ports Dual Placement Internal cable Description External cascading cable Connects ports between servers Use one cable for single port connections and two cables for dual port connections Cable...

Page 93: ...see the SC846 Chassis Manual available at www supermicro com D 11 Supported Cascading Con gurations Cable 0167L internal cable Cable 0166L external cable Single Port Cable Assembly HBA Host Bus Adapt...

Page 94: ...pander 1 Power Card PRI_J0 PRI_J1 PRI_J2 SEC_J0 SEC_J1 SEC_J2 J17 WWN Port A Expander 1 Power Card PRI_J0 PRI_J1 PRI_J2 SEC_J0 SEC_J1 SEC_J2 J17 WWN Port A Expander 1 Power Card PRI_J0 PRI_J1 PRI_J2 S...

Page 95: ...2 Power Card PRI_J0 PRI_J1 PRI_J2 SEC_J0 SEC_J1 SEC_J2 J17 WWN Port A Expander 1 Power Card PRI_J0 PRI_J1 PRI_J2 SEC_J0 SEC_J1 SEC_J2 J17 WWN Port A Expander 1 Cable 0168L internal cable Dual Port Cab...

Page 96: ...er Card Port B Ex 2 Port A Ex 1 Power Card Port B Ex 2 Port A Ex 1 Power Card Port B Ex 2 Port A Ex 1 Port A Ex 1 Power Card Port B Ex 2 Port A Ex 1 Power Card Port B Ex 2 Port A Ex 1 Figure 3 22 Dual...

Page 97: ...reasonably expected to result in signi cant injury or loss of life or catastrophic property damage Accordingly Supermicro disclaims any and all liability and should buyer use or sell such products fo...

Reviews: