2. Mount the camera
1. Insert SIM and SD Cards
surfsight.net| info@surfsight.net
WARNING:
This type of installation should be performed by a qualified individual or professional only. Working with
your vehicle's power system can be dangerous to both you and your vehicle if you do not know what you are doing! If
you have any doubts, please consult a professional.
For up to date support articles and installation guides please visit our support web pages at
under Docs.
In case the camera is not pre-installed with an SD and SIM cards, please follow the
following step to insert the SD and SIM cards. Using the specialty screwdriver supplied
with the product, unscrew the safety screw that locks the tamper proof case of the SD card
and SIM cards on the side of the camera.
Attach the mounting bracket to the camera, remove the 3M adhesive tape cover and
mount the camera to the windscreen. The camera should be placed as high as possible on
the driver side of the vehicle.
Make sure the glass is clean and dry before attaching the 3M adhesive mount to the
windshield.
PACKAGE CONTENTS
AT A GLANCE
INSTALLATION STEPS
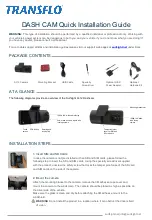
The following diagrams provide an overview of the Surfsight AI-12 Dashcam
AI-12 Camera
Optional: OBD
Power Adaptor
USB Cable
Mounting Bracket
Optional:
Hardwire Kit
Specialty
Screwdriver
1080p 140
°
wide cabin facing
Power and auxiliary inputs with
locking screws
Rotating and
locking ring
SOS button
Touch
screen
Mounting bracket slot
1080p 140
°
wide
road facing
camera
Tamper resistant
cover for SIM and
SD crad slots
WARNING
Do not install the product in a location where it can obstruct the drivers field
of vision.
DASH CAM Quick Installation Guide


