background image

 DX213 User’s Guide

Summary of Contents for DiskStation DX213

Page 1: ...DX213 User s Guide...

Page 2: ...D Indicator Behavior 6 Default Manual Switch Behavior 6 Hardware Specifications 7 Safety Instructions 9 Chapter 2 Setting Up 9 Tools and Parts for Drive Installation 9 Install Drives 11 Connect with S...

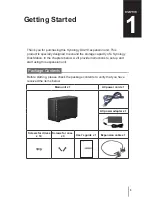
Page 3: ...the chapters below we ll provide instructions to set up and start using this expansion unit Package Contents Before starting please check the package contents to verify that you have received the ite...

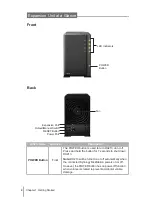
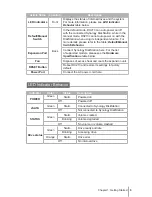
Page 4: ...ame Location Description POWER Button Front The POWER button is used to turn DX213 on or off Press and hold the button for 7 seconds to shut down DX213 Note DX213 will be turned on or off automaticall...

Page 5: ...ion Port Connect Synology DiskStation here For the list of supported models please see the Hardware Specifications table below Fan Disposes of excess heat and cools the expansion unit RESET Button Reb...

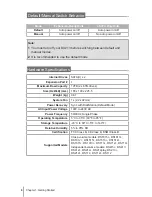
Page 6: ...w Capacity 12TB 2 x 6TB drives Size HxWxD mm 165 x 100 x 225 5 Weight kg 0 87 System Fan 1 x 92 x 92mm Power Recovery Sync with DiskStation Default Mode AC Input Power Voltage 100V to 240V AC Power Fr...

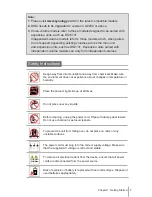
Page 7: ...from direct sunlight and away from chemicals Make sure the environment does not experience abrupt changes in temperature or humidity Place the product right side up at all times Do not place near any...

Page 8: ...8 Chapter 1 Getting Started...

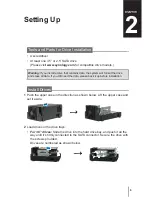
Page 9: ...se all data If you still need the data please back it up before installation Install Drives 1 Push the upper case in the direction as shown below Lift the upper case and set it aside 2 Load drives in...

Page 10: ...ly connected to the SATA connector Secure the Disk Holder with the provided screws Drives are numbered as shown below 1 2 1 2 Note Make sure the tray is pushed in all the way Otherwise the drive might...

Page 11: ...her to the power outlet Power Port 2 Connect the expansion cable to the expansion ports of DX213 and Synology DiskStation Expansion Port 1 Expansion Port 2 eSATA eSATA After the connection is complete...

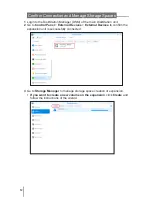
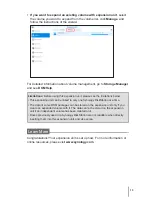
Page 12: ...kStation unit 2 Go to Control Panel External Devices External Devices to confirm the expansion unit is successfully connected 3 Go to Storage Manager to manage storage space creation or expansion If y...

Page 13: ...expansion unit can be linked to only one Synology DiskStation at a time The data of some DSM packages can be stored on the expansion unit only if you create an expanded volume with it The data cannot...

Page 14: ...urce code of or any trade secrets related to the Software except and only to the extent that such conduct is expressly permitted by applicable law notwithstanding this limitation d adapt modify alter...

Page 15: ...of its component parts Section 16 Assignment You may not transfer or assign your rights under this EULA to any third party except for that pre installed in the Products Any such transfer or assignmen...

Page 16: ...mmencing on the date the Product is purchased by Customer and ending 1 five years after such date for Category I Products 2 three years after such date for Category II lll Products or 3 two years afte...

Page 17: ...or 3 Customer implements installs or uses any correction modification enhancement improvement or other update made available by any third party The warranty set forth in Section 2 1 will terminate up...

Page 18: ...itration Association except as otherwise provided below The arbitration will be conducted before a single arbitrator and will be limited solely to the dispute between Customer and Synology The arbitra...

Page 19: ...forth in a written instrument signed by the party to be bound thereby...

Page 20: ...P N 15 06B0101B2 Printed in Taiwan...

Reviews: