background image


OPERATING 
INSTRUCTIONS 


Cryostat 


TN60


INS2410GB 
2021-09-001.00 


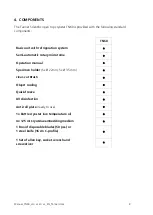
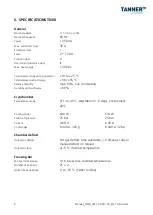
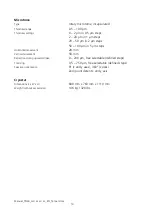
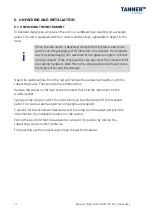
Summary of Contents for Cryostat TN60

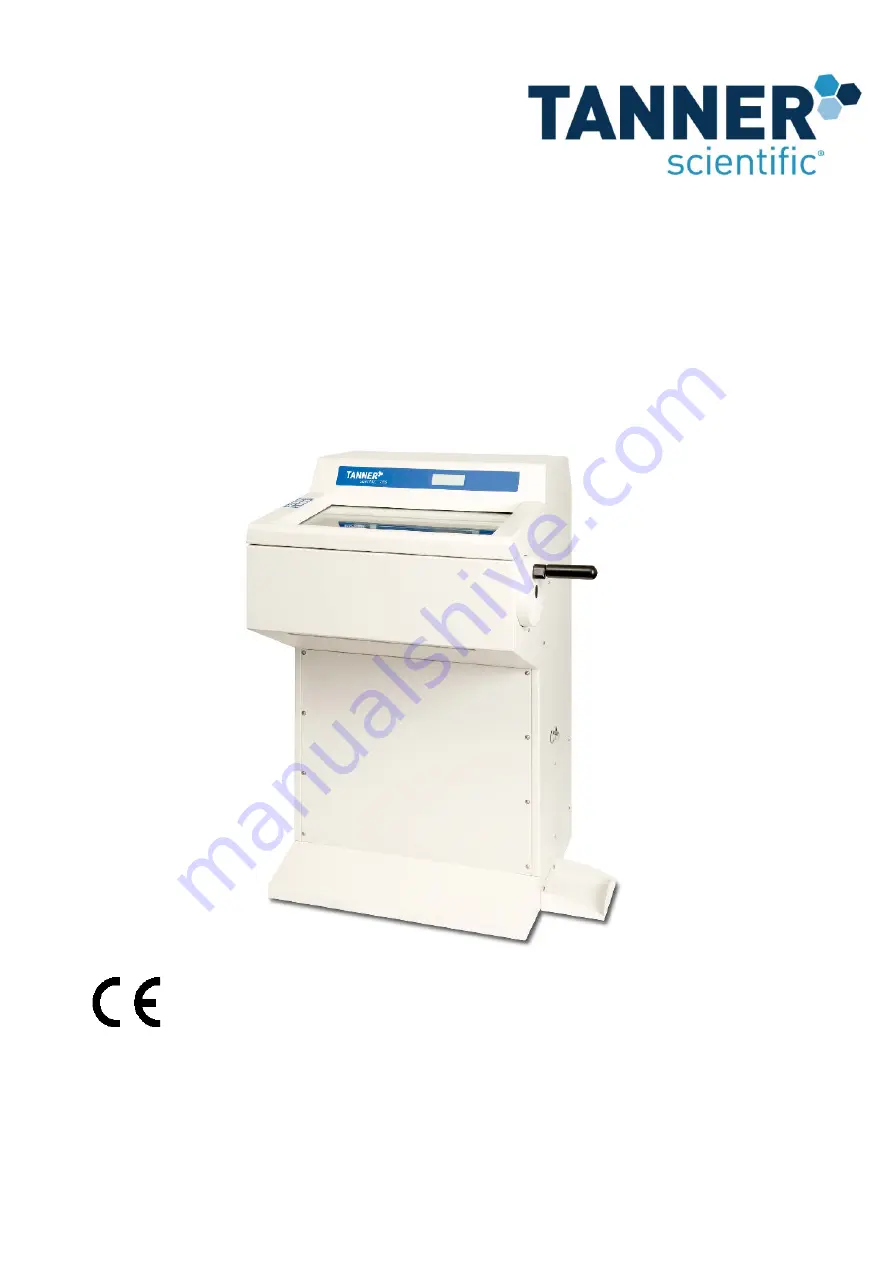
Page 1: ...OPERATING INSTRUCTIONS Cryostat TN60 INS2410GB 2021 09 001 00...

Page 2: ...Manual_TN60_2021 09 001 00_EN_Tanner docx 2...

Page 3: ...SYMBOLS 4 3 SAFETY NOTES 4 4 COMPONENTS 8 5 SPECIFICATIONS 9 6 UNPACKING AND INSTALLATION 11 7 INITIAL OPERATION 15 8 OPERATION OF MICROTOME 21 9 OPERATION OF CRYOSTAT 30 10 CLEANING AND MAINTENANCE 3...

Page 4: ...e disposable blades or microtome knives This stops rapid deterioration of the disposable blade or microtome knife 2 SYMBOLS Dangers warnings and cautions are marked by this symbol i Special instructio...

Page 5: ...stop position before working with the knife or specimen before changing the specimen during break time Hand wheel stop released Movement Hand wheel stop activated No movement The hand wheel can be st...

Page 6: ...EN_Tanner docx 6 3 2 FINGER PROTECTION Always use the finger protection Before you start any work with the knife or specimen Before changing the specimen During work break Finger protection released F...

Page 7: ...r circuit Before turning on the instrument check if the voltage of the mains supply is identical with the name plate of the unit 3 4 WORKING WITH KNIVES AND DISPOSABLE BLADES Microtome knives and disp...

Page 8: ...igeration system Semi automatic rotary microtome Operation manual Specimen holder 5x 22mm 5x 35 mm clear cut Brush Object cooling Quick freeze UV disinfection Anti roll plate ready to use 1x Bottle cr...

Page 9: ...ive humidity max 60 non condensing Humidity during storage 60 Cryochamber Temperature range 0 C to 35 C selectable in 1 K steps environment 20 C Cooling power 640 W 514 W Switch off pressure 25 bar 25...

Page 10: ...m in 2 m steps 50 100 m in 5 m steps Horizontal movement 28 mm Vertical movement 58 mm Retraction during upward stroke 0 200 m free selectable defined steps Trimming 0 5 750 m free selectable defined...

Page 11: ...uring transport Note this on the shipping documents and check the shipment for possible damage Open the cardboard box from the top and remove the accessories together with the supporting foams Then re...

Page 12: ...sockets a separate circuit should be provided Hand wheel must be reached easily Relative humidity lower than 60 A minimum distance between wall and rear of the instrument of 10 20 cm should be guaran...

Page 13: ...bracket for the defrost water collector Place the defrosting water container in the metal holder and connect the defrosting water pipe and the level sensor to the device Connection of the defrost wat...

Page 14: ...o use hand wheel lever that is folded away for transport reasons Before you start any work unfold the hand wheel lever by simply pulling the lever into a horizontal position For folding the lever back...

Page 15: ...ber temperature the target chamber temperature the status of the quick freeze unit optional and the total electronic status of the instrument and a cutting counter optional TUE 13 05 05 CUT 7 m Trim 1...

Page 16: ...defrost Contrast TIME TUE 13 05 05 To move further up in the main menu list Press Light Auto Light duration 10 m Chamber incr 15 C Retraction 5 m To change values select a setting Press to open the se...

Page 17: ...ument administrators Enter PIN 0000 Select defrosting programs 1 to 3 and set a time for the automatic defrosting programme e g each day at 12 00 h and at 23 00 h in this example Defr Start 1 12 00 De...

Page 18: ...ated way First select a time when the system will ask for a disinfection cycle e g at 12 00 h the instrument will ask for a disinfection cycle Disinfec Req 12 00 Disin Days 1 2 _ _ _ _ Disin Delay 10...

Page 19: ...with the optional fast cooling peltier system its function can be activated or deactivated The default setting for automatic deactivation of the quick freeze is set to 30 minutes The timer for automa...

Page 20: ...dure is activated Trim latching ON OFF If Trim latching mode is activated trimming function is activated and deactivated by pressing once If Trim latching mode is deactivated trimming function is acti...

Page 21: ...front of the knife holder counter clockwise Remove Insert knife Adjust knife height by turning the wheels on the left and right side of the knife holder base Tighten the knife fixation by turning the...

Page 22: ...lock Remove finger protection Loosen the blade fixation by turning the right lever counter clockwise Use the blade ejector to remove the blade Remove Insert blade from right side Tighten the blade fix...

Page 23: ...to the sample increases the cutting angle tilting the blade holder away from the sample reduces the cutting angle Secure the blade holder clockwise by turning the right lever on the blade holder base...

Page 24: ...arefully press the object on top Wait until the object is frozen mat surface or pressure 8 4 INSERTION OF OBJECT HOLDER 1 Turn hand wheel to its highest position and activate the hand wheel stop 2 Rel...

Page 25: ...holder counterclockwise 2 To adjust the orientation swing the right orientation screw Fix the sample orientation by turning the fixation lever on the left side of the sample holder clockwise Release t...

Page 26: ...ENT FOR CUT To change the cutting thickness press or to increase or decrease the value 8 10 TRIMMING OF SPECIMEN Insert object holder Orientate specimen as desired Deactivate the hand wheel stop Relea...

Page 27: ...is indicated in the display e g 7 m in this example TUE 13 05 05 CUT 7 m Trim 19 m Cha 20 C 22 QF 0 Status OK 0000 Turn hand wheel until some even sections have been obtained Clean the microtome knif...

Page 28: ...ws on the two sides of the plate A rotation of 30 corresponds to a height adjustment of approx 50 m Height adjustment of anti roll plate The anti roll plate can be exchanged with a few simple steps To...

Page 29: ...arrow 16 to 25 Brain 7 to 10 Breast with fat 25 to 30 i For tissue which has to be cut considerably below normal chamber temperature e g fatty tissues and in order to avoid cooling artefacts an additi...

Page 30: ...ing for the UVC light duration and the automatic deactivation is set to 30 minutes The timer can be set by an authorized service technician i For safety reasons UVC light will be deactivated upon open...

Page 31: ...n will be reached this place will be needed to connect the UV Lamp with the connecting plug Pic 2 3 Picture 4 The connector can be plugged into two directions of polarity a switch is excluded Picture...

Page 32: ...eze is set to 30 minutes The timer for automatic deactivation can be set by an authorized service technician 9 3 HEAT EXTRACTOR additional equipment For a more rapid freezing process with improved str...

Page 33: ...a manual activated defrost hot gas from the cooling system is pressed through the evaporator All ice which has built up is melted the water drops into a heated tray below of the evaporator and from th...

Page 34: ...ely dry in order to avoid a decision Switch on the instrument i Before starting a complete defrost of the instrument assure that all samples have been removed from the cryochamber Before switching on...

Page 35: ...icable without removing the microtome from the cryochamber When disinfecting the instrument take appropriate protective measures gloves mask protective clothing etc Wear protective clothing and dispos...

Page 36: ...aning of blade holder see section 10 3 Cleaning of window Monthly Check of temperature sensor in cryochamber Cleaning of cryostat ventilation see section 10 4 Yearly Complete Service performed by auth...

Page 37: ...he lever counterclockwise Use the blade ejector to remove the blade After removing the blade pull out the lever remove the pressure plate and clean the blade holder with a brush or cloth Reassemble th...

Page 38: ...d by Tanner Scientific If technical service or spare parts are necessary please contact your local Tanner Scientific distributor Please have the following information available Complete contact detail...

Page 39: ...lder low profile 10157005 Disposable Blade Holder high profile 10158005 Debris extraction system 10167100 Heat extractor block 31000253 Cork plate 100 pcs 20 mm 30001001 CryoGlue embedding medium 4x 1...

Page 40: ...vice is manufactured under an ISO 9001 2015 and ISO 13485 2016 quality management system Unauthorized modification or repair by third party persons will void the warranty Only original Tanner Scientif...

Page 41: ...41 Manual_TN60_2021 09 001 00_EN_Tanner docx Notes...

Page 42: ...Manual_TN60_2021 09 001 00_EN_Tanner docx 42 Notes...

Page 43: ...43 Manual_TN60_2021 09 001 00_EN_Tanner docx Notes...

Page 44: ...Tanner Scientific 12210 Rangeland Parkway 34211 Bradenton FL US Tel 888 708 5233 sales tannerscientific com www tannerscientific com...

Reviews: