
Summary of Contents for LEG PRESS IT95
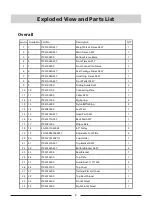
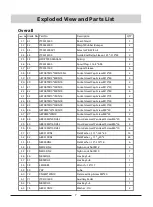
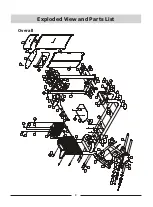
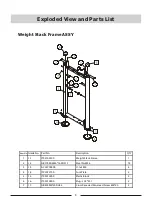
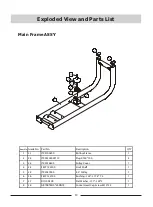
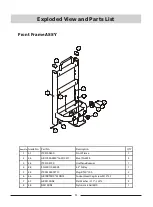
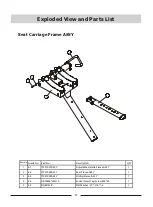
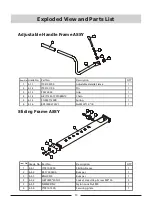
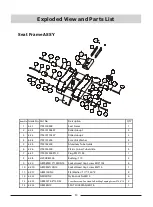
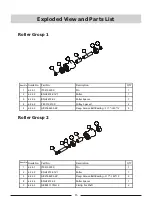
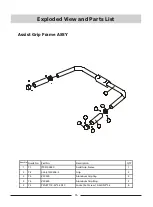
Page 8: ...8 Exploded View and Parts List Overall ...
Page 28: ......
Page 31: ...Assembly 31 STEP 6 ...
Page 34: ......
Page 38: ......
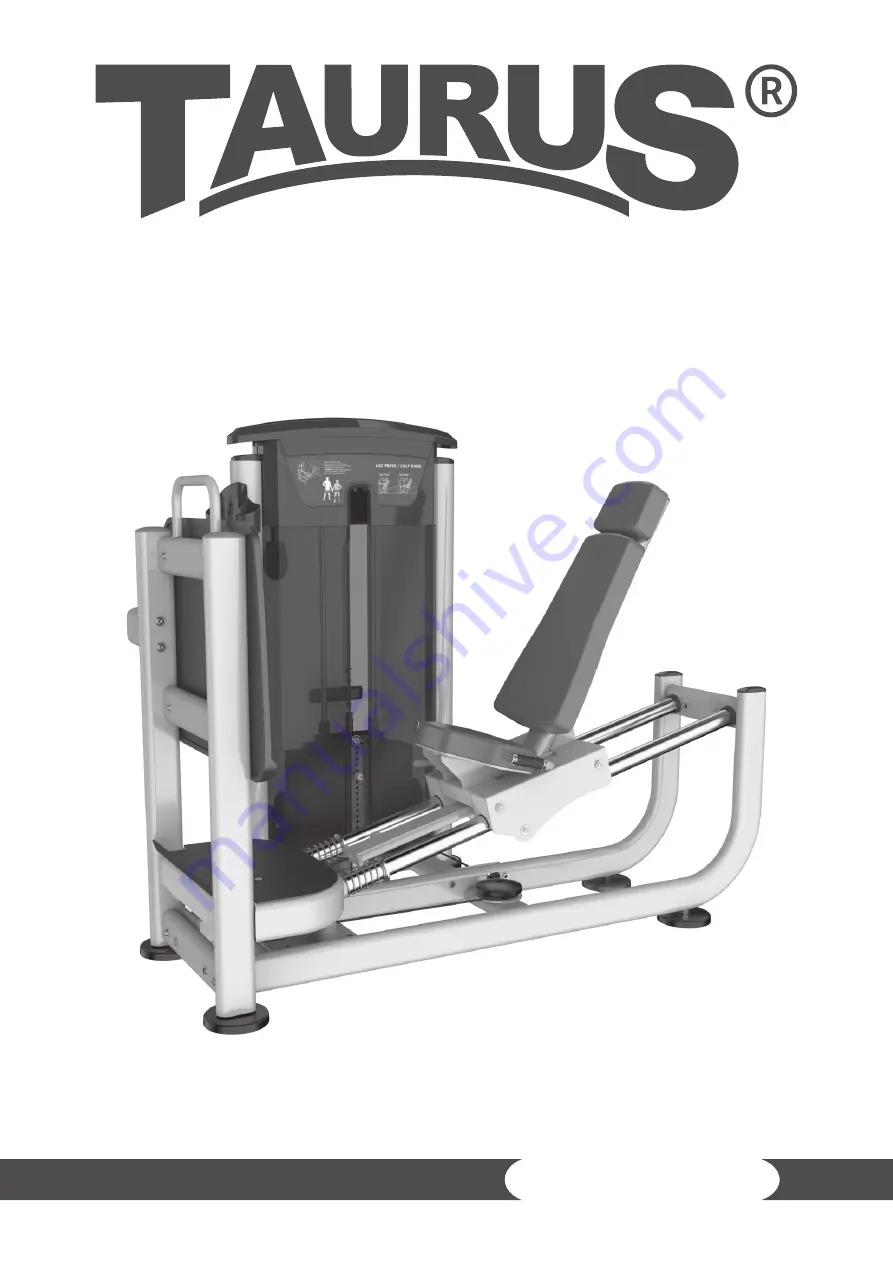
The Taurus LEG PRESS IT95 is a top-of-the-line fitness equipment designed to provide a challenging lower body workout. Enhance your strength and endurance with this high-quality leg press machine. For proper assembly and usage instructions, simply visit 88.208.23.73:8080 to download your free owner's manual.
Page 8: ...8 Exploded View and Parts List Overall ...
Page 28: ......
Page 31: ...Assembly 31 STEP 6 ...
Page 34: ......
Page 38: ......


