
Summary of Contents for 37
Page 1: ...Chapter I OPERATIONS AND MAINTENANCE MANUAL Chapter 1...
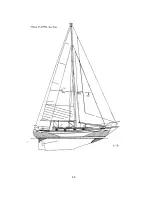
Page 7: ...I 6...
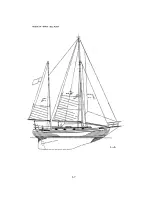
Page 8: ...I 7...
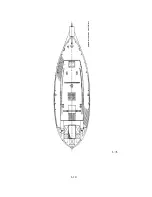
Page 9: ...I 10...
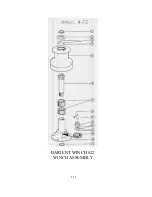
Page 10: ...I 11 BARIENT WINCH 22 WINCH ASSEMBLY...
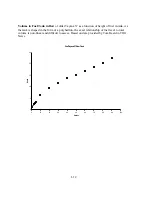
Page 14: ...II 3 Polars for Tayana37 Cutter...
Page 18: ...II 7...
Page 45: ...IV 8...
Page 54: ...IV 17...
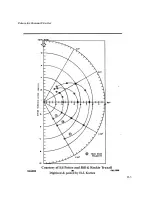
Page 69: ...V 13...
Page 76: ...V 20...
Page 80: ...V 24 moisture eliminating product...
Page 81: ...V 25...