background image


1


tbm MPL027PT-X SYNCHRO 

USER MANUAL 


2


FCC Notices   

It’s herewith confirmed to comply with the requirements of FCC Part 15 Rules. Operation is 
subject to the following two conditions: 

z


This device may not cause harmful interference. 

z


This device must accept any interference received, including interference that may 
cause undesired operation. 

Note: This equipment has been tested and found to comply with the limits for a Class B 
digital device, pursuant to part 15 of the FCC Rules. These limits are designed to provide 
reasonable protection against harmful interference when the equipment is operated in a 
residential installation. This equipment generated uses and can radiate radio frequency 
energy and if not installed and used in accordance with the instruction manual may cause 
harmful interference to radio communications. However, there is no guarantee that 
interference will not occur in a particular installation. If this equipment does cause harmful 
interference to radio of television reception, which can be determined by turning the 
equipment off or on, the user is encouraged to try to correct the interference by one or more 
of the following measures: 

z


Reorient or relocate the receiving antenna. 

z


Increase the separation between the equipment and receiver. 

z


Connect the equipment into an outlet on a circuit different from that to which the 
receiver is connected. 

z


Consult the dealer or an experienced radio TV technician for help. 


CE Declaration 


This device complies with CE class B. 
   EN55022 


IEC 61000-4-4 

   EN61000-3-2  

      IEC 61000-4-5 

   EN61000-3-3  

      IEC 61000-4-6 

   EN55024 


IEC 61000-4-8 

   IEC 61000-4-2 


IEC 61000-4-11 

   IEC 61000-4-3 

 
All contents are subject to change without notice. All trademarks are the property of 
their respective owner. 


Summary of Contents for MPL027PT-X SYNCHRO

Page 1: ...may cause harmful interference to radio communications However there is no guarantee that interference will not occur in a particular installation If this equipment does cause harmful interference to...

Page 2: ...Card Protective Cover 4 Video Audio Cable 5 RS 232 Cable optional 6 VGA to Y Pb Pr Cable optional 7 Power Adapter 8 Quick Guide 9 CD Driver Schedule Software IP Detect Tool User Manual 2 INTRODUCTION...

Page 3: ...y Lock Function Exports the Configuration Value You can export the configuration value to the CF card The configuration value can be modified on your PC and can be applied to the MPL027PT X or others...

Page 4: ...ample To enter the letter a You would press the button 2 twice Enter The IP Address For Example To enter the IP address 192 168 100 100 Step 1 Press 1 once then 1 is displayed and the color of 1 is or...

Page 5: ...he MPL027PT X is connected to a network without a DHCP server or you want to use Local FTP Server function enter the fixed IP address Mask Gateway and DNS for the MPL027PT X PS Refer to 5 1 for how to...

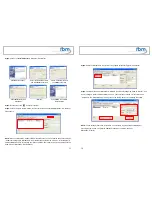
Page 6: ...t to continue Select the installation folder and click Next to continue Create a desktop icon and click Next to continue Click Install to start the installation Installing Click Finish to complete the...

Page 7: ...Samoa GMT 03 00 Nairobi GMT 10 00 Hawaii GMT 03 00 Moscow Saint Petersburg Volgograd GMT 09 00 Alaska GMT 03 00 Baghdad GMT 08 00 Pacific GMT U S Canada Tijuana GMT 03 00 Kuwait Raid GMT 07 00 Contine...

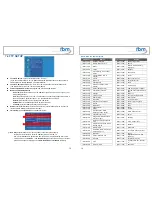
Page 8: ...d and set the correct resolution automatically SD Video Select the SD output mode Video S Video or Y Cb Cr VGA 60Hz Select the VGA output resolution 640x480 800x600 1024x768 1280x1024 1360x768 1680x10...

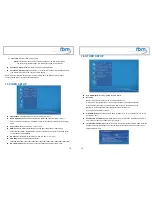
Page 9: ...Auto Power function If this function is enabled user might set a definite time for MPL027PT X to power on off automatically Auto Power Setting Press Enter button on the remote controller the Power On...

Page 10: ...RARY RETURN 20 Note If the symbol return appears on the screen you can use RETURN button of the remote control to go back one layer Step 3 Select the file you want to play and press ENTER or PLAY butt...

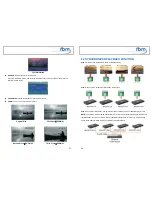
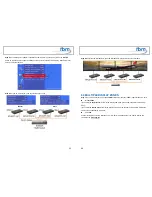
Page 11: ...Press ZOOM 03 22 8 2 SYNCHRONIZED PLAYBACK FUNCTION Step 1 Store four completed files to four CF cards separately Step 2 Insert four CF cards to four MPL027PT X separately Step 3 Connect four MPL027PT...

Page 12: ...7PT X will synchronize video playback 8 3 MULTIPLE DISPLAY ZONES Step 1 Put movies pictures only supports PNG format size 213x641 96DPI and text file on CF card Picture Files If you select the By Slid...

Page 13: ...e in the FTP server at 00 25 than again every 6 minutes 00 31 00 37 00 43 00 49 00 55 Example 2 the current time of the MPL027PT X is 00 10 and the entered value is 45 15 The MPL027PT X will connect t...

Page 14: ...Yellow Green or Rotation language Latin1 Set the font of scrolling text Please enter Latin1 Latin2 Japanese or Greek background Off Enable or disable the scrolling text background On Enable the backgr...

Page 15: ...X is downloading Blinking Red Light The connection to the FTP server has failed Blinking Green Light Blinking Red Light Blinking Red Light 30 8 5 RS 232 FUNCTION RS 232 cable is optional Use the tool...

Page 16: ...connected to the network Refer to 7 1 Confirm the Local HTTP Server function has been enabled and the Local HTTP Server Setup set has been completed refer to 7 2 Set your router or firewall and open a...

Page 17: ...uto play all the media files on the CF card after power on Multi Layer Directly execute Multiple Display function after power on HDMI In Auto play the video from HDMI source after power on only for MP...

Page 18: ...Setup Enable Turn on off the MPL027PT X server Port Enter the port of the MPL027PT X ID Enter the user name of the MPL027PT X default ID root Password Enter the password of the MPL027PT X default pass...

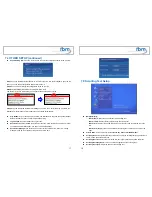
Page 19: ...CHEDULE FUNCTION NOTE The NTP Server or Local Time must be set before using the Schedule Function refer to 7 2 10 1 INSTALL THE SCHEDULE SOFTWARE Step1 Download the Schedule Software from our Website...

Page 20: ...es that you want to add You can also set up the Play Times and Volume of the file in this window Click the OK button to complete the setup z Click the Add button again to add other file If you choose...

Page 21: ...tion to open the Advance Schedule Editor window Set up the Start and Stop Date Start and Stop Time and the Week Day then click OK to quit the window 42 Step 2 Click the Add button in the File Setup se...

Page 22: ...Play Button ex 5 Play Buttons supports up to 12 play buttons Step 1 Put 6 demo files on CF card 1 default file and 5 demo files NOTE The files are sorted by filename in ascending order alphanumericall...

Page 23: ...h various operating environment glass plastics and acrylic material except metal material the thickness supports 3mm 5mm and it can be customized to 5cm for OEM project 11 4 2 Demo Files Ex Using the...

Page 24: ...the MPL027PT X 3 Press the TV MODE button on the remote control to select the correct output mode 4 Make sure the file format on the CF card is correct 5 Check if the display device is switched to co...

Page 25: ...ben zu Ihrem Ger t 1 Modell Bezeichnung und Nummer 2 Seriennummer 3 Firmware Version 4 Speichergr e und Fabrikat der Speicherkarte 5 Eine Beschreibung des Problems 6 Den Namen des H ndlers oder der In...

Reviews: