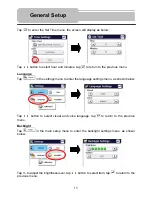
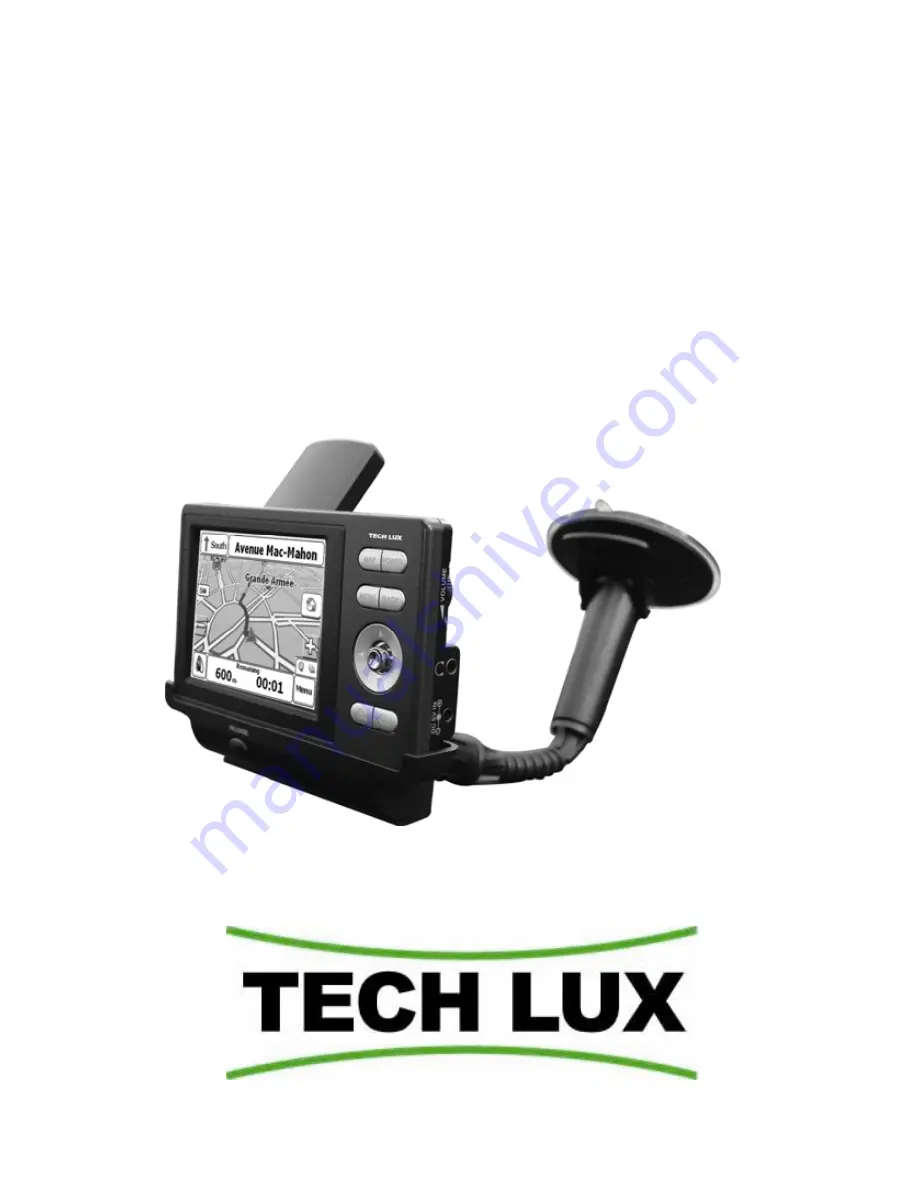
background image


TECHLUX NAVI 1 


TL070101 
 
- User’s Manual 


Summary of Contents for NAVI 1

Page 1: ...TECHLUX NAVI 1 TL070101 User s Manual ...

Page 2: ... in the literature accompanying the appliance CAUTION 1 To reduce the risk of electric shock do not remove the cover or back No user serviceable parts inside Refer servicing to qualified service personnel Unplug the product from the wall outlet before servicing or when it is unused for a long period of time 2 The manufacturer should not hold responsibility for the damage caused by any substitution...

Page 3: ...atus 13 Only use attachments accessories specified by the manufacturer 14 Use only with the cart stand tripod bracket or table specified by the manufacturer or sold with the apparatus When a cart is used use caution when moving the cart apparatus combination to avoid injury from tip over 15 Unplug the apparatus during lightning storms or when unused for long periods of time 16 Refer all servicing ...

Page 4: ...ut designed with SD card and USB ports can be connected to SD card or other USB device for file loading and store map data 64M Flash Storage built in 64M Flash Storage can store data Power Adapter Switch Automatically adapts to voltage requirements in U S and other countries Rechargeable Battery built in Rechargeable battery a fully charged battery delivers about 4 hours of use 3 ...

Page 5: ...ual 1 Power Adaptor 1 Car Adaptor 1 USB Cable 1 Audio Cable 1 SD Card 1 Following accessory is optional not included External Antenna optional 1 NOTE Accessories and their parts numbers are subject to modification without prior notice due to improvements 4 ...

Page 6: ...a Location p 24 Recent Locations p 27 Favorites p 28 POI s Gas Food Lodging p 32 1 3 4 6 9 11 13 17 48 49 50 Features Accessories View of Main Unit System Connections Power Supply Preparation General Setup Navigation Turn by Turn List p 36 Settings p 40 Definition Troubleshooting FAQ Specifications ...

Page 7: ... to enter the main setup menu 4 BACK button Press to return to the previous menu 5 Confirm buttons Adjust up and down to select items in the setup menu Adjust left and right to adjust the items in the setup menu Press it to confirm selection 6 Zoom in out buttons Press to zoom in or out the map 7 LCD Screen 8 Charge indicator When charging the battery it is red when finished charging it turns gree...

Page 8: ...it 7 1 Volume Control U sp sed to adjust the volume of the headphone and eaker 2 Headphone Jack Used to connect headphones for private listening When the headphones are connected to this jack the speaker will be turned off automatically 3 DC 5V Input Jack Used to connect to the supplied power adaptor or car adapter ...

Page 9: ...eaker 2 RESET hole Insert a stick to reset the hardware of the unit 3 RESET hole Insert a stick to reset the software of the unit 4 GPS Antenna Receiving GPS signals 5 GPS jack Connected to the external antenna for receiving signal 8 ...

Page 10: ... connected to your PC and that Microsoft Active Sync is active If you have not installed Microsoft Active Sync on your PC download and install Microsoft Active Sync from the Microsoft website http www microsoft com windowsmobile downloads activesync38 mspx After installation of this tool and reboot of the machine Microsoft ActiveSync will connect the GPS device to your PC 2 Turn on the unit Connec...

Page 11: ...h SD MMC Card jack which allows you to insert the SD MMC card into the unit as shown below Connecting to Headphones Connect the headphones to the right side of the unit for private listening When headphone is connected the speakers will automatically turn off 10 ...

Page 12: ...LCD screen will be brighter than with the rechargeable battery Using of Car Adaptor The device is supplied with a Car Adaptor for powering the unit while in a vehicle 11 Connect the Car Adaptor Power Plug to the unit s power jack and plug the other end to the vehicle s 5V accessory cigarette socket as shown on the right figure Attention Do not operate the unit while driving a vehicle Place the uni...

Page 13: ...32 100F Maintain well ventilated conditions around the product to avoid overheating Don t put the product on a bed sofa or anything that may block ventilation to the product When the battery is weak an indicator will appear on the LCD screen and about two minutes later the device will power OFF automatically When charging the battery the charge indicator is red when finished charging it turns gree...

Page 14: ...gation to go to the navigation menu Tap Settings to enter the general setup menu Settings Menu Tap Settings to enter the general setup menu the screen will display as below Tap to return the main setup menu Volume Tap in the main setup menu the screen will display as below Tap to adjust the volume tap to return to the previous menu ...

Page 15: ...eturn to the previous menu Tap to enter the Set Time Zone menu the screen will display as below Tap button to select the time zone tap to return to the previous menu Tap to enter the Set Date menu the screen will display as below Tap button to select tap to return to the previous menu 14 ...

Page 16: ...anguage Tap in the settings menu to enter the language settings menu as shown below Tap button to select visual and voice language tap to return to the previous menu Backlight Tap in the main setup menu to enter the backlight settings menu as shown below Tap to adjust the brightness level tap button to select item tap to return to the previous menu 15 ...

Page 17: ...ral Setup Calibration Tap to in the main setup menu the screen will display as below Tap the button as it moves around the screen then the will disappear and tap the screen to return to the settings menu 16 ...

Page 18: ... In the general setup menu tap Navigation to enter the destinations menu the screen will display as below Note When you have the Main Map screen displayed you can press the Menu button to display the Destinations menu Address Screens The Address button lets you navigate to an address as shown below For a complete description of how to navigate to an address see Enter Address in the manual 17 ...

Page 19: ... button the first screen of popular place categories appears as shown below The Gas Food Lodging button lets you navigate to thousands of interesting places such as beaches parks hotels museums and restaurants For more information see Gas Food Lodging on page 32 Settings Menu You can tap the Settings button to determine the map display and to show the generated route after you have selected a loca...

Page 20: ...ompts button For more information see Prompts on page 42 Choose among different maps on your memory card by tapping the Select Map button For more information see Select Map on page 43 The Pedestrian Mode Driving Mode button lets you toggle between traveling as a pedestrian or in a vehicle When in Pedestrian Mode you are not limited by vehicle constraints such as one way streets Note that you can ...

Page 21: ...rrent location Your last known location when the GPS signal is unreliable The generated route Your selected destination The Compass displays the travel direction The GPS bar is a toggle button that displays the remaining travel distance and travel time estimated time of arrival and speed and altitude and street name and address number When you have calculated a route the Directions bar displays in...

Page 22: ...imized for night driving or adverse weather conditions For an example refer to Figure 2 2D Night Mode Map View The 3D Mode Day View or Night View provides you with a three dimensional map for day or night driving For an example refer to Figure 3 3D Day Mode Map View and Figure 4 3D Night Mode Map View From the Map Options menu you can click from the following buttons 3D Mode button to view a three...

Page 23: ...o navigate to a specific point on the map but you don t have the street address When you tap on the map the context menu appears Go There This button lets you calculate a route from the map point Add to My Favorites This button lets you save a point on the map as a favorite destination This feature lets you quickly save a location that you would want to return to later Set as Origin This button le...

Page 24: ...tination The Actions button provides a list of command options available for the selected address or place The Hide Display Keyboard toggle button lets you show or remove the keyboard The Save OK or Done buttons confirm your value preferences and returns you to the menu or map Scrolling Through Screens Every navigation function in the system such as Address Gas Food Lodging or My Favorites consist...

Page 25: ...the keyboard to enter the first characters of the address name The characters appear in the Address field It automatically searches the Address list for the first occurrence of the entered characters After you have selected a city it displays the next address field such as street and address number You can also tap the Enter button to move through the sequence of address screens 24 ...

Page 26: ...ddress Modes You can define the information used to locate an address by tapping the Search By button The unit provides a variety of address formats as described below City Street This sequence displays the following address screens City Street Address Number You can also navigate to city or street only When you have selected a city the first entry of the Street Name list is City Center When you h...

Page 27: ...add an address to your list of favorite locations as shown in the figure below For more information see My Favorites on page 28 Go to your Destination After you have specified the address tap the Enter button The unit shows your destination on the Map screen before calculating a route Check that the destination address is correct at the top of the screen If you want to change the destination tap t...

Page 28: ...er button A map appears showing the specified location Tap the GO button to calculate the route 1 Recent Locations 2 Show on Map From the Recent Locations screen you can tap the Actions button to select from the following commands Set as Origin Lets you designate the selected address as the route origin You would use this command when calculating a route from a point other than your current locati...

Page 29: ...creen displays your favorites groups When you tap on a selected group the unit automatically displays its stored locations Tap the selected location to show your destination on a map Tap GO to calculate your route 1 Favorites Groups 2 Favorites Locations 3 Move to Enter Screen 4 Show on Map Note The MY FAVORITES folder is the default folder where all favorites are stored if not assigned to a group...

Page 30: ...map Edit Group When you tap this button the Favorites Group screen appears with the name and selected image of the highlighted group You can change the name and icon Delete Group When you tap this button the selected group and its associated entries are removed The My Favorites group cannot be deleted Favorite Alerts Alerts let you know that you are within a certain distance of a favorite location...

Page 31: ... route You can create a group called Restaurants and enter the restaurant addresses As you take your trip an alert will go off when you come within range of these restaurants Notes Favorite Alert settings affect all Favorites Groups The 2 nd Alert must be set to go off at closer distance than the 1 st Alert Alerts can be set for a group but not for individual locations Of course you can always cre...

Page 32: ...play the following commands Set as Origin Lets you designate the selected location as the route origin You would use this command when calculating a route from a point other than your current location Note You are still receiving the GPS signal Show Map Lets you see the map with the selected favorite destination for you to review before creating a route Edit Favorite Location Lets you change the n...

Page 33: ... tapping the Hide Display Keyboard button and entering text in the POI Category field The Smart Search System automatically displays the POI categories that match the characters entered If you didn t find the category through the initial search you can also use the Find button to do a sub search particularly useful when the category name consists of two or more words You can always browse the POI ...

Page 34: ...l order Subcategories Many categories have subcategories to provide for an even greater list of choices For example Gasoline Station may have many subcategories each representing a particular brand name The same is also true for Hotels Restaurants have subcategories that represent different types of food such as American Italian and French as shown below 33 ...

Page 35: ...this feature to search near that location for restaurants lodging historical sites or anything you want Search Radius Enter the location distance to search for a designated place For example if you enter 5 km the unit only searches within a five kilometer radius When you select a large search radius you risk the chance of finding too many locations which makes it harder to find the place that you ...

Page 36: ... location Note You are still receiving the GPS signal Show on Map Lets you show the map with the displayed destination for you to review before creating a route Add to My Favorites Lets you add a POI entry to your list of favorite locations For more information see My Favorites on page 28 Sort By ABC or Distance Lets you sort the entries of the selected category alphabetically or by distance from ...

Page 37: ...from your current point to your selected destination Use the Scroll buttons to move up or down the directions list The following options are available The Route Summary button displays your entire route on the Map screen plus the travel distance and the Estimated Travel Time Remaining ETR The Show Turn button displays the next turn on the Map screen including the street name the distance to it and...

Page 38: ...The Cancel Route button stops the current navigation and clears the route This button is active only after a destination has been set Avoid Roads You can specify that certain roads be permanently excluded from your route calculations Use this feature when you want to avoid congested boulevards toll roads or unsafe streets From the Map Options menu tap the Avoid Roads button The Avoid Roads screen ...

Page 39: ... appears displaying the group name Change the group name and tap Save The new name is displayed on the Avoid Roads screen Delete Group Select a group and tap this button to remove the group from the Avoid Roads screen The road entries in this group are also removed When selecting a group route you can tap the Allow or Avoid button to include or exclude all roads located in the group Avoid Road Loc...

Page 40: ... completed updating your road information tap Save Edit Road Lets you rename the road and select a different group When you have made your changes tap Save Delete Road Select a road and tap this button to remove the road from your group The unit no longer recognizes the removed entry as a road to avoid Show on Map Lets you show the map with the displayed destination for you to review before creati...

Page 41: ...ue The Shorter route option selects the route that is the shorter distance Remember the shorter route may not always be the quickest as you are able to travel faster on some roads than on others Note Route generation does not take into account any detours stops or delays along the route U Turn Enabled When this checkbox is selected the unit is permitted to use U turns when calculating a route Syst...

Page 42: ...n screen When the location is selected you can navigate to your address by tapping the Home button displayed on the Settings menu For example if you have selected Hospitals as the Set Home Location destination when you click the Home button it automatically creates a route to the closest hospital or clinic GPS Settings The unit uses the GPS receiver to pinpoint your location GPS signals are automa...

Page 43: ...r Tap the GPS Settings button to display the following Connection fields COM Port This field lets you specify the Communications port Note Most BlueTooth receivers use COM 6 or COM 8 Most serial receivers use COM 1 Baud Rate This field lets you specify the transmission rate of data Protocol This field displays the GPS protocol The default value is NMEA Note Most receivers use NMEA 4800 Connect to ...

Page 44: ...utomatically active Visual Prompts Text Directional prompts are displayed in written form Symbols Directional prompts are displayed in diagram form such as an arrow None Directional prompts are not displayed Select Map This feature lets you change the currently selected map to another map saved on your SD memory card You can tap the Select Map button from the Options menu to display the maps saved...

Page 45: ...ying to orient yourself to the Map screen during the day For example you have calculated a route but you don t know whether the route is to the right or left of your current position If you re shadow is behind you then the sun is in front of you Move your navigation device to the direction of the sun and follow the route At night no shadow is displayed Note The sun is always in the opposite direct...

Page 46: ...d group 1 2 Setting Stops along the Route You can set up stops by selecting the Route Group and tapping the Enter button From the Stops screen tap the Actions button to add rename or delete a destination Add a stop by Address POI My Favorites or Recent Locations Select one of these options specify a location and click the OK button The Add Stop screen appears You can change the location name enter...

Page 47: ...point other than your current location Note You are still connected to the GPS signal Add Stop Lets you add a location by specifying an address from recent locations favorite locations or pre defined POIs such as fuel food or lodging Rename Stop Lets you change the stop information such as name comments or route group Delete Stop Lets you remove a selected stop Optimize Route Your trip itinerary i...

Page 48: ...tom edge of the unit on the bottom of the mounting cradle Rotate the unit back until it clicks to into the mounting cradle 3 Lift the suction cup lever To mount to windshield press the suction cup to the windshield and press down on the suction cup lever To mount to dashboard use the included adhesive disk Choose a clean dry spot on your dashboard peel off protection liner from the back of the dis...

Page 49: ...m is a constellation of 24 well spaced satellites that orbit the Earth and make it possible for Vehicles people assets enabled with GPS receivers to pinpoint their location Lat Latitude An imaginary parallel circular line East West around the earth the same distance north or south from the equator expressed in degrees Long Longitude An imaginary circular line on the surface of the earth passing th...

Page 50: ...correctly spelled your entry If you do not know how an address is spelled correctly simply enter parts of it or a few characters Then browse in the result list and look for the address Also make sure that the city in which you are looking for an address is correct Sometimes the official postal address differs from the address you are looking for In that case search for an address nearby that you k...

Page 51: ...dio Signal to noise Rate 65dB Audio distortion noise 20dB 1kHz Channel Separation 70dB 1kHz Dynamic Range 80dB 1kHz Power AC 100 240V 50 60Hz Power Consumption 8W Dimensions 125mmX75mmX30mm L W D Weight About 0 25kg DESIGN AND SPECIFICATIONS ARE SUBJECT TO CHANGE WITHOUT NOTICE ...

Page 52: ...iceable defect THE WARRANTY DOES NOT COVER transport costs nor charges relating to an intervention at the address of the purchaser Scratches splinters or marks in the packaging of the device or its accessories which were not noted at the time of delivery breakable accessories except in case of manufacturing defects recognized by our technical department Moreover we wave any liability for general d...

Reviews: