background image

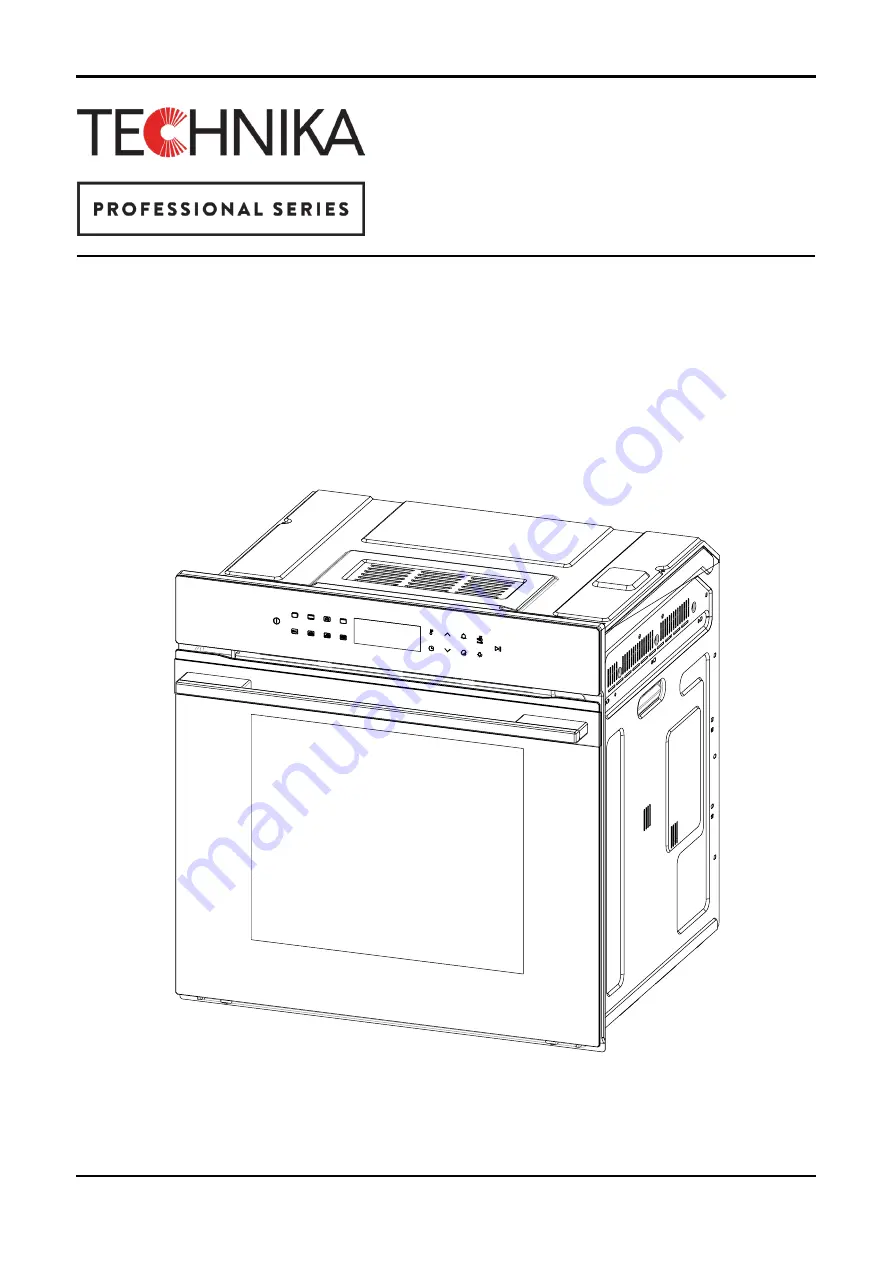
USER GUIDE

M U L T I F U N C T I O N   6 0 C M   O V E N

T G O 6 1 4 A B K

TECHNIKA.COM.AU

Summary of Contents for Professional Series TGO614ABK

Page 1: ...USER GUIDE M U L T I F U N C T I O N 6 0 C M O V E N T G O 6 1 4 A B K TECHNIKA COM AU ...

Page 2: ......

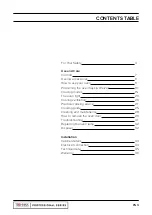
Page 3: ...ven trays shelves 10 Cooking modes 15 The oven light 20 Cooling ventilation 20 Practical cooking advice 21 Cooking guide 25 Cleaning and maintenance 28 How to remove the oven door 29 Troubleshooting 31 Replacing the oven lamp 32 Disposal 32 Installation Cabinet details 33 Electrical connection 34 Technical data 35 Warranty 36 ...

Page 4: ...ements inside the oven WARNING Accessible parts will become hot when in use To avoid burns and scalds children should be kept away This appliance is not intended for use by persons including children with reduced physical sensory or mental capabilities or lack of experience and knowledge unless they have been given supervision or instruction concerning use of the appliance by a person responsible ...

Page 5: ...ospheric agents such as rain or direct sunlight Using the oven for storage purposes Using flammable liquids near the appliance Authorised personnel must be contracted to Install the appliance according to these installation instructions and any local requirements Replace the temperature probe if it is damaged The probe is part of thermostat Only use the temperature sensing probe recommended for th...

Page 6: ...e has not been damaged immediately after it has been unpacked Disconnect the appliance from the electrical mains if it is not functioning properly and before cleaning or performing maintenance When left unused for a long period unplug the appliance from the electricity mains Use oven gloves to place cookware in the oven or when removing it Always grip the oven door handle in the centre Make sure t...

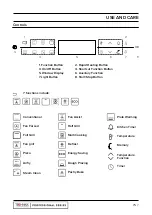
Page 7: ...play 6 Auxiliary Function 7 Light Button 8 Start Stop Button 7 functions include Conventional Fan Forced Full Grill Fan grill Pizza Airfry Steam Clean Fan Assist Half Grill Multi Cooking Defrost Energy Saving Dough Proving Pastry Bake Plate Warming Kitchen Timer Temperature Memory Temperature Function Timer 1 3 4 5 6 7 2 8 ...

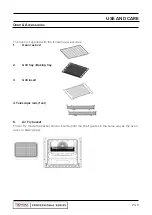
Page 8: ...ssories 1 Oven rack x 2 2 Grill tray Baking tray 3 Grill insert 4 Telescopic rails 1 set 5 Air Fry basket For Air Fry mode the basket can be inserted into the shelf guides in the same way as the oven racks or baking trays Oven Accessories USE AND CARE ...

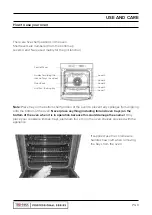
Page 9: ...uides for sliding the racks of trays in and out Oven Rack Grill Pan Baking tray Level 5 Level 4 Level 3 Level 2 Level 1 Note Place tray on the bottom shelf position of the oven to prevent any spillages from dripping onto the bottom of the oven Never place anything including foil and oven trays on the bottom of the oven when it is in operation because this could damage the enamel Only place your co...

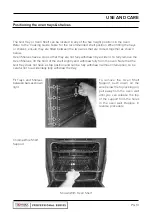
Page 10: ...awn by accident To fully remove the Oven Shelves lift the front of the shelf slightly and withdraw fully from the oven Note that the Grill Tray does not have a stop position and can be fully withdrawn without interruption so be careful not to accidentally fully withdraw the tray To remove the Oven Shelf Support push down on the wire below the top locking pin pull away from the oven wall until you ...

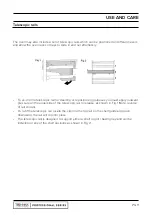
Page 11: ...s you must apply outward pressure on the underside of the telescopic rail to release as shown in Fig 1 Note reverse of rail shown To re fit the telescopic rail locate the clip into the top rail on the shelf guide and push downward the rail will clip into place The telescopic rail is designed to support either a shelf or grill baking tray and can be installed on any of the shelf positions as shown ...

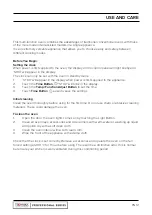
Page 12: ...uch the Temp Function Adjust Button to set the time 4 Touch Time Button again to save the settings Initial cleaning Clean the oven thoroughly before using for the first time Do not use sharp or abrasive cleaning materials These could damage the oven To clean the oven 1 Open the door the oven lights comes on by touching the Light Button 2 Clean all oven trays accessories and side runners with warm ...

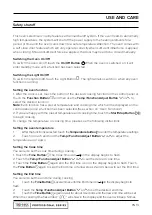
Page 13: ...l panel once a function has been selected See section on Oven Functions 2 If you are happy with the preset temperature and cooking time touch the Start Stop Button to begin cooking To change the temperature or cooking time please see the following instructions Setting the oven temperature 1 After the function is selected touch the Temperature button to enter the temperature settings 2 Touch or tou...

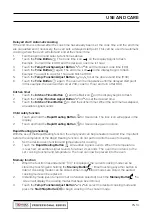
Page 14: ...art the kitchen timer When the set time has elapsed an audible signal sounds Child safety function 1 Touch and hold the Rapid Heating Button for 3 seconds The lock icon will appear in the display 2 Touch and hold the Rapid Heating Button for 3 seconds again to unlock Rapid Heating preheating WiththeuseoftheRapidHeatingfunction theemptyovencanbepreheatedinashorttime Important before the completion ...

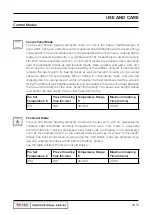
Page 15: ...rwise the heat distribution will be uneven Using the different rack heights available you can balance the amount of heat between the top and the bottom of the oven Select from among the various rack heights based on whether the dish needs more or less heat from the top Fan Assist Mode The top and bottom heating elements as well as the fan will come on guaranteeing constant heat distributed uniform...

Page 16: ...tion of a limited amount of condiments thus maintaining their flavor and appearance Excellent results can be attained when cooking vegetable based side dishes like courgettes aubergines peppers etc Desserts this mode is also perfect for baking leavened cakes Moreover this mode can also be used to thaw quickly white or red meat and bread by setting the temperature to 80 C To thaw more delicate food...

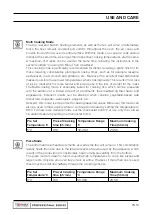
Page 17: ...vour You can slide your grill dish into either of the2 spaces within the upper pairs of support rails Grill food with the oven door closed Full Grill Mode The top inside and outside heating elements come on Maxi grill directs radiant heat from 2 powerful upper elements onto the food You can use the Maxi grill function for tender cuts of meat steak chops sausages fish cheese toasties and other quic...

Page 18: ...mples cream puffs sweet and savory biscuits savoury puffs Swiss rolls and small portions of vegetables au gratin etc When cooking with Baking Mode the temperature should generally be set 20C lower than when cooking with normal conventional mode Defrosting Mode The fan located in the back of the oven makes the air circulate at room temperature around the food This is recommended for the defrosting ...

Page 19: ...ting element and fan distribute heat uniformly throughout the oven By activating the heating element intermittently the ECO mode reduces the amount of energy used by utilising the residual heat within the cavity to cook food more efficiently This mode is ideal for baking and cooking delicate foods such as cakes which need to rise or smaller amounts of vegetables on up to 3 shelves at the same time...

Page 20: ...utomatically When the cooling fan is on you will notice a flow of air exiting between the oven door and the control panel Note When cooking is finished the cooling fan continues to operate until the oven cools down and then switches off automatically PRACTICAL COOKING ADVICE The oven offers a range of settings which allow you to cook any type of food in the best possible way With time you will lea...

Page 21: ...ack from the bottom placing the foodstuffs that require greater heat on the 2nd rack from the bottom For example when cooking meat roasts together with other food place the roast on the 2nd rack from the bottom and the more delicate food on the 4th rack from the bottom When cooking foodstuffs that require differing times and temperatures set a temperature that is somewhere between the two temperat...

Page 22: ... mean you cannot use lower temperatures simply by adjusting the thermostat knob to the desired temperature Therefore the best results when using the grill modes are obtained by placing the grid on the lower racks see cooking table then to prevent fat and grease from dripping onto the bottom of the oven and smoke from forming place a dripping pan on the 1st oven rack from the bottom Always grill wi...

Page 23: ...ower the temperature by 10 C if pastry is too dark on top Place it on a lower shelf lower the temperature and increase the cooking time if cooked well on the inside but sticky on the outside Use less liquid lower the temperature and increase the cooking time if the pastry sticks to the pan Grease the pan well and sprinkle it with a dusting of flour or use greaseproof paper if I used multi shelf co...

Page 24: ...he oven after having preheated it for at least 10 minutes Cooking Fish and Meat When cooking white meat fowl and fish use temperature setting from 180 C to 200 C For red meat that should be well done on the outside while tender and juicy in the inside it is a good idea to start with a high temperature setting 200 C 220 C for a short time then turn the oven down afterwards In general the larger the...

Page 25: ...PG 25 USE AND CARE Cooking Guide ...

Page 26: ...PG 26 USE AND CARE ...

Page 27: ...RE Note Cooking times are approximate and may vary according to personal taste When cooking using the grill or fan assisted grill the dripping pan must always be placed on the 1st oven shelf from the bottom Fan Assist ...

Page 28: ...ck the condition of this seal on a regular basis If necessary clean it but avoid using abrasive products or objects to do so Should it become damaged please contact Glen Dimplex Service Department We recommend you avoid using the oven until it has been repaired Never place anything including foil and oven trays on the bottom of the oven when it is in operation because this could damage the enamel ...

Page 29: ...or Open the door fully 1 Lift up and turn the latch situated on each of the two hinges 2 Grip the door on the two external sides and close it approximately 3 4 way 3 Pull the door up towards you lifting it out of the oven frame 4 To replace the door use the reverse procedure USE AND CARE How to remove the oven door ...

Page 30: ...move the inner door glass Remove the trim G by unscrewing the 2 screws fig 1 Gently slide out the inner pane of glass fig 2 Clean the glass with an appropriate cleaner Dry thoroughly and place on a soft surface Now you can also clean the inside of the outer glass Use the reverse procedure to re assemble the door glass USE AND CARE ...

Page 31: ... have been applied A household fuse may have blown or a circuit breaker may have tripped Replace the fuses or reset the circuit If this happens repeatedly call an authorised electrician There will always be a slight unevenness If browning is very uneven check that the correct temperature was set and that the correct shelf level was used A fault code appears in the Temperature sensor error display ...

Page 32: ...posal By ensuring this product is disposed of correctly you will help prevent potential negative consequences for the environment and human health which could otherwise be caused by inappropriate waste handling of this product The symbol on the product indicates that this product may not be treated as household waste Instead it shall be handed over to the applicable collection point for the recycl...

Page 33: ...out by authorised personnel Cabinet details In order to ensure that the built in appliance functions properly the cabinet containing it must be appropriate The figure below gives the dimensions of the cut out for installation under the counter or in a wall cabinet unit INSTALLATIONS ...

Page 34: ...reach a temperature of more than75 C along its entire length If the appliance is not supplied with a plug or if connecting the cable directly to the mains connection to the electricity supply must be made by an authorised person in accordance with the Wiring Rules AS NZS3000 The installation must include a suitable isolating switch with a minimum contact opening of 3mm between the appliance and th...

Page 35: ...ce with local regulations Glen Dimplex will not be held responsible for damages caused to cabinetry due to incorrect installation INSTALLATIONS Technical data Inner dimensions of the oven Width 42 3cm Depth 40 7cm Height 39 2cm Gross Oven Volume 85 litres Voltage and Frequency of Power Supply 220 240V 50 60Hz ...

Page 36: ...uding business or commercial use a period of 90 days from the date the product is purchased as a brand new product from a retailer located in Australia New Zealand Technika Professional products are designed and intended for domestic use only and c All warranty repairs must be carried out by Glen Dimplex or their nominated service agent Note warranty periods detailed above may vary in line with ag...

Page 37: ...s that cannot be excluded under the Australian New Zealand Consumer Law You are entitled to a replacement or refund for a major failure and for compensation for any other reasonably foreseeable loss or damage You are also entitled to have the goods repaired or replaced if the goods fail to be of acceptable quality and the failure does not amount to a major failure 4 How to make a claim You may mak...

Page 38: ... presented for repair may be replaced by refurbished goods of the same type rather than being repaired Refurbished parts may be used to repair the goods Products are designed and supplied for normal domestic use We will not be liable to you under this warranty for business loss or damage of any kind whatsoever Glen Dimplex Australia Pty Ltd Glen Dimplex New Zealand Ltd www glendimplex com au www g...

Page 39: ...ctrical plumbing and building codes with compliance being issued as required by state or national legislation Additionally all upright cookers must have the anti tilt device installed correctly in adherence to the relevant standards by a licenced installer For maximum effectiveness and efficiency all rangehoods should be installed with the use of ductwork by a licenced installer with adherence to ...

Reviews: