background image

Manual de Instrucciones

Campanas Extractoras DA-90 Vr. 01

Bedienungsanleitung

Dunstabzugshauben DA-90 Vr. 01

Instructions Manual

Kitchen Hoods DA-90 Vr. 01

Manuel d’instructions

Hottes aspirantes DA-90 Vr. 01

Manual de Instruções

Exaustores DA-90 Vr. 01

ÏÄÇÃÉÅÓ ˘Ñ

ÊÁÌÉÍÁÄÁ ÔÏɢÏÕ

DA-90 Vr. 01

Kullan˝m K˝lavuzu

Davlum   

DA-90 Vr. 01

Rev. 0705

Summary of Contents for DA-90

Page 1: ...gsanleitung Dunstabzugshauben DA 90 Vr 01 Instructions Manual Kitchen Hoods DA 90 Vr 01 Manuel d instructions Hottes aspirantes DA 90 Vr 01 Manual de Instruções Exaustores DA 90 Vr 01 ÏÄÇÃÉÅÓ Ñ ÊÁÌÉÍÁÄÁ ÔÏÉ ÏÕ DA 90 Vr 01 Kullan m K lavuzu Davlum DA 90 Vr 01 Rev 0705 ...

Page 2: ... filters is a fire risk and may also cause dripping therefore the inside of the kitchen hood and the metal filters must be cleaned at least once a month The lower part of the kitchen hood must be fitted at least 50 cm over electric hobs and 65 cm over gas or mixed hobs FOLLOW THE HOBS MANUFACTURER S MINIMUM RECOMMENDATIONS Never leave gas hobs lit if not covered by a container The fat accumulated ...

Page 3: ...for several minutes after you have finished cooking between 3 to 5 minutes in order to expel all the grease from the outlet duct This prevents the return of grease smoke and smells Proceed as follows 1 Choose the required speed 2 Press timer The light will begin to flash 3 Select the intake time by pressing the corresponding button see figure 4 Once the required time has been selected press timer ...

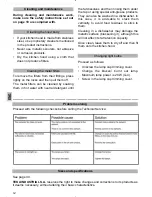
Page 4: ... detergent until the fat dissolves and then rinsing them under the tap or using special anti grease products They can also be washed in a dishwasher In this case it is advisable to stack them vertically to avoid food residues to stick to them Cleaning in a dishwasher may damage the metallic surface blackening it although this will not affect its fat retention capacity Once clean leave them to dry ...

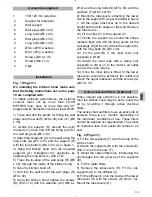
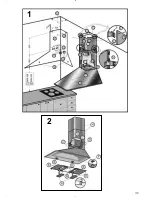
Page 5: ...o the support H as per the detail in figure 1 Lift the upper tubecover up to the desired height and mark its shape on the wall Remove the tubecovers 10 Fit the clips F to the support C 11 Centre the support C around the shape marked trace and drill the fixing points for the wall plugs E Ø6 x 30 Attach the support C with the long bolts D Ø4 x 30 12 Fit the part B if the inner tube not supplied is Ø...

Page 6: ...30 ...

Page 7: ...31 2 1 ...

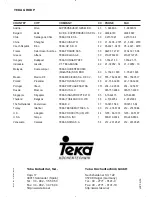
Page 8: ...xico D F TEKA MEXICANA S A DE C V 52 555 762 04 90 555 762 05 17 Poland Pruszków TEKA POLSKA SP ZO O 48 22 738 32 80 22 738 32 89 Portugal Ilhavo TEKA PORTUGUESA LTDA 351 234 32 95 00 234 32 54 57 Russia Moscow TEKA RUS LLC 7 095 737 4689 095 737 4690 Singapore Singapore TEKA SINGAPORE PTE LTD 65 6 73 42415 6 73 46881 Thailand Bangkok TEKA THAILAND CO LTD 66 2 5164954 2 9021484 The Netherlands Zoe...

Reviews: