background image

TREADMILL USER’S GUIDE

   FOR MODEL :


620T

Summary of Contents for 620T

Page 1: ...TREADMILL USER S GUIDE FOR MODEL 620T...

Page 2: ......

Page 3: ...fuller healthier lifestyle a Tempo Fitness treadmill can help you attain it adding club quality performance to your at home workouts with the ergonomics and innovative features you need to get strong...

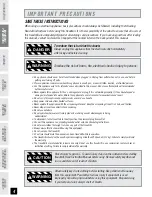
Page 4: ...t wear clothes that might catch on any part of the treadmill Always wear athletic shoes while using this equipment Do not jump on the treadmill At no time should more than one person be on treadmill w...

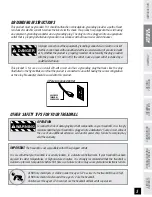
Page 5: ...figure Make sure that the product is connected to an outlet having the same configuration as the plug No adapter should be used with this product DANGER 3 Pole Grounded Outlet 2 Pole Outlet in Grounde...

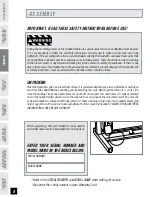
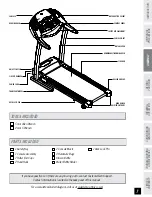
Page 6: ...instructions must be reviewed and corrective actions should be taken UNPACKING Place the treadmill carton on a level flat surface It is recommended that you place a protective covering on your floor...

Page 7: ...on Bottle Water Bottle Holder 1 Deck Lock Pin If you have questions or if there are any missing parts contact Customer Tech Support Contact information is located on the back panel of this manual For...

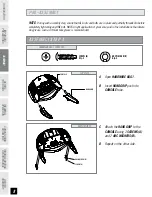
Page 8: ...in before completely tightening any ONE bolt NOTE A light application of grease may aid in the installation of hardware Any grease such as lithium bike grease is recommended Open HARDWARE BAG 1 Insert...

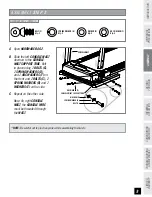
Page 9: ...onsole mast down on to the console mast support tube Bolt in place using 2 BOLTS C 2 SPRING WASHERS D and 2 ARC WASHERS F on the front and 2 BOLTS C 2 SPRING WASHERS D and 2 WASHERS E on the side Repe...

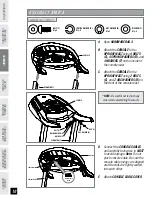
Page 10: ...E WIRE CONSOLE CABLE COVER A B C D E Open HARDWARE BAG 3 Attach the CONSOLE to the UPRIGHT MAST using 4 BOLTS C 4 SPRING WASHERS D and 4 WASHERS F on the inside of the console mast Attach the CONSOLE...

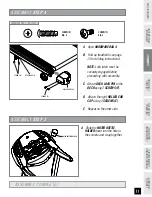
Page 11: ...OTTLE HOLDER ASSEMBLY STEP 5 ASSEMBLY COMPLETE SCREWS E ROLLER END CAP SCREWS F DECK LOCK PIN ASSEMBLY STEP 4 A Open HARDWARE BAG 4 B Fold up treadmill see page 13 for folding instructions NOTE Lock l...

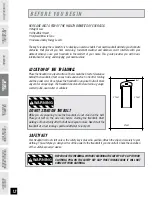
Page 12: ...on each side and one foot in front for folding and the power cord Do not place the treadmill in any area that will block any vent or air openings The treadmill should not be located in a garage covere...

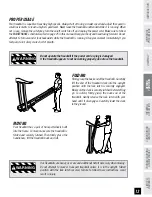
Page 13: ...readmill if the power cord or plug is damaged If the treadmill appears to not be working properly do not use the treadmill FOLDING Firmly grasp the back end of the treadmill Carefully lift the end of...

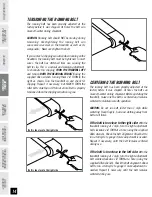
Page 14: ...1 4 turn at a time using the supplied Allen wrench Check the belt alignment Allow belt to run a full cycle to gauge if more adjustment is needed Repeat if necessary until the belt remains centered du...

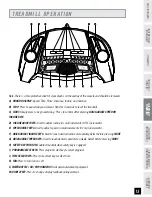
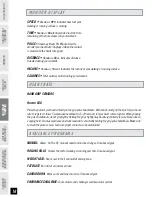
Page 15: ...ADJUST SPEED OR INCLINE KEYS D INCLINE adjust Keys Used to adjust incline in small increments 0 5 increments E Speed adjust Keys used to adjust speed in small increments 0 1 mph increments F quick ad...

Page 16: ...irectly on the grip pulse handlebars Both hands must grip the bars for your heart rate to register It takes 5 consecutive heart beats 15 20 seconds for your heart rate to register When gripping the pu...

Page 17: ...ss the TIME SELECT key use keys for time intervals not shown on quick time select option Press PROGRAM SELECT key Press START QUICK KEY OPERATION Once you have started your program you can use the qui...

Page 18: ...60 PROG SEG Warm Up 1 2 3 4 5 6 7 8 9 10 11 12 Cool Down INCLINE 1 2 2 3 3 3 4 4 5 5 5 5 4 4 3 3 2 1 0 0 TIME 60 60 60 60 60 60 60 60 60 60 60 60 60 60 60 60 60 60 60 60 PROG SEG Warm Up 1 2 3 4 5 6...

Page 19: ...y increase your exercise times If you ve been sedentary during the past year it may be a good idea to keep your exercise times to as little as five minutes initially Your body will need time to adjust...

Page 20: ...t Association recommends working out at a Target Heart Rate Zone of between 60 and 75 of your maximum heart rate A beginner will want to workout in the 60 range while a more experienced exerciser will...

Page 21: ...foot about 18 from the wall and the right foot about 12 behind the other foot Lean forward pushing against the wall with your palms Keep your heels flat and hold this position for a count of 15 secon...

Page 22: ...ing to lose weight Improve muscle Reduce stress Prepare for the spring racing schedule Knowing what your goals are will help you develop a more successful exercise program Below are some common exerci...

Page 23: ...more reflected noise TROUBLESHOOTING TREADMILL Your treadmill is designed to be reliable and easy to use However if you experience a problem please reference the troubleshooting guide listed below PRO...

Page 24: ...exercising If you are receiving erratic heart rate readouts try to only hold the grips long enough to monitor your heart rate When you are breathing heavily during a workout When your hands are constr...

Page 25: ...rneath the treadmill Return the treadmill to its previous position EVERY MONTH IMPORTANT Turn off the treadmill with the on off switch then unplug the power cord at the wall outlet Inspect all assembl...

Page 26: ...Tempo Fitness Incidental or consequential damages Tempo Fitness is not responsible or liable for indirect special or consequential damages economic loss loss of property or profits loss of enjoyment o...

Page 27: ......

Page 28: ...u may contact one of our trained customer technicians via phone email or our website Customer Tech Support Hotline 1 866 99 Tempo Email comments Tempo fitness com Website www Tempo fitness com Custome...

Reviews: