
5680/5700/5700XP
KIT NO. 9006309--5680, 9006310--5700/5700XP
Page 1 of 7
t
ec- H2O
Kit
9005074 Rev. 01 (07--09)
Tennant Company
Customer Service: (800) 553--8033 or (763) 513--2850
This kit includes the necessary parts to convert a standard model into an
ec- H2O
t
model.
INSTALLATION INSTRUCTIONS:
Installation Time: 5 Hours
Special Tools Required: Fish--Tape to route
ec-H2O
harness.
PREPARE MACHINE FOR KIT INSTALL:
1. Drain the solution tank and recovery tank.
2. Park the machine on a level surface. Lower the
scrub head and remove the key.
FOR SAFETY: Before installing kit, disconnect
battery cables.
3. Remove the front shroud.
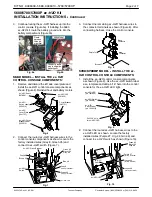
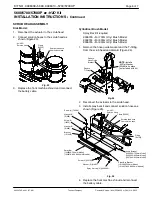
4. Disconnect the actuator at the scrub head.
5. Remove the actuator roller guide brackets and
discard (Figure 1).
Remove the
two Actuator
Roller Guide
Brackets
Fig. 1
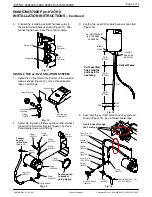
6. Install the
ec--H2O
module bracket, pump bracket
and clamps as shown (Figure 2).
ec--H2O
Pump
Bracket
[1002603]
M8x1.25x20
Screw (4) [12273]
M8x1.25x16
Screw [15675]
Clamp (2) [53466]
Clamp [69234]
Flat Washer (5) [01685]
ec--H2O
Module
Bracket [1044803]
NOTE:
Do not tighten the top screws w/ clamps at
this time. You will need to open the clamps later to
route
ec--H2O
wire harness through clamps.
Fig. 2
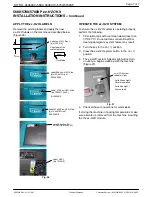
INSTALL
ec- H2O
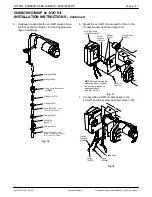
WIRE HARNESS:
1. Using a Fish--Tape, route the
ec--H2O
wire
harness through the harness channel along side
the machine’s main wire harness (Figure 3). Pull
the harness from the front of the machine to the
back (Figure 3).
p/n 1044831 -- 5680
ec--H2O
Wire Harness
p/n 1044833 or 1055478 -- 5700
ec--H2O
Wire
Harness
Harness
Channel
NOTE:
If installing
the 5700
ec--H2O
kit,
cut off the fuse
connector to allow
clearance to route
harness. After
completing step 3
(Fig 5a), reconnect
wire with an
insulated16G
butt--splice
connector.
(5680
harness
shown)
Fuse
Connector
Cut Here
Fish--Tape
Insert
harness
end here
Route this
end of
harness
(5700 harness)
Fig. 3
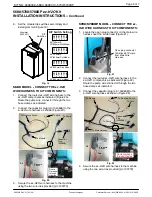
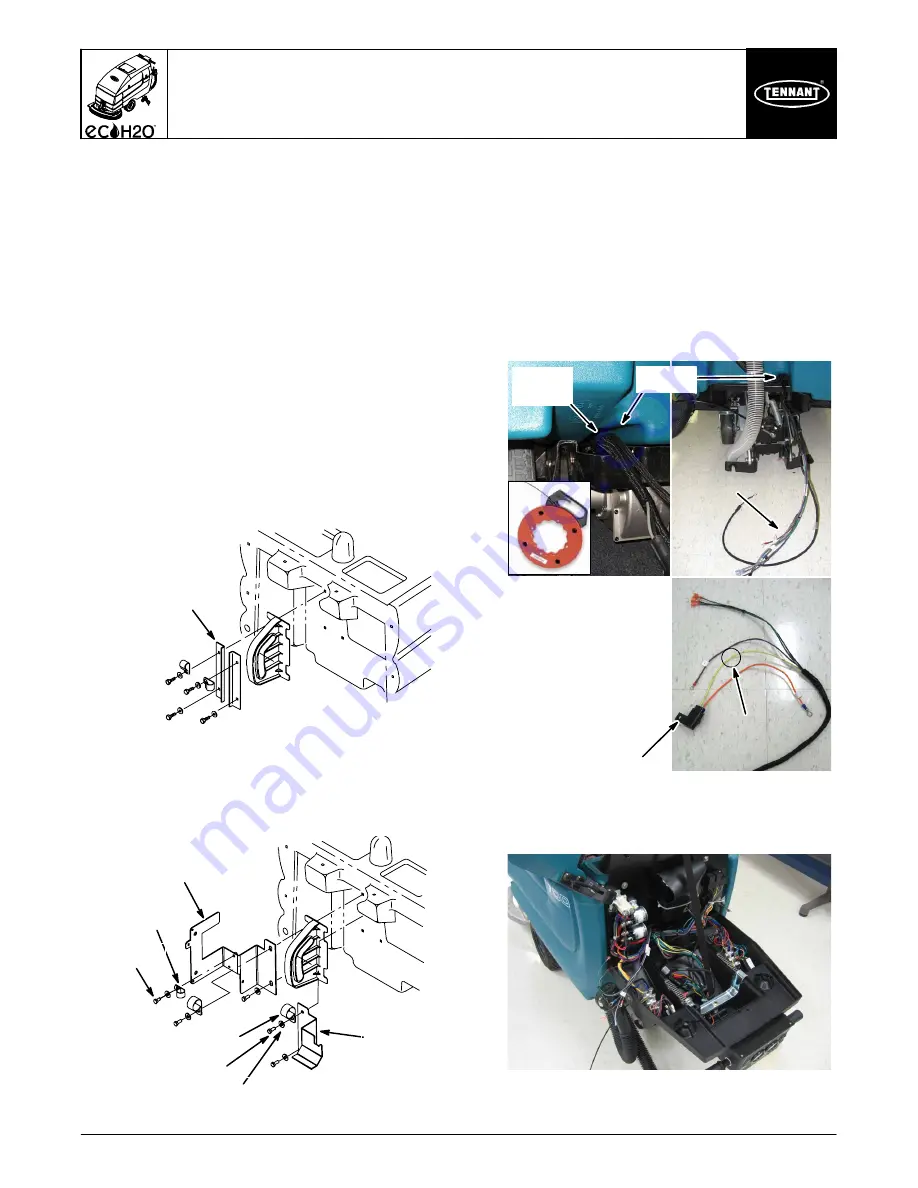
2. Open the control console to access the internal
wiring (Figure 4). Two screws secure console.
Fig. 4


