background image

Vektron MaxDrive System

Original Instructions

Systema MaxDrive de Vektron

Traducción de las instrucciones originales

Le Système MaxDrive

Traduction des Instructions Orginales

Vektron

 맥스 드라이브 시스템

설명서 원본 번역본

EN

ES

FR

KO

Summary of Contents for Vektron MaxDrive System

Page 1: ...MaxDrive System Original Instructions Systema MaxDrive de Vektron Traducción de las instrucciones originales Le Système MaxDrive Traduction des Instructions Orginales Vektron 맥스 드라이브 시스템 설명서 원본 번역본 EN ES FR KO ...

Page 2: ...2 EN ES FR KO Table of Contents 1 Overview 3 2 Drive Unit 4 3 Display 5 4 Battery 19 5 Charger 23 6 Riding 27 7 Troubleshooting 28 8 Maintenance 30 Edition 1 Rev 0 Oct 2017 ...

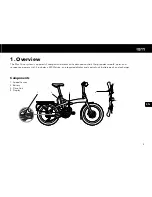
Page 3: ...ful compact mid motor with advanced controls that provides smooth quiet and responsive power assist It includes a 250W drive an integrated display and control unit battery pack and a charger Components 1 Speed Sensor 2 Battery 3 Drive Unit 4 Display 2 1 3 4 ...

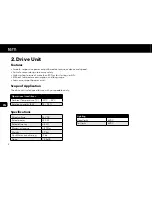
Page 4: ...ow power consumption and long range Low noise smooth power assist Scope of Application The drive unit is designed for use with your pedelec only Operational conditions Ambient Temperature C 20 C 55 C Relative humidity RH 15 95 Specifications Rated voltage 36 VDC Rated power 250 W Rated effciency 80 Maximum torque 80 Nm Weight 3 9 kg Dust Water proof rating IP 66 Noise 5 5 dB Lighting Head light 6V...

Page 5: ...range Retains settings Automatic Backlight Scope of Application The display is designed for use with your Max Drive system only Operational conditions Operation temperature 20 C 45 C Storage temperature 30 C 70 C Dust Water proof rating IP 65 Storage humidity 30 70 RH ...

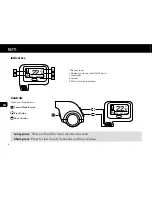
Page 6: ...sistance level Walk Assist 3 Headlight 4 Speed 5 Multi function indication Long press Press and hold for more than two seconds Short press Press for less than 0 5 seconds and then release Controls There are three buttons Power Mode Button Plus Button Minus Button ODO 22 6 399O km km h ...

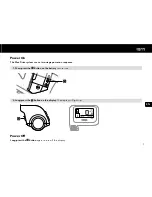
Page 7: ...tem uses a two stage power on sequence 1 Short press the Button on the battery to turn it on 2 Long press the Button on the display The display will light up Power Off Long press the Button again to turn off the display TRIP 0 0 143 km km h 1 ...

Page 8: ...assistance level Level 0 No power assistance Level 1 Lowest assistance level Level 5 Highest assistance level The higher the assistance level the faster the battery depletes The best way to conserve battery power and extend the assisted range is to pedal more and use a lower assistance level TRIP 0 22 6 3O km km h TRIP 1 22 6 3O km km h TRIP 5 22 6 3O km km h ...

Page 9: ...Long press the Plus Button to turn on the headlight When activated the light icon will appear on the display The display backlight will illuminate whenever the Headlight is turned on Long press the Plus Button again to turn off the headlight and display backlight TRIP 1 22 6 3O km km h ...

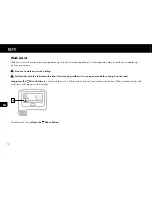
Page 10: ...not use walk assist when riding Get familiar with the initial acceleration Practice using walk assist in an open area before using it on the road Long press the Minus Button to activate walk assist it will remain active until you release the button When activated the walk assist icon will appear on the display To end walk assist release the Minus Button TRIP 4 5 3O km km h ...

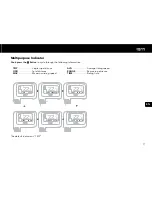
Page 11: ...P Single trip distance ODO Total distance MAX Maximum riding speed The default indicator is TRIP TRIP 1 22 6 3O km km h ODO 1 22 6 2999O km km h AVG 1 22 6 12 6 km h km h MAX 1 22 6 25 km h km h TIME 1 22 6 2O min km h RANGE 1 22 6 32 km km h AVG Average riding speed RANGE Remaining distance TIME Riding time ...

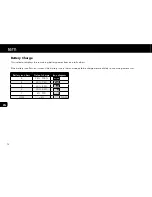
Page 12: ...aining battery power from one to five bars If the battery icon flashes it means the battery is very low and needs to be charged immediately to continue power assist Battery icon bars State of charge Icon diagram 5 75 100 4 50 75 3 30 50 2 10 30 1 5 10 LOW 5 FLASH ...

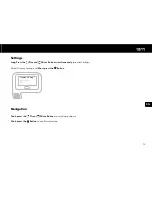
Page 13: ...nd Minus Buttons simultaneously to enter Settings Select Display Setting and Short press the Button Navigation Short press the Plus or Minus Buttons to scroll up or down Short press the Button to confirm selection Display Setting Information Exit ...

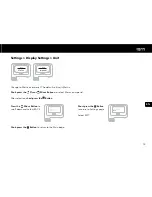
Page 14: ...ke Selection Short press the Button to save the setting Short press the Button to return to the Main page Trip Reset Unit Brightness Auto Off Trip Reset NO Trip Reset YES Unit Brightness Auto Off Back Display Setting Information Exit Short press the Button to return to Settings page Select EXIT Press the Minus Button to scroll down and select BACK ...

Page 15: ...us Buttons to select Metric or Imperial After selection short press the Button Short press the Button to return to the Main page Unit Metric Unit Imperial Unit Brightness Auto Off Back Display Setting Information Exit Short press the Button to return to Settings page Select EXIT Press the Minus Button to scroll down and select BACK ...

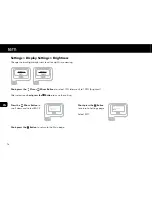
Page 16: ...o select 10 dimmest to 100 brightest After selection short press the Button to save the setting Short press the Button to return to the Main page Brightness 10 Brightness 100 Unit Brightness Auto Off Back Display Setting Information Exit Short press the Button to return to Settings page Select EXIT Press the Minus Button to scroll down and select BACK ...

Page 17: ...minutes Short press the Plus or Minus Buttons to select the display power off delay time After selection short press the Button to save the setting Short press the Button to return to the Main page Auto Off OFF Auto Off 9 Unit Brightness Auto Off Back Display Setting Information Exit Short press the Button to return to Settings page Select EXIT Press the Minus Button to scroll down and select BACK...

Page 18: ...ngs Information In Settings there is also the Information menu Note the Information menu is provided to assist your dealer in performing service work and contains no consumer relevant items Display Setting Information Exit ...

Page 19: ...g Port Cover 5 Charging Port 6 Battery Lock Specifications Cell Type Li ion Rated Capacity 11 Ah Rated Energy 400Wh Rated Voltage 36VDC Operating Temperature 0 60 C Charge Temperature 0 45 C Storage Temperature 15 35 C Storage Humidity 45 75 RH Dust Water proof rating IPX5 Weight 2 5 kg 1 3 4 5 6 2 ...

Page 20: ...ide To maintain battery life recharge the battery as soon as possible after each ride Frequent recharging does not damage the battery in any way Do not leave the battery completely empty This will severely shorten battery life Insertion and Removal Removal To remove turn the key to the vertical position and pull battery up Insertion Removal ...

Page 21: ...N ES FR KO Insertion To insert align battery with the mounting plate and push battery down until it is locked to the base Make sure to remove the key to prevent interference with the pedal Insertion Removal ...

Page 22: ...ts such as paper clips keys etc Metallic items can cause the terminals to connect and cause short circuiting Warning Mechanical impact such as drops or bumps may damage the internals and cause vapors and or corrosive liquids to leak If there is visible damage to the case or if the battery is emitting odors do not use the battery and contact your dealer for a replacement The vapors can irritate the...

Page 23: ... Output Cable 2 Status LEDs 3 Battery Input Socket 4 Input Cable Specifications Input Voltage 110 240 VAC Input Power 140W Maximum Charge Current 3A Output Voltage 36VDC Output Current 3A P O W E R C H A R G E 4 P O W E R C H A R G E 3 1 2 ...

Page 24: ...24 EN ES FR KO Operation Plug Input Cable into Input Socket Plug the Input Cable to a wall socket and the Status LEDs will light up POWER CHARGE ...

Page 25: ...utput cable into the Socket The battery s LEDs indicate the charge level When charging is complete disconnect the battery from the charger and the charger from the wall socket Charge LED indicator Color State Red Charging Disconnected Green Charging complete POWER CHARGE ...

Page 26: ...ver the charger while it is in use If the battery gives off any odor or the housing appears deformed stop charging immediately and contact your dealer for assistance When charging is taking much longer than usual stop charging immediately and contact your dealer for assistance Do not charge the battery through car cigarette lighters Do not disassemble the battery ...

Page 27: ...ll the instructions and safety warnings in this and all operating instructions included Make sure to remove the battery lock key Use Correct Gears To maximize battery range and reduce wear on the drive train begin pedaling on one of the lower gears Before coming to a stop shift to a lower gear The optimal cadence range is around 60 80 rpm Use your gears and choose an assistance level appropriate f...

Page 28: ...se cables No assistance Drive or display malfunction Seek dealer for servicing Abnormal noise or grinding Derailleur or brakes improperly tuned Tune derailleur for proper chain movement Adjust brake pads so that disc rotors do not rub excessively against them Seek dealer for servicing Light won t turn on Mechanical light switch on Valo in OFF position Turn switch to ON position Loose cables Make s...

Page 29: ...speed sensor For other errors do a reset by powering o the display wait 30 seconds and then power on If the error persists seek dealer for servicing Error code Error definition 07 High battery voltage fault 08 Motor hall sensor fault 10 High temperature fault 12 Current sensor fault 13 Battery temperature sensor fault 21 Speed sensor fault 22 Battery communication fault 30 Controller communication...

Page 30: ...ealer Do not modify or tamper the system This will void your warranty The drive must be repaired by qualified technicians using original replacement parts Speed Sensor The speed sensor requires a gap of 5 to 25mm from the spoke mounted magnet Speed will not be displayed if the gap is too large or the magnets are not aligned Arrange the speed sensor and the magnet unit as illustrated above When ins...

Page 31: ...battery casing Use only mild soap and water when needed Do not use pressurized water to clean your pedelec Do not submerge any part of your pedelec under water Key If you lose or break your keys provide the numbers on the lock to your dealer to get a replacement Disposal Consult your dealer about recycling Do not dispose of any part of the Max Drive system with household waste Batteries must not b...

Page 32: ... EN ES FR KO Tabla de Contenido 1 Resumen 33 2 Unidad de Accionamiento 34 3 Pantalla 35 4 Batería 49 5 Cargador 53 6 Ciclismo 57 7 Resolución de Problemas 58 8 Mantenimiento 60 Édition 1 Rév 0 Abril 2018 ...

Page 33: ...anzados que produce una asistencia mecánica de potencia suave silenciosa y sensible Incluye una unidad de accionamiento por 250W una pantalla y unidad de control integradas un paquete de baterías y un cargador Componentes 1 Sensor de Velocidad 2 Batería 3 Unidad de Accionamiento 4 Pantalla 2 1 3 4 ...

Page 34: ...gía eficiente y reducido una larga distancia Asistencia mecánica suave y sin ruido Ambito de Aplicación La unidad de accionamiento está diseñada para usar solamente con pedelec Condiciones Operativas Temperatura Ambiente C 20 C 55 C Humedad Relativa RH 15 95 Especificaciónes Tensión Nominal 36 VDC Potencia Nominal 250 W Eficiencia Nominal 80 Par Máximo 80 Nm Peso 3 9 kg Prueba de agua polvo IP 66 ...

Page 35: ...r los configuraciones Retroiluminación automática Ambito de Aplicación La pantalla está diseñada para uso solo con su sistema Max Drive Condiciones Operativas Temperatura de Servicio 20 C 45 C Temperatura de Almacenamiento 30 C 70 C Indicación prueba de Agua Polvo IP 65 Humedad de Almacenamiento 30 70 RH ...

Page 36: ...Asistencia Mecánica 3 Faros 4 Velocidad 5 Indicación de Multifunción Pulsación Larga Mantenga pulsado durante más de dos segundos Pulsación Corta Mantenga pulsado durante menos de medio segundo Controles Hay tres botones Boton Boton del Signo Más Boton del Signo Menos ODO 22 6 399O km km h ...

Page 37: ...os fases para encender 1 Pulse el botón con una pulsación corta para encender la batería 2 Pulse el botón en la pantalla con una pulsación larga La pantalla de tiempo se encenderá Apagar Pulse el botón en la pantalla con una pulsación larga apagar TRIP 0 0 143 km km h 1 ...

Page 38: ... No hay asistencia mecánica Nivel 1 Asistencia mecánica mínimo Nivel 5 Asistencia mecánica maximo Lo más alto que seria el nivel de asistencia mecánica lo más rápido podría quedarse sin batería La mejor manera de conservar y extender la duración de la batería es pedalear más y usar un nivel de asistencia mecánica mínimo TRIP 0 22 6 3O km km h TRIP 1 22 6 3O km km h TRIP 5 22 6 3O km km h ...

Page 39: ...n de Signo Más con una pulsación larga para encender el faro Cuando está activado en la pantalla se mostrará el ícono de la luz La luz de fondo se va encender cuando el faro se encende Pulse el Botón de Signo Más con una pulsación larga otra vez para apagar el faro y luz de fondo TRIP 1 22 6 3O km km h ...

Page 40: ...leración inicial Practique usando asistencia mecánica sin pedaleo en un área abierta antes de montar por el calle Pulse el Botón de Signo Menos con una pulsación larga para activar la asistencia mecánica sin pedaleo permanecerá activo hasta que sueltes el Botón el icono de asistencia mecánica sin pedaleo aparecerá en la pantalla Para finalizar el uso de la asistencia mecánica sin pedaleo pulse el ...

Page 41: ...TRIP Distancia de un Solo Viaje ODO Distancia Total MAX Velocidad Máxima El indicador por defecto es TRIP TRIP 1 22 6 3O km km h ODO 1 22 6 2999O km km h AVG 1 22 6 12 6 km h km h MAX 1 22 6 25 km h km h TIME 1 22 6 2O min km h RANGE 1 22 6 32 km km h AVG Velocidad Media RANGE Distancia Restante TIME Tiempo ...

Page 42: ...a cinco niveles Si el icono de la batería parpadea a la batería le queda muy poca carga y la tienes que cargar inmediatamente para seguir usado la asistencia mecánica Barra de iconos de la batería Estado de Carga Diagrama de Iconos 5 75 100 4 50 75 3 30 50 2 10 30 1 5 10 BAJO 5 FLASH ...

Page 43: ...r los Configuraciones Seleccione Configuración de Pantalla y pulse el Botón con una pulsación corta Navegación Pulse el Botón de Signo Más y el Botón de Signo Menos con una pulsación corta para desplazarse hacia arriba or abajo Pulse el Botón de Signo con una pulsación corta para confirmar la selección Display Setting Information Exit ...

Page 44: ...ción corta para guardar los configuraciones Pulse el Botón con una pulsación corta para regresar a la página principal Trip Reset Unit Brightness Auto Off Trip Reset NO Trip Reset YES Unit Brightness Auto Off Back Display Setting Information Exit Pulse el Botón con una pulsación corta para regresar a la página de configuraciones Seleccione EXIT Pulse el Botón Menos con una pulsación corta para des...

Page 45: ...cionar entre métrico o imperial Después de elegir pulse el Botón con una pulsación corta Pulse el Botón con una pulsación corta para regresar a la página principal Unit Metric Unit Imperial Unit Brightness Auto Off Back Display Setting Information Exit Pulse el Botón con una pulsación corta para regresar a la página de configuraciones Seleccione EXIT Pulse el Botón Menos para desplazarse hacia aba...

Page 46: ...ante Después de Elegir pulse el Botón con una pulsación corta para guardar el configuración Pulse el Botón con una pulsación corta para regresar a la página principal Brightness 10 Brightness 100 Unit Brightness Auto Off Back Display Setting Information Exit Pulse el Botón con una pulsación corta para regresar a la página de Configuraciones Seleccione EXIT Pulse el Botón Menos para desplazarse hac...

Page 47: ...tos Pulse el Botón de Signo Más y el Botón de Signo Menos Después de Selección pulse el Botón con una pulsación corta para guardar el configuración Pulse el Botón con una pulsación corta para regresar a la página principal Auto Off OFF Auto Off 9 Unit Brightness Auto Off Back Display Setting Information Exit Pulse el Botón con una pulsación corta para regresar a la página de Configuraciones Selecc...

Page 48: ...En la página de Configuraciónnes encontrarás el menú de información Nota El menú de información se proporciona para ayudar su distribuidor a llevar a cabo un servicio y no hay puntos relevantes para el consumidor Display Setting Information Exit ...

Page 49: ... El cierre de la batería Especificaciones Tipo celular Li ion Temperatura de servicio 11 Ah Temperatura de almacenamiento 400Wh Temperature de Tensión 36VDC Humedad de Almacenamiento 0 60 C Temperatura de Carga 0 45 C Temperatura de almacenamiento 15 35 C Humedad de Almacenamiento 45 75 RH Idicación Aprueba de agua polvo IPX5 Peso 2 5 kg 1 3 4 5 6 2 ...

Page 50: ...antener la vida de la batería recarga la batería lo antes posible después de su viaje Si cargas frecuentemente la batería no se dañará de ningún modo Por favor no dejes la batería sin carga Si dejas sin carga se acortará la duración de la batería Inserción y Extraer Extraer Para extraer gire la llave a la posición vertical y extraiga la batería Insertion Removal ...

Page 51: ...serción Para insertar alinee la batería con la placa de montaje y empuje la batería hacia abajo hasta que esté encerrado con la base Asegúrese de quitar el llave para evitar interferencias con el pedal Insertion Removal ...

Page 52: ...es etc Los artículos metálicos pueden causar terminales al conectar y podría provocar un cortocircuito Señales Impactos Mecánicos como las caídas y los golpes puede dañar las partes internas y pueden causar que los vapores y líquidos corrosivos se desprendan Si hay daños considerables en la carcasa o si la batería emite un olor extraño no utilice la batería y comuníquese con su distribuidor para u...

Page 53: ... Estado 3 Enchufe de Entrada para la batería 4 Entrada de cable Especificación Tensión de Entrada 110 240 VAC Corriente de Entrada 140W Una Corriente de Carga Máxima 3A Tensión de Salida 36VDC Corriente de Salida 3A P O W E R C H A R G E 4 P O W E R C H A R G E 3 1 2 ...

Page 54: ...54 EN ES FR KO Funcionamiento Inserte la entrada del cable en la entrada del conector Inserte la entrada del cable en el enchufe POWER CHARGE ...

Page 55: ... cable de salid Los LEDs indican el nivel de la carga de la batería Cuando la carga está completa por favor desconecte la batería del cargador y desconecte el cargador del enchufe Indicador LED de la Carga Color Estado Rojo Cargando Desconectado Verde Carga Completa POWER CHARGE ...

Page 56: ...bra la batería cuando está cargando Si la batería tiene un olor o la carcasa de la batería parece deformada deje de cargar y contacte de inmediato a su distribuidor para asistencia Si la carga está tardando un poco más de lo habitual deje de cargar y contacte de inmediato a su distribuidor para asistencia No cargue la batería con un encendedor cigarrillos del coche No desmonte ni modifique la bate...

Page 57: ... instrucciones de manejo incluidos Asegúrese de extraer la lleve de bloqueo de la batería Utilice Correctamente Las Marchas Para maximizar la energía de la batería y minimizar el desgaste del sistema de tracción comience a pedalear con una marcha baja Antes de detenerse cambia a una marcha más baja El rango de cadencia óptimo es 60 80 rpm Usa las marchas y seleccione un nivel de asistencia apropia...

Page 58: ...cción o pantalla funciona mal Contacte de inmediato a su distribuidor para asistencia Ruido extraño o molienda Desviador o frenos están mal sintonizados Afine su desviador para obtener movimiento de cadenas más naturales Regule las zapatas de freno para que los rotores de disco no se rocen excesivamente Communicarse con su distribuidor para asistencia Las luces no encienden La luz mecánica del VAL...

Page 59: ...n o en la pantalla para 30 segundos después encienda su sistema Si el error persiste lleve la unidad a su distribuidor para su reparación Código de Error Definición del Error 07 Fallo de voltajes altos de la batería 08 Fallo del sensor del motor 10 Fallo de temperatura alta 12 Fallo del sensor de corriente 13 Fallo del sensor de temperatura para baterías 21 Fallo del sensor de velocidad 22 Fallo c...

Page 60: ...r o modificar el sistema Esto puede anular la garantía La unidad de asistencia solamente puede ser reparada por un técnico cualificado con repuestos originales Sensor de Velocidad El sensor de velocidad necesita un espacio de 5 25mm por el imán del radio instalado La velocidad no se mostrará en la pantalla si el espacio es demasiado grande o si los imanes no están alineados Organizar el sensor de ...

Page 61: ...iento y batería Use sólo jabón suave y agua cuando sea necesario No use agua presurizado para limpiar su pedelec eléctrica No sumerja ninguna parte de su pedelec eléctrica en agua Importante Si perde o rompe sus llaves por favor proporcione los números en la cerradura a su distribuidor para obtener un reemplazo Disposición Consulte a su distribuidor sobre el reciclaje No se depositen los partes de...

Page 62: ...62 EN ES FR KO Contenu 1 Aperçu 63 2 Moteur 64 3 Display 65 4 Batterie 79 5 Chargeur 83 6 Utilizer le velo 87 7 Résolution de problème 88 8 Entretien 90 Édition 1 Rév 0 Avril 2018 ...

Page 63: ...intermédiaire puissant et compact doté de commandes avancées qui fournit une assistance électrique douce silencieuse et réactive Il comprend un moteur de 250 W un display intégrée une batterie et un chargeur Composants 1 Capteur de Vitesse 2 Batterie 3 Moteur 4 Display ...

Page 64: ...ion d énergie et longue portée Faible bruit aide de puissance lisse Champ d Application Le moteur est conçu pour une utilisation avec votre VAE uniquement Conditions opérationnelles Température ambiante C 20 C 55 C Humidité relative HR 15 95 Caractéristiques Tension nominale 36 VDC Puissance nominale 250 W Efficacité évaluée 80 Couple maximal 80 Nm Poids 3 9 kg Poussière étanche à l eau IP 66 Brui...

Page 65: ...onserve les paramètres Rétro éclairage automatique Champ d Application L écran est conçu pour être utilisé avec votre système Max Drive uniquement Conditions opérationnelles Température ambiante C 20 C 45 C Température de stockage 30 C 70 C Poussière étanche à l eau IP 65 Humidité de stockage 30 70 RH ...

Page 66: ...assistance Aide à la marche 3 Phare 4 Vitesse 5 Indication multifonctions Appui long Maintenez la touche enfoncée pendant plus de deux secondes Appui court Appuyez sur pendant moins de 0 5 seconde puis relâchez Contrôles Il y a trois Boutons Bouton Bouton Plus Bouton Moins ODO 22 6 399O km km h ...

Page 67: ...mise sous tension à deux étages 1 Appuyez brièvement sur le Bouton de la batterie pour l allumer 2 Appuyez longuement sur le Bouton sur l affichage L affichage s allume Éteindre Appuyez de nouveau longuement sur le Bouton pour éteindre l affichage TRIP 0 0 143 km km h 1 ...

Page 68: ...électrique Niveau 1 Niveau d assistance le plus bas Niveau 5 Niveau d assistance le plus élevé Plus le niveau d assistance est élevé plus la batterie s épuise rapidement La meilleure façon d économiser la batterie et d étendre la portée assistée est de pédaler davantage et d utiliser un niveau d assistance inférieur TRIP 0 22 6 3O km km h TRIP 1 22 6 3O km km h TRIP 5 22 6 3O km km h ...

Page 69: ...longuement sur le Bouton Plus pour allumer le phare Lorsqu elle est activée l icône d éclairage apparaît sur le display Le rétroéclairage de l écran s allume lorsque le phare est allumé Appuyez à nouveau longuement sur le Bouton Plus pour éteindre le phare et afficher le rétroéclairage TRIP 1 22 6 3O km km h ...

Page 70: ...lez Familiarisez vous avec l accélération initiale Entraînez vous à utiliser l aide à la marche dans une aire ouverte avant de l utiliser sur la route Appuyez longuement sur le Bouton Moins pour activer l aide à la marche il restera actif jusqu à ce que vous relâchiez le Bouton Lorsqu elle est activée l icône d aide à la marche apparaît sur le display Pour terminer l aide à la marche relâchez le B...

Page 71: ...ance de voyage unique ODO Distance totale MAX Vitesse de conduite maximale L indicateur par défaut est TRIP TRIP 1 22 6 3O km km h ODO 1 22 6 2999O km km h AVG 1 22 6 12 6 km h km h MAX 1 22 6 25 km h km h TIME 1 22 6 2O min km h RANGE 1 22 6 32 km km h AVG Vitesse moyenne de conduite RANGE Distance restante TIME Temps restante ...

Page 72: ...terie d une à cinq barres Si l icône de la batterie clignote cela signifie que la batterie est très faible et doit être rechargée immédiatement pour continuer à l utiliser Barres d icônes de batterie État de charge Diagramme d icône 5 75 100 4 50 75 3 30 50 2 10 30 1 5 10 FAIBLE 5 CLIGNOTANT ...

Page 73: ...accéder aux paramètres Sélectionnez le réglage d affichage et appuyez brièvement sur le Bouton Navigation Appuyez brièvement sur les Boutons Plus ou Moins pour faire défiler vers le haut ou vers le bas Appuyez brièvement sur le Bouton pour confirmer la sélection Display Setting Information Exit ...

Page 74: ...on Appuyez brièvement sur le Bouton pour enregistrer le réglage Appuyez brièvement sur le Bouton pour revenir à la page principale Trip Reset Unit Brightness Auto Off Trip Reset NO Trip Reset YES Unit Brightness Auto Off Back Display Setting Information Exit Appuyez brièvement sur le Bouton pour revenir à la page Paramètres Sélectionnez EXIT Appuyez sur le Bouton Moins pour défiler vers le bas et ...

Page 75: ... Métrique ou Impérial Après la sélection appuyez brièvement sur le Bouton Appuyez brièvement sur le Bouton pour revenir à la page principale Unit Metric Unit Imperial Unit Brightness Auto Off Back Display Setting Information Exit Appuyez brièvement sur le Bouton pour revenir à la page Paramètres Sélectionnez EXIT Appuyez sur le Bouton Moins pour défiler vers le bas et sélectionnez BACK ...

Page 76: ...ble à 100 le plus lumineux Après la sélection appuyez brièvement sur le Bouton pour enregistrer le réglage Appuyez brièvement sur le Bouton pour revenir à la page principale Brightness 10 Brightness 100 Unit Brightness Auto Off Back Display Setting Information Exit Appuyez brièvement sur le Bouton pour revenir à la page Paramètres Sélectionnez EXIT Appuyez sur le Bouton Moins pour défiler vers le ...

Page 77: ...ez brièvement sur les Boutons Plus ou Moins pour sélectionner le délai d extinction de l affichage Après la sélection appuyez brièvement sur le Bouton pour enregistrer le réglage Appuyez brièvement sur le Bouton pour revenir à la page principale Auto Off OFF Auto Off 9 Unit Brightness Auto Off Back Display Setting Information Exit Appuyez brièvement sur le Bouton pour revenir à la page Paramètres ...

Page 78: ... les paramètres il y a aussi le menu Information Remarque le menu Informations est fourni pour aider votre revendeur à effectuer des travaux d entretien et ne contient aucun article pertinent pour le consommateur Display Setting Information Exit ...

Page 79: ...rt de charge 6 Verrouillage de la batterie Caractéristiques Type de cellule Li ion Capacité nominale 11 Ah Énergie évaluée 400Wh Tension nominale 36VDC Température de fonctionnement 0 60 C Température de charge 0 45 C Température de stockage 15 35 C Humidité de stockage 45 75 RH Indice de poussière d étanchéité IPX5 Poids 2 5 kg 1 3 4 5 6 2 ...

Page 80: ... de vie de la batterie rechargez la batterie dès que possible après chaque trajet Une recharge fréquente n endommage en aucun cas la batterie Ne laissez pas la batterie complètement vide Cela réduira considérablement la durée de vie de la batterie Insertion et Retrait Retrait Pour l enlever tournez la clé en position verticale et tirez la batterie vers le haut Insertion Removal ...

Page 81: ... insérer alignez la batterie avec la plaque de montage et poussez la batterie vers le bas jusqu à ce qu elle soit verrouillée à la base Assurez vous de retirer la clé pour éviter toute interférence avec la pédale Insertion Removal ...

Page 82: ...lés etc Les éléments métalliques peuvent provoquer la connexion des bornes et entraîner un court circuit Attention Des chocs mécaniques tels que des chutes ou des bosses peuvent endommager les pièces internes et provoquer des fuites de vapeurs et ou de liquides corrosifs Si le boîtier est endommagé ou si la batterie émet des odeurs n utilisez pas la batterie et contactez votre revendeur pour un re...

Page 83: ...tput 2 LED d état 3 Batterie Input port 4 Cable de Input Caractéristiques Tension d entrée 110 240 VAC Puissance d entrée 140W Courant de charge maximum 3A Tension de sortie 36VDC Courant de sortie 3A P O W E R C H A R G E 4 P O W E R C H A R G E 3 1 2 ...

Page 84: ...84 EN ES FR KO Operation Branchez le câble d entrée dans la prise d entrée Branchez le câble d entrée à une prise murale et les DEL d état s allumeront POWER CHARGE ...

Page 85: ... câble de sortie dans la prise Les LED de la batterie indiquent le niveau de charge Lorsque la charge est terminée débranchez la batterie du chargeur et le chargeur de la prise murale Indicateur LED de charge Coleur Etat Rouge En charge Déconnecté Verte Charge complète POWER CHARGE ...

Page 86: ...ouvrez pas le chargeur pendant son utilisation Si la pile dégage une odeur ou si le boîtier semble déformé arrêtez la charge immédiatement et contactez votre revendeur Lorsque le chargement prend beaucoup plus de temps que d habitude arrêtez le chargement immédiatement et contactez votre revendeur pour obtenir de l aide Ne chargez pas la batterie dans les allume cigares de voiture Ne démontez pas ...

Page 87: ... d emploi et de toutes les instructions d utilisation incluses Assurez vous de retirer la clé de verrouillage de la batterie Utilisez des engrenages corrects Pour maximiser la portée de la batterie et réduire l usure de la transmission commencez à pédaler sur l une des vitesses inférieures Avant de s arrêter passez à un rapport inférieur La plage de cadence optimale est d environ 60 à 80 tr min Ut...

Page 88: ... du lecteur ou de l écran Rechercher un concessionnaire pour l entretien Bruit anormal ou meulage Dérailleur ou freins mal réglés Dérailleur de réglage pour un bon mouvement de la chaîne Ajuster les plaquettes de frein de manière à ce que les disques ne frottent pas excessivement contre eux Rechercher un concessionnaire pour l entretien L éclairage ne s allume pas Allumage mécanique sur Valo en po...

Page 89: ... effectuez une réinitialisation en allumant l écran attendez 30 secondes puis rallumez le Si l erreur persiste demander l assistance du revendeur Code d erreur Définition d erreur 07 Faute de tension de batterie élevée 08 Défaillance du capteur du moteur 10 Faute de haute température 12 Erreur de capteur de courant 13 Erreur du capteur de température de la batterie 21 Erreur du capteur de vitesse ...

Page 90: ...r ou altérer le système Cela annulera votre garantie Le variateur doit être réparé par des techniciens qualifiés utilisant des pièces de rechange d origine Capteur de Vitesse Le capteur de vitesse nécessite un espace de 5 à 25 mm par rapport à l aimant monté sur les rayons La vitesse ne sera pas affichée si l écart est trop important ou si les aimants ne sont pas alignés Disposez le capteur de vit...

Page 91: ...le boîtier de la batterie N utilisez que du savon doux et de l eau si nécessaire N utilisez pas d eau sous pression pour nettoyer votre VAE N immergez aucune partie de votre VAE sous l eau Clé Si vous perdez ou cassez vos clés fournissez les numéros sur la serrure à votre revendeur pour obtenir un remplacement Cession Consultez votre revendeur sur le recyclage Ne jetez aucune partie du système Max...

Page 92: ...92 EN ES FR KO 목차 1 개요 93 2 드라이브 유닛 94 3 디스플레이 95 4 배터리 109 5 충전기 113 6 주행 117 7 문제 해결 118 8 유지 관리 120 호화판의판 1 개정판 0 2018 년 4 월 ...

Page 93: ...93 EN ES FR KO 2 1 3 4 1 목차 바팡 맥스 드라이브는 부드럽고 조용하며 반응성이 뛰어난 보조 동력을 제공하는 첨단 제어 장치를 갖춘 강력하고 콤팩트한 미드 모터입니다 여기에는 250W 드라이브 통합 디스플레이 및 제어 장치 배터리 팩 및 충전기가 포함됩니다 구성품 1 스피드 센서 2 배터리 3 드라이브 유닛 4 디스플레이 ...

Page 94: ... fail safe 센서 설계 업힐 시 80N 이상의 힘이 가해질 때 모터의 HIGH 출력 작동 효율적이고 낮은 전력 소모와 긴 주행 거리 저소음 부드러운 전원 보조 장치 적용 범위 PAS 전용으로만 설계 된 드라이브 유닛 작동 조건 외부 온도 C 20 C 55 C 상대 습도 RH 15 95 사양 정격 전압 36 VDC 정격 출력 250 W 정격 효율 80 최대 토크 80 Nm 무게 3 9 kg 방진 및 방수 등급 IP 66 노이즈 5 5 dB 라이트 전조등 6VDC 후미등 6VDC ...

Page 95: ...95 EN ES FR KO 3 디스플레이 특징 속도 거리 전력 및 범위를 표시 설정 유지 자동 백 라이트 적용 범위 MaxDrive 시스템에만 사용하도록 설계 된 디스플레이입니다 작동 조건 작동 온도 20 C 45 C 보관 온도 30 C 70 C 방진 및 방수 등급 IP 65 저장 습도 3 30 70 RH ...

Page 96: ...96 EN ES FR KO 표시 ODO 22 6 399O km km h 1 2 3 4 5 1 배터리 레벨 2 파워 어시스턴스 레벨 워크 모드 3 전조등 4 속도 5 다기능 표시 길게 누르기 2초 이상 누릅니다 짧게 누르기 0 5초 미만 동안 눌렀다 놓으십시오 컨트롤 세 개의 버튼이 있습니다 버튼 플러스 버튼 마이너스 버튼 ODO 22 6 399O km km h ...

Page 97: ...97 EN ES FR KO 파워 켜기 MaxDrive시스템은 연속 2단계 전원 켜기를 사용합니다 1 배터리를 켜기 위해 버튼을 짧게 누릅니다 2 디스플레이에 있는 버튼을 길게 누릅니다 디스플레이에 불이 들어옵니다 파워 끄기 버튼을 다시 길게 눌러 디스플레이를 끕니다 TRIP 0 0 143 km km h 1 ...

Page 98: ...니다 플러스 단추 또는 마이너스 단추 짧게 누르기 레벨 0 전원 보조 기능 없음 레벨 1 가장 낮은 어시스턴스 레벨 레벨 5 가장 높은 어시스턴스 레벨 보조 레벨이 높을수록 배터리가 더 빨리 소모됩니다 배터리 전력을 절약하고 주행 거리를 늘리는 가장 좋은 방법은 페달을 더 많이 밟고 더 낮은 보조 레벨을 사용하는 것입니다 TRIP 0 22 6 3O km km h TRIP 1 22 6 3O km km h TRIP 5 22 6 3O km km h ...

Page 99: ...99 EN ES FR KO 전조등 라이트가 기계식 스위치를 가지고 있다면 그것을 ON 위치로 바꿉니다 플러스 버튼을 길게 눌러 헤드램프를 켜십시오 활성화되면 디스플레이에 조명 아이콘이 나타납니다 헤드램프가 켜지면 디스플레이 백 라이트가 켜집니다 플러스 버튼을 다시 길게 눌러 헤드램프와 백 라이트를 끕니다 TRIP 1 22 6 3O km km h ...

Page 100: ...하도록 해 줍니다 이 기능은 오르막길과 경사면을 걷는 데 도움을 주기 위해 설계되었습 니다 탑승 시 워크 모드를 사용하지 마십시오 초기 가속에 익숙해져야 합니다 길에서 사용하기 전에 넓은 곳에서 워크 모드를 연습해 보세요 마이너스 버튼을 길게 눌러 워크 모드를 활성화합니다 이 버튼을 다시 놓을 때까지 켜진 상태를 유지합니다 활성화되면 워크 모드 아이콘이 디스플 레이에 나타납니다 워크 모드를 끝내려면 마이너스 버튼을 놓습니다 TRIP 4 5 3O km km h ...

Page 101: ...게 누르십시오 TRIP 편도 주행 거리 ODO 총 거리 MAX 최고 주행 속도 기본 표시는 TRIP 입니다 TRIP 1 22 6 3O km km h ODO 1 22 6 2999O km km h AVG 1 22 6 12 6 km h km h MAX 1 22 6 25 km h km h TIME 1 22 6 2O min km h RANGE 1 22 6 32 km km h AVG 평균 주행 속도 RANGE 남은 거리 TIME 주행 시간 ...

Page 102: ...102 EN ES FR KO 배터리 충전 디스플레이는 1 5까지의 배터리 잔량을 표시합니다 배터리 아이콘이 깜박이면 배터리가 매우 부족하다는 뜻이며 이는 PAS 시스템을 계속 사용하려면 즉시 충전해야 한다는 뜻입니다 배터리 칸 잔여용량 아이콘 도표 5 75 100 4 50 75 3 30 50 2 10 30 1 5 10 부족 5 깜빡거림 ...

Page 103: ...103 EN ES FR KO 설정 플러스 및 마이너스 버튼을 동시에 길게 눌러 설정을 입력합니다 디스플레이 설정을 선택하고 버튼을 짧게 누릅니다 조종 플러스 또는 마이너스 단추를 짧게 눌러 위 또는 아래로 스크롤 합니다 버튼을 짧게 눌러 선택 내용을 확인합니다 Display Setting Information Exit ...

Page 104: ...트립 재설정 선택 선택하기 설정을 저장하려면 버튼을 짧게 누릅니다 메인 페이지로 돌아가려면 버튼을 짧게 누르십시오 Trip Reset Unit Brightness Auto Off Trip Reset NO Trip Reset YES Unit Brightness Auto Off Back Display Setting Information Exit 마이너스 버튼을 눌러 아래로 스크롤 한 다음 BACK 뒤로가기 을 선택합니다 설정 페이지로 돌아가려면 버튼을 짧게 누르십시오 EXIT를 선택합니다 ...

Page 105: ...입니다 플러스 또는 마이너스 버튼을 짧게 눌러 메트릭 또는 임페리얼을 선택합니다 선택이 끝나면 버튼을 짧게 누릅니다 메인 페이지로 돌아가려면 버튼을 짧게 누르십시오 Unit Metric Unit Imperial Unit Brightness Auto Off Back Display Setting Information Exit 마이너스 버튼을 눌러 아래로 스크롤 한 다음 BACK 뒤로가기 을 선택합니다 설정 페이지로 돌아가려면 버튼을 짧게 누르십시오 EXIT를 선택합니다 ...

Page 106: ... 마이너스 버튼을 짧게 눌러 10 가장 일반적 100 가장 밝음 를 선택합니다 선택이 끝나면 버튼을 짧게 눌러 설정을 저장합니다 메인 페이지로 돌아가려면 버튼을 짧게 누르십시오 Brightness 10 Brightness 100 Unit Brightness Auto Off Back Display Setting Information Exit 마이너스 버튼을 눌러 아래로 스크롤 한 다음 BACK 뒤로가기 을 선택합니다 설정 페이지로 돌아가려면 버튼을 짧게 누르십시오 EXIT를 선택합니다 ...

Page 107: ...FF 자동 OFF 비활성화 1 9 지속 시간 분 플러스 또는 마이너스 버튼을 짧게 눌러 디스플레이 전원 지속 시간을 선택합니다 선택이 끝나면 버튼을 짧게 눌러 설정을 저장합니다 메인 페이지로 돌아가려면 버튼을 짧게 누르십시오 Auto Off OFF Auto Off 9 Unit Brightness Auto Off Back Display Setting Information Exit 설정 페이지로 돌아가려면 버튼을 짧게 누르십시오 EXIT를 선택합니다 마이너스 버튼을 눌러 아래로 스크롤 한 다음 BACK 뒤로가기 을 선택합니다 ...

Page 108: ...108 EN ES FR KO 설정 정보 설정에 정보 메뉴도 있습니다 참고 정보 메뉴는 대리점이 서비스 작업을 수행하는 데 도움이 되도록 제공되며 고객과 관련된 항목이 포함되어 있지 않습니다 Display Setting Information Exit ...

Page 109: ...R KO 4 배터리 구성품 1 배터리 팩 2 충전 인디케이터 3 파워 스위치 4 충전 포트 커버 5 충전 포트 6 배터리 락 사양 셀 타입 리튬 이온 정격 용량 11 Ah 정격 에너지 400Wh 정격 볼트 36VDC 작동 온도 0 60 C 충전 온도 0 45 C 보관 온도 15 35 C 보관 습도 45 75 RH 방진 및 방수 등급 IPX5 무게 2 5 kg 1 3 4 5 6 2 ...

Page 110: ...가 일부만 충전된 상태로 배송됩니다 처음 승차하기 전에 제공된 충전기로 배터리를 완전히 충전하십시오 배터리 수명을 유지하려면 매 승차 후 최대한 빨리 배터리를 충전하십시오 자주 충전하더라도 배터리는 손상되지 않습니다 배터리를 완전히 비워 두지 마십시오 그러면 배터리 수명이 상당히 짧아집니다 삽입 및 제거 제거 제거하려면 키를 수직 위치로 돌려 배터리를 위로 당깁니다 Insertion Removal ...

Page 111: ...111 EN ES FR KO 삽입 삽입하려면 배터리를 마운팅 플레이트에 맞추고 배터리를 아래로 맞물릴때까지 누릅니다 키를 제거하여 페달에 걸리는 것을 방지해야 합니다 Insertion Removal ...

Page 112: ...0 정도 충전하십시오 배터리를 받침대에서 분리할 경우 종이 클립 키 등과 같은 작은 금속 물체에 가까이 두지 마십시오 연결이 끊어지고 단락이 발생할 수 있습니다 경고 떨어뜨리거나 부딪히는 등의 기계적 충격으로 인해 내부가 손상될 수 있고 증기 및 또는 부식성 액체가 누출될 수 있습니다 케이스에 가 시적인 손상이 있거나 배터리에서 냄새가 나는 경우에는 배터리를 사용하지 말고 교체용으로 딜러에게 문의하십시오 증기가 호흡기를 자 극할 수 있으므로 배터리를 신선한 공기가 많은 곳으로 이동하여 주십시오 ...

Page 113: ...113 EN ES FR KO 5 충전기 구성품 1 출력 케이블 2 상태 표시등 3 배터리 입력 소켓 4 입력 케이블 사양 입력 전압 110 240 VAC 입력 파워 140W 최대 전하 전류 3A 출력 전압 36VDC 출력 전류 3A P O W E R C H A R G E 4 P O W E R C H A R G E 3 1 2 ...

Page 114: ...114 EN ES FR KO 작동 입력 케이블을 콘센트에 연결합니다 입력 케이블을 벽 콘센트에 연결하면 상태 표시등이 켜집니다 POWER CHARGE ...

Page 115: ...115 EN ES FR KO 배터리 충전 포트 커버를 열고 출력 케이블을 소켓에 꽂아 주십시오 배터리 LED는 충전 수준을 나타냅니다 충전이 완료되면 배터리를 벽 소켓과 충전기에서 분리하십시오 충전 LED 표시등 색상 상태 빨강 충전 중 분리 됨 녹색 충전 완료 POWER CHARGE ...

Page 116: ...및 또는 불꽃 근처에 노출되어 있을 때는 배터리를 충전하지 마십시오 구성품으로 포함되어 있는 충전기만 사용해 주십시오 충전 중일 때는 충전기 커버를 덮지 마십시오 배터리에서 냄새가 나거나 하우징이 변형된 것 같으면 즉시 충전을 중단하고 대리점에 도움을 요청하십시오 충전이 평소보다 오래 걸릴 경우 즉시 충전을 중지하고 대리점에 도움을 요청하십시오 자동차의 시거잭 라이터를 통해 배터리를 충전하지 마십시오 배터리를 분해하지 마십시오 ...

Page 117: ... 주행 체크 항목에 대해서는 포함되어 있는 PAS 설명서를 참조하십시오 본 문서와 여기에 포함된 모든 작동 지침에 포함된 안전 경고를 읽고 이해한 후 수행하십시오 배터리 잠금 키를 제거하였는지 확인하여 주십시오 올바른 기어 사용법 배터리 범위를 극대화하고 드라이브 트레인의 마모를 줄이기 위하여 하부 기어에서부터 페달을 밟기 시작하십시오 정지하기 전에 낮은 기어로 변속해 주십시오 최적의 케이던스 범위는 약 60 80rpm입니다 기어를 조정하여 지형에 적합한 보조 레벨을 선택하여 케이던스를 유지하십시오 과도하게 낮거나 높은 케이던스는 배터리 가용 범위를 줄게 합니다 높은 기어에 높은 보조 동력을 사용하여 기어에 무리를 주지 마십시오 이를 통해 드라이브 트레인의 수명이 극심하게 단축될 수 있습니다 ...

Page 118: ...않음 자석 센서 정렬 오류 속도 센서 정렬을 점검 유지 관리 섹션 참조 케이블 연결이 느슨한지 점검하고 동력 보조 없음 드라이브 또는 디스플레이 오작동 대리점에 정비 의뢰 비정상적인 소음 또는 갈림 드레일러 또는 브레이크가 부적절하게 설정 올바른 체인의 움직임을 위해 변속기 조절 디스크 로터가 심하게 마찰하지 않도록 브레이크 패드를 조정 대리점에 정비 의뢰 켜지지 않는 라이트 기계식 Valo 조명 스위치가 OFF에 놓여 있음 스위치를 ON위치로 변경 케이블이 느슨함 Valo에 입력 커넥터가 단단히 연결되었는지 확인 케이블 단자에 접속 불량 대리점에 정비 의뢰 렌치 아이콘이 표시됨 내부 고장 대리점에 정비 의뢰 문제를 해결하지 못할 경우 대리점에 문의하여 서비스를 받으십시오 ...

Page 119: ...코드가 표시됩니다 오류 21이 나타나면 유지 관리 섹션을 참조하여 속도 센서를 조정하는 방법에 대한 자세한 내용을 살피십시오 기타 오류의 경우 디스플레이의 전원을 다시 켜서 초기화하고 30초간 기다린 다음 전원을 킵니다 오류가 지속될 경우 대리점에 수리를 의뢰하십시오 오류 코드 오류 정의 07 높은 배터리 전압 불량 08 모터 홀 센서 불량 10 고온 결함 12 전류 센서 고장 13 배터리 온도 센서 고장 21 스피드 센서 고장 22 배터리 통신 불량 30 컨트롤러 통신 불량 ...

Page 120: ...서 조정 이외에 사용자가 바꿀 수 있는 품목이 없습니다 오류나 문제가 발생하면 대리점에 문의하십시오 장비를 개조하거나 개조하지 마십시오 개조 시 보증이 무효화됩니다 드라이브는 순정 교체 부품을 사용하는 숙련된 미캐닉을 통해 수리 되어야 합니다 스피드 센서 스피드 센서는 스포크에 장착된 자석과 5 25mm의 간격이 필요합니다 간격이 너무 크거나 자석이 정렬되지 않으면 속도가 표시되지 않습니다 위의 그림처럼 스피드 센서와 자석을 배열합니다 자석을 설치할 때 자석의 중심이 정렬되어 있고 자석 면 평평한 표면 이 스피드 센서 유도 영역의 중 심과 수직인지 확인하십시오 5 25mm 5 25mm ...

Page 121: ...하여 비바람에도 견딜 수 있도록 설계되었습니다 마모된 젖은 천을 사용하여 드라이브 및 배터리 케이싱을 닦아주십시오 필요 시 순한 비누와 물만 사용하세요 수압이 센 물을 사용하여 PAS 시스템을 청소하지 마십시오 PAS 시스템의 어떤 부분도 물 속에 넣지 마십시오 핵심 키를 분실하거나 파손한 경우 잠금 장치에 있는 번호를 취급점 제공하고 조치를 받도록 하십시오 처리 재활용에 대해서는 대리점에 문의하십시오 맥스 드라이브 시스템의 일부를 가정용 폐기물로 분류하지 마십시오 배터리를 소각하거나 매립지에 폐기해서는 안 됩니다 리튬 이온 ...

Page 122: ... the Tern Werd logotype and the Tern Berd device used alone or in combination are trade names trade devices or registered trademarks of Mobility Holdings Ltd 2011 2018 Mobility Holdings Ltd all rights reserved Tern Bicycles ...

Reviews: