background image

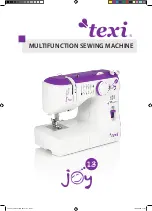
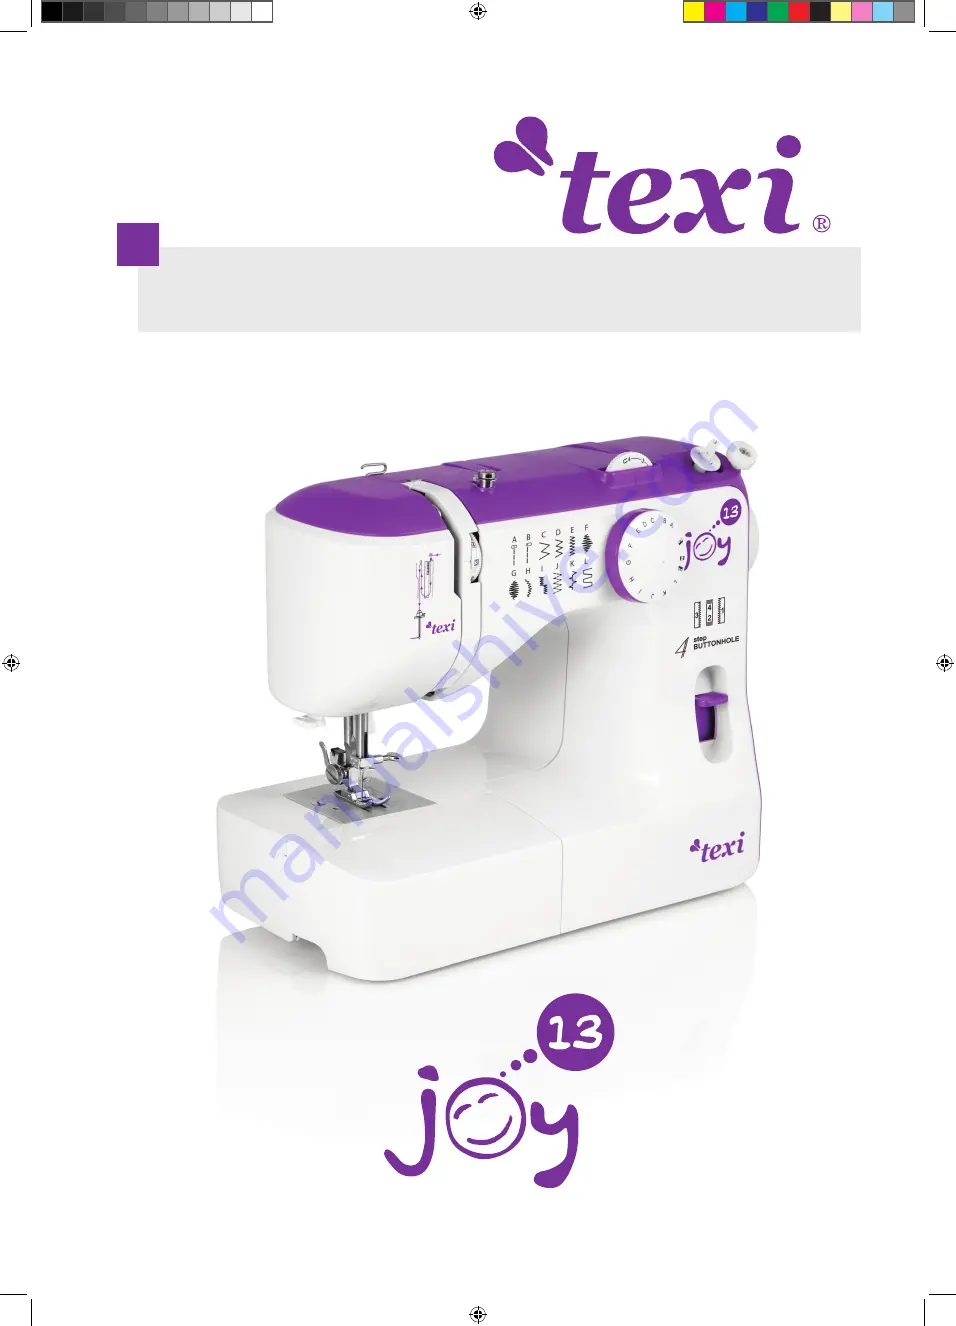
MULTIFUNCTION SEWING MACHINE

Texi Joy 13 instrukcja 2017 + PT.indd   1

Texi Joy 13 instrukcja 2017 + PT.indd   1

18.09.2020   11:31

18.09.2020   11:31

Summary of Contents for Joy 13

Page 1: ...MULTIFUNCTION SEWING MACHINE Texi Joy 13 instrukcja 2017 PT indd 1 Texi Joy 13 instrukcja 2017 PT indd 1 18 09 2020 11 31 18 09 2020 11 31...

Page 2: ...Texi Joy 13 instrukcja 2017 PT indd 2 Texi Joy 13 instrukcja 2017 PT indd 2 18 09 2020 11 31 18 09 2020 11 31...

Page 3: ...4 DE User manual 56 EN Manual de usuario 74 ES Manuel d utilisation 94 FR Instrukcja obs ugi 114 PL Manual do usu rio 136 PT 154 RU Texi Joy 13 instrukcja 2017 PT indd 3 Texi Joy 13 instrukcja 2017 PT...

Page 4: ...n mu dealerovi nebo servisn mu centru pro kontrolu a p padnou opravu 5 Nikdy nepou vejte ic stroj pokud je n kter z otvor stroje blokov n Uchov vejte ventila n otvory stroje stroj i ped l ist 6 Nikdy...

Page 5: ...druhu stehu 20 it ve zp tn m chodu 20 21 21 Odstran n l tky ze stroje 22 Odst i en nit 22 U itkov it Overlockov stehy 23 T bodov Z ev 23 Slep ev 24 Dekorativn stehy 24 it knofl kov ch d rek 25 27 P e...

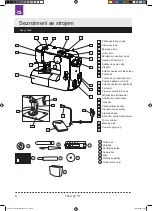
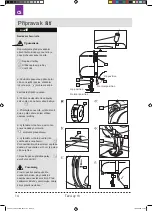
Page 6: ...ro nav jen c vek Posuvn p ka horn nit Kole ko nastaven nap t nit eln kryt Pracovn plocha box na uchov v n p slu enstv Kole ko pro volbu stehu O ez nit P ka p tla n patky roubek jeheln svorky Stehov de...

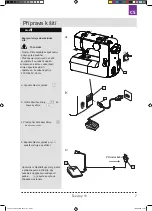
Page 7: ...b Vlo te z str ku stroje do z suvky stroje a Vypn te hlavn vyp na Pros m t te d le it bezpe nostn pokyny p ed pou it m P ed zapojen m stroje do el s t se ujist te e uveden nap t zobrazen na t tku v z...

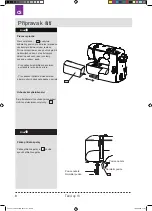
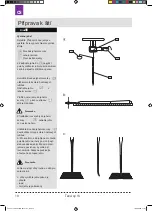
Page 8: ...stupn ch oblast na od vech jako jsou lemy nohavice ruk vy apod Pro odstran n p idr te konec stolku a vyt hn te jej ze ic ho stroje Pro nasazen zatla te stolek sm rem k ic mu stroji dokud nezapadne na...

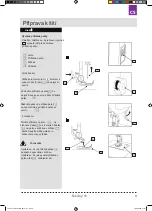
Page 9: ...ice pomoc p ky p tla n patky Stiskn te p ku na dr ku patek na zadn stroje a p tla n patka se uvoln b Nasazen Polo te p tla nou patku na stehovou desku a srovnejte h delku na patce s dr kou v dr ku pat...

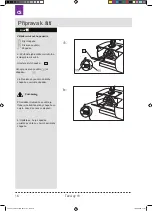
Page 10: ...ou jehlu do jeheln svorky plochou stranou sm rem dozadu P i vkl d n nov jehly do jeheln svorky zatla te jehlu co nejv ce nahoru Ut hn te roubke jeheln svorky pevn ot en m po sm ru hodinov ch ru i ek b...

Page 11: ...e l tky Pro b n it by m la b t pou it stejn sil a typ nit jak pro spodn tak pro horn nit Nikdy nepou vejte tupou nebo ohnutou jehlu Pro b n it nebo na jemn l tky pou ijte jehlu o velikosti 9 11 Na hru...

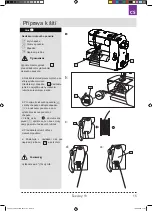
Page 12: ...co nejv c l c c vek d Provl kn te nit jedn m z otvor v c vce sm rem zevnit ven Omotejte nit ru n n kolikr t kolem pr zdn c vky ve sm ru hodinov ch ru i ek 8 Texi Joy 13 instrukcja 2017 PT indd 12 Texi...

Page 13: ...mile je pln navinuta g dokud neklapne Nezapome te po ukon en c vkov n zatla it ru n kolo zp t Zvuk klapnut je velmi d le it 9 Texi Joy 13 instrukcja 2017 PT indd 13 Texi Joy 13 instrukcja 2017 PT indd...

Page 14: ...tran stroje c P idr ujte konec nit vyt hn te nit dol a pot nahoru kolem dr ku nap nac pru iny d Vyt hn te nit nahoru a skrz o ko posuvn p ky horn nit sm rem zprava doleva e Vyt hn te nit dol a ve te j...

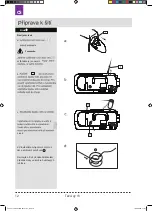
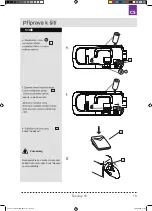
Page 15: ...ehlu do nejvy polohy ot en m ru n ho kola sm rem k sob b Pro vyjmut c vkov ho pouzdra z dr hy chapa e odklopte z padku na c vkov m pouzdru a za ni vyt hn te c vkov pouzdro z chapa e c Vlo te c vku do...

Page 16: ...co nejv c dokud se neozve klapnut b Ujist te se e je z padka um st na v z ezu v horn sti dr hy chapa e a Zdvihn te jehlu ot en m ru n ho kola sm rem k sob Otev ete kryt chapa e Uchopte c vkov pouzdro...

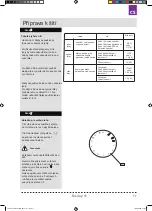
Page 17: ...nov ch ru i ek sm rem k sob pro vyta en spodn nit a Zdvihn te p tla nou patku P idr te horn nit lehce levou rukou a ot ejte ru n m kolem proti sm ru hodinov ch ru i ek sm rem k sob a prove te jedno ko...

Page 18: ...d je nap t spr vn nit se odmot o 1 i 2 palce Pokud je nap t p li vysok nit se neodmot v bec Pokud je nap t p li vysok nit se odmot o v ce ne 2 palce b Pro upraven nap t oto te mal m roubkem na bo n st...

Page 19: ...stehov desce zna vzd lenost mezi jehlou v centr ln poloze a vod c lini vu sla v p edn sti stehov desky jsou v milimetrech a ern sla jsou v palc ch 15 Texi Joy 13 instrukcja 2017 PT indd 19 Texi Joy 1...

Page 20: ...podn i horn nit dozadu za patku a spus te p tla nou patku Pomalu se l pn te ped l a za n te t pod l vodi e Kole kem nelze nep etr it ot et proti sm ru hodinov ch ru i ek ale zp tn rotace p i nastaven...

Page 21: ...t sm r s jehlou v l tce Zdvihn te p tla nou patku a oto te l tkou kolem jehly do nov ho sm ru s vyu it m jehly jako bodu ot en Spus te p tla nou patku a pokra ujte v it nov m sm rem Zm na sm ru it Z k...

Page 22: ...kou Ot ejte ru n m kolem pro posun kalibra n ch zna ek do nejvy ho bodu Ot ejte ru n m kolem sm rem k ob pro zdvih posuvn p ky horn nit do nejvy polohy Zdvihn te p tla nou patku a vyt hn te l tku ze s...

Page 23: ...dinov ch ru i ek k sob pro zdvih posuvn p ky horn nit do nejvy polohy Pokud ot te ru n m kolem v nespr vn m sm ru m e doj t k zaseknut horn i spodn nit pod stehovou deskou Ot ejte ru n m kolem proti s...

Page 24: ...Dekorativn stehy Ot ejte ru n m kolem proti sm ru hodinov ch ru i ek k sob pro zdvih posuvn p ky horn nit do nejvy polohy Ot en m ru n ho kola nespr vn m sm rem m e doj t k zaseknut horn a spodn nit...

Page 25: ...y ne budete t p mo na od v P prava pro it knofl kov d rky Zm te p rm r knofl ku a p idejte cca 1 8 inch 0 3cm na zapo it Pokud m te velmi siln knofl k p idejte k pr m ru knofl ku v ce Vyzna te polohu...

Page 26: ...ni zdvihn te jehlu z l tky Krok 2 d Oto te kole kem volby stehu na a u ijte 5 6 zapo vac ch steh Po dokon en zdvihn te jehlu z l tky Krok 3 e Oto te kole kem volby stehu na a u ijte levou stranu knofl...

Page 27: ...ch d rek Tipy h Pon kud sni te nap t horn nit pro doc len lep ho v sledku Na jemn a stre ov l tky pou ijte spodn v ztuhu Doporu ujeme do obou zapo vac ch steh na konci knofl kov d rky aby se p ede lo...

Page 28: ...rou rovku ot en m proti sm ru hodinov ch ru i ek Namontov n rovky rovku namontuje ot en m po sm ru hodinov ch ru i ek Nasa te eln kryt stroje Ut hn te roubek Neuchov vejte stroj ve vlhk m prot ed u zd...

Page 29: ...apa e b Otev ete z padku c vko v ho pouzdra a vyjm te jej ze stroje c Otev ete dr ky krytu chapa e d Odstra te kryt chapa e e Odstra te chapa e f Vy ist te dr hu chapa e kart kem a such m m k m had ke...

Page 30: ...lky zapadly do z ez j Uzamkn te dr ky cel ho chapa e tak e je oto te zp t do p vodn pozice viz obr zek k Vlo te c vkov pouzdro Krok 3 3 i t n spodn ho podava e a Odstra te jehlu a p tla nou patku Ods...

Page 31: ...itn oleje na ic stroje na body vyzna en ipkami na obr zku a Odpojte stroj z el s t Odstra te roubek a eln kryt stroje b Nama te body ozna en ipkami Pokud pou v te ic stroje asto je t eba prov d t maz...

Page 32: ...ehlu a jej nasazen p padn vym te jehlu Stehy vynech vaj 1 Jehla nen spr vn nasazena 2 Jehla je tup nebo ohnut 3 Jehla a nebo nit nen vhodn pro it materi l 4 Horn nit nen spr vn navle ena 5 Nen zvolena...

Page 33: ...oje Rozm ry balen 650 50 rpm 14 90 6 6 5 mm 4 4 5 mm 3 6 mm G W 6 5kg N W 5 5 kg 347 x 150 5 x267 5 mm 405 x 210 x330 mm 588 S elektrick m za zen m nezach zejte jako se sm en m odpadem za zen je t eba...

Page 34: ...m Kontakt mit Wasser war In solchen F llen soll man sich an einen autorisierten Partner wenden um die Maschine zu berpr fen reparieren oder entsprechend warten und einstellen 4 Man soll die Maschine n...

Page 35: ...Besch digung der Nadel oder andere Besch digung der Maschine vorzubeugen 17 Schalten Sie die Maschine ab stellen Sie den Ein Ausschalter auf 0 immer wenn Sie etwas neben der Nadel machen Einf deln Spu...

Page 36: ...N 44 OBERFADENSPANNUNG 44 FADENSPANNUNG F R ZICKZACK STICH 45 STICHAUSWAHL 45 EINSTELLEN DER STICHL NGE 46 UNTERFADENSPANNUNG 46 R CKW RTSN HEN 46 BEGINN DES N HPROZESS 47 STICHPLATTENMARKIERUNGEN 47...

Page 37: ...llrad 10 Fadenf hrung 11 Fadenf hrung 12 Fadenheber 13 Fadenspanner 14 Vorderplatte 15 Verwandlungn hfl che mit Zubeh rbox 16 Stichauswahl Einstellrad 17 Fadenabschneider 18 N hfu heber 19 N hfu griff...

Page 38: ...an und den Stecker von Netzkabel 1 stecken Sie in die Steckdose 3 Wenn dies getan wird schalten Sie die Maschine an indem Sie den Schalter 2 in die Position I stellen Gleichzeitig wird die Beleuchtun...

Page 39: ...gt wurde Zubeh r wird im Arbeitstisch der Maschine aufbewahrt so wie es auf der Abbildung gezeigt wurde Die Gl hbirne wird unter dem Geh use der Maschine montiert Um die Gl hbirne zu wechseln sollen S...

Page 40: ...andrad auf sich zu drehen Senken Sie den N hfu Um die Nadel herauszunehmen schrauben Sie die Nadelbefestigungsschraube gegen den Uhrzeigersinn Nehmen Sie die Nadel heraus Stecken Sie die Nadel bis zum...

Page 41: ...nicht bewegen dann arbeitet nur der Motor die Maschine n ht nicht 2 Setzen Sie die Spule mit dem Faden auf einen der St nder auf F hren Sie den Faden ber die F hrung auf dem oberen Geh use der Maschi...

Page 42: ...Fu pedal wieder bewegen EINSETZEN DER SPULE IN DIE SPULENKAPSEL 1 Setzen Sie die volle Spule in die Spulenkapsel ein Wenn Sie am Faden ziehen muss sich die Spule im Uhrzeigersinn drehen so wie es auf...

Page 43: ...Faden durch die Fadenf hrung 2 indem Sie den Faden von rechts einf hren 4 F hren Sie den Faden nach unten und zwischen den Teller von Oberfadenspannung 2 5 Ziehen Sie den Faden nach oben ber den Tell...

Page 44: ...ie ca 15 cm unter dem N hfu W hrend des N hens mit einem Geradestich wenn die Oberfadenspannung richtig eingestellt ist sollen sich die Ober und die Unterfaden in der Mitte von zwei Stofflagen verbind...

Page 45: ...e nur f r Zickzackstich eingestellt und man kann sie flie end zwischen den Programmen C schmaler Stich und E breiter Stich w hlen 2 Ist die Oberfadenspannung zu fest eingestellt liegt die Verknotung a...

Page 46: ...pannung kann beim N hen von besonders leichten oder schweren Stoffen notwendig sein Es ist zu tun indem man leicht die Schraube von der Spulenkapsel der Abbildung nach abschraubt oder zudreht Dazu sol...

Page 47: ...nige Stiche r ckw rts 5 Wenn Sie das N hen zum Ende gef hrt haben vergewissern Sie sich dass sich die Nadel in ihrer obersten Stelle befindet Um den Stoff herauszunehmen heben Sie den N hfu und ziehen...

Page 48: ...hten Sie k nnen bei diesem Stich entweder einen Universaln hfu oder einen Spezialn hf en benutzen ZIERSTICHE F G H I dienen vor allem dazu die Ziern hte zu erreichen Sie sehen am besten aus wenn die...

Page 49: ...Sp ter nehmen Sie die Nadel aus dem Stoff heraus indem Sie das Handrad auf sich zu drehen Die Nadel soll sich auf der rechten Stichseite befinden 5 Stellen Sie das Stichauswahl Einstellrad auf die Po...

Page 50: ...m glich befindet 5 W hrend des N hens von der rechten Rei verschlussseite muss sich der N hfu auf der linken Seite der Nadel befindet Der Stich soll sich so nahe der Z hnen von Rei verschluss wie m gl...

Page 51: ...1 Spulenkapsel 2 Spannelemente 3 Greiferring 4 Greifer 5 Greifertr ger 6 se zur Einstellung der Greiferringposition 7 Schlitz des Greifertr gers 1 Beseitigen Sie Staub sowie Faden und Stoffreste von...

Page 52: ...usreichend Mehr l kann verursachen dass die lresten den Stoff verschmutzen Wenn die Maschine nach l ngerem Stillstand nicht gleichm ig arbeitet soll man sie mit einigen Tropfen l vor der Inbetriebnahm...

Page 53: ...n Der Unterfaden wird gebrochen Der Unterfaden ist nicht richtig aufgespult F deln Sie die Maschine erneut ein Faden und Stoffreste begrenzen die Greiferbewegung Reinigen Sie die Spulenkapsel und den...

Page 54: ...alsch angepasste Faden oder Nadelst rke Passen Sie die richtige St rke von Faden und Nadel an Der Stoff wird nicht transportiert Die Faden und Stoffresten blockieren den Transporteur Reinigen Sie den...

Page 55: ...en Sie den Transporteur Die Maschine ist nicht ausreichend ge lt Pr fen Sie die Informationen zur richtigen Wartung der Maschine Die Gl hbirne leuchtet nicht Ein Ausschalter der Maschine zeigt die Pos...

Page 56: ...4 THREAD TENSION FOR ZIGZAG STITCH 65 PATTERN SELECTION 65 STITCH LENGTH DIAL 66 ADJUSTING THE LOWER THREAD TENSION 66 REVERSE STITCHING 66 STARTING TO SEW 67 MARKS ON THE NEEDLE PLATE 67 TYPES OF STI...

Page 57: ...ocked Keep ventilation openings of this sewing machine and foot controller free from accumulation of lint dust and loose cloth 5 Never drop or insert any object into any opening 6 Do not use outdoors...

Page 58: ...Thread guide 12 Thread take up lever 13 Bobbing Winding thread guide 14 Face cover 15 Sewing table and accessory box 16 Stitch dial 17 Thread cutter 18 Presser foot lever 19 Presser foot holder 20 Ne...

Page 59: ...and before maintenance WARNING Do not unplug by pulling on the cord To unplug grasp the plug not the cord Sewing speed can be varied by the foot control The harder you press on the control the faster...

Page 60: ...er to the drawing CHANGING THE PRESSER FOOT The presser foot must be changed according to the sewing job or stitch you sew CAUTION Turn OFF the power switch before you change the presser foot Turn the...

Page 61: ...CASE Open the hook cover 1 Raise the needle by turning the balance wheel toward you Take out bobbin case holding the latch 2 When inserting the bobbin case place the tip of the bobbin case 3 into the...

Page 62: ...to the left and cut the thread 7 Turn the hand wheel to the right position INSERTING THE BOBBIN 1 Place bobbin into bobbin holder with the thread unwinding counter clockwise 2 Draw thread into notch...

Page 63: ...e back of the spool 3 Draw thread into thread guide 1 4 Guide thread through tension disc 2 and pull it up 5 Draw the thread through take up lever from right to the left 3 6 Then draw thread down 4 7...

Page 64: ...s highest position 3 Lightly draw up the needle thread forming a loop of the bobbin thread 4 Pull both threads out under the presser foot about 15 cm The thread tension must be properly balanced If ad...

Page 65: ...2 To choose your pattern place dial on the correct symbol A L which refers to pattern table printed on the machine head Changing stitch width is possible only for zigzag stitches It can be changed bet...

Page 66: ...e adjusted a little bit by thight or realease screw as shown on the drawing To increase thread tension turn the screw clockwise To decrease thread tension turn the screw counterclockwise Reverse stitc...

Page 67: ...utter located behind presser foot Leave around 15 cm of both threads Line on the stitch plate help to guide material evenly Distance from stitch from the central needle position to the edge of materia...

Page 68: ...abric that point C on the foot will be match to point B on the fabric 3 Choose left side of the buttonhole on the dial Lower the needle and start to sew till the pint A Stop to sew and raise the needl...

Page 69: ...er side Choose one of the zigzag stitch pomi dzy C D E Stitch length should be 0 5 1 Therad tension should be 1 4 1 Baste on the fabric applique which needs to be sew on 2 Sew along the edge of the ap...

Page 70: ...atch of bobbin case and take it out of the machine 1 Bobbin case 2 Latch 3 Open the hook race ring holders and remove the hook race ring 4 Hook 5 Bobbin case base 6 Bottom pin 7 7 Socket for bottom pi...

Page 71: ...ine quality sewing machine oil to the point indicated by the arrows in the figures For machine in constant use oil two or three times a year In case the machine does not work smoothly due to standing...

Page 72: ...e correct size needle for fabric Incorrect size needle on stretch fabric Use stretch needle Fabric puckers Machine not properly threaded Rethread machine Bobbin threaded incorrectly Rethread the bobbi...

Page 73: ...e needle plate and bobbin case and clean the hook race and feed dog Machine will not run Cord not plugged into electrical outlet Insert plug fully into outlet Power switch is not turned on Turn on the...

Page 74: ...REGULACI N DE TENSI N DEL HILO SUPERIOR 84 TENSI N DE HILOS EN PUNTADA ZIGZAG 84 SELECCI N DE PUNTADA 85 REGULACI N DE LONGITUD DE PUNTADA 85 REGULACI N DE TENSI N DEL HILO INFERIOR 85 COSTURA INVERSA...

Page 75: ...tuaciones citadas anteriormente acuda al servicio t cnico autorizado m s pr ximo para revisarla repararla o realizar las regulaciones el ctricas o mec nicas pertinentes 4 No encienda la m quina en cas...

Page 76: ...cualquier tipo de actividad cerca de la aguja como enhebrado de hilo cambio de aguja cambio del carrete sustituci n del pie etc debe ajustar el interruptor a la posici n 0 18 Antes de proceder a los...

Page 77: ...Gu a de hilos 12 Palanca tirah los 13 Selector de tensi n de hilo 14 Tapa frontal 15 Mesa de trabajo y caja para accesorios 16 Selector de patr n 17 Cortah los 18 Palanca de elevaci n del pie prensat...

Page 78: ...Para comenzar a coser es necesario presionar el pedal La velocidad de la costura se regula a trav s del pedal Cuanta m s presi n apliquemos al pedal m s r pido coser la m quina BOMBILLA PRECAUCI N An...

Page 79: ...l volante hac a usted hasta que la aguja se encuentre en la posici n m s alta Levante el prensatelas hacia arriba si est bajado Presione hacia usted la palanca de liberaci n del soporte del pie prensa...

Page 80: ...ladas o romas ya que a menudo provocan que la m quina enrede los hilos o salte puntadas e incluso puede provocar da os en el mecanismo de la m quina Adem s recuerde elegir un tama o de aguja adecuado...

Page 81: ...canillero 5 Deslice el cabezal de la canilla a la derecha 6 Sostenga el extremo del hilo y presione el pedal comenzando en bobinado Detenga la m quina tras bobinar varias bobinas y corte el hilo cerc...

Page 82: ...e tensi n del hilo hasta el orificio de salida 4 Saque el hilo un m nimo de 10 cm fuera del carrete ENHEBRADO DE HILO SUPERIOR 1 Ajuste la aguja en la posici n m s alta girando a mano el volante hacia...

Page 83: ...nsatelas hacia la parte posterior de la m quina 4 A continuaci n dirija el hilo hacia abajo y p selo por los discos tensores del hilo superior 2 5 Tire del hilo hacia arriba por encima de los discos 2...

Page 84: ...el tejido se arruga y los puntos se deshacen con facilidad En tal caso disminuya la tensi n del hilo superior deslizando el disco hacia un n mero m s bajo 3 Un hilo superior con poca tensi n provoca...

Page 85: ...l y como se muestra en el dibujo Para ello utilice el destornillador de menor tama o incluido en el equipamiento de la m quina Para aumentar la tensi n del hilo inferior apriete el tornillo en direcci...

Page 86: ...ntra en su posici n m s alta Para retirar el tejido eleve el prensatelas y extraiga el tejido desde la parte trasera de la m quina del pie 7 Corte el hilo utilizando p ej el cortah los que se encuentr...

Page 87: ...stura de el sticos Dirija la puntada sobre el borde del tejido y a continuaci n recorte el trozo de tela sobrante Utilice un pie prensatelas universal OJALES 1 Sit e un bot n en una muestra de tejido...

Page 88: ...i n superior al lado izquierdo de la puntada 7 Una vez realizados los ojales eleve el prensatelas y retire el tejido de la m quina Corte los hilos Corte el agujero con un abridor de ojales Tenga cuida...

Page 89: ...dera 3 Anillo de la lanzadera 4 Lanzadera 5 Jaula de la lanzadera 6 Leng eta de posici n del anillo 7 Ranura de la jaula de la lanzadera INSERCI N DE APLICACIONES 1 Elija puntada zigzag entre C E 2 Aj...

Page 90: ...ja y ret relos 3 Limpie los dientes del transportador con un pincel y monte de nuevo la placa de aguja 4 Para preparar la m quina para coser de nuevo vuelva a apretar la aguja y coloque el pie prensat...

Page 91: ...correctamente en el carrete Enhebre de nuevo la m quina seg n las instrucciones Los restos de hilo y hebras bloquean el balanceo de la lanzadera Limpie el carrete y la lanzadera Carrete da ado Sustitu...

Page 92: ...Aguja doblada o roma Cambie la aguja por una nueva Grosor del hilo o tama o de aguja incorrecto Elija un tama o de aguja y un tipo de hilo adecuado para el tejido Hilo superior enhebrado incorrectamen...

Page 93: ...a la posici n 1 El volante est desconectado enla posici n de bobinado del canillero Dirija el volante hacia la izquierda Hilo enganchado en el mbolo del canillero Coloque correctamente la canilla en e...

Page 94: ...tice 6 Il est interdit d utiliser la machine quand le c ble ou la fiche sont endommag s ou quand il y a des perturbations dans le fonctionnement quand la machine a t heurt e ou endommag e ou quand ell...

Page 95: ...le tissu ni le pousser pendant la couture Cela pourrait endommager l aiguille 19 Il faut toujours laisser l aiguille en position la plus haute apr s avoir termin de coudre afin d viter de casser l aig...

Page 96: ...SION DU FIL POUR LE POINT ZIG ZAG 104 CHOIX DU POINT 105 REGULATION DE LONGUEUR DU POINT 105 REGULATION DE LA TENSION DU FIL INFERIEUR 105 COUTURE EN MARCHE ARRIERE 105 DEBUT DE LA COUTURE 106 DESIGNA...

Page 97: ...e la longueur du point 10 Plaque de guidage du fil 11 Plaque de guidage du fil 12 D chiqueteur 13 Tendeur 14 Plaque frontale 15 Table de travail et caisse d outils 16 Touche du choix du point 17 Coupe...

Page 98: ...ut appuyer sur le d marreur afin de commencer la couture La vitesse de couture est r gl e l aide du d marreur Plus nous appuyons sur le d marreur plus vite la machine coud AMPOULE ATTENTION D brancher...

Page 99: ...i de mani re ce que l aiguille se trouve dans la plus haute position Soulever le pied presseur s il est abaiss Appuyer vers soi le levier rel chant la poign e du pied presseur Le pied presseur va se l...

Page 100: ...ent que la machine fait des n uds ou laisse passer les points et m me peuvent causer un endommagement des m canismes de la machine Il ne faut pas non plus oublier de bien choisir la taille de l aiguil...

Page 101: ...le pivot avec la bobine vers la droite 5 Retenir le bout du fil et appuyer sur le d marreur en commen ant l enroulement Arr ter la machine apr s avoir enrouler quelques bobines et couper le fil pr s...

Page 102: ...rtir au moins 10 cm du fil en dehors de la canette Le mauvais ordre de l enfilage ou le mauvais guidage du fil peut causer la rupture du fil le passage des points le plissage du tissu ENFILAGE DU FIL...

Page 103: ...asser le fil par le guidage 1 en introduisant le fil du c t droite 4 Ensuite faire passer le fil vers le bas et le faire passer par les disques du tendeur du fil sup rieur 2 5 Remontez le fil vers le...

Page 104: ...tissu le tissu est pliss et les points s arrachent facilement Diminuez dans ce cas la tension du fil sup rieur en d pla ant la molette vers un num ro inf rieur 3 Le fil sup rieur trop l che fait que l...

Page 105: ...il faut utiliser le tournevis plus petit se trouvant dans l quipement de la machine Afin d augmenter la tension du fil inf rieur il faut serrer la vis dans le sens des aiguilles d une montre Par cont...

Page 106: ...e la couture assurez vous que l aiguille se trouve en haut Afin de sortir le tissu soulevez le pied presseur et sortez le tissu l arri re de la machine derri re le pied presseur 7 Coupez le fil en uti...

Page 107: ...s Cousez le point pr s du bord du tissu et ensuite coupez le morceau inutile du tissu Utilisez le pied universel COUTURE DE BOUTONNIERES 1 Posez le bouton sur un chantillon du tissu et marquez la poin...

Page 108: ...en position haute du c t gauche du point 7 Apr s avoir fini de coudre les boutonni res levez le pied presseur et sortez le tissu de la machine coupez les fils Coupez la boutonni re en utilisant le cou...

Page 109: ...a griffe 3 Anneau de la griffe 4 Griffe 5 Panier de la griffe 6 Languette r glant la position de l anneau 7 Prise du panier de la griffe COUTURE DES APPLICATIONS 1 Choisissez le point zigzag entre C E...

Page 110: ...orteur avec un pinceau et remettez et resserrez la plaque points 4 Afin de pr parer la machine une nouvelle couture placez l aiguille et remettez le pied presseur ATTENTION Il faut souvent nettoyer le...

Page 111: ...bien introduit Enfilez la machine nouveau conform ment la notice Les restes de tissu bloquent le mouvement pendulaire de la griffe Nettoyez la canette et la griffe Canette endommag e Changez la canett...

Page 112: ...ension et le genre de l aiguille appropri e au tissu Le fil n est pas bien introduit Enfilez la machine nouveau conform ment la notice Le tissu plisse ou ondule Trop grande tension du fil sup rieur Di...

Page 113: ...lette vers la gauche Le fil s est accroch la goupille de la canette Mettez correctement la bobine et la canette L ampoule ne brille pas L interrupteur se trouve en position 0 Mettre l interrupteur en...

Page 114: ...st puj zak cenia w funkcjonowaniu gdy maszyna zosta a uderzona lub uszkodzona lub te gdy pozostawa a w kontakcie z wod W takich przypadkach nale y zwr ci si do najbli szego autoryzowanego punktu serwi...

Page 115: ...nie ig y 16 Po zako czeniu szycia zawsze pozostawia ig w najwy szym po o eniu aby zapobiec z amaniu ig y czy innemu uszkodzeniu maszyny 17 W czasie wykonywania jakichkolwiek czynno ci w s siedztwie ig...

Page 116: ...24 NAPR ENIE NITKI DLA CIEGU ZYGZAK 125 WYB R CIEGU 125 REGULACJA D UGO CI CIEGU 126 REGULACJA NAPR ENIA NITKI DOLNEJ 126 SZYCIE WSTECZNE 126 ROZPOCZ CIE SZYCIA 127 OZNACZENIA NA P YTCE SCIEGOWEJ 127...

Page 117: ...ugo ci ciegu 10 Prowadnik nici 11 Prowadnik nici 12 Szarpacz 13 Napr acz 14 P ytka czo owa 15 St roboczy i skrzynka z akcesoriami 16 Pokr t o wyboru ciegu 17 Obcinacz nici 18 D wignia podnoszenia sto...

Page 118: ...oc wtyczki 5 a wtyczk kabla zasilaj cego 1 pod cz do gniazdka 3 Kiedy wszystkie powy sze wskaz wki b d spe nione w cz maszyn ustawiaj c wy cznik zasilania 2 na pozycj I jednocze nie za czy si o wietle...

Page 119: ...ewn trz sto u jak pokazano na rysunku obok UWAGA Przed rozpocz ciem wymiany ar wki wy cz maszyn i wyjmij wtyczk z kontaktu ar wka jest wmontowana pod pokryw tyln maszyny Aby wymieni ar wk post puj zgo...

Page 120: ...zamachowym do siebie Opu stopk Aby wyj ig odkr caj wkr t uchwytu ig y przeciwnie do ruchu wskaz wek zegara Wyjmij ig z uchwytu W now ig p ask stron do ty u maszyny od siebie i doci nij j maksymalnie...

Page 121: ...na rozrusznik ig a nie b dzie si porusza pracuje tylko silnik maszyna nie szyje 2 Na szpul z nici na jeden ze stojak w Poci gnij nitk ze szpulki i przeprowad przez prowadnik na pokrywie g rnej 2 3 Pr...

Page 122: ...si porusza ZAK ADANIE SZPULKI W B BENKU 1 Umie nawleczon wcze niej szpuleczk w b benku Upewnij si e nitka odwija si zgodnie ruchem wskaz wek zegara za strza k tak jak pokazano to na rysunku 2 Przeci g...

Page 123: ...ej 2 5 Podci gnij nitk do g ry nad talerzykami 2 mocno j napinaj c 6 Prze nitk od prawej strony o lewej przez oczko podci gacza nici 3 7 Nast pnie prowad nitk w d w kierunku ig y i przewlecz przez dol...

Page 124: ...yci gaj c tym samym doln 4 Wyci gnij obydwie nici na d ugo ci oko o 15 cm i przeci gnij je pod stopk do ty u maszyny Podczas szycia ciegiem prostym przy prawid owym ustawieniu napr enia nitka g rna i...

Page 125: ...w znajduj c si na maszynie Szeroko ciegu jest ustawiona tylko dla ciegu zygzakowego i mo na j wybiera p ynnie pomi dzy programami C szerszy cieg i E w szy cieg 2 Zbyt napi ta ni g rna powoduje e wi za...

Page 126: ...y wskazana je eli szyjemy materia y bardzo cienkie lub bardzo grube Regulacji tej mo na dokona delikatnie przykr caj c lub odkr caj c wkr t b benka jak pokazano na rysunku W tym celu u yj mniejszego z...

Page 127: ...lka cieg w do ty u 5 Kiedy zako czysz szycie upewnij si e ig a znajduje si w najwy szym po o eniu Aby wyj materia podnie stopk i wyci gnij materia z ty u maszyny za stopk 6 Obetnij nitk korzystaj c np...

Page 128: ...kt re maj sk onno do marszczenia si po przeszyciu cieg ten rozci ga si razem z materia em Jest on r wnie doskona y do cerowania i naprawiania rozdar wszywania ta m elastycznych Przeszyj ciegiem przy...

Page 129: ...i Aby zrobi rygielek przeszyj 4 6 szw w nast pnie obracaj c ko em zamachowym do siebie wyjmij ig z tkaniny pozostawiaj c j po prawej stronie ciegu 5 Ustaw pokr t o wyboru ciegu w pozycji prawa strona...

Page 130: ...o lewej stronie aby mo liwe by o szycie prawej strony zamka b yskawicznego Przyszyj t stron r wnie maksymalnie blisko z bk w zamka 6 Podnie stopk i rozsu suwak zanim stopka dojdzie do uchwytu zamka Wy...

Page 131: ...jmij go 1 B benek 2 Dociski pier cienia chwytacza 3 Pier cie chwytacza 4 Chwytacz 5 Kosz chwytacza 6 Wypust ustalaj cy po o enie pier cienia 7 Gniazdo koszu chwytacza 1 Usu kurz i resztki nici oraz ma...

Page 132: ...arcz 1 2 krople oleju wi ksza ilo mo e spowodowa poplamienie szytych tkanin Je eli maszyna nie pracuje p ynnie po d u szym okresie jej nieu ywania nale y j naoliwi kilkoma kroplami prze uruchomieniem...

Page 133: ...nio dobrana grubo nici Dobierz w a ciw grubo nici Ni dolna zrywa si Dolna nitka nieprawid owo za o ona w b benku Nawlecz maszyn ponownie zgodnie z instrukcj Resztki nici i meszek z tkanin blokuj ruch...

Page 134: ...g rnej Zwi ksz napr enie nitki g rnej Nieodpowiednio dobrana grubo nici lub rozmiar ig y Dobierz w a ciwy rozmiar ig y i rodzaj nici do szytej tkaniny Materia nie przesuwa si w trakcie szycia Resztki...

Page 135: ...transportera Oczy z bki transportera Maszyna niewystarczaj co naoliwiona Sprawd rozdzia dotycz cy konserwacji maszyny ar wka si nie pali Wy cznik maszyny znajduje si w pozycji 0 Ustaw wy cznik w pozy...

Page 136: ...DA TENS O DA LINHA 144 AJUSTE DA TENS O DA LINHA PARA PONTO ZIGUEZAGUE 145 SELE O DE PONTOS 145 DISCO DE COMPRIMENTO DE PONTOS 146 AJUSTE DA TENS O DA LINHA INFERIOR 146 COSTURA REVERSA 146 COME AR A...

Page 137: ...l trico ou mec nico 4 Nunca opere com qualquer abertura de ar bloqueada Mantenha as aberturas de ventila o desta m quina de costura e do pedal livre de acumula o de fiapos poeira e tecido 5 Nunca deix...

Page 138: ...de linha 11 Guia de linha 12 Alavanca de recolhimento da linha 13 Guia da linha da bobinadeira 14 Tampa de cobertura 15 Tabela de costura e caixa de acess rios 16 Seletor de pontos 17 Cortador de linh...

Page 139: ...es de fazer manuten o AVISO N o desligue puxando pelo cabo Para desligar segure pelo plugue A velocidade da costura pode variar pelo pedal Quanto mais voc pressiona lo mais r pido a m quina executada...

Page 140: ...e costura Consulte o desenho MUDAN A DO CALCADOR O calcador deve ser trocado de acordo com o projeto de costura ou ponto que for costurar CUIDADO Desligue o interruptor de alimenta o antes de trocar o...

Page 141: ...ha girando o volante em sua dire o Retire a caixa da bobina segurando a trava 2 Ao inserir a caixa da bobina coloque a ponta 3 no recesso da corrida do lan adeira CARREGAR A BOBINA 1 Puxe o volante de...

Page 142: ...Passe a linha no entalhe 3 Puxe a linha para a esquerda e ao longo do interior da mola at que ela desliza no entalhe sendo certo que n o vai escorregar para fora do entalhe 4 Puxe o fio para fora cerc...

Page 143: ...do carretel 3 Passe a linha pela guia 1 4 Passe a linha atrav s do disco de tens o 2 e puxe a para cima 5 Passe a linha pela alavanca de recolhimento da direita para a esquerda 3 6 Em seguida passe a...

Page 144: ...lta 3 A linha da agulha vai formar um la o com a linha da bobina 4 Puxe os dois fios para fora sob o calcador cerca de 15 cm A tens o da linha deve estar devidamente equilibrada Se algum ajuste for ne...

Page 145: ...olher o ponto posicione o disco no s mbolo correto A L que se refere tabela de pontos impressos na cabe a da m quina Alterar a largura do ponto poss vel apenas para pontos em ziguezague Pode ser alter...

Page 146: ...pode ser ajustada um pouco com o parafuso como mostrado no desenho Para aumentar a tens o do fio gire o parafuso no sentido hor rio Para diminuir a tens o do fio gire o parafuso no sentido anti hor ri...

Page 147: ...usando o cortador localizado atr s do calcador Deixe cerca de 15 cm de ambos os fios As linhas na placa do ponto ajudam voc a guiar o material uniformemente A dist ncia do ponto da posi o da agulha ce...

Page 148: ...ue o ponto C do p ser igual ao ponto B do tecido 3 Escolha o lado esquerdo do bot o no disco de pontos Abaixe a agulha e comece a costurar at a marca A Pare para costurar e levante a agulha at sua pos...

Page 149: ...Certifique se de que a agulha esta do lado do z per este o lado certo Escolha um dos pontos em ziguezague entre C D E O comprimento do ponto deve ser 0 5 1 e a tens o deve ser ente 1 4 1 Alinhave o a...

Page 150: ...va articulada da caixa da bobina e retire a da m quina 1 Caixa de bobina 2 Trava 3 Aro da caixa da lan adeira 4 Lan adeira 5 Base da caixa da bobina 6 Pino inferior 7 Tomada para o pino inferior Limpe...

Page 151: ...uina de costura de boa qualidade at ao ponto indicado com setas nas figuras Para a m quina em uso constante lubrifique a duas ou tr s vezes por ano No caso de a m quina n o funcionar devido perman nci...

Page 152: ...a M quina pula pontos Agulha mal inserida Reinsira a agulha Agulha torta ou sem corte Insira uma nova agulha Tamanho incorreto da agulha Escolha a agulha do tamanho correto para o tecido Agulha incorr...

Page 153: ...a e da linha A m quina executada com dificuldade Sujeira ou fiapos acumulados no gancho da lan adeira ou nos dentes impelentes Remova a placa da agulha e a caixa da bobina e limpe a corrida do gancho...

Page 154: ...Texi Joy 13 154 RU 1 2 15 3 1 2 3 4 5 6 7 8 9 Texi Joy 13 instrukcja 2017 PT indd 154 Texi Joy 13 instrukcja 2017 PT indd 154 18 09 2020 11 32 18 09 2020 11 32...

Page 155: ...Texi Joy 13 155 RU 10 11 12 13 14 15 16 17 Texi Joy 13 instrukcja 2017 PT indd 155 Texi Joy 13 instrukcja 2017 PT indd 155 18 09 2020 11 32 18 09 2020 11 32...

Page 156: ...8 159 159 159 MATIC 160 160 161 161 162 163 164 164 165 165 166 166 166 167 167 168 169 169 170 170 170 171 171 172 174 Texi Joy 13 instrukcja 2017 PT indd 156 Texi Joy 13 instrukcja 2017 PT indd 156...

Page 157: ...Texi Joy 13 157 RU 1 2 3 4 5 6 7 8 9 10 11 12 13 14 15 16 17 18 19 20 21 22 23 24 Texi Joy 13 instrukcja 2017 PT indd 157 Texi Joy 13 instrukcja 2017 PT indd 157 18 09 2020 11 32 18 09 2020 11 32...

Page 158: ...Texi Joy 13 158 RU 2 O 6 5 1 3 I Texi Joy 13 instrukcja 2017 PT indd 158 Texi Joy 13 instrukcja 2017 PT indd 158 18 09 2020 11 32 18 09 2020 11 32...

Page 159: ...Texi Joy 13 159 RU Texi Joy 13 instrukcja 2017 PT indd 159 Texi Joy 13 instrukcja 2017 PT indd 159 18 09 2020 11 32 18 09 2020 11 32...

Page 160: ...Texi Joy 13 160 RU MATIC 130 705 H 70 80 90 100 Texi Joy 13 instrukcja 2017 PT indd 160 Texi Joy 13 instrukcja 2017 PT indd 160 18 09 2020 11 32 18 09 2020 11 32...

Page 161: ...Texi Joy 13 161 RU 1 2 3 1 1 2 2 3 3 4 4 5 5 Texi Joy 13 instrukcja 2017 PT indd 161 Texi Joy 13 instrukcja 2017 PT indd 161 18 09 2020 11 32 18 09 2020 11 32...

Page 162: ...Texi Joy 13 162 RU 6 6 7 7 1 1 2 2 3 3 4 10 Texi Joy 13 instrukcja 2017 PT indd 162 Texi Joy 13 instrukcja 2017 PT indd 162 18 09 2020 11 32 18 09 2020 11 32...

Page 163: ...Texi Joy 13 163 RU 1 2 3 1 4 2 5 2 6 3 7 4 4 8 5 10 Texi Joy 13 instrukcja 2017 PT indd 163 Texi Joy 13 instrukcja 2017 PT indd 163 18 09 2020 11 32 18 09 2020 11 32...

Page 164: ...Texi Joy 13 164 RU 1 1 2 2 2 3 2 4 15 3 1 Texi Joy 13 instrukcja 2017 PT indd 164 Texi Joy 13 instrukcja 2017 PT indd 164 18 09 2020 11 32 18 09 2020 11 32...

Page 165: ...Texi Joy 13 165 RU 1 2 A L C E 2 3 Texi Joy 13 instrukcja 2017 PT indd 165 Texi Joy 13 instrukcja 2017 PT indd 165 18 09 2020 11 32 18 09 2020 11 32...

Page 166: ...Texi Joy 13 166 RU 0 4 1 4 1 2 3 0 Texi Joy 13 instrukcja 2017 PT indd 166 Texi Joy 13 instrukcja 2017 PT indd 166 18 09 2020 11 32 18 09 2020 11 32...

Page 167: ...y 13 167 RU 1 2 3 4 5 6 15 10 15 20 3 8 4 8 5 8 6 8 Odleg o w cm 1 0 1 5 2 0 1 0 1 3 1 6 1 9 Texi Joy 13 instrukcja 2017 PT indd 167 Texi Joy 13 instrukcja 2017 PT indd 167 18 09 2020 11 32 18 09 2020...

Page 168: ...Texi Joy 13 168 RU K L 3 C E F G H I 0 5 1 A B J Texi Joy 13 instrukcja 2017 PT indd 168 Texi Joy 13 instrukcja 2017 PT indd 168 18 09 2020 11 32 18 09 2020 11 32...

Page 169: ...69 RU 1 2 C B 3 4 4 6 5 6 4 6 7 A 1 5 4 4 6 1 2 3 ozsu suwak zanim stopka dojdzie do uchwytu zamka Texi Joy 13 instrukcja 2017 PT indd 169 Texi Joy 13 instrukcja 2017 PT indd 169 18 09 2020 11 32 18 0...

Page 170: ...Texi Joy 13 170 RU C E 0 5 1 1 4 2 1 2 3 4 2 3 4 1 2 3 4 5 6 7 Texi Joy 13 instrukcja 2017 PT indd 170 Texi Joy 13 instrukcja 2017 PT indd 170 18 09 2020 11 32 18 09 2020 11 32...

Page 171: ...Texi Joy 13 171 RU 1 3 4 2 3 4 4 3 6 5 2 6 1 2 3 4 1 2 3 4 1 2 Texi Joy 13 instrukcja 2017 PT indd 171 Texi Joy 13 instrukcja 2017 PT indd 171 18 09 2020 11 32 18 09 2020 11 32...

Page 172: ...Texi Joy 13 172 RU Texi Joy 13 instrukcja 2017 PT indd 172 Texi Joy 13 instrukcja 2017 PT indd 172 18 09 2020 11 32 18 09 2020 11 32...

Page 173: ...Texi Joy 13 173 RU Texi Joy 13 instrukcja 2017 PT indd 173 Texi Joy 13 instrukcja 2017 PT indd 173 18 09 2020 11 32 18 09 2020 11 32...

Page 174: ...Texi Joy 13 174 RU 0 0 I 0 I Texi Joy 13 instrukcja 2017 PT indd 174 Texi Joy 13 instrukcja 2017 PT indd 174 18 09 2020 11 32 18 09 2020 11 32...

Page 175: ...Texi Joy 13 175 RU Texi Joy 13 instrukcja 2017 PT indd 175 Texi Joy 13 instrukcja 2017 PT indd 175 18 09 2020 11 32 18 09 2020 11 32...

Page 176: ...Joy 13 588 With this declaration relates complies with following directives Electromagnetic compatibility 2014 30 EU EN 55014 1 2006 A1 A2 EN 55014 2 2015 EN 61000 3 2 2014 EN 61000 3 3 2013 Low volt...

Page 177: ...Texi Joy 13 177 Texi Joy 13 instrukcja 2017 PT indd 177 Texi Joy 13 instrukcja 2017 PT indd 177 18 09 2020 11 32 18 09 2020 11 32...

Page 178: ...Texi Joy 13 instrukcja 2017 PT indd 178 Texi Joy 13 instrukcja 2017 PT indd 178 18 09 2020 11 32 18 09 2020 11 32...

Reviews: