background image


1

The type and production number of your appliance are printed on the guarantee certificate delivered with your video recor-
der. Keep this certificate as well as the invoice.These documents are indispensable for claiming your guarantee rights.

• All repairs during the guarantee period must be carried out by an authorised technician represen-

ting our brand.

• If this condition is not met, your rights will no longer be valid.
• Never open the appliance yourself, since this may be dangerous for you or damage the equipment.

G

UARANTEE

S

ETTING UP

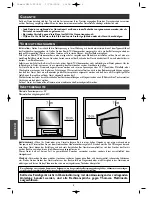
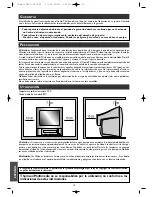
Ensure that the mains supply in your house complies with that indicated on the identification sticker located on

the back of your appliance. Install the video recorder horizontally, away from any source of heat (fireplace) or appliances crea-
ting strong magnetic or electric fields.
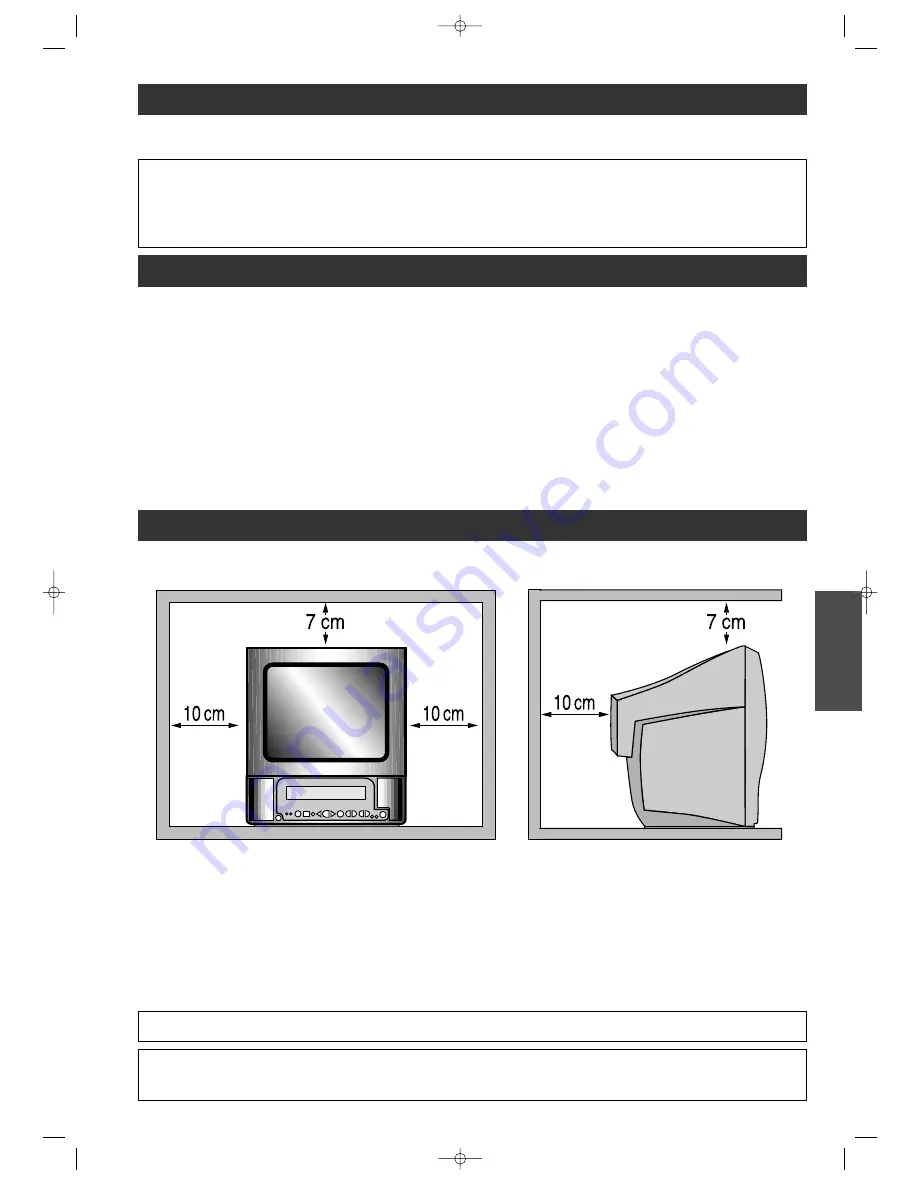
If you install your video recorder in a purpose-built unit, check that the air vents are not obstructed. Allow a clearance of 10
cm on either side and at the rear of the appliance and at least 7 cm above.
Even when the on/off switch is off, the Combi TV-video recorder is not completely cut off from the mains. To disconnect it
completely, it is necessary to remove the mains plug from the mains socket
For MAINS powered apparatus and for apparatus producing internal voltages greater than 35V (peak) a.c. or d.c., having no
protection against splashing water, the instructions for use shall state that the apparatus shall not be exposed to dripping or
splashing and that no objects filled with liquids, such as vases, shall be placed on the apparatus.
The ventilation should no be impedes by covening the ventilation openings with item, such as newspapers, table-cloths, cur-
tains, etc…
No naked flame sources, such as lighted candies, should be placed on the apparatus.

U

SE

If your appliance, or a cassette, has been stored in a very cold atmosphere for a certain amount of time (transported

during winter for example), wait approximately 2 hours before using your video recorder. The openings located on the top
and the bottom are for ventilation purposes.They should not be obstructed. In the event of lightning, the appliance should be
disconnected from the external aerial.
Under no circumstances should this appliance be put to industrial use. It is designed solely for domestic operation.

M

AINTENANCE

Use a dry, clean, soft cloth. Do not use any scouring agents, solvents or abrasive products, etc. If an object or

liquid enters inside the appliance, unplug it immediately and have it checked by an authorised technician.

P

RECAUTIONS

Maximum ambient temperature: 35°
Maximum humidity ratio: 85%

U

SE

ENGLISH

It is illegal to make total or partial copies of recordings protected by copyright laws without explicit permission of the
copyright holder.

Thomson Multimédia is not liable if the television is used other than in

accordance with this manual.

2 Combo(GB-D-IT-ES)  17/05/1999  19:58  Page 1

Summary of Contents for 14CB10C

Page 1: ...ction against splashing water the instructions for use shall state that the apparatus shall not be exposed to dripping or splashing and that no objects filled with liquids such as vases shall be placed on the apparatus The ventilation should no be impedes by covening the ventilation openings with item such as newspapers table cloths cur tains etc No naked flame sources such as lighted candies shou...

Page 2: ... BEFORE YOU START In our efforts to improve the quality of our products we reserve the right to change their features The information contained in these instructions are therefore liable to change and are not contractual ENGLISH MENU EXIT 2 1 5 8 4 7 AV 6 9 3 0000 SP L P MONIT OR PR 0 GO TO 00 00 TRK REW PLAY REC PAUSE F FW D STOP IN FO TEX T SH OW VIE W TV VPS PREF SIZE AAA 1 5 V 0 MERCUR Y GR EE...

Page 3: ... press key EXAMPLE The symbols C B displayed on the screen indicate that an option is available To select an option press key or EXIT MENU ABOUT THIS INSTRUCTION BOOKLET this document applies to several Combi TV Video recorder models Certain functions or settings may therefore not be included in the model which you have bought ABOUT THE SWITCH the position of the On Off Bswitch varies from model t...

Page 4: ...ner Berieselung oder Wasserspritzern ausgesetzt werden und daß kein mit Flüssigkeit gefülltes Gefäß wie z B eineVase auf dem Gerät abgestellt werden darf DieVentilation darf nicht durchVerschließen derVentilationsöffnungen mit Gegenständen wie z B Zeitschriften Tischservietten Vorhängen etc behindert werden Auf dem Gerät darf keine offene Flamme etwa eine brennende Kerze abgestellt werden INBETRIE...

Page 5: ...R DER INBETRIEBNAHME Im Bermühen um eine ständigeVerbesserung unserer Produkte behalten wit uns vor die technischen Daten ohne Vorankündigung zu verändern Die in der vorliegenden Anleitung enthaltenen Angaben sind daher Änderungen unterworfen und keinesfalls rechtsverbindlich DEUTSCH MENU EXIT 2 1 5 8 4 7 AV 6 9 3 0000 SP L P MONIT OR PR 0 GO TO 00 00 TRK REW PLAY REC PAUSE F FW D STOP IN FO TEX T...

Page 6: ... der Dipolantenne an die Buchse IN Ihres Kombi TV Videorecorders an Schließen Sie den Kombi TV Videorecorder über das Netzkabel an eine Steckdose an 2 1 ZU DIESER ANLEITUNG die vorliegende Bedienungsanleitung bezieht sich auf mehrere KombiTV Videorecordermodelle so daß gewisse Funktionen oder Einstellungen von Ihrem Modell abweichen bzw fehlen können ZUR TASTE EIN AUS Je nach Modell kann sich die ...

Page 7: ...superiori s 35V picco a corrente conti nua o alternata che non sono provvisti di protezioni contro spruzzi d acqua le istruzioni di funzionamento precisano che l ap parecchio non deve essere esposto ad acqua corrente o a spruzzi e che non dovranno essere posti sull apparecchio oggetti pieni di liquido come vasi ecc L aerazione non deve essere impedita otturando le bocche di aerazione con oggetti c...

Page 8: ...LEMI 32 PRIMA DI COMINCIARE Al fine di migliorare la qualitá dei nostri prodotti ci riserviamo il diritto di modificarne le caratteristiche Le infor mazioni contenute in questo manualetto d istruzioni possono quindi venir modificate e non rivestono carattere contrattuale ITALIANO MENU EXIT 2 1 5 8 4 7 AV 6 9 3 0000 SP L P MONIT OR PR 0 GO TO 00 00 TRK REW PLAY REC PAUSE F FW D STOP IN FO TEX T SH ...

Page 9: ...DI NAVIGAZIONE 1 2 Collegare alVideovision IN il cavo d antenna esistente o utilizzare l antenna bipolare Collegare il Videovision alla presa di corrente con il cavo elettrico 2 1 A PROPOSITO DI QUESTO MANUALETTO il presente documento è comune a più modelli diVideovision pertanto alcune funzioni o determinate regolazioni possono mancare sul modello da voi acquistato A PROPOSITO DELL INTERRUTTORE l...

Page 10: ...a que no presenten ninguna protección contra las salpicaduras de agua las instrucciones de funciona miento precisarán que el aparato no debe ser expuesto al chorreo o las salpicaduras y que no se le debe colocar encima ningún objeto lleno de líquido como un florero No deben haber obstáculos a la ventilación por obturación de las mangas de ventilación con objetos tales como periódicos servilletas c...

Page 11: ...BLEMAS 32 ANTES DE COMENZAR Preocupados por mejorar la calidad de nuestros productos nos reservamos el derecho de modificar sus caracteris ticas Por lo tanto las informaciones contenidas en esta nota pueden cambiar y no son contractuales ESPAÑOL MENU EXIT 2 1 5 8 4 7 AV 6 9 3 0000 SP L P MONIT OR PR 0 GO TO 00 00 TRK REW PLAY REC PAUSE F FW D STOP IN FO TEX T SH OW VIE W TV VPS PREF SIZE AAA 1 5 V...

Page 12: ...XIT MENU INSTRUCCIONES DE NAVEGACIÓN 1 2 Conecte el cable de la antena exterior o de la antena de dipolo a la toma IN del CombiTV vídeo Conecte el Combi TV vídeo a un enchufe de la red mediante el cable de alimentación 2 1 220 240V ACERCA DE LAS INSTRUCCIONES este documento es común a varios modelos de Combi TV Vídeo Por ello ciertas funciones o ajustes pueden no estar disponibles en el modelo adq...

Page 13: ...he channels which can be received in your region and is storing them You ll have to wait a fairly long time until a message informs you that channel storage is completed Press OK to sort the channels Un messaggio indicherà che ilVideovision sta cercando e memorizzando i canali che potete ricevere nella vostra regione Alla fine dell operazione un messaggio segnalerà la fine della memorizzazione dei...

Page 14: ...alls gehen Sie zu Schritt 5 über Si desea continuar ordenando los canales de TV repita las etapas 1 a 3 de lo contrario pase a la etapa 5 Call up the SUMMARY menu with key MENU With key V W select the line Installation and press OK Select the line Clock set with key V W and press OK Visualizzate il menu SOMMARIO con il tasto MENU Posizionatevi sulla linea Installazione con V W e pre mete su OK Pos...

Page 15: ...rovato appaiono le immagini SE LA QUALITÀ DELL IMMAGINE È SCADENTE provate la Sintonia fine W C B poi W SENDERSUCHE STARTEN Die Sendersuche mit C B starten Wird ein Sender gefunden erscheinen seine Bilder WENN DIE BILDQUALITÄT SCHLECHT IST die Feineinstellung benut zen W C B dann W Feinabstimmung COMENZAR LA SINTONIZACIÓN Pulse C B para comenzar la instalación Cuando se encuentra un canal aparecen...

Page 16: ...ta los pasos 4 9 Press OK button to store Premete il tasto OK per memorizzare questo numero Zum Speichern der Sendernummer OK drücken Pulse la tecla OK para guardar Press EXIT button to remove menu Premete il tasto EXIT per uscire dal menu ZumVerlassen des Menüs dieTaste EXIT drücken Pulse la tecla EXIT para salir del menú 6 7 8 9 10 SHOWVIEW is a registered trademark of Gemstar Development Corpor...

Page 17: ...speicherten TV Programme sehen drücken Sie die Zifferntasten 0 9 oder die Tasten PR Ver los canales deTV sintonizados en el vídeo pulse las teclas numéricas 0 9 o las teclas PR To select a programme above 9 E g press 0 then 1 and 7 for Pr 17 Per selezionare un programma superiore a 9 Esempio premete il tasto 0 poi 1 e 7 per il programma 17 Wahl eines zweistelligen Programmes über 9 Beispiel drücke...

Page 18: ...abe einerVideokassette Taste PLAY drücken Ver una cinta de vídeo Pulse la tecla PLAY To watch aTV channel or a program me as it is being recorded press the MONITOR key On models equipped with 1 tuner Guardare un canale o una registra zione in corso premete il tasto MONITOR Con modello munito di 1 tuner Betrachten von Bildern eines Programmes bzw Bildern die gerade aufgezeichnet werden Drücken Sie ...

Page 19: ...INFO Ver el modo en que se encuentra el Combi TV vídeo Pulse la tecla INFO MENU EXIT PR GOTO 0000 TRK INFO TEXT SHOWVIEW TV VPS PREF Playing a video tape fast forward Press the F FWD button while in STOP mode Per far avanzare il nastro preme te il tasto F FWD videoregistratore su STOP SchnellerVorlauf drücken Sie die Taste F FWD Videorecorder auf STOP Avance rápido de una cinta de vídeo Pulse la t...

Page 20: ...DE UN APARATO ADICIONÁL CONECTADO AUDIO VIDÉO 1 2 Press the AV key on the remote control to select the unit connected to socket AV1 or AV2 Premete il tasto AV del telecomando per selezio nare un apparecchio collegato alla presa AV1 o AV2 Drücken Sie die Taste AV der Fernbedienung um ein an den Anschluß AV1 bzw AV2 angeschlos senes Gerät zu wählen Pulse la teclaAV del mando a distancia para selec c...

Page 21: ... PLAY Arranque la grabación con la tecla PLAY Press EXIT to leave Premere EXIT per uscire Verlassen Sie das Menü mit EXIT Pulse EXIT para salir AV 0 REW PLAY REC PAUSE F FWD STOP 2 1 5 8 4 7 AV 6 9 3 0000 SP LP MONITOR 0 PLAY AV 0 REW PLAY REC PAUSE F FWD STOP MENU EXIT GOTO 0000 INFO TEXT SHOWVIEW TV VPS PREF Press the REC button twice Premere 2 volte il tasto REC Drücken Sie folgendeTaste REC zw...

Page 22: ...S PREF 2 1 5 8 4 7 AV 6 9 3 0000 SP LP MONITOR PR 0 REW PLAY F FWD You can programme a recording using the ShowView codes in your TV listings magazine or using the manual programming proce dure if you do not know the codes PROGRAMMING A RECORDING WITH SHOW VIEW CODES Sie können eine Aufnahme mit den ShowView Codes Ihres TV Magazins oder falls Sie diese nicht kennen manuell programmieren PROGRAMMIE...

Page 23: ...y seleccione la línea GRABACIÓN PROGRAM por medio de Para confirmar pulse OK MENU EXIT 2 1 3 MONITOR PR GOTO 0000 TRK INFO TEXT SHOWVIEW TV VPS PREF MENU EXIT 2 1 3 MONITOR PR GOTO 0000 TRK INFO TEXT SHOWVIEW TV VPS PREF Press digit buttons 0 9 to timer record TV programmes or press AV button to timer record AV programme O and 1 for PRI Premete sui tasti numerici da 0 a 9 per programmare la regist...

Page 24: ...misor debe transmitir señales VPS MENU EXIT 2 1 3 MONITOR PR GOTO 0000 TRK INFO TEXT SHOWVIEW TV VPS PREF Press OK button to select between SP or LP recording NOTE Long Play recording may enable you to record up to twice the length of the tape Premete il tasto OK per scegliere tra una registrazione in durata normale SP o in lunga durata LP NOTA la registrazione in lunga durata vi permette di raddo...

Page 25: ...ni tivamente la línea del menú de grabación seleccionada programada 2 1 5 8 4 7 AV 6 9 3 0000 SP LP MONITOR PR 0 GOTO 0000 REW PLAY F FWD Press EXIT button to remove menu Premete il tasto EXIT per uscire dal menu ZumVerlassen des Menüs die Taste EXIT drücken Pulse la tecla EXIT para salir del menú MENU EXIT 2 1 3 MONITOR PR GOTO 0000 TRK INFO TEXT SHOWVIEW TV VPS PREF 2 3 4 25 With the MENU key ca...

Page 26: ...one in MESECAM selezionate la casella þ Mesecam tasto OK MESECAM Wenn Sie eine MESECAM Aufnahme erstellen oder wiedergeben möchten müssen Sie das Kästchen þ mit der OK Taste ankreuzen MESECAM Si desea grabar o reproducir una emi sión en Mesecam marque la casilla þ MESECAM tecla OK PICTURE Using the OK V W buttons select the function to be adjusted brightness colour contrast sharpness Adjust using ...

Page 27: ...to TEXT per visualizzare il sommario pagina 100 CHIAMARE UNA PAGINA Digitate le 3 cifre del numero della pagina che desiderate leggere 150 170 ad esempio Un momento dopo la pagina appare Utilizzate i tasti C B per consultare la pagina seguente o la precedente PAGINE GIREVOLI Interrompere lo scorrimento delle pagine girevoli con il tasto OK Una nuova pressione sul tasto OK avvia nuovamente lo scorr...

Page 28: ...u vi consente di essere svegliati dal vos tro Videovision come con una sveglia normale Visualizzate il MENU SVEGLIA premendo il tasto Per mezzo dei tasti W C B 1 selezionate SVEGLIA DISATTIVA sveglia disattivata QUOTIDIANO per essere svegliato ogni giorno UNA VOLTA per una volta sola 2 Scegliete l ora della sveglia e il numero di canale W C B 0 9 3 Premete EXIT INTERRUZIONE AUTOMATICA per programm...

Page 29: ...n Sie den nächsten oder vorherigen Index anwählen Der Zähler zeigt die abgelaufene Zeit in Stunden Minuten und Sekunden an Status Menü Kopiermodus Das Zählen beginnt mit dem Laden der Cassette oder mit dem Setzen des Zählers auf 00h00m00s Zum Zurücksetzen des Zählers auf Null 0000 die Taste 0000 drücken CONTROL DE CINTA CONTADORES Pulse la tecla INFO Los índices permiten identificar los pasajes de...

Page 30: ...Il vostro videoregistratore riconosce questi segnali ARRESTO REGISTRAZIONE CON VPS Durante la registra zione di una trasmissione VPS premete sul tasto VPS 4 secondi La registrazione si arresta quando la trasmissio ne è effettivamente terminata REGISTRAZIONE AVVIATA CON VPS Mettete il videoregis tratore su pause poi premete il tasto VPS 4 secondi Non appena la trasmissione VPS comincia il videoregi...

Page 31: ...halter auf Ein steht Die Fernbedienung funktioniert mit 1 Richten Sie die Fernbedienung auf den KombiTV videorecorder Der Infrarotstrahl darf durch kein Hindernis Unterbrechungen oder überhaupt nicht zwischen der Fernbedienung und dem KombiTV videorecorder unterbrochen werden 2 Wechseln Sie die Batterien der Fernbedienung da diese vielleicht verbraucht sind Bild mit Schnee SchlechteTonqualität 1 Ü...

Page 32: ...tá rota no protegida protegida SINTOMI INTERVENTI CORRETTIVI Il videoregistratore non si accende 1 Verificate che la presa del cavo sia inserita in una presa elettrica a corrente alternata 2 Verificate che l interruttore ON OFF sia in posizione ON Il telecomando funziona in modo intermittente 1 Orientate il telecomando verso il videovision Niente deve interrompere il fascio d infrarossi tra o non ...

Page 33: ...ell 75 al massimo Testine rotanti video 2 Tuner Tipo PLL FST Bande di ricezione I III IV Hertziane antenna Inter banda via cavo Iper banda via cavo Gamme di frequenza Banda I 48 25 a 116 75 MHz Banda III 119 25 a 399 25 MHz Banda IV 407 25 a 863 25 MHz Sistema colore e norma PAL SECAM B G LL MESECAM Numero di canali memorizzabili 99 Dimensioni dello schermo 14 36 cm 14CB10 C 14 36 cm 14CB15 CT 14 ...

Reviews: