THANK YOU FOR PURCHASING YOUR TIMEX
®
WATCH.
Register your product at
www.timex.com
W-162
301-095017
NA
Enregistrez votre produit à
www.timex.com
W-162
301-095017
NA
Registre su producto en
www.timex.com
W-162
301-095017
NA
EXTENDED WARRANTY
Available in U.S. only.
Extend your warranty for an additional 4 years from date of purchase for
$5. You can pay with AMEX, Discover, Visa or MasterCard by calling 1 800-448-4639 during nor-
mal business hours. Payment must be made within 30 days of purchase. Name, address, tele-
phone number, purchase date, and 5-digit model number required. You can also mail a check for
$5 to: Timex Extended Warranty, P.O. Box 1676, Dept. EF, Little Rock, AR 72203.
Please read instructions carefully to understand how to operate your Timex
®
watch.
Your model
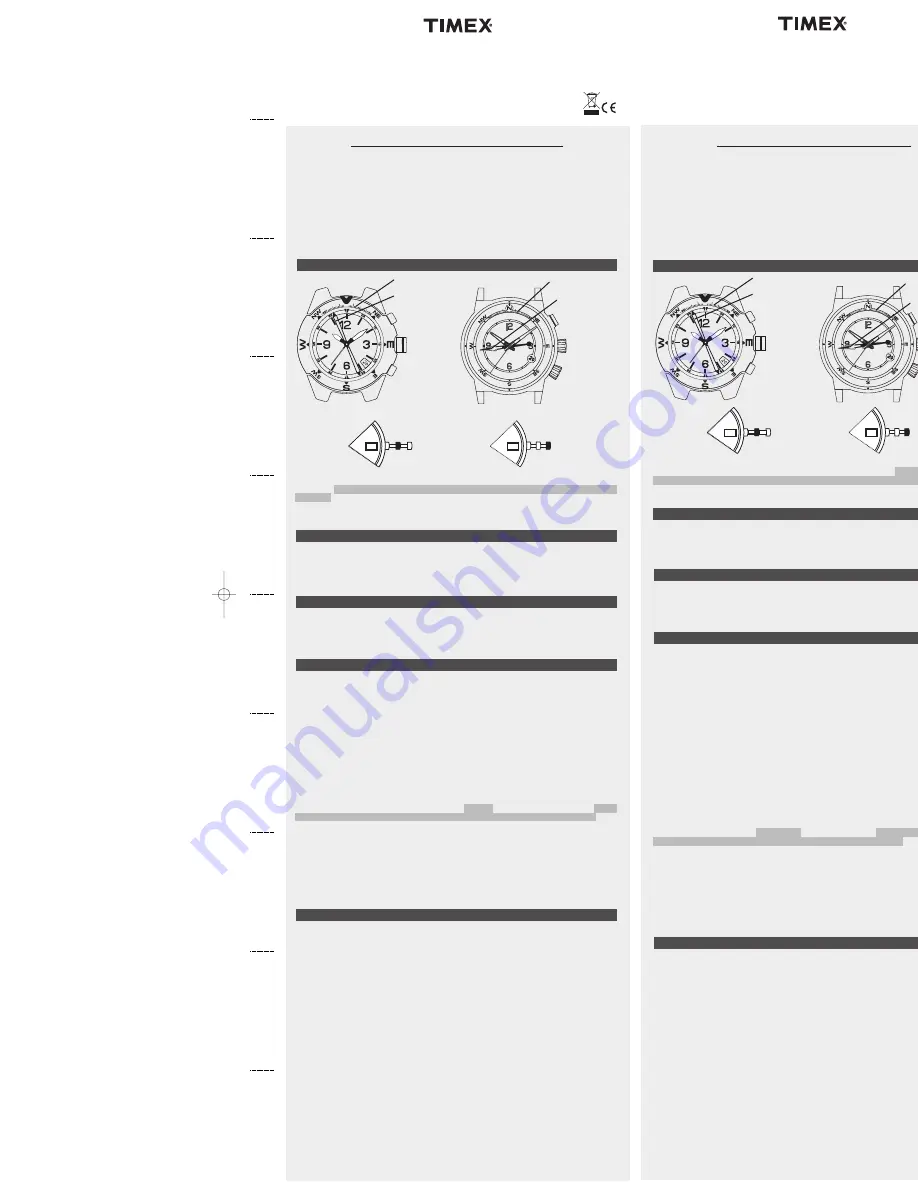
may not have all of the features described in this booklet. Please refer to below images
to determine your model.
MERCI D’AVOIR ACHETÉ CETTE MONTRE TIMEX
®
.
GARANTIE ÉTENDUE
Proposée aux États-Unis seulement.
La garantie peut être prolongée pour une période
additionnelle de 4 ans à compter de la date d’achat pour la somme de 5 $. Vous pouvez
effectuer ce paiement avec AMEX, Discover, Visa ou MasterCard en composant le 1-800-448-
4639 durant les heures normales d’ouverture. Le paiement doit être effectué dans les 30 jours
qui suivent l’achat. Indiquer les nom, adresse, numéro de téléphone, date d’achat et numéro
de modèle à 5 chiffres. Il est également possible d’envoyer un chèque de 5 $ US par courrier
à : Timex Extended Warranty, P.O. Box 1676, Dept. EF, Little Rock, AR 72203.
Lire les instructions attentivement pour bien comprendre le fonctionnement de cette montre
Timex®.
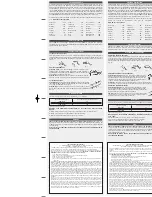
Il est possible que ce modèle ne présente pas toutes les fonctions décrites dans
le dépliant. Veuillez vous référer au schéma ci-dessous afin de déterminer votre modèle.
LE AGRADECEMOS LA COMPRA DE SU RELOJ TIMEX
®
.
GARANTÍA EXTENDIDA
Disponible solamente en EUA.
Extienda su garantía por 4 años más a partir de la fecha de
compra por $5. Puede pagar con AMEX, Discover, Visa o MasterCard llamando al 1 800-448-
4639 en horas normales de oficina. El pago deberá efectuarse dentro de los 30 días siguientes
a la fecha de compra. Indique el nombre, dirección, número de teléfono, fecha de compra y
número de modelo (5 dígitos). También puede enviar un cheque de $5 por correo a: Timex
Extended Warranty, P.O. Box 1676, Dept. EF, Little Rock, AR 72203.
Por favor lea atentamente las instrucciones para saber cómo funciona su reloj Timex®.
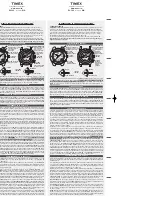
Su
reloj tal vez no posea todas las funciones descritas en este folleto. En los gráficos que
siguen encontrará su modelo.
SET DATE AND TIME
Pull CENTER CROWN to MIDDLE position and turn until correct date appears. After setting date,
pull CENTER CROWN all the way out and turn to correct time. Ensure correct AM/PM setting by
verifying that date changes at midnight, not noon. Push CENTER CROWN in when done. Adjust
date after months with fewer than 31 days.
COMPASS OPERATION
Normally, compass is off and compass hand points to 12 o’clock. If compass hand does not point
to 12 o’clock when compass is off, compass hand must be adjusted; see COMPASS HAND
ADJUSTMENT.
Compass must be calibrated prior to use and calibration should be performed in the area of
intended use; see COMPASS CALIBRATION. If compass has not been calibrated since battery
replacement, attempting to activate compass causes watch to rotate compass hand once and
play melody to remind you to calibrate.
While holding watch level, press either PUSH BUTTON or LOWER CROWN to activate compass.
Compass hand moves to point north. If watch is turned, compass hand will continue to move,
always pointing north. After 20 seconds, compass will automatically turn off and hand will return
to its home position, pointing to 12 o’clock. This conserves battery life. Press either PUSH BUT-
TON or LOWER CROWN at any time to keep compass on for another 20 seconds. Once compass
is activated, there are two typical ways to use it.
Which way am I headed?
Hold watch so that 12 o’clock is in direction of your travel. Turn com-
pass ring or LOWER CROWN until compass hand is pointing to north on ring. Your heading is
direction on ring at 12 o’clock.
Which way should I go?
If you know the direction you want to go (e.g., NE), turn compass ring
or LOWER CROWN until that direction appears at 12 o’clock. Then, turn your body until compass
hand points to north on compass ring. Go in the direction of 12 o’clock.
NOTE:
While compass is on, INDIGLO® night-light may flicker slightly when on. This is normal,
as INDIGLO® night-light must be turned off briefly during compass readings to maintain accuracy.
Also,sweep second hand will move in two second increments while in compass mode.
COMPASS HAND ADJUSTMENT
Pull CENTER CROWN all the way out. Compass hand should point to 12 o’clock. If it does not,
press either PUSH BUTTON or LOWER CROWN to move compass hand until it points to 12 o’clock.
Hold PUSH BUTTON or LOWER CROWN to move hand fast. Push CENTER CROWN in when done
and recalibrate compass.
FIJAR FECHA Y HORA
Jale la CORONA CENTRAL hasta el punto MEDIO y gírela hasta cuando aparezca la fecha correc-
ta. Después de fijar la fecha, jale la CORONA CENTRAL totalmente hacia afuera y gírela hasta la
hora correcta. Asegúrese que la hora corresponda con el momento correcto AM/PM (mañana/-
tarde) verificando que la fecha cambie a la medianoche y no al mediodía. Pulse la CORONA CEN-
TRAL hacia adentro cuando termine. Ajuste la fecha después de meses con menos de 31 días.
FUNCIONAMIENTO DE LA BRÚJULA
Normalmente, la brújula está inactiva y la aguja señala las 12 en punto. Si la aguja no señala las
12 en punto cuando la brújula está inactiva, la aguja debe ser ajustada; ver AJUSTE DE LA AGUJA
DE LA BRÚJULA.
La brújula debe ser calibrada antes del uso y la calibración debe realizarse en el área donde va
a ser usada; ver CALIBRACIÓN DE LA BRÚJULA. Si no se ha calibrado la brújula desde cuando se
reemplazó la pila, intentar activarla ocasiona que el reloj rote la aguja de la brújula una vez y
toque una melodía para recordarle hacer la calibración.
Mientras mantiene el reloj a nivel, oprima cualquier BOTÓN DE ACTIVACIÓN o la CORONA INFE-
RIOR para activar la brújula. La aguja se mueve y apunta hacia el norte. Si se gira el reloj, la aguja
de la brújula continuará moviéndose, apuntando siempre al norte. Después de 20 segundos, la
brújula se apagará automáticamente y la aguja volverá a su posición pre-configurada señalando
las 12 en punto. Esto alarga la duración de la pila. Oprima cualquier BOTÓN DE ACTIVACIÓN o la
CORONA INFERIOR en cualquier momento para mantener la brújula encendida durante otros 20
segundos. Estando la brújula activada, hay dos maneras típicas de proceder para usarla.
¿Hacia dónde voy?
Sostenga el reloj de modo que las 12 en punto estén en la dirección de su
viaje. Mueva el anillo giratorio o la CORONA INFERIOR hasta que la aguja de la brújula apunte al
norte en el anillo. Su rumbo se indica en el anillo a las 12 en punto.
¿Cuál ruta debo seguir?
Si sabe la dirección a donde desea ir (p.e.,NE), mueva el anillo girato-
rio o la CORONA INFERIOR hasta que la dirección aparezca a las 12 en punto. Enseguida, gire su
cuerpo hasta que la aguja de la brújula apunte al norte en el anillo giratorio. Vaya en la dirección
de las 12 en punto.
NOTA:
Mientras la brújula esté encendida, la luz nocturna INDIGLO® puede parpadear un poco
cuando se activa. Esto es normal, puesto que la luz nocturna INDIGLO® debe apagarse breve-
mente mientras se lee la brújula para mantener la exactitud. También, la manecilla de segundos
se moverá en incrementos de dos segundos cuando está funcionando la brújula.
AJUSTE DE LA AGUJA DE LA BRÚJULA
Jale la CORONA CENTRAL totalmente hacia afuera. La aguja de la brújula debe señalar las 12 en
punto. Si esto no ocurre, oprima cualquier BOTÓN DE ACTIVACIÓN o la CORONA INFERIOR para
mover la aguja de la brújula hasta las 12 en punto. Sostenga el BOTÓN DE ACTIVACIÓN o la CORO-
NA INFERIOR para mover la aguja con rapidez. Pulse la CORONA CENTRAL hacia adentro cuando
termine y vuelva a calibrar la brújula.
RÉGLAGE DE LA DATE ET DE L’HEURE
Tirer la COURONNE CENTRALE en position CENTRE et tourner jusqu’à afficher la date courante.
Après avoir réglé la date, tirer la COURONNE CENTRALE complètement et tourner jusqu’à afficher
l’heure exacte. S’assurer que le réglage matin/soir (AM/PM) est correct en vérifiant que la date
change à minuit et non à midi. Enfoncer la COURONNE CENTRALE pour valider. Régler la date
après les mois comptant moins de 31 jours.
RÉGLAGE DE L’AIGUILLE DE LA BOUSSOLE
Tirer la COURONNE CENTRALE complètement. L’aiguille de la boussole devrait indiquer
12 heures. Sinon, appuyer sur le BOUTON POUSSOIR ou sur la COURONNE INFÉRIEURE pour faire
avancer l’aiguille de la boussole jusqu’à ce qu'elle indique 12 heures. Tenir le BOUTON POUSSOIR
ou la COURONNE INFÉRIEURE enfoncé pour la faire avancer rapidement. Enfoncer la COURONNE
CENTRALE pour valider et refaire l’étalonnage de la boussole.
FONCTIONNEMENT DE LA BOUSSOLE
La boussole est normalement inactive et son aiguille indique 12 heures. L’aiguille doit être
ajustée si elle n’indique pas 12 heures quand la boussole est inactive ; voir RÉGLAGE DE
L’AIGUILLE DE LA BOUSSOLE.
La boussole doit être étalonnée avant usage, à l’endroit où elle sera utilisée ; voir ÉTALONNAGE
DE LA BOUSSOLE. Si la boussole est activée sans avoir été étalonnée après remplacement de la
pile, l’aiguille effectue une rotation complète et la montre fait entendre une mélodie pour vous
rappeler de procéder à l’étalonnage.
Tout en maintenant la montre à l’horizontale, appuyer sur le BOUTON POUSSOIR ou la
COURONNE INFÉRIEURE pour activer la boussole. L'aiguille se déplace et pointe vers le nord. Si
on tourne la montre, l'aiguille de la boussole se déplace, pointant toujours vers le nord. La bous-
sole est automatiquement désactivée au bout de 20 secondes et l’aiguille retourne à sa position
initiale, indiquant 12 heures. Ceci permet de prolonger la durée de vie de la pile. À tout moment,
appuyer sur le BOUTON POUSSOIR ou la COURONNE INFÉRIEURE pour garder la boussole activée
pendant 20 secondes de plus. Une fois la boussole activée, on peut l'utiliser de deux façons.
Dans quelle direction vais-je ?
Tenez la montre de sorte que 12 heures pointent dans la direction de
déplacement. Faites tourner la bague ou la COURONNE INFÉRIEURE jusqu'à ce que l’aiguille s'aligne sur le
point nord indiqué sur la bague.Vous vous dirigez dans la direction correspondant à 12 heures sur la bague.
Dans quelle direction dois-je aller ?
Si vous savez dans quelle direction vous souhaitez aller
(NE, par ex.), faites tourner la bague ou la COURONNE INFÉRIEURE jusqu'à ce que celle-ci
corresponde à 12 heures. Puis tournez sur vous-même jusqu'à ce que l'aiguille s'aligne sur le
point nord indiqué sur la bague. Suivez la direction correspondant à 12 heures.
REMARQUE :
Lorsque la boussole est activée, il se peut que la lumière de la veilleuse INDIGLO®
clignote légèrement quand elle est allumée. Ceci est normal, car la veilleuse INDIGLO® doit
s’éteindre brièvement pour permettre à la boussole de produire des mesures précises. Lorsqu’on
se trouve dans le mode boussole, la trotteuse centrale avance par intervalles de deux secondes.
ÉTALONNAGE DE LA BOUSSOLE
Une boussole utilise le champ magnétique terrestre ; par conséquent, il importe d’éviter d’être
à proximité de grands objets métalliques (automobiles, ponts, etc.) ou autres objets produisant
un rayonnement électromagnétique, tels que téléviseurs ou ordinateurs, susceptible d’affecter le
champ magnétique autour de la montre. Si la boussole est étalonnée à proximité de tels objets,
elle ne fonctionnera correctement qu’à cet endroit. Si la boussole est étalonnée loin de tels
objets, elle ne fonctionnera pas correctement près d’eux. Pour de meilleurs résultats, étalonner
à l’endroit où elle sera utilisée.
Lors de l’étalonnage et des mesures ultérieures, il importe, comme avec toutes les boussoles, de main-
tenir la montre dans un plan horizontal. Procéder à l’étalonnage ou à des mesures alors que la montre
n’est pas en position horizontale peut causer des erreurs importantes. Veiller également à éviter les
endroits susceptibles de présenter des concentrations de fer de roche ou industriel supérieures à la
normale, dont l’effet pourrait produire des mesures inexactes. En présence de toute mesure suspecte,
effectuer un nouvel étalonnage.
Veiller à ne pas ranger la montre à proximité d’une quelconque source magnétique (ordinateurs,
appareils électriques, téléviseurs, etc.) car cela pourrait l’aimanter et fausser les mesures ultérieures.
Pour étalonner la boussole, tirer la COURONNE CENTRALE en position CENTRE. Appuyer sur le
BOUTON POUSSOIR ou la COURONNE INFÉRIEURE pour commencer. L’aiguille de la boussole
effectue deux tours complets pour vous rappeler de faire pivoter la montre. Tenir la montre en
position horizontale ou la poser sur une surface plane (si le bracelet gêne, la poser sur une tasse
tournée à l’envers). La montre peut être posée à l’envers à condition d’en protéger la face. Tenir
la montre à plat et effectuer
LENTEMENT
deux tours complets,
en comptant 15 secondes
environ par tour. Ceci est essentiel pour obtenir un étalonnage correct.
Une fois les rotations
terminées, appuyer sur le BOUTON POUSSOIR ou la COURONNE INFÉRIEURE, tout en maintenant
la montre à l’horizontale. L’aiguille oscille pour confirmer que l’étalonnage est terminé et indique
ensuite l’angle de déclinaison courant (voir ANGLE DE DÉCLINAISON pour plus d’informations). Si
vous ne désirez pas régler l’angle de déclinaison, appuyez sur la COURONNE CENTRALE. Pour que
la boussole tienne compte automatiquement de l’angle de déclinaison, faire tourner la bague ou
la COURONNE INFÉRIEURE jusqu’à ce que le nord soit à 12 heures. Appuyer sur le BOUTON POUS-
SOIR ou la COURONNE INFÉRIEURE pour déplacer l’aiguille vers l’est (+) ou l’ouest (-) afin d’indi-
quer l’angle de déclinaison de l’endroit où vous êtes (voir tableau ci-dessous) à l’aide de l’échelle
de déclinaison. Tenir le BOUTON POUSSOIR ou la COURONNE INFÉRIEURE enfoncé pour faire
avancer l’aiguille rapidement. Enfoncer la COURONNE CENTRALE pour valider.
CALIBRACIÓN DE LA BRÚJULA
Dado que la brújula usa el campo magnético de la Tierra, usted debe tener cuidado de objetos
metálicos grandes tales como vehículos o puentes, u objetos que emitan radiación electromag-
nética como televisores y ordenadoras, porque podrían afectar el campo magnético alrededor
del reloj. Si la brújula es calibrada cerca de tales objetos, sólo funcionará apropiadamente en ese
mismo lugar. Si la brújula es calibrada lejos de tales objetos, no funcionará apropiadamente en
la cercanía de ellos. Para óptimos resultados, haga la calibración en el área donde va a ser usada.
Al calibrar y tomar rumbos es importante, como con todas las brújulas, mantener la brújula a
nivel. Calibrar y tomar un rumbo cuando el reloj no está a nivel pudiera resultar en errores
grandes. Hay que evitar también áreas que pudieran exhibir concentraciones de hierro duro y
suave más altas de lo normal, pues pueden ocasionar rumbos incorrectos. Cuando un rumbo no
infunda confianza, vuelva a calibrar.
No guarde el reloj cerca de alguna fuente de magnetismo como ordenadoras, electrodomésticos
o televisores, pues el reloj puede recoger la carga magnética y conducir a rumbos inexactos.
Para calibrar la brújula, jale la CORONA CENTRAL hasta el punto MEDIO. Pulse cualquier BOTÓN
DE ACTIVACIÓN o la CORONA INFERIOR para comenzar. La aguja de la brújula gira dos vueltas
para recordarle a usted rotar el reloj. Mantenga el reloj a nivel o colóquelo sobre una superficie
nivelada (si la banda interfiere, colóquelo sobre un vaso invertido). El reloj pudiera estar bocaba-
jo, pero así se protege el cristal. Todavía a nivel, dé dos rotaciones al reloj
LENTAMENTE
,
toman-
do aproximadamente 15 segundos por rotación. Esto es muy importante para lograr una
calibración correcta.
Cuando haya acabado, oprima cualquier BOTÓN DE ACTIVACIÓN o la
CORONA INFERIOR, manteniendo el reloj a nivel. La aguja de la brújula se mueve hacia atrás y
hacia adelante para señalar el fin de la calibración y enseguida se mueve hacia el ángulo de
declinación en uso (ver ÁNGULO DE DECLINACIÓN para más información). Si no desea ajustar el
ángulo de declinación, pulse la CORONA CENTRAL hacia adentro. De otro modo, para hacer que
el reloj compense automáticamente el ángulo de declinación, mueva el anillo giratorio o gire la
CORONA INFERIOR de la brújula hasta que el norte esté en las 12 en punto. Oprima cualquier
BOTÓN DE ACTIVACIÓN o la CORONA INFERIOR para mover la aguja de la brújula hacia el este (+)
u oeste (-) y apuntar hacia el ángulo de declinación de su posición (ver la tabla de abajo) usando
la escala de declinación. Sostenga el BOTÓN DE ACTIVACIÓN o la CORONA INFERIOR para mover
la aguja con rapidez. Pulse la CORONA CENTRAL hacia adentro cuando termine.
MIDDLE
SET DATE
OUT
SET TIME
I
I
14
I
I
14
COMPASS HAND
(north end is red
pointed/longer)
PUSH BUTTON
(compass on)
CENTER
CROWN
PUSH BUTTON
(compass on)
DECLINATION SCALE
CENTER
CROWN
LOWER
CROWN
PUSH BUTTON
(compass on)
PUSH BUTTON
(compass on)
CENTER
CROWN
COMPASS HAND
(north end is red
pointed/longer)
DECLINATION SCALE
GENERAL OPERATION
Watch is shipped with guard around CENTER CROWN. Remove guard and push CENTER CROWN
in to start.
Compass must be calibrated before using to ensure accuracy and avoid improper
headings.
Go to
www.timex.com/expedition
for help. Watch incorporates magnetic sensor
technology of Precision Navigation, Inc., Mountain View, CA.
COMPASS CALIBRATION
Since a compass uses the Earth’s magnetic field, you must be aware of large metallic objects,
such as vehicles or bridges, or objects that give off electromagnetic radiation, such as TVs or PCs,
which could affect the magnetic field around the watch. If compass is calibrated near such
objects, it will only work properly in that same location. If compass is calibrated away from such
objects, it will not work properly near them. For best results, calibrate in area of intended use.
In calibrating and taking headings, it is important, as with all compasses, to keep compass level.
Calibrating or taking a heading when watch is not level can result in large errors. Also avoid areas
that may exhibit higher than normal concentrations of hard and soft iron, as they may cause
inaccurate headings. Whenever a heading is suspect, recalibrate.
Do not store watch near any source of magnetism, such as computers, appliances, or TVs, as
watch can take on a magnetic charge, yielding inaccurate headings.
To calibrate compass, pull CENTER CROWN to MIDDLE position. Press either PUSH BUTTON or
LOWER CROWN to begin. Compass hand rotates two revolutions to remind you to rotate watch.
Keep watch level or place on level surface (if band interferes, place on inverted cup). Watch may
be face down, but protect watch face. While level,
SLOWLY
rotate watch two revolutions,
taking
at least 15 seconds per revolution. This is critical in achieving proper calibration
. When
done, press either PUSH BUTTON or LOWER CROWN, keeping watch level. Compass hand moves
back and forth to acknowledge end of calibration and then moves to current declination angle
setting (see DECLINATION ANGLE for more information). If you do not wish to set declination
angle, push CENTER CROWN in. Otherwise, to have watch automatically compensate for decli-
nation angle, turn compass ring or turn LOWER CROWN until north is at 12 o’clock. Press either
PUSH BUTTON or LOWER CROWN to move compass hand east (+) or west (–) to point to your
location’s declination angle (see table below) using declination scale. Hold PUSH BUTTON or
LOWER CROWN to move hand fast. Push CENTER CROWN in when done.
CENTRE
RÉGLAGE DE LA DATE
EXTRÉMITÉ
RÉGLAGE DE L’HEURE
I
I
14
I
I
14
AIGUILLE DE LA BOUSSOLE
(l’extrémité nord est
rouge/pointue/
plus longue)
BOUTON POUSSOIR
(boussole activée)
COURONNE
CENTRALE
BOUTON POUSSOIR
(boussole activée)
ÉCHELLE DE DÉCLINAISON
COURONNE
CENTRALE
COURONNE
INFÉRIEURE
BOUTON POUSSOIR
(boussole activée)
BOUTON POUS-
SOIR (boussole
activée)
COURONNE
CENTRALE
AIGUILLE DE LA BOUS-
SOLE (l’extrémité
nord est rouge/
pointue/ plus longue)
ÉCHELLE DE DÉCLINAISON
MEDIO
FIJAR LA FECHA
AFUERA
FIJAR LA HORA
I
I
14
I
I
14
AGUJA DE LA BRÚJULA
(el extremo norte es rojo/
puntiagudo/más largo)
BOTÓN DE
ACTIVACIÓN
(brújula activada)
CORONA
CENTRAL
BOTÓN DE
ACTIVACIÓN
(brújula activada)
ESCALA DE DECLINACIÓN
CORONA
CENTRAL
CORONA
INFERIOR
BOTÓN DE
ACTIVACIÓN
(brújula
activada)
BOTÓN DE
ACTIVACIÓN
(brújula activada)
CORONA
CENTRAL
AGUJA DE LA BRÚJULA
(el extremo norte es
rojo/puntiagudo/más
largo)
ESCALA DE DECLINACIÓN
FUNCIONAMIENTO GENERAL
El reloj se entrega con un protector alrededor de la CORONA CENTRAL. Quite el protector y pulse
la CORONA CENTRAL hacia adentro para comenzar.
La brújula debe ser calibrada antes de su
uso para asegurar la exactitud y evitar rumbos incorrectos.
Vaya a
www.timex.com/expe-
dition
por ayuda. El reloj incorpora tecnología magnética sensorial de Precision Navigation, Inc.,
Mountain View, CA.
UTILISATION GÉNÉRALE
La COURONNE CENTRALE de la montre est protégée pour l’expédition. Retirer le capot de
protection et enfoncer la COURONNE CENTRALE pour mettre en marche.
La boussole doit être
étalonnée avant utilisation pour garantir sa précision et éviter les erreurs d’orientation.
Consulter
www.timex.com/expedition
pour assistance. La montre utilise un système de
capteurs magnétiques fabriqué par Precision Navigation, Inc., Mountain View, Californie.
T0804-19_W162_NA_V2.qxd 5/5/08 12:56 PM Page 1


