background image

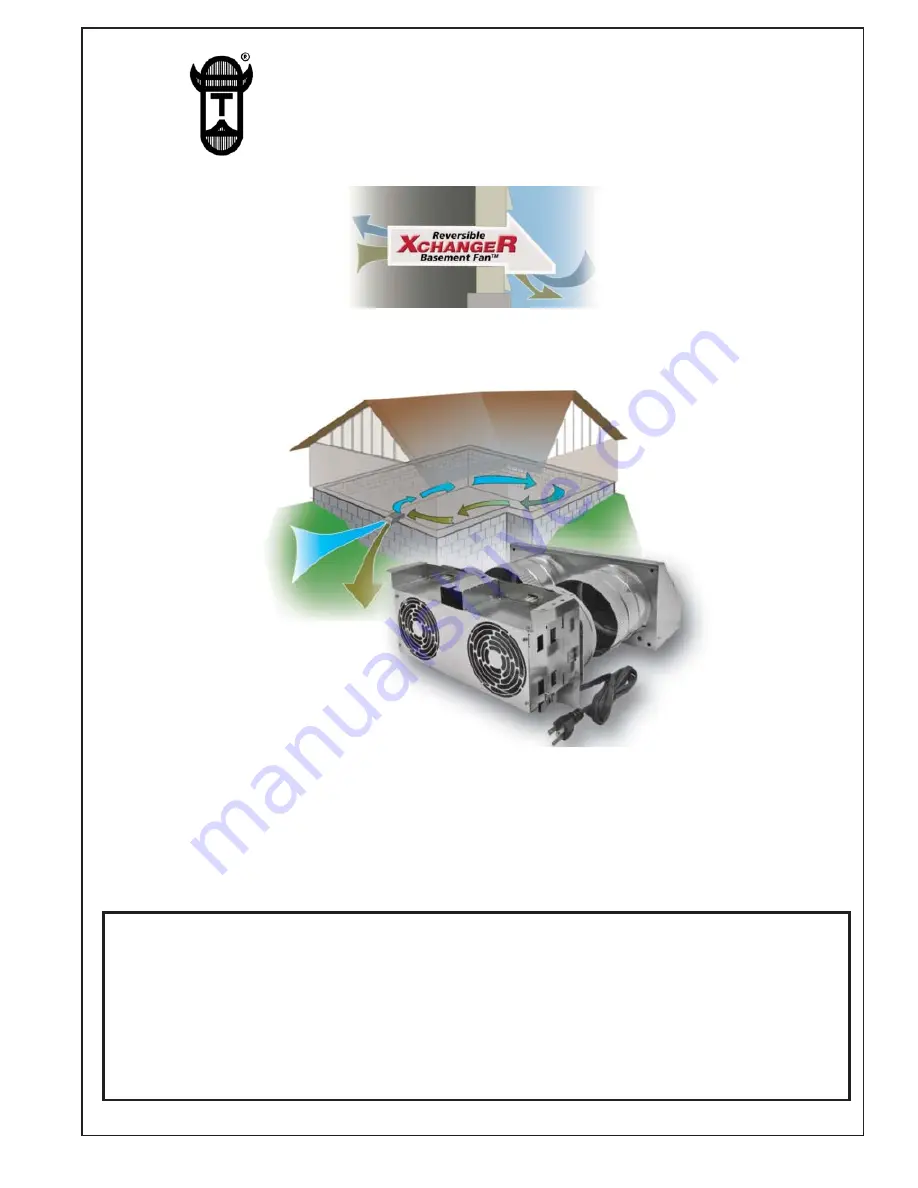
INSTALLATION INSTRUCTIONS

MODEL X2R

OWNER'S INSTRUCTIONS, DO NOT DESTROY

Copyright © 2014, Tjernlund Products, Inc.  All rights reserved.

P/N 8504202

THIS DEVICE MUST BE INSTALLED BY A 

QUALIFIED PERSON.

READ INSTRUCTIONS CAREFULLY PRIOR TO 

INSTALLATION  AND OPERATION OF THE XCHANGER.

REV. A 07/14

TJERNLUND PRODUCTS, INC.

1601 Ninth Street • White Bear Lake, MN 55110-6794
PHONE (800) 255-4208 • (651) 426-2993 • FAX (651) 426-9547
Visit our web site • www.tjernlund.com

Summary of Contents for XCHANGER X2R

Page 1: ... reserved P N 8504202 THIS DEVICE MUST BE INSTALLED BY A QUALIFIED PERSON READ INSTRUCTIONS CAREFULLY PRIOR TO INSTALLATION AND OPERATION OF THE XCHANGER REV A 07 14 TJERNLUND PRODUCTS INC 1601 Ninth Street White Bear Lake MN 55110 6794 PHONE 800 255 4208 651 426 2993 FAX 651 426 9547 Visit our web site www tjernlund com ...

Page 2: ...ing carton Inspect thoroughly for hidden damage INSTALLATION RESTRICTIONS WARNING Improper installation adjustment alterations service or maintenance can cause injury or property damage Refer to this manual For assistance or additional information consult a qualified installer service agency or the equipment supplier WARNING Sufficient air is needed for proper combustion and exhausting of gases th...

Page 3: ... or needs of the occupants For example a family with smok ers may want to cycle the XCHANGERTM more frequently than a family of non smokers Another timed method may be to cycle the XCHANGERTM during peak usage of exhaust fans such as bathroom kitchen laundry or utility Outdoor air should be brought in at these peak times to help balance out pressure inside the house The XCHANGERTM can be cycled on...

Page 4: ...t exhaust air from mechanical room unless makeup air is also supplied or equipment in mechanical room is sealed combustion Carbon monoxide poisoning may result Use the optional DT2 6 6 duct take off kit so exhaust can be removed from outside the mechanical room if necessary It is required that the XCHANGERTM be installed in a location where it will not be directed at the occupants Do not discharge...

Page 5: ...t damage electrical wiring and other hidden utilities Using a 1 2 bit drill pilot holes noted on the template from inside through rim joist wall board siding etc keeping drill bit perpendicular to the wall 1 2 bit must be long enough to penetrate through exterior 3 Use a level to mark 4 holes drilled in step 2 and connect the holes on building exterior See Diagram C Use provided X2R oval template ...

Page 6: ... 16 x 1 1 4 screws on left right and center mounting feet See Diagram K 11 Use 6 flex duct to connect XCHANGERTM hood to fan assembly collars Firmly secure duct to collars with included zip ties Insulated flex should be used in cold climates to prevent condensation Properly support duct to minimize sagging bends and sharp turns that may restrict air flow See Diagram L 5 DIAGRAM E DIAGRAM F LEVEL X...

Page 7: ... was performed 4 Details of the problem LIMITED PARTS WARRANTY AND CLAIM PROCEDURE Tjernlund Products Inc warrants the components of the XCHANGERTM for one year from date of installation This warranty covers defects in material and workmanship This warranty does not cover normal maintenance transportation or installation charges for replacement parts or any other service calls or repairs This warr...

Page 8: ...pairing or replacing at our option any product which shall within the above stated warranty period be returned to Tjernlund Products Inc at the address listed below postage prepaid THERE ARE NO WARRANTIES WHICH EXTEND BEYOND THE DESCRIPTION ON THE FACE HEREOF AND TJERNLUND PRODUCTS INC EXPRESSLY DISCLAIMS LIABILITY FOR INCIDENTAL OR CONSEQUENTIAL DAMAGES ARISING FROM THE USE OF THIS PRODUCT THIS W...

Reviews: