background image

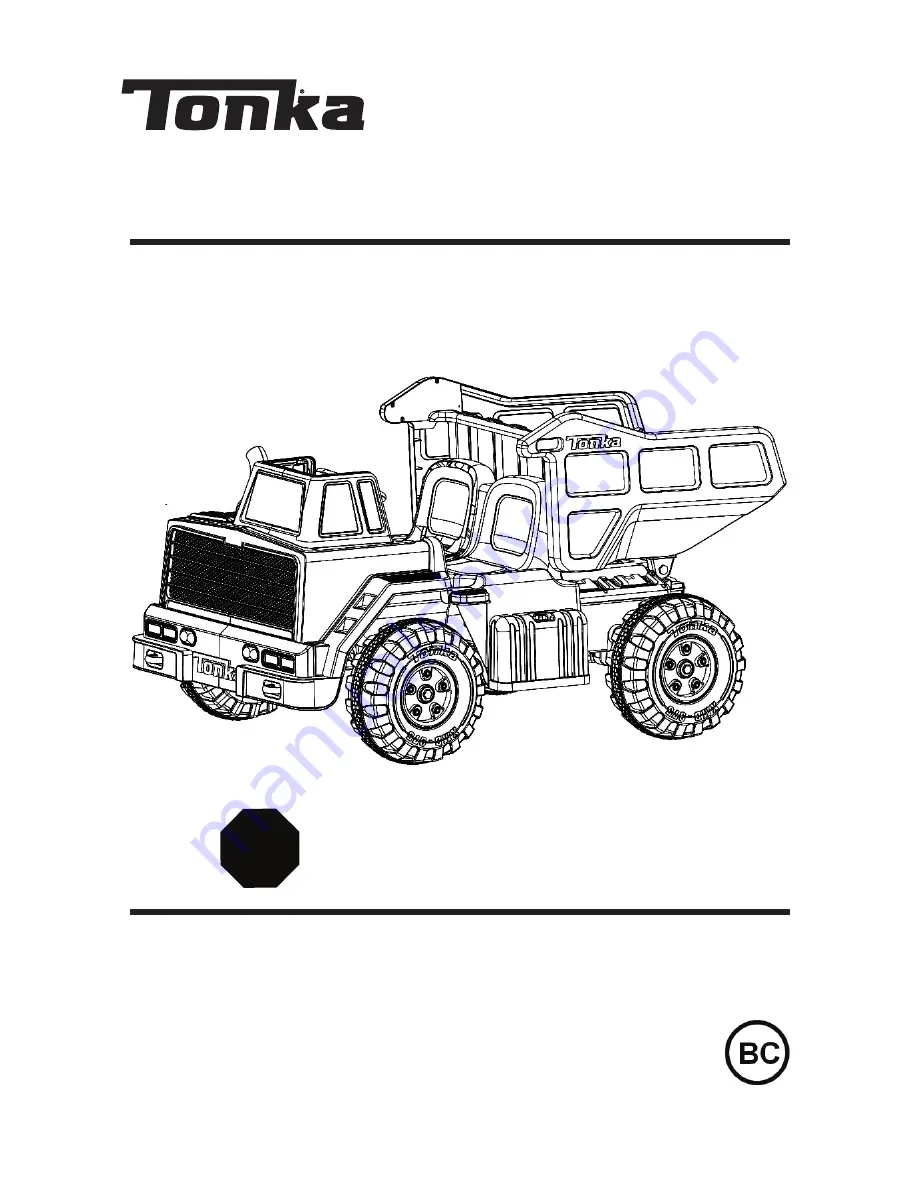
12V TONKA DUMP TRUCK

this


manual


contains


important


safety

performance


and


maintenance


information

read


the


manual


before


taking


your


first


ride


or


allowing


your


child


to


ride


your


new


electric


ride

-

on


toy

keep


the


manual


handy


for


future


reference

.

FOR AGES 3+

MAXIMUM WEIGHT: 130 lb. (59 kg) / 65 lb. (29.5 kg) per seat

OWNER’S MANUAL

NOTE: Illustrations in this manual are for reference purposes only and may not reflect the 

exact appearance of the actual product. Specifications are subject to change without notice.

DO NOT RETURN TO STORE!

QUESTIONS OR COMMENTS?

1-800-288-1560

STOP

Summary of Contents for DUMP TRUCK

Page 1: ...lectric ride on toy keep the manual handy for future reference FOR AGES 3 MAXIMUM WEIGHT 130 lb 59 kg 65 lb 29 5 kg per seat OWNER S MANUAL NOTE Illustrations in this manual are for reference purposes...

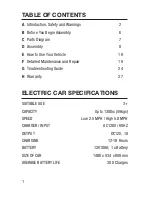
Page 2: ...ow to Use Your Vehicle F Detailed Maintenance and Repair G Troubleshooting Guide H Warranty SUITABLE AGE CAPACITY SPEED CHARGER INPUT OUTPUT CHARGING BATTERY SIZE OF CAR AVERAGE BATTERY LIFE 2 6 7 8 1...

Page 3: ...er maintenance of your new ride on toy is your responsibility and helps reduce the risk of injury Certain conditions may cause components to fail without fault of the manufacturer The ride on toy can...

Page 4: ...e at a minimum able to comfortably and safely operate it Children operating the electric ride on toy should be supervised by an adult at all times Parents should ensure that children only use the elec...

Page 5: ...on toy when in use or directly after use as these parts can become extremely hot Never allow more than two person to ride the electric ride on toy at one time and never try to tow anything Do not use...

Page 6: ...and only with the manufacturer s authorized replacement parts Installation should be performed only by adult qualified personnel The charger should be examined regularly for damage to the cord plug e...

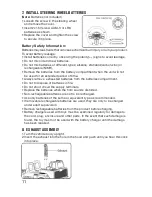
Page 7: ...l assembly is complete to ensure that no parts are discarded You should allow approximately 35 minutes for assembly not including initial charging time Initial charging can take approximately 18 hours...

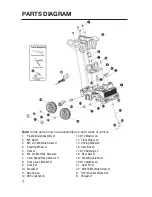
Page 8: ...x12 Machine Screw x4 7 4x16 Round Head Screw x11 8 Dump Lock Bracket x1 9 Dump x1 10 Exhaust x1 11 Axle Cap x4 12 M10 Locknut x4 13 12 Washer x6 14 Front Wheel x2 15 Driving Wheel x2 16 Gear Box x2 1...

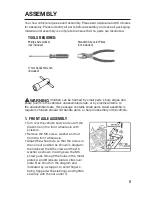
Page 9: ...ingers being trapped while steering and tighten securely with the nut under it ASSEMBLY Your new vehicle requires adult assembly Please set aside around 35 minutes for assembly Please identify all par...

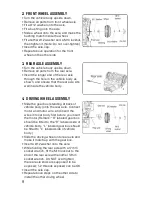
Page 10: ...at the rear axle sits well inside the vehicle body Slide the gear box standing at back of vehicle body onto the rear axle Connect motor and motor wire and insert the wires into car body first before y...

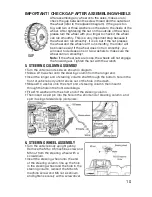
Page 11: ...wheel onto the end of the steering column line up the hole in the steering wheel and the hole in the steering column reinsert the M5 x 35 machine screw and M5 nut as shown and tighten securely with a...

Page 12: ...period of time Always remove exhausted batteries from the batteries compartment Do not to dispose of batteries in fire Do not short circuit the supply terminals Replace the batteries when the horn sou...

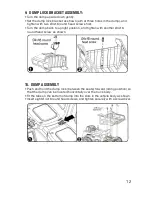
Page 13: ...mp back to upright position and tighten with another 4x16 round head screw as shown 10 DUMP ASSEMBLY Push and hold the dump lock between the seats forward riding position so that the dump can be locat...

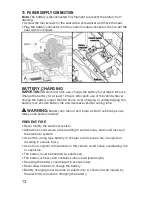
Page 14: ...hicle running time WARNING Battery can fall out and injure a child if vehicle tips over Always use battery retainer PREVENT FIRE Never modify the electrical system Alterations could cause a fire resul...

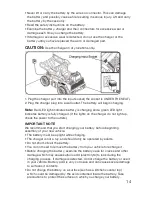
Page 15: ...battery is fully charged If the lights on the charger do not light up check the power to the outlets IMPORTANT NOTE We recommend that you start charging your battery before beginning assembly of your...

Page 16: ...ge the battery after each use regardless of how long the vehicle was used Do not allow the battery to run down completely before charging Charge the battery before storing the vehicle Charge the batte...

Page 17: ...tion the vehicle will stop when your child s foot is removed from the Foot Pedal the vehicle will also stop automatically BACKWARD 1 Move the Forward Backward Switch to the Backward position 2 Press t...

Page 18: ...playing with the dump IMPORTANT Always stop vehicle when changing the direction to avoid damage to the gears and motors This vehicle has an adjustable seat belt please instruct children on how to fas...

Page 19: ...ight rating or age grading to use the vehicle To stop you must take your foot off the pedal Charging should only be done by an adult An adult must teach the child how to operate the vehicle Do not rid...

Page 20: ...ve the wheel then replace with a new one and make sure the 12 bushing sits inside the wheel 5 Remount the 12 washer M10 locknut and securely tighten the wheel then re insert the axle cap HOW TO REPLAC...

Page 21: ...into the battery connector and replace the seat HOW TO REPLACE THE FOOT PEDAL 1 Turn the vehicle body on its side 2 On the bottom of the vehicle you will find a compartment which contains the foot pe...

Page 22: ...the High Low Speed Switch Socket as shown 3 Plug in the new High Low Speed Switch with the High Low Speed Switch Socket for replacement HOW TO REPLACE THE POWER SWITCH 1 Remove the power switch with a...

Page 23: ...with the leaking acid and place the damaged battery in a plastic bag See information above for proper disposal If acid comes in contact with skin or eyes flush with cool water for at least 15 minutes...

Page 24: ...gravel which could damage moving parts motors or the electric system CAUTION Charge the battery before storing your vehicle otherwise the battery will be damaged ABOUT THERMAL FUSES Your vehicle is eq...

Page 25: ...before operating the vehicle again To avoid repeated automatic shutdowns do not overload the vehicle by exceeding the 130 Ib maximum weight capacity or by towing anything behind the vehicle Do not dr...

Page 26: ...sure the battery connector is tightly plugged into the control module connector and that the charger is plugged into the wall Make sure that there is power flow to the wall outlet Do not charge the ba...

Page 27: ...sure that there is power flow to the wall outlet Be sure to charge the battery after each use Even with proper care a rechargeable battery does not last forever Average battery life is 1 to 3 years de...

Page 28: ...or the rider s parent s express and implied assumption of the risk of such use and Dynacraft shall not have any responsibility for any resulting break down of the ride on toy or its components or for...

Page 29: ...uired and helps us handle your call more effectively DO NOT return this item to the store Please call Dynacraft for assistance STOP Dynacraft BSC Inc 89 S Kelly Rd American Canyon CA 94503 Call Toll F...

Reviews: