background image

Form No. 3396-496 Rev A

Power Max 724 OE Snowthrower

Model No. 38811—Serial No. 316000001 and Up

Operator's Manual

This product complies with all relevant European directives.
For details, please see the separate product specific
Declaration of Conformity (DOC) sheet.

Introduction

This machine is intended to be used by residential
homeowners or professional, hired operators. It is
designed primarily for removing snow from paved
surfaces, such as driveways and sidewalks, and other
surfaces for traffic on residential or commercial
properties. It is not designed for removing materials
other than snow, nor is a model with a pivoting scraper
designed for clearing off gravel surfaces.

Read this information carefully to learn how to operate and
maintain your machine properly and to avoid injury and
machine damage. You are responsible for operating the
machine properly and safely.

You may contact Toro directly at www.Toro.com for machine
and accessory information, help finding a dealer, or to register
your machine.

Whenever you need service, genuine Toro parts, or additional
information, contact an Authorized Service Dealer or Toro
Customer Service and have the model and serial numbers of
your machine ready.

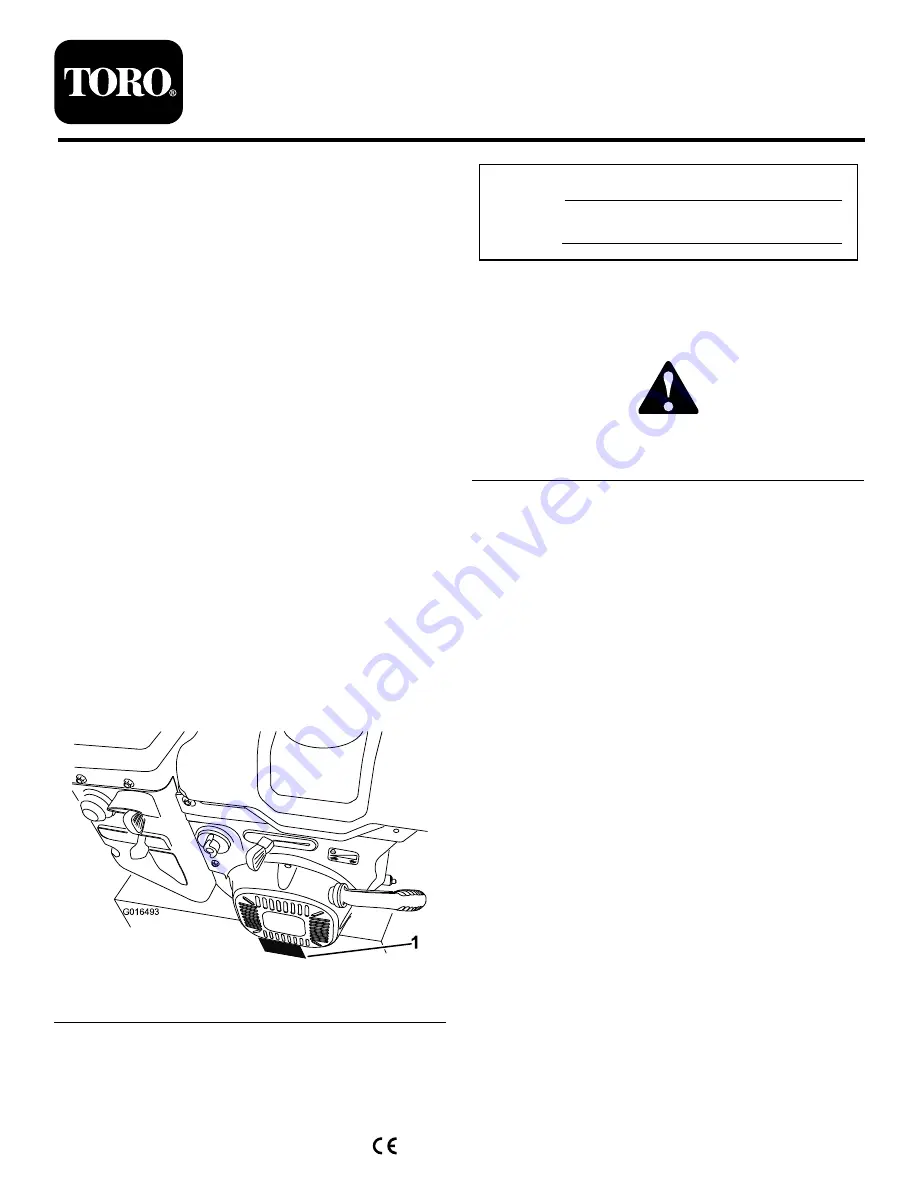
Figure 1

identifies the location of the

model and serial numbers on the machine. Write the numbers
in the space provided.

ST OP

G016493

1

Figure 1

1.

Model and serial number location

Model No.

Serial No.

This manual identifies potential hazards and has safety
messages identified by the safety alert symbol (

Figure 2

),

which signals a hazard that may cause serious injury or death
if you do not follow the recommended precautions.

Figure 2

1.

Safety alert symbol

This manual uses 2 words to highlight information.

Important

calls attention to special mechanical information

and

Note

emphasizes general information worthy of special

attention.

© 2015—The Toro® Company
8111 Lyndale Avenue South
Bloomington, MN 55420

Register at www.Toro.com.

Original Instructions (EN)

Printed in the USA

All Rights Reserved

*3396-496* A


Summary of Contents for Power Max 724 OE

Page 1: ...ly at www Toro com for machine and accessory information help finding a dealer or to register your machine Whenever you need service genuine Toro parts or additional information contact an Authorized Service Dealer or Toro Customer Service and have the model and serial numbers of your machine ready Figure 1 identifies the location of the model and serial numbers on the machine Write the numbers in...

Page 2: ...pping the Engine 14 Operating the Traction Drive 15 Operating the Speed Selector 15 Operating the Auger Impeller Drive 16 Operating the Quick Lever 16 Unclogging the Discharge Chute 16 Operating Tips 17 After Operation 17 Safety 17 Preventing Freeze up 17 Maintenance 18 Recommended Maintenance Schedule s 18 Maintenance Safety 18 Preparing for Maintenance 19 Checking the Engine Oil Level 19 Checkin...

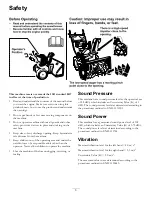
Page 3: ...orking on the machine Keep clear of any discharge opening Keep bystanders a safe distance from the machine Keep children out of the operating area and under the watchful care of a responsible adult other than the operator Never allow children to operate the machine Shut the machine off before unclogging servicing or fueling Sound Pressure This machine has a sound pressure level at the operator s e...

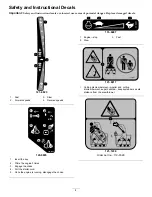
Page 4: ...erse speeds x 3 1 2 3 4 5 120 9805 120 9805 1 Insert the key 2 Prime the engine 3 times 3 Engage the choke 4 Pull the starter cord 5 Once the engine is running disengage the choke 131 6487 1 Engine stop 3 Fast 2 Slow 121 6817 1 Cutting dismemberment impeller and cutting dismemberment auger hazards keep bystanders a safe distance from the snowthrower 121 1239 Order part no 119 7629 4 ...

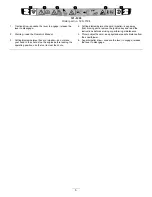
Page 5: ...instructions before servicing or performing maintenance 2 Warning read the Operator s Manual 5 Thrown object hazard keep bystanders a safe distance from the snowthrower 3 Cutting dismemberment hazard impeller do not place your hand in the chute stop the engine before leaving the operating position use the tool to clear the chute 6 Auger impeller drive squeeze the lever to engage release the lever ...

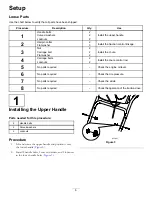
Page 6: ...uts 2 Install the chute control rod 5 No parts required Check the engine oil level 6 No parts required Check the tire pressure 7 No parts required Check the skids 8 No parts required Check the operation of the traction drive 1 Installing the Upper Handle Parts needed for this procedure 2 Handle bolts 2 Curved washers 2 Locknuts Procedure 1 Lift and rotate the upper handle and position it over the ...

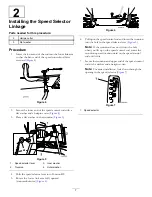
Page 7: ...2 Trunnion 4 Outer washer 4 Shift the speed selector lever into Position R2 5 Rotate the lower link arm fully upward counterclockwise Figure 6 g019378 Figure 6 6 Pull up on the speed control rod and insert the trunnion into the hole in the speed selector lever Figure 5 Note If the trunnion does not fit into the hole when you lift up on the speed control rod rotate the trunnion upward or downward o...

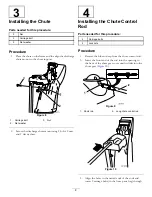
Page 8: ...s 2 nuts and 2 flat washers 4 Installing the Chute Control Rod Parts needed for this procedure 2 Carriage bolts 2 Locknuts Procedure 1 Remove the blue rod cap from the chute control rod 2 Insert the front end of the rod into the opening in the back of the chute gear cover until it slides into the chute gear Figure 10 g019005 Figure 9 1 Short rod 2 Long chute control rod g018899 Figure 10 3 Align t...

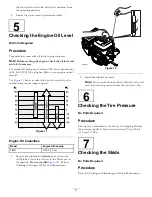
Page 9: ...049 Figure 11 Engine Oil Capacities Model Engine Oil Capacity 38811 0 50 L 17 oz 1 Remove the dipstick and slowly pour oil into the oil fill tube to raise the oil level to the Full mark on the dipstick Do not overfill Figure 12 Refer to Checking the Engine Oil Level in Maintenance Figure 12 2 Install the dipstick securely Note Do not spill oil around the oil fill tube oil could leak onto traction ...

Page 10: ...d clockwise on the speed control rod Figure 5 D Connect the trunnion to the speed selector lever Figure 5 4 Release the traction lever 5 Move the speed selector to the Position 1 refer to Operating the Speed Selector 6 Squeeze the left hand traction lever to the hand grip Figure 13 The machine should move forward If the machine does not move or moves rearward complete the following A Release the t...

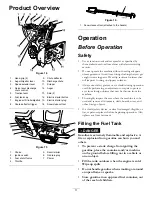
Page 11: ...oving parts Wear slip resistant footwear that will improve footing on slippery surfaces Always wear safety glasses or eye shields during operation or while performing an adjustment or repair to protect eyes from foreign objects that may be thrown from the machine Thoroughly inspect the area where the machine is to be used and remove all doormats sleds boards wires and other foreign objects If a sh...

Page 12: ...chine When not actively clearing snow disengage power to the rotor blades Use extension cords and receptacles as specified by the manufacturer for all machines with electric starting motors Do not attempt to clear snow from a gravel or crushed rock surface This product is intended for use only on paved surfaces Do not use the machine on a roof Never attempt to make any adjustments while the engine...

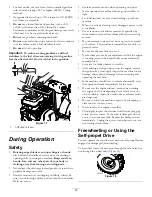
Page 13: ...er to Checking the Engine Oil Level in Maintenance 2 Turn the fuel shutoff valve 1 4 turn counterclockwise to open it Figure 20 G016512 Figure 20 3 Insert the ignition key all the way in Figure 21 1 G016498 Figure 21 1 Ignition key 4 Firmly push in the primer with your thumb 3 times holding the primer in for a second before releasing it each time Figure 22 G016494 Figure 22 13 ...

Page 14: ...not operate the machine Replace or repair the damaged cord immediately Contact an Authorized Service Dealer for assistance Important To prevent damaging the electric starter run it in short cycles 5 seconds on 5 seconds off no more than 10 times If the engine still does not start take the machine to an Authorized Service Dealer for service 8 Disconnect the power cord from the power outlet first an...

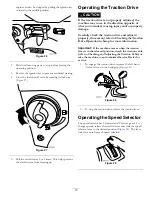
Page 15: ...ty damage Carefully check the traction drive and adjust it properly if necessary refer to Checking the Traction Drive Operation in Setup for more information Important If the machine moves when the traction lever is in the released position check the traction cable refer to Checking and Adjusting the Traction Cable or take the machine to an Authorized Service Dealer for service 1 To engage the tra...

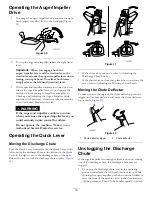
Page 16: ...perating the Quick Lever Moving the Discharge Chute Push the Quick Lever forward move the Quick Lever to the left to move the discharge chute to the left move the Quick Lever to the right to move the discharge chute to the right Release the lever to lock the discharge chute in place Figure 31 g018897 Figure 31 If the chute does not move refer to Adjusting the Discharge Chute Latch If the chute doe...

Page 17: ...ystanders Keep the area to be cleared free of all objects that the rotor blades could pick up and throw Keep all children and pets away from the area of operation Always set the throttle to the Fast position when throwing snow If the engine slows down under a load or the wheels slip shift the machine into a lower gear If the front of the machine rides up shift the machine into a lower gear If the ...

Page 18: ...heck the air pressure in the tires and inflate them to 17 20 psi 116 137 kPa Drain the gasoline and run the engine to dry out the fuel tank and the carburetor at the end of the season Have an Authorized Service Dealer inspect and replace the traction drive belt and or the auger impeller drive belt if necessary Important You can find more information about maintaining and servicing your machine at ...

Page 19: ...1 1 8 inch 3 mm Important The auger blades must be supported above the ground by the skids 3 Ensure that the scraper is 1 8 inch 3 mm above and parallel to a level surface Note If the pavement is cracked rough or uneven adjust the skids to raise the scraper For gravel surfaces adjust the skids further down to prevent the machine from picking up rocks 4 Move the skids down until they are even with ...

Page 20: ... the auger impeller cable and adjust or replace it if necessary 1 Loosen the jam nut 2 Engage the auger impeller lever and hold it in place Figure 37 Figure 37 3 Loosen or tighten the turnbuckle to adjust the spring length to 2 75 inches 7 cm Figure 38 Figure 38 1 Jam nut 3 Spring 2 Turnbuckle 4 2 75 inches 7 cm 4 Tighten the jam nut Figure 38 ensuring there is slight tension on the cable 5 If the...

Page 21: ... your engine owner s manual Use Figure 40 below to select the best oil viscosity for the outdoor temperature range expected g019049 Figure 40 Engine Oil Capacities Model Engine Oil Capacity 38811 0 50 L 17 oz 1 Clean the area around the oil drain cap Figure 41 Figure 41 1 Oil drain cap 2 Slide an oil drain pan under the drain extension and remove the oil drain cap 3 Drain the oil Note Dispose of t...

Page 22: ...el line onto the fuel shutoff valve and secure it with a hose clamp 6 Run the machine until the engine stops from running out of fuel 7 Prime the engine and start it again 8 Allow the engine to run until it stops When you can no longer start the engine it is sufficiently dry 9 Stop the engine and allow it to cool 10 Remove the ignition key 11 Disconnect the spark plug wire 12 Remove the spark plug...

Page 23: ...engine rapidly using the starter to blow the excess oil from the cylinder 2 Install the spark plug by hand and then torque it to 15 ft lb 20 4 N m 3 Connect the spark plug wire 4 Perform the annual maintenance procedures as given in the Recommended Maintenance Schedule 23 ...

Page 24: ... the wire to the spark plug 7 The spark plug is pitted fouled or the gap is incorrect 7 Check the spark plug and adjust the gap if necessary Replace the spark plug if it is pitted fouled or cracked 8 The fuel vent cap is restricted 8 Remove the vent restriction or replace the fuel cap The engine does not start or starts hard 9 The engine oil level in the engine crankcase is too low or too high 9 A...

Page 25: ... the auger impeller drive belt refer to www Toro com for servicing information or take the machine to an Authorized Service Dealer The engine runs but the machine discharges snow poorly or not at all 7 The auger impeller drive belt is worn or broken 7 Replace the auger impeller drive belt refer to www Toro com for servicing information or take the machine to an Authorized Service Dealer The discha...

Page 26: ...Notes 26 ...
Page 27: ...India 0091 44 2449 4387 Valtech Morocco 212 5 3766 3636 Jean Heybroek b v Netherlands 31 30 639 4611 Victus Emak Poland 48 61 823 8369 European Privacy Notice The Information Toro Collects Toro Warranty Company Toro respects your privacy In order to process your warranty claim and contact you in the event of a product recall we ask you to share certain personal information with us either directly ...

Page 28: ...rvice See attached Distributor List 2 Bring the product and your proof of purchase sales receipt to the servicing outlet If for any reason you are dissatisfied with the servicing outlet s analysis or with the assistance provided contact us at Toro Warranty Company Toro Customer Care Department RLC Division 8111 Lyndale Avenue South Bloomington MN 55420 1196 USA 001 952 948 4707 Items and Condition...

Reviews: