background image

English

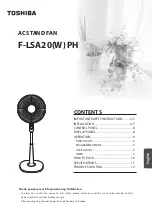
AC STAND FAN

F-LSA20(W) PH

CONTENTS

IMPORTANT SAFETY INSTRUCTIONS ..........2-5
INSTALLATION ....................................................6-7
CONTROL PANEL ...................................................8
DISPLAY PANEL ......................................................8
OPERATION ..............................................................9

TURN ON/OFF .....................................................................9
PROGRAMMED MODE .....................................................9
OSCILLATION .......................................................................9
TIMER .....................................................................................9

HOW TO PACK .....................................................10
SPECIFICATIONS ..................................................11
TROUBLE SHOOTING .........................................12

Thank you very much for purchasing Toshiba fan.


y

ll

u

f


o

t

 l

a

u

n

a

m


n

o

i

t

c

u

r

t

s

n

i


s

i

h

t


d

a

e

r


y

ll

u

f

e

r

a

c


e

s

a

e

l

p

 ,

y

l

e

f

a

s


d

n

a


y

l

t

c

e

r

r

o

c


n

a

f


s

i

h

t


e

s

u


o

t

 r

e

d

r

o


n

 •

understand the content before using it.

•  After reading the manual, keep it handy for easy reference.

Summary of Contents for F-LSA20(W) PH

Page 1: ...TION 9 TIMER 9 HOW TO PACK 10 SPECIFICATIONS 11 TROUBLE SHOOTING 12 Thank you very much for purchasing Toshiba fan y l l u f o t l a u n a m n o i t c u r t s n i s i h t d a e r y l l u f e r a c e s a e l p y l e f a s d n a y l t c e r r o c n a f s i h t e s u o t r e d r o n I understand the content before using it After reading the manual keep it handy for easy reference ...

Page 2: ...tached Risk of injury due to the fan toppling Do not operate the fan without the blades or guard attached Risk of injury Do not clean the fan in its stand up position Risk of injury due to the motor falling out as a result of accidentally Do not spray flammable aerosols and the like or place aerosol cans nearby Risk of fire or explosion if flammable aerosols or chemicals are placed nearby Do not h...

Page 3: ...maged or hot or if the outlet is loose Risk of fire electrical shock injury or short circuit Avoid damaging the power plug or cord Risk of fire electrical shock or short circuit Do not modify Do not place close to heat generating devices Do not subject to strain place underneath heavy objects or pinch Do not forcibly bend or twist or apply current when coiled Do not place the cord under the base o...

Page 4: ... into the guard or any moving parts Risk of injury or failure Keep hair and clothing away from the guard Risk of injury due hair or clothing becoming caught Disassemble the fan before transporting it Risk of breakage When transporting the fan store it in its box Keep your eyes and face away from the motor shaft when assembling the fan Risk of injury due to contact with the edge of the shaft Use on...

Page 5: ...oducts may be sucked into the guard which may cause damage to the blades or personal injury After waxing a wooden floor wait until the floor dries completely before placing the fan on it Otherwise it may leave undesired marks on the floor or cause the wax to peel off Cleaning Dilute a neutral kitchen detergent with water in accordance with the instructions on its packaging Wait for 30 minutes or m...

Page 6: ...dy Refer to Fig A Lock Blade with Spinner after attaching it to Body Refer to Fig B Attach Front Guard to Rear Guard Refer to Front Guard Installation Front Guard Installation Align the hook of Front Guard with Rear Guard as shown below Press guards sequentially until clipping Fix the clip using screw after locking 1 2 3 1 2 3 Guard Clip Height Adjustment Loosen Knob B counterclockwise Adjust the ...

Page 7: ...e blade in correct direction Fig B Battery Installation Open the battery cover Insert AAA type battery in correct direction Close the cover e c n a t s i d m 5 n i h t i w e t a r e p o o t e l b a l i a v a s i r e l l o r t n o C e t o m e R e t o N with 30 degrees angle in front of fan ...

Page 8: ...tment for NORMAL mode SWING For oscillation ON OFF For turning on off Remote Control Panel SPEED ON OFF SWING SILENT MODE TIMER SPEED Adjustment for NORMAL mode ON OFF For turning on off TIMER For on off timer setting MODE For selection NORMAL NATURE SLEEP SWING For oscillation SILENT For SILENT mode DISPLAY PANEL SLEEP SPEED NORMAL NATURE TIMER SILENT ...

Page 9: ...LLATION Press SWING repeatedly FAN start and stop oscillation accordingly TIMER OFF TIMER Press TIMER repeatedly when the fan is working the time will go every 0 5h up to 7 5h Note Timer will count total time on the display Ex To set the timer for 3 5h press TIMER 7 times for total 3 5h on the display Total 3 5h Note Press TIMER once after counting 7 5h the timer will cancel with no display ON TIM...

Page 10: ...10 HOW TO PACK Base Front Guard Remote Controller Rear Guard Pole Body with Nut Spinner Blade ...

Page 11: ...TIONS Model F LSA20 W PH Rated Voltage 230V Rated Frequency 60Hz Power Consumption 60W Blade Diameter ø400mm Unit Dimensions W 465mm D 405mm H 1130 1350mm Net Weight Approx 7 2 kg Accessories Remote Controller Battery AAA ...

Page 12: ...blades in position Are the front and rear guard sections properly mounted Are any of the blades contacting guard 7 Are the blades and guard clean The remote control does not work Is the remote control pointing toward the receiver Do the batteries need changing Are the batteries inserted correctly polarity 7 The on timer does not work Is the power plug properly inserted into the outlet Is the fan o...

Reviews: