background image

Warranty Registration and Inquiry 
For product warranty registration, TOTO U.S.A. Inc. recommends online warranty registration. Please visit  
our web site http://www.totousa.com. If you have questions regarding warranty policy or coverage, please 
contact TOTO U.S.A. Inc., Customer Service Department, 1155 Southern Road, Morrow, GA 30260  
(888) 295-8134 or (678) 466-1300 when calling from outside of U.S.A.

No CEFIONTECT®

With CEFIONTECT®

WHAT IS
CEFIONTECT®?

CEFIONTECT® MAINTENANCE INSTRUCTIONS

CEFIONTECT® glaze is TOTO’s patented super-smooth permanent 
glazing that prevents debris from sticking to surfaces. 

Toilets and lavatories are made of ceramic – a porous material that allows 
mold and particles to stick to the surface creating stains, scaling and 
build-up. 

CEFIONTECT® glaze, along with regular cleaning, will keep your TOTO 
products in pristine condition.
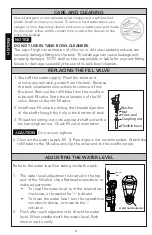
NOTE:

For regular cleaning of your TOTO product with CEFIONTECT®: 
• Use a mild dish detergent to clean your lavatory.
• Use a gel-based toilet bowl cleaner.
• Use a soft cloth to clean your lavatory.
• Use a soft-bristled plastic brush to clean your toilet.
• Don’t use cleanser, polishing powders or detergents that
   have gritty or coarse particles.
• Don’t use bleach, chemical thinners, or products that include 
   acid or alkaline detergents in their ingredients.
• Don’t use metal scrub brushes or steel wool.

Following these cleaning instructions will ensure that the CEFIONTECT® 
glaze on your product will remain intact, keeping your TOTO product 
beautiful for years to come. 

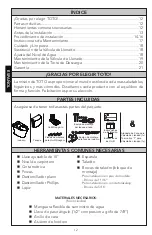
Installation and Owner’s Manual
Manual de instrucciones y del propietario
Manuel d’installation et d’utilisation

Dual-flush Toilet

Inodoro de doble descarga

Toilettes à double chasse d’eau
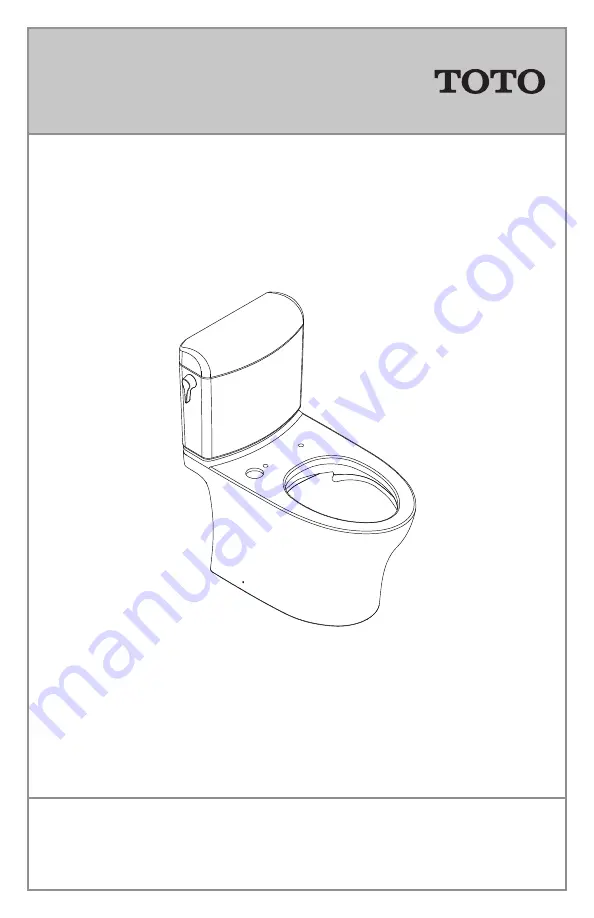
CST436
CST448

* Actual parts may appear different from drawing according to the model. 

* El producto real puede variar en apariencia dependiendo del modelo.

* Le produit réel peut varier en apparence en fonction du modèle.

Summary of Contents for CST436

Page 1: ...outhern Road Morrow GA 30260 888 295 8134 or 678 466 1300 when calling from outside of U S A Installation and Owner s Manual Manual de instrucciones y del propietario Manuel d installation et d utilisation Dual flush Toilet Inodoro de doble descarga Toilettes à double chasse d eau CST436 CST448 Actual parts may appear different from drawing according to the model El producto real puede variar en a...

Page 2: ...ater Level 8 Servicing Fill Valve 9 Servicing Flush Tower 10 Warranty 11 10 adjustable wrench Carpenters level Tape measure Hand pliers Flat head screwdriver Phillips screwdriver Pencil Putty knife Drill Drill bits mounting block For wood floor installation 11 16 drill bit For concrete tile installation 5 16 drill bit Check to make sure you have the following parts included in your package Flexibl...

Page 3: ...ase contact your builder or contractor prior to this installation Double Combination WYE 1 8 Bend YES Double Sanitary Tee Sanitary Cross NO NOTICE Water supply shut off valve installation recommendations Follow these recommendations to ensure an optimal and trouble free installation with a neat and professional appearance Location From floor and left of center of floor flange 4 3 4 x 4 3 4 120mm x...

Page 4: ...lange after wax seal is set If this notice is disregarded discard the wax ring and replace with new wax ring 3 Place the toilet bowl over the Unifit Rough In and the two mounting blocks by aligning the bowl outlet with the Unifit Rough In opening ill 2 4 Align the toilet perpendicular to the back wall and parallel to side walls it should not sit crooked or diagonal ill 3 Mounting block Unifit Inse...

Page 5: ...side the tank and position the bolt through one of the holes in the bottom of the tank On the outside of the tank place a metal washer and nut onto the bolt Hold the bolt centered in the hole and tighten the nut finger tight Turn the nut an additional 1 2 turn with a wrench Repeat this process for the remaining hole in the tank Do NOT overtighten hardware as it may break the china and cause persona...

Page 6: ... to remove any debris that may enter the new fill valve For new home constructions and or additions flush the water supply line for more than a minute to help remove any residual PVC adhesives solder flux and or pipe sealants that were used for the new plumbing 13 Install the flexible water supply hose to the angle stop ill 11 Make sure that the hose is free of kinks 14 Carefully place the lid on top...

Page 7: ...ill 3 6 Remove the grey rubber seal gasket and rinse under running water to clean ill 4 7 Place the gasket back on the flush tower 8 Align and place the flush tower into housing and rotate to lock into place 9 Replace the trip lever gear box and push down on lever to lock it in place 10 Carefully install the tank lid back on the tank 11 Flush the toilet several times making sure the trip lever opera...

Page 8: ... the indicator 2 Flush after each adjustment to check the water level When satisfied with the water level flush once more to verify Flexible hose Coupling nut Nut Washer Cone seal Ill 1 ADJUSTING THE WATER LEVEL CAUTION water level adjuster Ill 1 CARE AND CLEANING DO NOT USE IN TANK BOWL CLEANERS The use of high concentration of chlorine or chlorine related products can seriously damage fittings i...

Page 9: ...ge of the diaphragm ill 6 Note the position of the diaphragm while removing 7 Remove the strainer from the tube with needle nose pliers ill 7 Use twisting motion while pulling to help with removal 8 Rinse all parts under running water to clear any debris residues or films Reinstall all parts in reverse order Turn the water ON and check for leaks and operation Ill 6 SERVICING THE FILL VALVE Ill 4 I...

Page 10: ...wards the overflow tube and pull it up to remove it ill 1 5 Remove the rubber seal gasket and rinse under running water to clean see Ill 2 6 Place the gasket back on the flush tower Ill 3 7 Align arrow with the overflow tube and install the flush tower back on the base 8 Rotate the flush tower to the same orientation step 3 9 Carefully install the tank lid back on the tank 10 Flush the toilet seve...

Page 11: ...hase is required TOTO encourages warranty registration upon purchase to create a record of Product ownership at http www totousa com Product registration is completely voluntary and failure to register will not diminish your limited warranty rights 5 THIS WARRANTY GIVES YOU SPECIFIC LEGAL RIGHTS YOU MAY HAVE OTHER RIGHTS WHICH VARY FROM STATE TO STATE PROVINCE TO PROVINCE OR COUNTRY TO COUNTRY 6 T...

Page 12: ... la Torre de Descarga 20 Garantía 21 Llave ajustable de 10 Nivel de carpintero Cinta métrica Pinzas Destornillador plano Destornillador Phillips Lapiz Espátula Taladro Brocas de taladro bloque de montaje Para instalación en piso de madera Brocas de 11 16 Para instalación en concreto azulejo Brocas de 5 16 Asegúrese de tener todas estas partes del paquete Manguera flexible de suministro de agua Lla...

Page 13: ... contratista antes de realizar esta instalación Combinación doble de conexión en Y codo de 1 8 SÍ Combinación doble de conexión en Y codo de 1 8 NO AVISO Recomendaciones de instalación de la válvula de cierre de suministro de agua Siga estas recomendaciones para garantizar una instalación óptima y sin problemas con un aspecto limpio y profesional Ubicación Desde el suelo y la izquierda del centro ...

Page 14: ...ués de fijar el sello de cera Si se ignora este aviso deseche el anillo de cera y sustitúyalo por uno nuevo 3 Coloque la taza del inodoro sobre el montaje Unifit y los dos bloques de montaje alineando la salida de la taza con la apertura del montaje Unifit Il 2 4 Alinee el inodoro perpendicular a la pared trasera y paralelo a las paredes laterales no debe estar en posición opuesta o diagonal Il 3 ...

Page 15: ...o y coloque el perno a través de uno de los orificios de la parte inferior del depósito En el exterior del depósito coloque una arandela metálica y una tuerca sobre el perno Sujete el perno centrado en el orificio y apriete la tuerca con las manos Gire la tuerca una 1 2 vuelta adicional con una llave Repita este proceso para el orificio restante del depósito NO apriete demasiado los componentes de...

Page 16: ...os residuos que puedan entrar en la nueva válvula de llenado Para nuevas construcciones y o adiciones en casa purgue la línea de suministro de agua durante más de un minuto para ayudar a eliminar cualquier adhesivo de PVC residual fundente de soldadura y o selladores de tubos utilizados para la nueva plomería 13 Instale la manguera flexible de suministro de agua en la llave angular Il 11 Asegúrese...

Page 17: ... 3 6 Retire la junta de goma gris del sello y en juague bajo agua corriente para limpiarla Il 4 7 Vuelva a colocar la junta en la torre de des carga 8 Alinee y coloque la torre de descarga en la carcasa y gírela para fijarla en su sitio 9 Sustituya la caja de engranajes de la palanca de descarga y empuje la palanca para fijarla en su sitio 10 Instale con cuidado la tapa del depósito en el depósito...

Page 18: ...nivel de agua gire el destornillador en sentido horario o hacia el indicador Para bajar el nivel de agua gire el destornillador en sentido contrario al de las agujas del reloj o hacia el indicador 2 Descargue el inodoro después de cada ajuste para comprobar el nivel de agua Cuando esté satisfecho con el nivel de agua descargue una vez más para verificar Tubo flexible Tuerca de acoplamiento Tuerca ...

Page 19: ...Il 6 Tome nota de la posición del diafragma mientras lo retira 7 Retire el filtro del tubo con alicates de punta de aguja Il 7 Utilice un movimiento giratorio mientras tira para facilitar la extracción 8 Enjuague todas las piezas bajo agua corriente para eliminar restos residuos o películas Vuelva a instalar todas las piezas en orden inverso Haga correr el agua y compruebe si hay fugas y funcionam...

Page 20: ...a el tubo de desbordamiento y tire de ella hacia arriba para extraerla Il 1 5 Retire la junta de goma del sello y enjuague bajo agua corriente para limpiarla Il 2 6 Vuelva a colocar la junta en la torre de descarga Il 3 7 Alinee la flecha con el tubo de desbordamiento e instale la torre de des carga en la base 8 Gire la torre de descarga a la misma orientación paso 3 9 Instale con cuidado la tapa ...

Page 21: ...o es totalmente voluntario y la falta a registrar no disminuirá sus derechas de garantía limitada 5 ESTA GARANTÍA LE DA DERECHOS LEGALES ESPECÍFICOS USTED PODRÍATENER OTROS DERECHOS QUE PUEDEN VARIAR DEPENDIENDO DEL ESTADO O PROVINCIA EN EL QUE SE ENCUENTRE 6 Para obtener el servicio de reparación de esta garantía debe llevar el Producto o enviarlo prepagado a un modulo de servicios TOTO junto con...

Page 22: ...de remplissage 29 Instructions d entretien de valve de chasse 30 Garantie 31 10 clé ajustable Niveau de charpentier Mètre à ruban Pinces manuelles Tournevis plat Tournevis Phillips Crayon Couteau à mastiquer Perceuse Mèche bloc de montage Pour l installation de plancher en bois 11 16 mèche Pour l installation de béton carreaux 5 16 mèche Assurez vous que vous avez toutes ces pièces dans l paquet T...

Page 23: ... votre constructeur ou votre entrepreneur avant de procéder à cette installation Combinaison double Y 1 8 Courbe OUI Té sanitaire double En croix NON AVIS Recommandations d installation de robinet d arrêt d alimentation en eau Suivez ces recommandations pour assurer une installation optimale et sans problème avec une apparence soignée et professionnelle Emplacement à partir du plancher et à gauche...

Page 24: ...ixé Si cet avis a été ignoré jetez l anneau en cire et remplacez le par un nouvel anneau en cire 3 Placez la cuvette de toilette sur l adaptateur Unifit Rough In et les deux blocs de montage en alignant la sortie de la cuvette avec l ouverture de l adaptateur Unifit Rough In ill 2 4 Alignez la toilette perpendiculairement au mur arrière et parallèlement aux murs latéraux elle ne doit pas être désa...

Page 25: ...eur du réservoir placez une rondelle métallique et un écrou sur le boulon Tenez le boulon centré dans le trou et serrez l écrou à la main Tournez l écrou de de tour supplémentaire à l aide d une clé Répétez ce processus pour le trou restant dans le réservoir Ne serrez PAS à excès les pièces de fixation car elle peuvent briser la porcelaine et causer des blessures corporelles ou des dommages matéri...

Page 26: ...ut débris qui pourrait pénétrer dans la nouvelle soupape Pour les constructions neuves et ou rénovations domiciliaires rincez la conduite d alimentation en eau pendant plus d une minute afin d éliminer tous les résidus d adhésif à PVC de flux de brasage et ou de scellant à tuyaux utilisés pour la nouvelle tuyauterie 13 Raccordez le tuyau flexible d alimentation en eau sur le robinet d arrêt d éque...

Page 27: ... caoutchouc gris et rincez le sous l eau courante pour le nettoyer ill 4 7 Replacez le joint d étanchéité sur le corps de chasse d eau 8 Alignez et placez le corps de chasse dans le boîtier et tournez la pour la verrouiller en place 9 Replacez la boîte d engrenage du levier de déclenchement et appuyez sur le levier pour la verrouiller en place 10 Reposez avec précaution le couvercle du réservoir s...

Page 28: ...evis dans le sens horaire ou vers l indicateur Pour abaisser le niveau d eau tournez le tournevis dans le sens antihoraire ou vers l indicateur 2 Tirez la casse d eau après chaque réglage pour vérifier le niveau d eau Lorsque vous êtes satisfait du niveau d eau tirez la chasse d eau de nouveau pour vérifier Tuyau flexible Écrou de raccord Écrou Rondelle Joint de cône Ill 1 RÉGLAGE DU NIVEAU D EAU ...

Page 29: ... du diaphragme lors du retrait 7 Retirez la crépine du tube à l aide d une pince à bec effilé ill 7 Exercez un mouvement de torsion tout en tirant pour faciliter le retrait 8 Rincez toutes les pièces sous l eau courante pour éliminer tout débris résidu ou pellicule Réinstallez toutes les pièces en ordre inverse Ouvrez l eau vérifiez la présence de fuites puis vérifiez le fonctionnement Ill 6 ENTRE...

Page 30: ...irez le vers le haut pour le retirer ill 1 5 Retirez le joint d étanchéité en caoutchouc et rincez le sous l eau courante pour le nettoyer ill 2 6 Replacez le joint d étanchéité sur le corps de chasse d eau ill 3 7 Alignez la flèche avec le tube de trop plein et réinstallez le corps de chasse 8 Faites pivoter le corps de chasse dans la même orientation étape 3 9 Remettre en place avec précaution l...

Page 31: ...it au site http www totousa com L enregistrement du produit est complètement volontaire et à défaut de l enregistrement ne va pas limiter votre droit au garantie limitée 5 CETTE GARANTIE DONNE DES DROITS SPÉCIFIQUES IL EST POSSIBLE QUE L ACHETEUR AIT D AUTRES DROITS QUI VARIENT DUN ÉTAT A UN AUTRE OU D UNE PROVINCE À L AUTRE 6 Pour obtenir une réparation selon les termes de cette garantie l achete...

Page 32: ...to surfaces Toilets and lavatories are made of ceramic a porous material that allows mold and particles to stick to the surface creating stains scaling and build up CEFIONTECT glaze along with regular cleaning will keep your TOTO products in pristine condition NOTE For regular cleaning of your TOTO product with CEFIONTECT Use a mild dish detergent to clean your lavatory Use a gel based toilet bowl...

Reviews: