
®
®
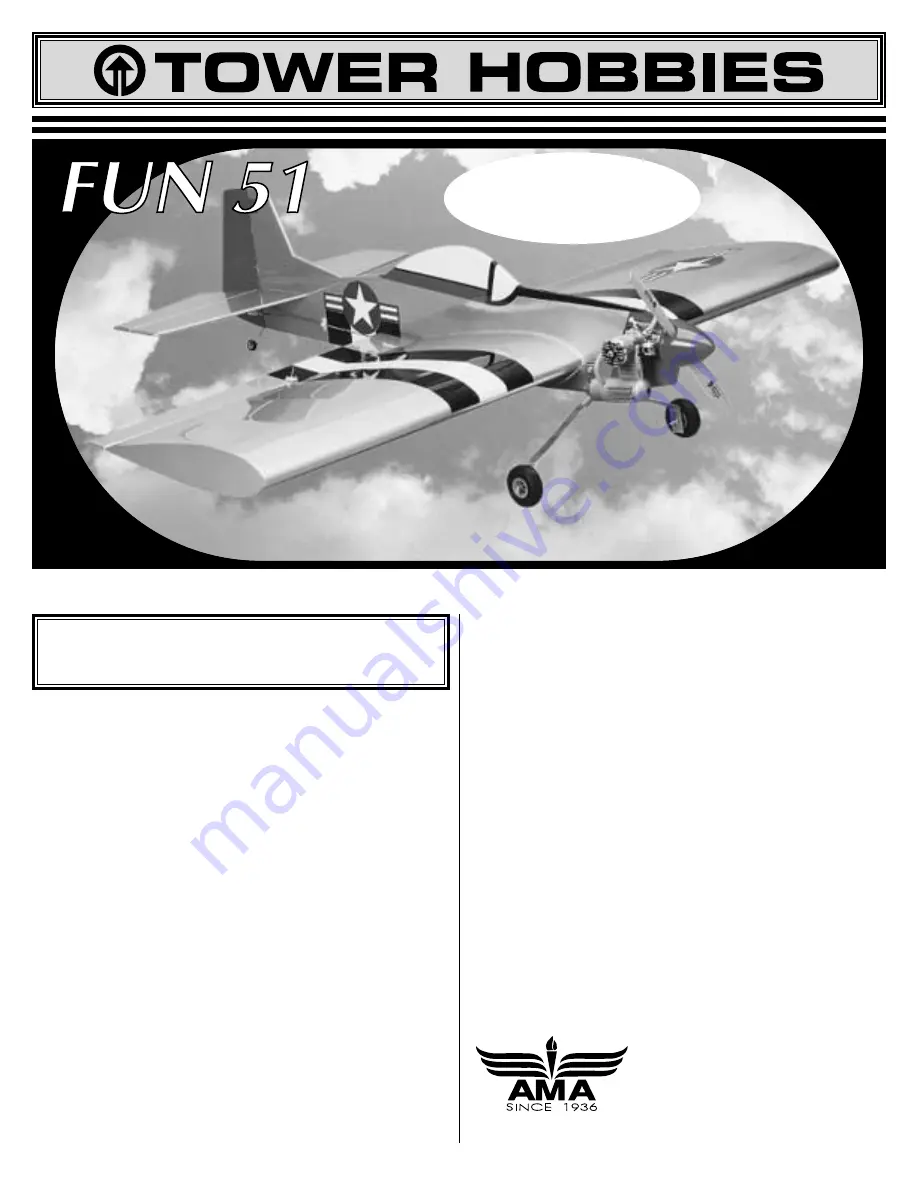
The Profile Alternative
.40-SIZE RADIO CONTROLLED MODEL AIRPLANE KIT
INSTRUCTION MANUAL
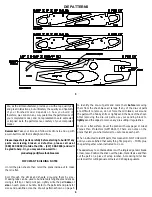
Wing Span: 44 in.
Wing Area: 627 sq. in. Weight: 3.5 lb.
Length: 34.5 in. Wing Loading: 13 oz./sq. ft.
Engine: .35 to .51 Radio: 4 ch./5 servos
2
READ THROUGH THIS INSTRUCTION MANUAL FIRST. IT
CONTAINS IMPORTANT INSTRUCTIONS AND WARNINGS
CONCERNING THE BUILDING AND USE OF THIS MODEL.
WARRANTY
Tower Hobbies
®
guarantees this kit to be free from defects in
both material and workmanship at the date of purchase. This
warranty does not cover any component parts damaged by use
or modification. In no case shall Tower Hobbies’ liability exceed
the original cost of the purchased kit. Further, Tower Hobbies
reserves the right to change or modify this warranty without
notice.
In that Tower Hobbies has no control over the final assembly or
material used for final assembly, no liability shall be assumed nor
accepted for any damage resulting from the use by the user of
the final user-assembled product. By the act of using the
user-assembled product, the user accepts all resulting liability.
If the buyers are not prepared to accept the liability associated
with the use of this product, they are advised to return this kit
immediately in new and unused condition to Tower Hobbies.
The Fun 51 is not a toy, but rather a sophisticated, working
model that functions very much like an actual airplane.
Because of its performance, the Fun 51, if not assembled and
operated correctly, could possibly cause injury to yourself or
spectators and damage property.
To make your R/C modeling experience totally enjoyable, we
recommend that you get experienced, knowledgeable help with
assembly and during your first flights. You’ll learn faster and
avoid risking your model before you’re truly ready to solo.
You can contact the national Academy of Model Aeronautics
(AMA), which has more than 2,500 chartered clubs across the
country. Through any one of them, instructor training programs
and insured newcomer training are available.
Contact the AMA at the address or toll-free phone number
below.
Academy of Model Aeronautics
5151 East Memorial Drive
Muncie, IN 47302-9252
Tele. (800) 435-9262
Fax (765) 741-0057
Web Site: HTTP://WWW.MODELAIRCRAFT.ORG
© Copyright 1999 Version 1.1
PRINTED IN USA FP51PO2


