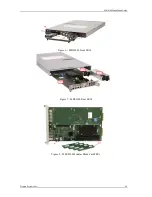
background image


MBS1000  

1U MODULAR BLADE  

SERVER 


No. MBS1000-xxx   Revision


INSTALLATION GUIDE 


Publication No. 8401000-08205 


Summary of Contents for MBS1000

Page 1: ...MBS1000 1U MODULAR BLADE SERVER No MBS1000 xxx Revision B INSTALLATION GUIDE Publication No 8401000 08205 ...

Page 2: ...ts of God or other causes beyond the control of Trenton Trenton reserves the right to make changes or improvements in any product without incurring any obligation to similarly alter products previously purchased In no event shall Trenton Systems Inc be liable for any defect in hardware or software or loss or inadequacy of data of any kind or for any direct indirect incidental or consequential dama...

Page 3: ... with any particular installation Trenton Systems cannot assume responsibility or liability for actual system use based on the examples and diagrams No patent liability is assumed by Trenton Systems with respect to the use of the information components equipment or software described in this manual This manual is as complete and factual as possible at the time of publication however the informatio...

Page 4: ... 3 1 RACK MOUNTING 3 1 RACKMOUNT INSTRUCTIONS 3 1 SLIDE RAIL INSTALLATION 3 1 CONNECTING AC POWER MBS1000 002 SYSTEM CONFIGURATION 3 4 CONNECTING DC POWER MBS1000 001 SYSTEM CONFIGURATION 3 4 CONNECTING A VIDEO MONITOR REAR ETHERNET AND USB TO THE MBS1000 3 5 CHAPTER 4 REPLACING SYSTEM COMPONENTS 4 1 MBS1000 FIELD REPLACEMENT UNITS FRUS 4 1 COOLING FAN REPLACEMENT 4 3 STORAGE DRIVE REPLACEMENT 4 3...

Page 5: ...proper lifting techniques when moving and installing the system When removing or installing boards and sub components keep these components in their static shielded bag and or packaging until you are ready to for component installation Handle the sub components by their edges Do not touch any sub component I O connector pins Do not apply pressure or attach labels to the board level sub components ...

Page 6: ...e active system power supply as well as the stand by fail over supply is each connected to a power source with a solid earth ground Each supply must have an incoming power source of 48 to 60VDC 20 4A DC typical and the maximum input current must not exceed 23A The 48VDC power supply option delivers 12VDC and 12VDC AUX to the system at 61 5A and 2 5A respectively Total output power must not exceed ...

Page 7: ...cal media drive and a choice of either AC DC or DC only redundant power supplies The MBS1000 also has the ability to support an off the shelf PCI Express plug in option card Some typical MBS1000 applications include data servers industrial automation machinery and weapon control systems Refer to the agency approval section in chapter five and the MBS1000 Certificate Of Compliance document in chapt...

Page 8: ...n BRC8244 SBC Single processor MBC8240 with one Intel Xeon E3 1225 v3 processor part no 92 824001300000 and four 8GB DDR3 1600 DIMMs part no 198500001112 00 System Power Supply 100 127 200 240VAC 10A 5A at 50 to 60Hz or 200 250VDC at 5 5A 900W rear mount redundant ADDITIONAL SYSTEM ELEMENTS Each MBS1000 xxx configuration contains the following active components 2 SATAIII 2 5 HDD 1TB installed in f...

Page 9: ...NGS Note Ensure that there is at least 4 6 inches 101 152mm behind the chassis and 7 8 inches 178 203mm in front of the chassis of open space in order to allow for cable connections airflow and system fan maintenance MBS1000 Front View MBS1000 Rear View Side View MBS1000 Inside Top View 28 711mm 17 432mm 1 75 44 5mm ...

Page 10: ... mounting rails RACKMOUNT INSTRUCTIONS A Elevated Operating Ambient If installed in a closed or multi unit rack assembly the operating ambient temperature of the rack environment may be greater than room ambient Therefore consideration should be given to installing the equipment in an environment compatible with the maximum ambient temperature Tma specified by the manufacturer B Reduced Air Flow I...

Page 11: ...ar screws and discard the spacing washers Use the screws to attach the 1U chassis mounting ears to the MBS1000 4 Standard 19 instrument racks have a wide variety of mounting hole types Some mounting holes are threaded but most of not some mounting holes are located on side flanges rather than the front and back of the rack supports and finally some holes are round while others are rectangular Our ...

Page 12: ...orts as shown in figure 5 13 CAUTION Ensure that when mounting the completed rail and frame assemblies to the 19 rack that the left and right assemblies are the same distance from the top or bottom of the rack Failure to align the slide rails properly will result in the modular blade server binding when moving in and out of the component rack or not being level inside the rack If the slides are gr...

Page 13: ...on Power must be available at both three pin AC input receptacles located at the rear of the system An over current protection device shall protect each power cord Under this incoming power connection scenario the power supply delivers 12VDC and 12VDC AUX to the system at 73 8A and 2 5A respectively Total output power must not exceed 900W To connect AC power to the server 1 Establish a chassis to ...

Page 14: ...on the system s MBC8240 single board server blade Follow the connection label located below the MBC8240 SBC to make the necessary connections for your specific MBS1000 application Note that the orange Ethernet LAN cable in the illustration below is connected to Ethernet Lnk 0 This LAN port indicated by the black connection label identifier is dedicated to the system management function and cannot ...

Page 15: ...01112 00 00RY460 6 MBC8240 SBC Battery 198500001114 00 00RY455 7 900W 100 240VAC 200 250VDC System Power Supply 198500001098 00 00RR363 00RR365 8 750W 48VDC System Power Supply 198500001117 00 00RR406 00FX892 9 Fan Module 198500001102 00 00RY463 10 DVD with Carrier 198500001104 00 00RY461 11 2 5 HDD Carrier 198500001105 00 00RY471 12 1TB 2 5 SATAIII HDD with Carrier 198500001106 00 00RY459 13 Beze...

Page 16: ...MBS1000 Installation Guide Trenton Systems Inc 4 2 Figure 6 MBS1000 Front FRUs Figure 7 MBS1000 Rear FRUs Figure 8 MBC8240 Modular Blade Card FRUs ...

Page 17: ...o remove Slide the new fan module in until you feel it seat into the connector and re install the fan bezel cover STORAGE DRIVE REPLACEMENT The storage drives of the MBS1000 are mounted in drive carriers that are accessible on the front of the system as shown in Figure 11 Drive carrier mounted HDDs are secured to the chassis with black carrier release lever Slide the black HDD catch to the left gr...

Page 18: ...d eject levers as shown in Figure 12 NOTE 1 Trenton recommends disconnecting the MBS1000 incoming power connections before removing the systems MBC8240 SBC NOTE 2 To protect MBC8240 components from electrostatic damage be sure to observe the handling precautions outlines on page i of this installation guide Reverse the card removal process to install the replacement MBC8240 modular blade card Figu...

Page 19: ...he SBC while lifting up on the battery to remove it from its socket Install the new batter ensuring that the side of the board faces the outer edge of the SBC CAUTION Risk of explosion if the system host board battery is replaced by and incorrect type Dispose of used batteries according to the instructions OPTION CARD INSTALLATION Following proper anti static precautions mentioned earlier and refe...

Page 20: ...ccessed from the front on the unit for removal and replacement Referring to Figure 15 insert the ICY Dock DVD carrier release tool into the right slot of the DVD carrier as show in Figure 15 to release the DVD carrier door from the system After the carrier door releases swing the door open and the DVD carrier will move out of the chassis Remove the DVD from the carrier and replace it with Trenton ...

Page 21: ... ELECTRICAL MBS1000 002 SYSTEM CONFIGURATION Line Voltage 100 240VAC 10A 5A or 200 250VDC at 5 5A Line Frequency 50 60Hz Power Consumption 450W typical 900W max PHYSICAL Approximate Dimensions W x H x D 17 x 1 75 x 28 432mm x 44 5mm x 711mm Net Weight 35 2 lbs 16 0 kg doesn t include an option card SHOCK VIBRATION Shock Class 3M4 operational and non operational under EN60721 3 3 10G operating 100m...

Reviews: