background image

HOME GYM CARE INSTRUCTIONS

AND ASSEMBLY MANUAL

TROJAN

MY SPACE MY TIME 

®

#

1


HOME

FITNESS

SOUTH AFRICA’S

SINCE

1981

CAUTION

READ ALL PRECAUTIONS AND

INSTRUCTIONS IN THIS MANUAL

BEFORE USING THIS EQUIPMENT

KEEP THIS MANUAL FOR

FUTURE REFERENCE

1 YEAR

warranty

CALL

0861 8765

26

0 8 6

1   T

R O J

A N

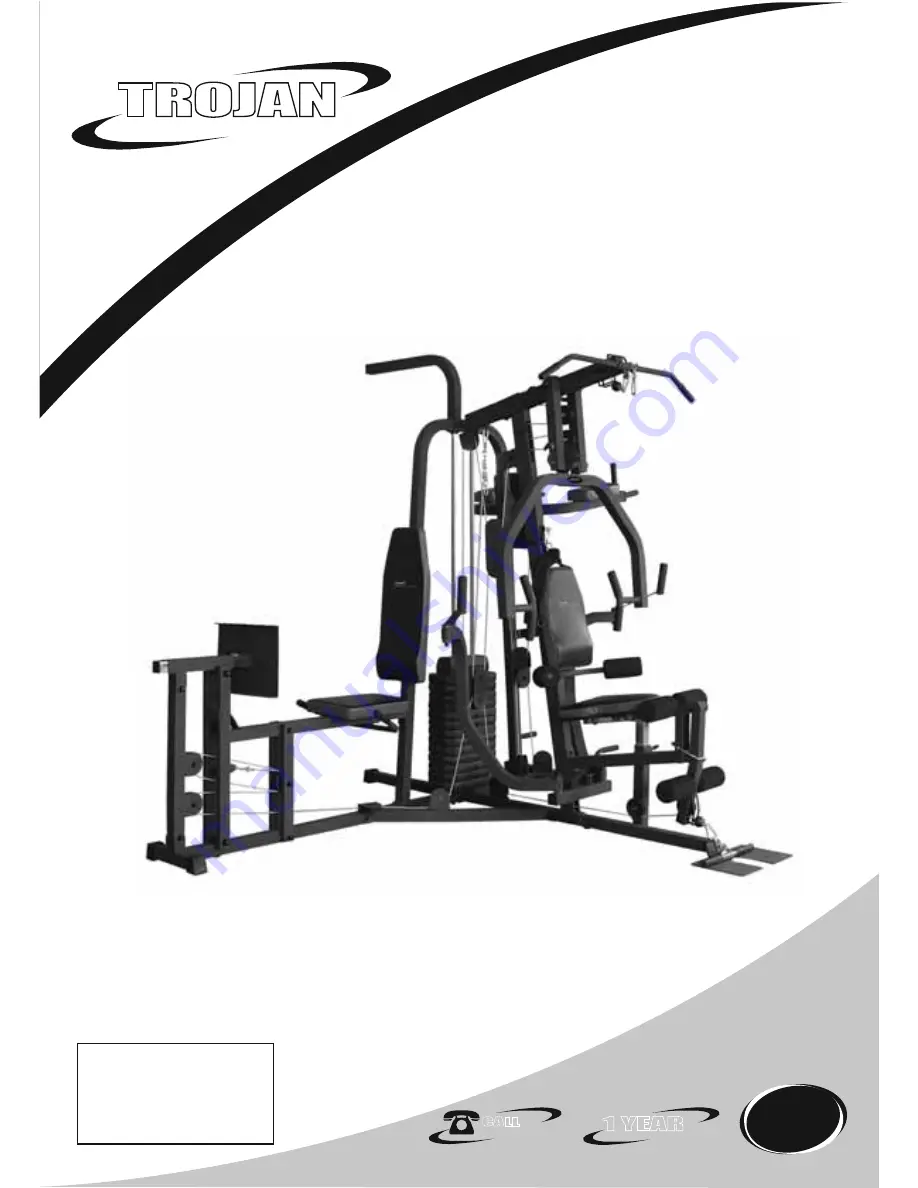
POWER STATION 600

H O M E   G Y M

1575

Summary of Contents for iSMART 600

Page 1: ...Y TIME 1HOME FITNESS SOUTH AFRICA S SINCE 1981 CAUTION READ ALL PRECAUTIONS AND INSTRUCTIONS IN THIS MANUAL BEFORE USING THIS EQUIPMENT KEEP THIS MANUAL FOR FUTURE REFERENCE 1 YEAR warranty CALL 0861...

Page 2: ...ARE LIST 8 5 ASSEMBLY STEPS 10 6 FITNESSTIPS ANDTECHNIQUES 19 7 CONDITIONING GUIDELINES 20 8 WARM UP AND COOL DOWN 21 9 EXERCISE PROGRAM 22 10 FREQUENTLY ASKED QUESTIONS 27 11 EXPLODED DRAWING 28 12 T...

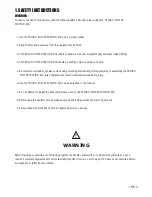
Page 3: ...ding unfolding or assembling theTROJAN POWER STATION 600 loss of balance may result in a fall and serious bodily injury 6 Use theTROJAN POWER STATION 600 only as described in the manual 7 Do not attem...

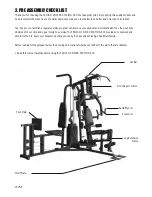
Page 4: ...h Too often our busy lifestyles limit our time and opportunity to exercise TheTROJAN POWER STATION 600 provides a convenient and simple method to begin your assault on getting your body in shape and a...

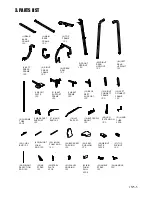
Page 5: ...6 PRESS ARM 1PC 11 SEAT SUPPORT FRAME 1PC 1 REAR BASE FRAME 1PC 17 HAND BAR 1PC 5 RIGHT PRESS FRAME 1PC 2 MAIN BASE FRAME 1PC 4 LEFT PRESS FRAME 1PC 10 FOOT PLATE 1PC 23L LONG FOAM ROD 1PC 30 STEEL P...

Page 6: ...8PCS 46 PULLEY 25PCS 36 RECTANGLE PATCH 4PCS 41 BLACK BALL PIN 1PC 47 SQUARE END CAP 5PCS 53 SQUARE BUMPER 2PCS 59 STEEL BUSHING 2PCS 65 25X50mm SQUARE END PLUG 10PCS 103 1 2 PLASTIC DOME CAP 6PCS 71...

Page 7: ...USHION 3 1PC 112 LEG PRESS EXTENSION FRAME 1PC 122 VKR FRAME 1PC 117 HANDLE FRAME 1PC 125 HANDLE TUBE 2PCS 115 FOOT PLATE ADJUSTABLE FRAME 1PC 114 LEG EXTENSION CONNECT FRAME 1PC 109 BASE FRAME 1PC 11...

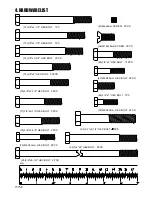
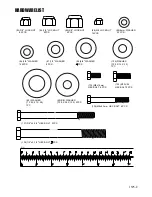
Page 8: ...m HEX BOLT 2PCS 82 3 8 x1 HEX BOLT 1PC 91 M6x8mm SCREW 2PCS 95 3 8 x4 HEX BOLT 2PCS mm 93 3 8 x8 3 4 HEX BOLT 2PCS 78 3 8 x2 3 8 HEX BOLT 2PCS 79 M8X53mm HEX BOLT 2PCS 73 3 8 x3 7 8 HEX BOLT 1PC 74 3...

Page 9: ...KNUT 14PCS 134 M8x16mm HEX BOLT 6PCS 88 5 8 WASHER PCS 85 5 8 LOCKNUT 4PCS 137 3 8 x4 3 4 HEX BOLT 3PCS 138 1 2 x5 1 2 HEX BOLT PCS mm 90 BIG WASHER T3 0X 38X 13 5 4PCS 89 WASHER T3 0X 47X 26 1PC 84 1...

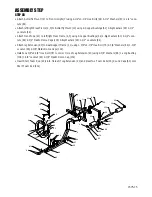
Page 10: ...to Press Base Frame 123 using 2 3 8 X3 Hex Bolts 75 4 3 8 Washers 86 2 3 8 Locknuts 83 Attach Front Upright 7 to Main Base Frame 2 using 2 3 8 X3 Hex Bolts 75 4 3 8 Washers 86 2 3 8 Lock nuts 83 Atta...

Page 11: ...ChromeTubes 9 SlideTop Weight 27 down Slide down Steel Bushing 59 and fix with M6X8MM Screw 91 Attach Plastic Bushing 107 to Weight Selection Rod 28 with Pin 105 placeT3 0x47x26 Washer 89 and T3 0x13x...

Page 12: ...3 8 Washers 86 4 3 8 Locknuts 83 AttachTop Frame 3 to Front Upright 7 using 1 3 8 X3 3 4 Hex Bolt 74 1 3 8 X2 7 8 Hex Bolt 76 4 3 8 Washers 86 2 3 8 Locknuts 83 Attach single Pulley Bracket 100 to Ma...

Page 13: ...Lock Nuts 83 Install handleTube 125 toVKR Frame 122 using 2 M10x25mm Screws 135 2 3 8 Washers 86 Install Backrest Cushion 3 127 toVKR Frame 122 using 2 M8x16mm Hex Bolts 134 2 8mm Washers 99 Install...

Page 14: ...103 Attach leg extension Connect Frame 114 to the bracket of Base Frame 109 Using 1 3 8 X3 Hex Bolt 75 2 3 8 Washers 86 1 3 8 Lock Nut 83 2 3 8 Plastic Dome Cap 102 Plug two Oil Bushings 61a into Wel...

Page 15: ...shers 90 2 1 2 Locknuts 84 Attach leg Extension 20 to Seat Support Frame 11 using 1 3 8 x2 7 8 Hex Bolt 76 2 3 8 Washers 86 1 3 8 Locknut 83 2 3 8 Plastic Dome Caps 102 Install one 3 8 x2 3 8 Hex Bolt...

Page 16: ...m8x40mm Hex Bolts 81 2 M8 Washers 99 Attach Backrest Cushion 2 120 to Right Rear Upright 8r Using 2 M8x63mm Hex Bolts 136 2 8mm Washers 99 Attach Seat Cushion 2 119 to Seat Support Frame 110 using 4...

Page 17: ...7 8 to unit using 2 3 8 x2 Hex Bolts 80 4 3 8 Washers 86 and 2 3 8 Locknuts 83 Attach Hand Grips 54 to Lat Bar 18 Attach Lat Bar 18 to Ball End of Upper Cable 70 using 2 Chain Hooks 45 1 Chain 37 ASS...

Page 18: ...ashers 86 and 3 3 8 Locknuts 83 Install Pulley no 14 to unit using 1 3 8 x2 Hex Bolts 80 2 3 8 Washers 86 1 3 8 Locknut 83 Install Pulley no 15 17 to unit using 2 3 8 x2 Hex Bolts 80 4 3 8 Washers 86...

Page 19: ...AINING Along with aerobic exercising which helps get rid of and keep off the excess fat that our bodies can store weight training is an essential part of the exercise routine process Weight training h...

Page 20: ...et from walls and furniture EXERCISE INTENSITY To maximize the benefits of exercising it is important to exercise with the proper intensity The proper intensity level can be found by using your heart...

Page 21: ...k and shoulders to relax as you reach down toward your toes as far as pos sible Hold for 15 counts then relax Repeat 3 times Stretches Hamstrings back of knees and back 2 Hamstring Stretch Sit with on...

Page 22: ...ing over the top of the bar and the palms facing in towards the body Underhand Grip The bar is gripped with the hands reaching under the bar and the palms facing away from the body Breathing Breathing...

Page 23: ...at your weights are firmly clamped to the bar Do seek medical advice before starting any exercise programme Do start off slowly to avoid unnecessary soreness and stiffness Do remember to bend at the k...

Page 24: ...er Return the bars in a controlled manner to the start position LAT PULL DOWN FRONT Attach lat bar to high pulley In a seated position facing away from the machine pull the lat bar to the front of you...

Page 25: ...ner to the start position DIPS Grip both dip handle bars with your arm extended Slowly bend your elbows dipping body down until upper arms are parallel to the floor Return in a controlled manner to th...

Page 26: ...ller pads in a controlled manner to the start position VERTICAL KNEE RAISE With your back against the support and your arms on the pads bring your knees up towards your stomach Return in a controlled...

Page 27: ...ble parts Q3 My weight stack is not moving freely 1 Apply a light coating of grease to the guide tubes as this will help reduce any unneccesary friction Q4 Is it possible to leave my weights on the be...

Page 28: ...1575 28 11 EXPLODED DRAWING...

Page 29: ...by law or otherwise including without limitation any obligation of the Supplier in respect of any injury loss or damage direct indirect or consequential arising out of the use of or inability to use t...

Page 30: ...contrary herein the service agent s prevailing charges for services repairs including call out and or spares will be payable by the Consumer upon collection or delivery of the repaired product The Con...

Page 31: ...ed to your home on an agreed date and time Note Should you live in an outlying area it may be neccessary to return the product to the store nearest to you Our service operator will advise you of your...

Page 32: ...1575 32...

Reviews: