background image


------------------------------------------------------------------------------------------------------------------------ 


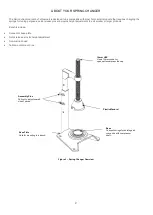
IMPORTANT NOTES ON YOUR SPRING CHANGING TOOL 

Turbosmart accepts NO responsibility whatsoever for incorrect use of this product which is potentially hazardous and can cause serious  
personal injury. 


Read and understand the instructions for you individual product before attempting to use this tool. 
 

RECOMMENDATIONS 

Turbosmart recommends that your Products be assembled by an appropriately qualified technician 
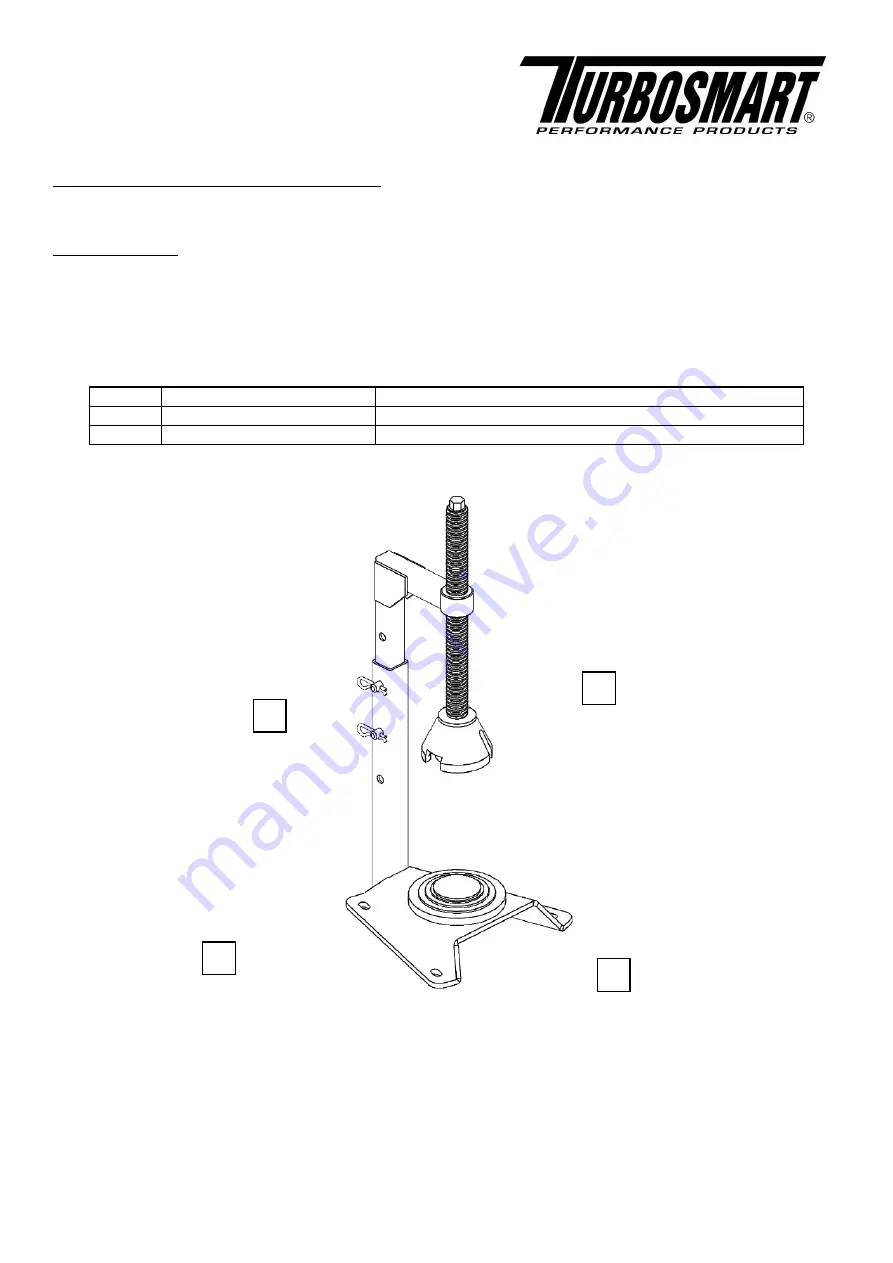
 

------------------------------------------------------------------------------------------------------------------------ 

KIT CONTENTS 


Please check that the following items have been provided in your Turbosmart Spring Change Tool packaging 


Part 

Description 

Use 

Turbosmart Spring Changer 

Main unit  

Turbosmart Sticker 

Turbosmart sticker 


Figure 1 - Kit Contents 


TOOLS REQUIRED 

- 12mm spanner/socket and driver 


------------------------------------------------------------------------------------------------------------------------ 

Product Name:   

Spring Change Assistance Kit


Product Description:  

Spring Change Assistance Kit 

Product Number:  

TS-0550-3094 

Document Version: 

V1.00 Rev A 

Summary of Contents for TS-0550-3094

Page 1: ... recommends that your Products be assembled by an appropriately qualified technician KIT CONTENTS Please check that the following items have been provided in your Turbosmart Spring Change Tool packaging Part Description Use 1 Turbosmart Spring Changer Main unit 4 Turbosmart Sticker Turbosmart sticker Figure 1 Kit Contents TOOLS REQUIRED 12mm spanner socket and driver Product Name Spring Change Ass...

Page 2: ... to suit smaller or larger products Benefits include Concentric base plate Quick release pins for height adjustment Non marring head Table mountable or Vice Assembly Pins Pull out to adjust overall size of device Plastic Mandrel Base Plate Hole for mounting to a bench Figure 2 Spring Changer Overview 12mm HEX Use a 12mm socket or spanner to compress the cap Base Concentric rings for holding part c...

Page 3: ... clips from the pins in the stem of tool remove the pins and slide the head up and down to the desired position and reinsert the pins and R clips Have the tool as short as possible whilst maintaining enough room for the springs to extend Set Part and Compress Cap Set part on the concentric base the different levels of the base will hold the part centred with the compression screw Ensure head is pl...

Page 4: ...in a way that prevents ejection of the spring out the side Once the spring tension has been released change the spring to your desired configuration and reverse the steps ensuring the cap is aligned correctly on the product during compression NOTE Use individual product instructions for how to remove and assemble the spring and cap CAUTION Beware on pinching 2 ...

Reviews: