background image

TYM

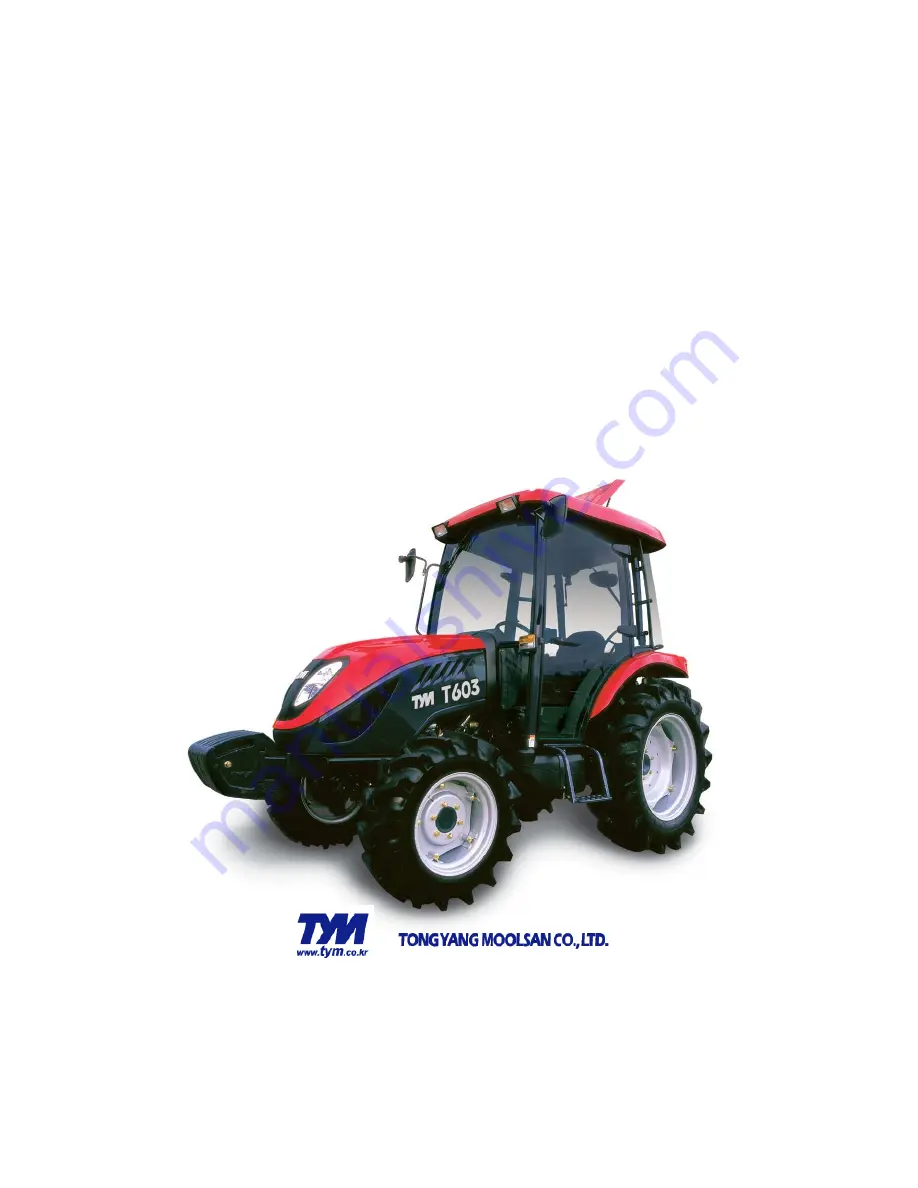
OPERATOR’S MANUAL

FOR

TRACTORS

(T603)

#604-9, Namsan-dong, Changwon-city, Kyungnam, Korea 

TEL:82-55-279-4379, FAX:82-55-279-4447

www.tym.co.kr

Summary of Contents for T603

Page 1: ...TYM OPERATOR S MANUAL FOR TRACTORS T603 604 9 Namsan dong Changwon city Kyungnam Korea TEL 82 55 279 4379 FAX 82 55 279 4447 www tym co kr ...

Page 2: ......

Page 3: ...epaired or replaced Any such part repaired or replaced under warranty is warranted for the remainder of the warranty period specified in 2 above During the term of this warranty Perkins will provide through a Perkins distributor or the distributor of the original equipment manufacturer or other establishment authorized by Perkins repair or replacement of any warranted part at no charge to the owne...

Page 4: ...property of Perkins Reasonable and customary labor during normal working hours required to make the warranty repair This includes labor to remove and install the engine if necessary Responsibilities and Limitations The warranty is subject to the following Provide timely notice of a warrantable failure and promptly making the product available for repair Limitations The emissions related parts cove...

Page 5: ...ailable after being notified of a potential product problem This warranty is in addition to Perkins standard warranty applicable to the engine product involved Remedies under this warranty are expressly limited to the provision of material and services as specified herein Perkins will not be responsible for any incidental indirect or consequential loss damage expense or cost including but not limi...

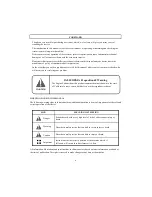
Page 6: ...NIA Proposition 65 Warning The Engine Exhaust from this product contains chemicals known to the state of California to cause cancer birth defects or other reproductive harm WARNING SIGNS IN THIS MANUAL 4 WARNING SIGNS IN THIS MANUAL The following warning signs in this manual draw additional attention to items of importance for the safe and correct operation of the tractor SIGN MEANING OF THE SIGN ...

Page 7: ... 7 8 10 11 12 14 15 27 28 30 31 33 56 57 79 11 CABIN 12 Air conditioning system Section D 13 Specifications 14 Fuel saving Tips 15 Fault tracing 16 Wiring Diagram 17 Power train 18 Tractor history card 19 Service record 20 Daily operating Log 21 Part replacement record All information illustrations and specifications in this manual are based on latest information available at the time of publicati...

Page 8: ...r WARRANTY OF THE PRODUCT The manufacturer warrants this product and full details of the warranty are provided on a separate warranty schedule SERVICE Service is available from any TYM dealer in the country PARTS To obtain spare parts please contact your nearest dealer and give him the details listed below Tractor model Tractor serial number Tractor engine number Part number and description Quanti...

Page 9: ...utine services as specified in this manual are carried out at the recommended intervals Read this Manual carefully and keep it in a convenient place for future reference If at any time you require advice concerning your Tractor do not hesitate to contact your Authorized TYM dealer Distributor He has trained personnel genuine parts and necessary equipments to undertake all your service requirements...

Page 10: ...rmed of the latest methods of servicing Tractors They stock genuine spare parts and are backed by the Company s full support Through this manual The use of the terms LEFT RIGHT FRONT and REAR must be understood RIGHT FRONT and REAR must be understood to avoid any confusion when following the introductions The LEFT and RIGHT means left and right sides of the Tractor when facing forward in the drive...

Page 11: ...ders of T603 designed by AVL Caterpillar Clutch and Transmission A single plate dry clutch 10 83 diameter is used on these tractors Tractor with IPTO Independent Power Take Off are fitted with hydraulic Clutch Assy The transmission Gear box has 24 forward 24 reverse speeds of T603with high low selector lever Presently TYM Tractors are fitted with partial synchromesh type gears type gears Brakes TY...

Page 12: ...ne through the Starter Motor and the Electrical system comprising Horn Head Lamp Side indicator Lamps Plough Lamp Brake Light Gauge lamp Hazard Lamp Generator or Alternator Fuse box also from part of the Electrical system When operating the tractor at High speed Do not attempt to make sharp turns by using the brakes This may result in overturning of the Tractor causing serious injury or DEATH Warn...

Page 13: ...blem and request assistance When additional assistance is needed Your Dealer Distributor has direct access to your office If you cannot obtain satisfaction by doing this contact the TYM CO LTD Office and provide them with Your name address and telephone number Model and Tractor serial number Dealer Distributor Name Address Machine purchase date and Hours used Nature of problem Before contacting TY...

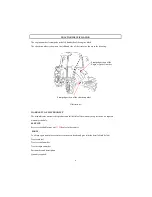
Page 14: ...e when lowering the upper section of the ROPS frame and take extreme care while driving the tractor with the ROPS frame lowered Do not wear the seat belt with the ROPS lowered and please remember that the fold down facility is for special circumstances only and must not be lowered for general use Use of the tractor with the ROPS lowered can cause fatal injuries As the ROPS frame or cab together wi...

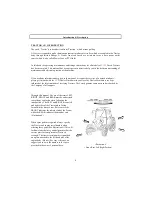
Page 15: ...HE ROPS Never attach chains ropes to the ROPS for pulling purposes this will cause the Tractor to tip backwards Always pull from the Tractor drawbar Be careful when driving through door opening or under low overhead objects Make sure there is sufficient overhead clearance for the ROPS fatal injuries If the ROPS is removed or replaced make certain that the proper hardware is used to replace the ROP...

Page 16: ...fies the seat fitted to your Tractor FOR Sliding seat To select Seat position move Adjusting lever and slide Seat closer to or away from Dash panel and controls Fig 1 Check whether the seat properly locked in its position before driving the tractor 14 Always use the seat belt when the ROPS is installed Do not use the seat belt if a foldable ROPS is down or there is no ROPS Check the seat belt regu...

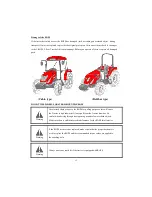
Page 17: ...contains important information about safety Carefully read the message DANGER WARNING CAUTION Carefully read all safety instructions given in this manual for your safety Tempering with any of the safety devices can cause serious injuries or death Keep all safety signs in good condition Replace missing or damaged safety signs Keep your tractor in proper condition and do not allow any unauthorized m...

Page 18: ...hine operation when the machine is equipped with a certified ROPS Failure to do so will reduce or eliminate protection for the operator in the event of a roll over PRECAUTION TO AVOID TIPPING Do not drive where the Tractor could slip or tip Stay alert for holes and rocks in the terrain and other hidden hazards Slow down before you make a sharp turn Slow down before you make a sharp turn Driving fo...

Page 19: ...bited by state or local regulations Use slow moving vehicle SMV sign when driving on public road Use slow moving vehicle SMV sign when driving on public road during both day night time unless prohibited by law PRACTICE SAFE MAINTENANCE Understand service procedure before doing work Keep the surrounding area of the Tractor clean and dry Do not attempt to service Tractor when it is in motion Keep bo...

Page 20: ... enough to burn skin cause holes in clothing and cause blindness if found entry into eyes For adequate safety always 1 Fill batteries in a well ventilated area 2 Wear eye protection and acid proof hand gloves 3 Avoid breathing direct fumes when electrolyte is added 4 Do not add water to electrolyte as it may splash off causing severe burns If you spill acid on yourself 1 Flush your skin with water...

Page 21: ...al only when the Clutch pedal is fully pressed 2 Do not By pass this safety starter switch or work on it Only Authorized Dealers are WORK IN VENTILATED AREA Do not start the Tractor in an enclosed building unless the doors windows are open for proper ventilation as tractor fumes can cause sickness or death If it is necessary to run an engine in an enclosed area remove the exhaust fumes by connecti...

Page 22: ...re that the operator wears clothing which will not get entangled in the moving parts of the tractor or machine and protect him or her from the elements When spraying or using chemicals please ensure that clothing and protective equipment is worn which prevents respiratory or skin problems For full details consult the manufacturer of the chemicals 20 To avoid lengthy exposure to noise ensure that e...

Page 23: ...a is well ventilated as exhaust gases are very harmful and can cause death 6 Do not work under raised implements 7 When changing wheels or tires ensure that a suitable wheel stand is placed under the axle prior to removing the wheel and the wheels are chocked 21 to removing the wheel and the wheels are chocked 8 Where guards or shields need to be removed to perform a service or repair ensure that ...

Page 24: ...e care during dusty operations which will reduce visibility substantially 9 Never start the tractor unless the transmission is out of gear the operator is in the seat and all round safety has been checked 10 Only operate the tractor seated in the drivers seat and never turn or brake suddenly at high speed as this can cause a roll over and serious injury or death 11 When traveling on a public road ...

Page 25: ... signs 8 Keep safety signs clean of dirt and grease Servicing the Tractor 1 Keep the tractor in good operating condition for your safety An improperly maintained Tractor can be hazardous 2 Stop the engine before performing any service on the tractor 3 The cooling system operates under pressure which is controlled by the radiator cap It is dangerous to remove the cap while the system is hot First t...

Page 26: ...ot operate the tractor in an enclosed building without adequate ventilation Exhaust fumes can cause death 8 Do not park the tractor on a steep slope 24 9 If power steering or Engine seizes to operate stop the tractor immediately 10 Pull only from the swinging draw bar or the lower link drawbar in the down position Use only a drawbar pin that locks in place Pulling from the tractor rear axle carrie...

Page 27: ...ing brake and block the rear wheels from front and rear side 4 To avoid injury always move down flip part of PTO Do not clean adjust or service PTO driven equipment when the tractor engine is running 5 Make sure the PTO master shield is installed at all times and always replace the PTO shield cap When the PTO is not in use 25 Diesel fuel 1 Keep the equipment clean and properly maintained 2 Under n...

Page 28: ...nd to minor adjustments and repairs as soon as necessity is apparent DO Allow the engine to cool before removing the radiator filler cap and adding water remove the radiator cap slowly 26 radiator cap slowly DO Shift into low gear when driving down steeps hills DO Latch the brake pedals together when driving on a highway DO Keep draft control lever fully down when not in use Don ts For safe operat...

Page 29: ...ON T Mount or dismount from the right side of the tractor DON T Temper the hydraulic control levers upper limit stops DON T Use draft control lever for lifting of implements DON T Start the engine with the PTO engaged DON T Use the governor Control Lever Hand throttle while driving on roads DON T Move the hydraulic levers rearward 27 ...

Page 30: ...formation should be kept with the machine at all times as reference data This symbol means ATTENTION YOUR SAFETY IS INVOLVED The message that follows the symbol contains important information about safety Follow recommended precautions and safe operating practice 28 Location On Dash cover side LH Part No 1260 904 062 0 ...

Page 31: ... 1200 910 024 0 Location On the Fuel filler No 1200 910 005 0 Location On the Cab Part No 1200 910 011 0 30 Location On Dash cover side RH Part No 1200 910 023 0 Location On Radiator Part No 1200 910 015 0 Location On the Cab Part No 1200 910 003 0 Location Near the step RH Part No 1769 910 001 0 ...

Page 32: ...ender RH Part No 1200 910 019 0 Location On the Fender LH Part No 1200 910 016 0 30 Location On the Fender LH Part No 1200 910 001 0 Location Below the Seat Part No 1200 910 016 0 Location Below the Seat Part No 1200 910 006 0 Location Rear the Cab Part No 1200 910 014 0 Location Rear the Cab Part No 1200 910 013 0 ...

Page 33: ... Slow or minimum Setting Engine coolant temperature Warning Hare fast or maximum setting Fuel level Hazard warning Transmission oil pressure Engine Stop Neutral Turn signal 31 control Lights Fan Transmission oil temperature Horn Power take off engaged parking brake Engine oil pressure Power take off Disengaged Work lamps Air filter Lift arm raise Differential lock Battery charge Lift arm lower See...

Page 34: ......

Page 35: ...th the location and function of all the features of your New Tractor Do not start the engine or attempt to drive or operate the Tractor until you are fully accustomed to all the controls It is too late to learn once the Tractor is moving If in doubt about any aspect of the operation of the tractor consult your TYM Tractor Dealer Distributor Particular attention should be paid to the recommendation...

Page 36: ...ENT AND SWITCHES 34 Main switch OFF The key can be inserted or removed ON The electric circuit is on Glow Glow plugs preheat the combustion chamber START The starter motor is engaged When the key is released it will return to the ON position ...

Page 37: ... gear 2 Left needle Indicates engine revolutions HOUR METER Mile hour Km hour 35 The hour meter consists of digits with the last digit indicating 1 10th of an hour FUEL GAUGE Shows the amount of fuel in the tank when the ignition switch is ON WATER TEMPERATURE GAUGE Shows the water temperature with the ignition switch ON C is low to normal temperature H is high temperature If the pointer is in the...

Page 38: ...n while the engine is running stop the engine and get expert advice 36 PTO monitor Lamp Shows the revolution of PTO Refer to monitor lamp on Page 36 High beam lamp is operated on the combination switch Low beam lamp is operated on the combination switch Glow signal Lamp indicates preheating Parking brake is operated when footbrake is engaged Fuel Level If it comes on while the engine is running Fi...

Page 39: ...ionary but will instantly start rotating of the clutch pedal is released or the implement is lowered 37 1 PTO ON OFF switch PTO ON OFF switch is situated on the LHS on the steering column and can be identified easily with its built in red colored indicator When the switch is pushed down to start the PTO indicator glows to indicate that the switch and the PTO are in ON position If the switch is pus...

Page 40: ...ally cause injuries to the persons standing near the tractor The stopping of the PTO when the implement is lifted off the ground with the position control prevents the damage to the implement or the PTO shaft 1 When the PTO control switch is in manual position the PTO does not stop rotating even if the clutch pedal is pressed If working on hard soils pavements with a rotary implement the PTO ON OF...

Page 41: ...ng it away from the driver decreases revolution Clutch disconnecting arm For long term storage of the Tractor it is possible to latch the clutch in the disengaged position Push the clutch down and engage the latch to hold it there Do not attempt to start engine when this arm is being used Foot operated accelerator This pedal can override a fixed hand throttle setting warning ...

Page 42: ...e button can be depressed Hold button in and lower park brake handle all the way down to release the park brake Park brake handle Button Caution 40 Traveling with the park brake on will damage the brakes And To prevent damage to the park brake pedal make sure that brake pedals are fully depressed before push the park brake pedal down important Shuttle shift lever This control allows shifting from ...

Page 43: ...reverse to select rearward drive direction Power Shuttle Lever If Equipped A B Mode Switch This switch is situated up the starting key location on the dash panel There are three positions marked for this switch 41 Main gear lever This lever can be shifted by using the clutch both when the tractor is stationary or mobile It is located on the RHS of the driver seat Sub gear lever Linear shift lever ...

Page 44: ...damage Select the proper speed range and gear for the job The machine maybe operated in any gear with engine speeds at 950 2600 rpm Within these limits the engine can be placed under varying load operations Never overload engine by lugging machine at low idle speeds Raise engine speed the match expected loads If a slight increase engine rpm occurs simultaneously with moving hand throttle lever for...

Page 45: ...lying the brakes or they will not work When starting to operate the tractor be sure to release the parking brakes Misuse of the brakes may cause damage to the transmission and is therefore not acceptable to TYM for coverage under the warranty Diff lock pedal In case of wheel slippage use the diff lock by pushing down on the diff lock pedal To release it remove the foot from the pedal Tractor will ...

Page 46: ...eel drive is ON when push the button And again push the button it is operated OFF mode Do not use front wheel drive at high speed or on the road as premature 44 Use of front wheel drive improves traction performance Driver s seat To adjust the seat backwards and forwards lift the lever at the front of the seat and set it to the desired position Tilt pedal To adjust the inclination of the steering ...

Page 47: ...s to the implement stop the engine to avoid serious injury When leaving the tractor stop the engine and remove the key Set the parking brake To raise the implement Pull the lever back To lower the implement Push the lever forward Caution Operating the hydraulics The hydraulics are powered with an engine driven hydraulic pump and controlled with a position control lever mounted beside the driver Po...

Page 48: ... forward The depth increase by moving the lever backwards the depth increases Adjusting Knob of hydraulic descent speed Warning 46 hydraulics three point linkage and is positioned at the front of the driver s seat To slow the downward speed Turn the knob clockwise To increase the downward speed turn the knob anticlockwise To lock the knob clockwise Do not over tighten the knob Always set the knob ...

Page 49: ...Insert the implement coupler to the tractor hydraulic coupler 4 pull the implement coupler slightly to make sure couplers are firmly connected 47 firmly connected Disconnecting 1 Lower the implement first to the ground to release hydraulic pressure in the hoses 2 Clean the couplers 3 Relieve pressure by moving hydraulic control levers with engine shut off Pull the hose straight from the hydraulic ...

Page 50: ...re applying pressure to the system Release all pressure before disconnecting the lines or performing other work on the hydraulic system To find a leak under pressure use a small piece of cardboard or wood Never 1 To raise the front end loader 2 To lower the front end loader 3 To rollback the bucket 4 To dump the bucket NOTE The Joystick control and valve can also be used for other applications if ...

Page 51: ...s are interconnected ADJUSTMENT OF THE TOP LINK Lengthening or shortening the top link will change the angle of the implement The locating hole of the top link varies with the type of implement used The most common locations are the 1st and 2nd hole from the top ADJUSTMENT OF LOWER LINK The adjustment is done with the adjusting handle on the Right hand yoke rod To shorten it wind the handle clockw...

Page 52: ...nt 2 For Rotary tilling Use the Pin to B point 50 Do not attach a PTO shaft with the engine running and ensure all safety shields are in place MOUNTING IMPLEMENT If the PTO is used remove the safety cover off the PTO shaft Adjust the yoke rod on the lower links to suit the implement in use Attach the left lower link then attach the right lower link using the adjusting handle on the leveling box if...

Page 53: ...cuit automatically activates Operator need to wait for glow light to turn off As the lamp goes off turn the key to the start position to start the engine 9 Ensure that all the warning lights are off with the engine running 51 Only engage the starter for a period of not more than 10 seconds If Engine does not start rest the starter for about 20 seconds and try again for a maximum of 10 seconds If t...

Page 54: ...F 4 F 30 40 min Below 4 F Over 40 min 52 Ensure the handbrake Foot brake is on during the warming period Failure to warm up correctly can result in problems When the engine is warm push down the clutch and engage the main and auxiliary gear levers to the required position Push down on the brake pedals and release the handbrake Increase the engine revolutions and let out the clutch smoothly Only ch...

Page 55: ...of individual pedals To make a tight turn use both the steering wheel and the brake pedal at the same time For a left turns use the left pedal and a right turn the right pedal 53 Perform tight turns only at a slow safe speed Doing so at a high speed can cause rollovers and very serious injury or death Caution NORMAL BRAKING AND PARKING Let the engine come back to idle and at the same time push in ...

Page 56: ...ers to low and the throttle to medium engine speed Release the clutch and as it engages release the brake pedals Adjust the throttle to the required speed 54 The diff lock would only be used in situations where traction is lost on one of the rear wheels Use low engine revolutions when using the diff lock If the diff lock does not release after removing the foot from the pedal use the left and righ...

Page 57: ...broken or stretched fan belt When traveling on public or farm roads connect both brake pedals and allow for Allow the engine to cool down before opening radiator cap as serious burns may result due to hot steam boiling water Danger 55 When traveling on public or farm roads connect both brake pedals and allow for the weight of any mounted implement to ensure that the unit is not unbalanced Also all...

Page 58: ... Track adjustment As T603 models of TYM are front wheel assist the front track can be set in 2 positions The rear track can be set in 5 positions as illustrated 56 Unit mm in ...

Page 59: ...n Maintenance 57 This section gives full details of the service procedures necessary to maintain your Tractor at peak efficiency while the lubrication and maintenance chart provides a ready reference to these requirements ...

Page 60: ...sty color drain the system completely and refill with the correct mixture of water and anti freeze or corrosion inhibitor Engine oil Pull out the stick wipe it and dip in the oil sump Ensure that oil level is between the upper and lower mark near the upper mark If too low add oil but never excess 100hrs of service intervals 58 100hrs of service intervals Do not overfill the crankcase with oil Tran...

Page 61: ...sure The air pressure used in the tires has a direct bearing on the life of the tire and its performance in the field Ensure that the tire pressures are correct and in accordance with the table on page 62 To make a visual judgment see the drawing on the right It is strongly recommended that tire pressures are checked with a proper gauge only visual inspections are relied upon Excess tire pressure ...

Page 62: ...ent can cause excessive wear and reduced tractor performance Caution Electrical Check the operation of all gauge switches horn lights and indicators Installing loader 1 Connect P port of loader control valve to the line on the tractor marked P from the PTO valve 2 Connect the T port on the loader control valve to the line on the tractor marked T 3 Connect the remaining line from the control valve ...

Page 63: ... the dipstick Air cleaner Clean every 100 hours Radiator coolant Check daily top up if required See page 69 Radiator Check daily for damages leakage Fuel Fill tank 61 Engine Fuel filter Every 500 hours or 12months after first 50 hours Fan belt Check daily See page 74 Battery Check daily Oil filter Every 500 hours or 12months after first 50 hours Loose nuts and bolts Check daily Tighten Radiator ho...

Page 64: ...both brake pedals Check daily Adjust so that both operate simultaneously and brake at the same time Operation of each lever Check daily Smooth operation 62 lever Free play of steering wheel Check daily About 50mm 1 97 in of wheel circumference Toe in Check every 300 hours 0 08 0 24in Grease in front wheel hub Grease every 900 hours Check the steering wheel joint Adjust every 300 hours Wheel nut fa...

Page 65: ...oil at the clutch chamber Check once a year with the lower plug pulled out Hydraulic oil filter Change every 500 hours Oil of the 4WD front Check every 100 hours Change Replace if leaking 63 4WD front axle hours Change every 600 hours Check the electric wiring Check every year Without loose or broken terminals Without damaged or missing wiring Correctly clamped Tire Standard DIVISION SIZE Air pres...

Page 66: ...2 11 US gal 2 ENGINE API CH4 grades Recommended SAE viscosity grades 7 0ℓ 1 85 gal 3 TRANSMISSION CASE See next page 43ℓ 11 37 US gal 4 FRONT AXLE API GL4 Grades Gear oil 80 or 90 16 4ℓ 4 33 US gal 5 FINAL DRIVE CASE B API GL4 Grades Gear oil 80 or 90 6 Clutch pedal shaft Grease As required 7 BALL JOINT Grease As required 8 FUEL TANK Diesel fuel 72ℓ 19 US gal 64 A Viscosity B Temperature ...

Page 67: ...can be removed by pulling rearwards having first detached the hood lamp wiring harness Hood can be open by itself 65 Fuel Use clean diesel fuel only As diesel fuel equipment is susceptible to contamination by dust or water Ensure that all dust and water is kept well away from the fuel tank Opening the Side cover To open grasp the side cover Pull the forward panel rearward to separate from guide su...

Page 68: ...engine or transmission oil refer to the page 60 Refer to the table on page 60 61 and 62 for the change frequency Changing engine oil Park tractor on level surface shut off engine Remove sump plug drain oil Replace and check the sump plug and refill the engine with oil to the correct level on the dipstick approx 1 85 gal The grade of oil to be used will depend on the ambient temperature The tractor...

Page 69: ...sion oil Remove the drain plug from bottom of the transmission and drain the oil Replace and check the drain plug important 67 Always use the same grade and specified oil as replacements Dispose off the old oil as per local regulations Refill the transmission to the correct level on the dipstick with new oil qty 43ℓ 11 37 US gal Drain plug front transmission Drain plug Spacer transmission importan...

Page 70: ... on both final drives and tighten Some operators have found that when they fill with the correct amount of oil and dip it the oil level on the dipstick is too high due to the fact that it takes a while for the oil to run into the final drives Opening the Vent plugs helps to speed this up important 68 CLEANING AND CHANGING FILTERS Engine oil filter Using a filter wrench turn the filter anti clockwi...

Page 71: ...ent fuel from being spilled when the element is removed Notice Do not use a tool in order to remove the fuel filter Attempting to remove the fuel filter with a filter wrench or a filter strap could damage the locking ring 3 Hold fuel filter and rotate quick release collar counterclockwise Removed and discarded Note If the element is equipped with a sediment bowl remove the sediment bowl from the e...

Page 72: ...h the primary fuel filter After replacing the filter always bleed the system important 70 CHANGING THE COOLANT 1 Open the tap in front of the gear pump to drain the coolant 2 Open the radiator cap at the same time 3 To give a thorough clean run a hose into the radiator and flush it out 4 Close the tap and refill the radiator with a coolant mixture of water and corrosion inhibitor or anti freeze 5 ...

Page 73: ...Mix the anti freeze solution in accordance with the instructions applicable to the brand of anti freeze and the locals climate Replace the solution in the radiator In case of loss of solution due to evaporation or overflow replace with the original mixture ratio 71 Water or air under high pressure can distort the cooling fins on the radiator and reduce its efficiency CLEANING THE RADIATOR Insects ...

Page 74: ...the service schedule page 61 and 62 Ensure that grease nipples are cleaned well before any attempt is made to grease them Grease Nipple Grease Nipple Brake area Clutch area Front Axle Lift Rod Front Axle 72 Grease Nipple Grease Nipple Lift Rod Front Axle ...

Page 75: ...ay is correct ADJUSTING THE BRAKES As is the case with the clutch use of the brakes will change the pedal free play and the balance between the right and left pedal The correct pedal free play is 1 18 1 57 in 73 Adjustment method Loosen the double locknuts to adjust the brake Turning it to increases the free play or decreases it Tighten the double locknuts and confirm to fix the Nuts Check that th...

Page 76: ... incorrect it can cause severe shaking of both the steering wheel and the entire tractor The correct toe in is 0 08 0 24in We recommend that this adjustment is made by the dealer CHECKING THE BATTERY The electrolyte level of the battery can evaporate during use thus lowering the level 74 Where it does so replace it with distilled water Where a spillage has reduced the level replace it with electro...

Page 77: ...them once a month in summer and every second month in winter When replacing the original battery ensure that the replacement battery is the same size Failure to do so can cause problems with the electrical circuit 75 Always disconnect the negative terminal first when removing the battery and always connect the positive terminal first when fitting the battery When connecting the battery leads make ...

Page 78: ...ot fully charge A battery with a low charge will freeze more easily than a battery with a full charge Alternator and Fan Belts Inspect Adjust Replace 1 Burroughs gauge Fit the gauge 1 at the center of the longest free length and check the tension The correct tension is 535N 120 lb If the tension of the belt is below 250N 56 lb adjust the belt to 535 N 120 lb If twin belts are installed check and a...

Page 79: ...ernator move the alternator to the desired position and tighten the bolt Also ensure that the bottom alternator bolts are tighten Never beat the element on a stone or concrete floor wall to clean it Check all connections and hoses especially on the clean side of the air cleaner to ensure no dusty air can enter the engine Check the element for flaws by putting a light inside the element When reasse...

Page 80: ...lace as required REPLACING FUSES The circuit has 8 blade type fuses in its wiring circuit See diagram on page 101 102 and 103 When a fuse has blown replace it with one of the same value Using a large capacity fuse or wire burn out the wiring system Use fuse tongs to replace fuses important 78 Use fuse tongs to replace fuses MAIN FUSES The wiring harness is equipped with 3 main fuses who s function...

Page 81: ... or drain the coolant to protect the engine from damage from frozen coolant important 79 Run the engine for approx 5 min to ensure that it has new oil throughout the engine Drain the coolant from the radiator and remove the ignition key Attach a tag both the key and the steering wheel saying No coolant Lubricate all grease and oil points on the tractor Check the pressures and add a small amount of...

Page 82: ......

Page 83: ...the following version Cab with ventilation and heating systems Cab with ventilation heating and air conditioning systems The cab is in full conformity with the international standards as to the cab s soundproofing Be very careful when operating in small spaces and always protect your ears whenever other working equipment is generating dangerous noise levels Working Lamp Roof hatch 81 Rear Mirror F...

Page 84: ...eful during implement hitching and unhitching operations When using implement supports be sure they are suitable and sufficiently strong Doors The doors are provided with key locks Instrument and Related parts To open from the outside when unlocked depress the push button To open from inside push the lever downwards Rear Window The rear window is fitted with central handle for opening When opened ...

Page 85: ...ow positioning for maximum convenience by the user Remember that mirrors must always be positioned in compliance with road traffic regulations when driving on a public highway Cab ceiling Working Lamp Cab ceiling The ceiling is padded with insulation material to block heat radiation into the cab and keep the temperature down when working in very sunny areas The cab platform is covered with a firm ...

Page 86: ...ioned behind the grille N B it is very important that the air diffusers never be completed closed so as to allow for a steady air flow To obtain a greater pressurization inside the cab it is necessary to take the air from the outside therefore the inside air recirculatiing grille should be fully closed Working lamp switch The front and rear working lights are ON when push the button The work light...

Page 87: ...ol Set temperature control as required fully clockwise For maximum cool and fully counterclockwise for heat Circulation diffuses With the circulation vent set in any position outside Air will still be pulled into the cab 1 During cold weather with ambient temperature above 0 ºC 32 ºF operate the air conditioner at least once per month for a period of 10 to 15 minutes This will lubricate the seals ...

Page 88: ...IMPORTANT Ventilation is provided by a single blower unit serving both the heating system and the air conditioning system After reaching the desired temperature adjust the system to suit your needs Note For ideal system operation the engine must run at a minimum of 1000 rpm 1 Speed heating fan 2 Electric resistances 3 Recirculation inlets 4 Pivotal air diffuser 5 Air filter Before starting the eng...

Page 89: ...ing set consisting of an auxiliary alternator located front of the engine and driven by a belt directly linked to the engine pulley If the air does not come out from the diffusers right away as soon as the system is started turn off immediately and identify the fault N B Never turn on the heating system when working in dusty environments 87 ...

Page 90: ...Air conditioning system The system is designed to ensure optimum temperature inside the cab and maximum comfort and safety for the operator However it is advisable to consult our specialized workshops whenever repairs or adjustments need to be performed Do not approach the system with open flames as any escape from the circuit may produce a lethal gas 1 Alternator 2 Compressor 3 Speed fan 4 Electr...

Page 91: ...with the paper filter since this is the only type suited for filtering foreign particles from the air Optional ACTIVE CARBONFILTER is informed to parts Catalogue spraying crops or in weed control Many chemicals used for these purposes are toxic when improperly used and can be hazardous to operators and others in the area Follow the instructions of manufacturers of both the equipment and the chemic...

Page 92: ...engine at 1500rpm B Set the air conditioning system in the coldest for 5 minutes C Check sight glass for clear sight or cloudy Caution If the air conditioning system is operated without being charged The lubrication in the compressor can cause damage 2 Check the refrigerant with receive drier sight glass Bubbles or foam visible Trouble shoot Bubbles flow and refrigerant gas disappeared like a fog ...

Page 93: ...ressure is normal with below Low 1 5 2 0kg High 14 5 15kg normal 5 Diagnosing malfunctions 1 Tracing faults SYMPTOM CONDITION CAUSE REMEDY SYMPTOM CONDITION CAUSE REMEDY 1 Compressor Abnormal sound Inlet sound Outlet sound Insufficient Lub Replenish Belt tension release Adjust Release the bracket Tighten the bolts Clutch fail Check Abnormal revolution Inlet cause Damaged parts Check replace Slip t...

Page 94: ...gaged to push Clutch gap large Adjust Engaged to push with hand Clutch gap large Adjust Low voltage Check battery No defect wire malfunction Replace Slip Slip during rotation Low voltage Check battery Oil stick at clutch Clean Malfunction Replace 2 How to check the air conditioning system with the needle of high low gauge To connect with manifold pressure gauge can find the cause of air conditioni...

Page 95: ... LTD policy is one of continuous improvement and the right to change prices specifications or equipment at any time without notice is reserved All date given in this book is subject to production variations Dimensions and weights are approximate only and the illustrations do not necessary show Tractors in standard condition For exact information about any particular Tractor please consult your TYM...

Page 96: ... 6 splines Diameter 1 in Standard PTO 540 1000 750 94 ELECTRICAL STARTING AND LIGHTING Battery Capacity 12 Volt Starter Solenoid Engaged Key Start with Safety starter switch Alternator 12V 65A Instrumentation Water Temperature Gauge Taco meter Hour meter Electrical fuel level gauge Lighting Head lights side indicators Rear parking brake indicator light Front parking indicator light On dash board i...

Page 97: ...nk ends lb kg Pump type Implement pump capacity L min 3 POINT HITCH DRIVETRAIN FUEL SYSTEM 95 39 6 17 6 57 2 Position Draft 3 sets Independent Clockwise Multiple Wet Disk 540 1000 750 1 35 159 4030 71 1814 83 2100 98 2480 15 7 400 139 8 3550 Cabin 5292 2400 Roll bar 4490 2037 9 5 20 14 9 28 12 16 5 17 5 24 12 16 5 16 9 24 Cabin Roll bar Tire Size Standard Front Rear Overall length in mm with 3P Mi...

Page 98: ... 25 H 1 10 63 6 61 10 90 6 77 2 16 84 10 46 17 26 10 72 3 25 90 16 09 26 55 16 50 4 32 21 20 01 33 01 20 51 ON L 1 0 31 0 19 0 31 0 19 The specifications are subject to change for improvement without notice 96 0 31 0 19 0 31 0 19 2 0 48 0 30 0 50 0 31 3 0 74 0 46 0 74 0 46 4 0 93 0 58 0 95 0 59 M 1 0 98 0 61 1 00 0 62 2 1 55 0 96 1 58 0 98 3 2 38 1 48 2 44 1 52 4 2 96 1 84 3 03 1 88 H 1 3 20 1 99 ...

Page 99: ...on Pump or nozzles should be checked 3 Do not run the engine without load for more than 2 minutes It is better to stop the engine 97 3 Do not run the engine without load for more than 2 minutes It is better to stop the engine rather than run it idle This will help in saving of fuel C Clutch Brakes 1 Do not reduce the power of the power of the engine by depressing the clutch halfway Instead use low...

Page 100: ...o not remove the thermostat but replace with a new one if required 5 Do not change the radiator water often Note 1 Always stop any fuel or oil leakages 2 Carry out the regular maintenance failure to do so might increase the fuel consumption by 25 3 Carry out the torque of cylinder head bolt adjustment of valve clearance regularly Consult your dealer for this 98 4 Check the tire pressure inflate as...

Page 101: ...ler for repair Engine revolutions are irregular Air in the fuel system Faulty injector Fuel pipe leak Bleed the system Contact dealer for repair FAULT TRACING 99 The engine stops at low revolution Poor fuel injection Faulty injection pump Wrong valve clearance Wrong idle setting Faulty injector Contact dealer for repair Contact dealer for repair Contact dealer for repair Contact dealer for repair ...

Page 102: ...r Contact dealer for repair Contact dealer for repair Fill the tank and check fuel quality Clean the element Oil warning light comes on with the engine running Low oil level Wrong oil Faulty light or switch Clogged oil filter Fill to correct level Change to correct oil Replace faulty part Contact dealer for repair Alternator light comes on Wiring fault Contact dealer for repair FAULT TRACING 100 A...

Page 103: ...ulic system Hydraulics are not lifting Engine revs too low Lack of transmission Oil Air leaking in from a pipe Clogged suction filter Faulty pump Faulty hydraulic valve Faulty cylinder Increase engine revs Top up the oil to the correct level Repair or replace pipe or replace O ring on joint and tighten Clean and change oil Contact dealer for repair Contact dealer for repair FAULT TRACING 101 Fault...

Page 104: ...er for repair Contact dealer for repair Replace or adjust Before anything else check the electrolyte level of the battery and the connections Top up it required and clean and retighten the terminal Dim head lights Low battery Faulty wiring Charge or replace Repair or replace as needed Headlights not working Blown bulb Blown fuse Replace bulb Replace fuse FAULT TRACING 102 Electric instruments Faul...

Page 105: ...T603 CABIN WIRING DIAGRAM A3 103 ...

Page 106: ......

Page 107: ...T603 ROPS WIRING DIAGRAM A3 105 ...

Page 108: ......

Page 109: ...T603 WIRING DIAGRAM FOR POWER SHUTTLE If equipped 105 ...

Page 110: ......

Page 111: ...WIRING DIAGRAM 107 ...

Page 112: ...CABIN WIRING DIAGRAM 108 ...

Page 113: ...CABIN WIRING DIAGRAM 109 ...

Page 114: ...RECTION SIGNAL RELAY FOR THE POWER 4 PTO MONITOR 5 COUPLER FOR THE POWER MAX RATED AMPERE 6 COUPLER FOR THE TRAILER A HEAD LAMP 12V55W B DIRECTION SIGNAL LAMP 12V21W STOP LAMP BACK LIGHT 21 5W C META PANEL LIGHT 12V3 4W D WORKING LAMP 12V35W E DIRECTION SIGNAL LAMP 12V21W SIDE LAMP 21V5W F BACK LAMP 12V20W G NUMBER LAMP 12V10W 6 CONTROLER 7 ENGINE STOP 8 FUEL PUMP 9 COUPLER 10 AUTO ROLLING 11 QUIC...

Page 115: ... T603 POWER TRAIN 111 ...

Page 116: ... T603 POWER TRAIN FOR POWER SHUTTLE If equipped 111 ...

Page 117: ...DATE JOB CARD NO NATURE OF DEFECT PARTS REPLACEMENT W CLAIM NO AND DATE REMARK S TRACTOR HISTORY CARD 112 ...

Page 118: ...DATE TRACTOR HOURS NATURE TYPE OF REPAIR SERVICE CARRIED OUT SERVICE RECORD 113 ...

Page 119: ...DATE JOB DONE MACHINE HOURS FUEL CONSUMPTION ENGINE OIL TOPPED UP REMARKS START END DAILY OPERATION LOG 114 ...

Page 120: ...PART REPLACEMENT RECORD DATE PART DESCRIPTION QTY COST DATE PART DESCRIPTION QTY COST 115 ...

Page 121: ...T603 Operator s Manual for Tractors Code No 1995 940 002 1 Printed on August 2008 3rd Edition ...

Reviews: