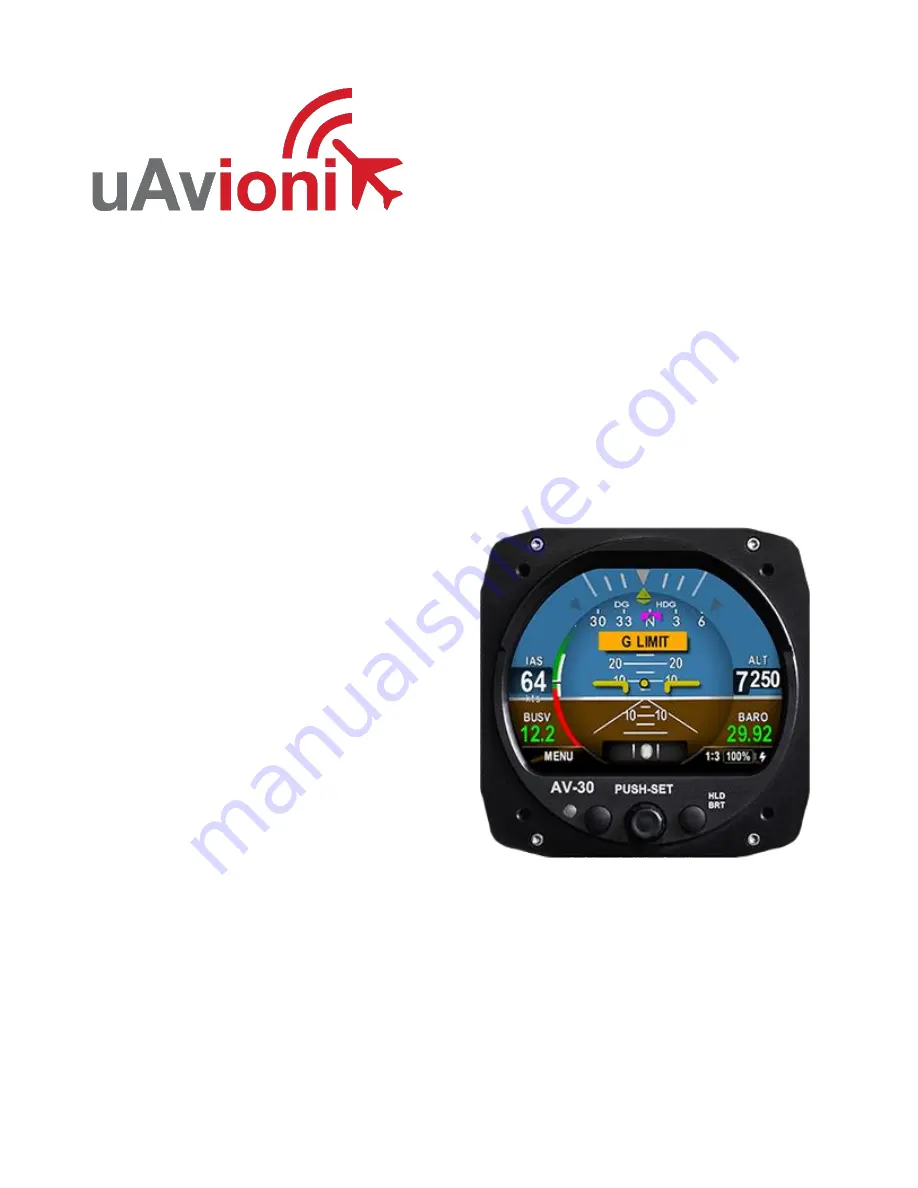
background image

Service Bulletin 


UAV-1005757-001 Rev A 


AV-30-E  

Service Bulletin 

Software Upgrade to 2.1.1 


Summary of Contents for AV-30-E

Page 1: ...Service Bulletin UAV 1005757 001 Rev A AV 30 E Service Bulletin Software Upgrade to 2 1 1 ...

Page 2: ...ssions to download a single copy of this guide onto an electronic storage medium to be viewed for personal use provided that the complete text of this copyright notice is retained Unauthorized commercial distribution of this manual or any revision hereto is strictly prohibited uAvionix and Ping are registered trademarks of uAvionix Corporation and may not be used without express permission of uAvi...

Page 3: ...Service Bulletin 3 UAV 1005757 001 Rev A 1 Revision History Revision Date Comments A 7 21 2021 Initial release ...

Page 4: ...ms are controlled by the U S Government and authorized for export only to the country of ultimate destination for use by the ultimate consignee or end user s herein identified They may not be resold transferred or otherwise disposed of to any other country or to any person other than the authorized ultimate consignee or end user s either in their original form or after being incorporated into othe...

Page 5: ... and Balance 8 Electrical Load Data 8 Applicable Publications 8 Required Items 9 Windows PC with Serial Port 9 AV Link 10 Update Notes 10 PC Serial Update 11 Serial Update Preparation 11 Serial Update Procedure 11 AV Link Update 15 AV Link Update Preparation 15 AV Link Update Procedure 15 Post Accomplishment Verification and Actions 19 SERIAL 3 20 AID MODE 20 VIBE MONITOR 21 GYRO CAL 22 MAG CAL 24...

Page 6: ...Service Bulletin 6 UAV 1005757 001 Rev A System Checkout 25 Support 25 Maintenance Record 26 ...

Page 7: ...e Table 4 1 Applicability to determine applicability of the software update Hardware P N Marking Applicability UAV 1004035 001 Verify by procedure UAV 1004035 002 Verify by procedure Table 4 1 Applicability Parts identified above as Verify by procedure may have software release 2 1 0 or previous installed To determine what version of software is installed 1 Push and hold center rotary knob while p...

Page 8: ... Pitot and static shall be connected to the DG if not already installed 4 3 Time Required For Internal Magnetometer addition unit must be returned to uAvionix to update hardware For software only update in the field up to 90 minutes is required to perform this update procedure Add pitot and static connections if not installed 4 4 Weight and Balance No change 4 5 Electrical Load Data No change 4 6 ...

Page 9: ... on the link in the section AV 30 E v2 1 1 Firmware and save it to your PC or mobile device Ensure the software and any necessary update tools have been downloaded prior to visiting the aircraft An internet connection is required to download the software and application An internet connection is not required to perform the update 5 1 Windows PC with Serial Port The following items are required to ...

Page 10: ...s now to ensure full performance and functionality Ensure you are running a previous version of AV 30 E software Specifically your AV 30 E should currently be running 2 0 3 or earlier There are two approved methods for update of the AV 30 E The AV 30 can be updated using either a traditional direct serial connection or the AV Link can be used to update the AV 30 via wireless interface Either metho...

Page 11: ...ness or ground the new wire directly to aircraft ground 2 Connect the new wires to the DB 9 connector as shown below Upon completion of wiring connect the new assembly to an available serial port or USB serial adapter Note AV Link must not be installed if performing an update using the PC serial update procedure 7 2 Serial Update Procedure 1 Connect the AV 30 E to the Windows PC through the DB 9 c...

Page 12: ...appropriate COM Port from the dropdown menu and click Connect 5 Proper connection has been made when the message Unit Detected has appeared on the bottom left corner of the AV Updater Tool 6 Once proper connection has been made select the firmware file to upload to the AV 30 E by clicking Open File and selecting the previously downloaded firmware file as identified in Table 5 1 Software Update Fil...

Page 13: ...e sensitive 7 When confirmed press OK and the main dialog will re appear 8 Select Write Firmware to begin the upload DO NOT POWER OFF THE AV 30 OR CLOSE THE UPDATER TOOL UNTIL THE UPDATE IS COMPLETE THE SCREEN OF THE AV 30 WILL GO BLACK WHILE THE DEVICE REBOOTS THIS BEHAVIOR IS NORMAL AND THE STARTUP SCREEN WILL APPEAR AFTER REBOOTING ...

Page 14: ...tart Upon restart of the unit verify the startup screen indicates the updated software version 11 If the unit was removed to perform the update it can now be reinstalled as per the installation manual 12 Any new wiring as a result of the update process should be properly secured 13 Following the completion of update follow Section 9 to perform required post installation procedures ...

Page 15: ...he installation procedure as described in AV 30 E Installation Manual UAV 1004234 001 Rev C Section 11 1 8 2 AV Link Update Procedure After the AV Link and AV 30 have been installed AV 30 firmware updates can be performed using the AV Link web interface The web interface is accessible through any PC or mobile device Ensure the PC or device has the AV 30 software in Table 5 1 Software Update Files ...

Page 16: ...e AV 30 and AV Link Hold for 5 seconds This will allow the AV 30 to enter the bootloader mode The screen will remain black Do not interrupt power during the update process 2 Connect a PC to the AV Link Wi Fi Network This will be displayed as AV where will be 4 random characters ranging from 0 8 and A F ...

Page 17: ...5757 001 Rev A 3 In a Web Browser such as Google Chrome navigate to the AV Link home page via the following URL 192 168 4 1 A page similar to shown on the right should appear 4 At the bottom of the page select AV Firmware Update ...

Page 18: ...ce the file has been selected click Start Update DO NOT power off the unit or close the web browser until the update is complete The AV 30 will power back on when complete and the AV Link home page will be displayed Note File name will be different than shown in image 7 Upon restart of the AV 30 verify the startup screen indicates the updated software version ...

Page 19: ...teps 1 To enable access to the Installation Menu ensure the unit is completely turned off Push and hold the main control knob in while power is applied 2 Keep the knob pushed until the startup screen displays and then release 3 Ensure the unit is in AI or DG mode select the mode by pushing and holding the center button until the mode display changes 4 In AI or DG mode push the left button under th...

Page 20: ...lect these settings 9 1 SERIAL 3 Follow the procedure in Section 9 to access the Installation Menu Rotate the center knob until SERIAL 3 is displayed SERIAL 3 will be set to AVLINK after update This will enable the AV Link MFD screen If not AV Link is installed this setting should be set to NONE 9 2 AID MODE There are 3 options for the AID MODE With the internal magnetometer installed P N UAV 1004...

Page 21: ...aiding and then push the center button to confirm your choice 9 3 VIBE MONITOR The Vibration Monitor can be used with assistance from uAvionix support to troubleshoot installation issues or unusual aircraft conditions The monitor can be accessed by selecting VIBE MONITOR from the Installation Menu Follow the procedure in Section 9 to access the Installation Menu Rotate the center knob until VIBE M...

Page 22: ...e run periodically to respond to higher rates of observed DG drift For more information on Gyro Calibration reference the procedure as described in AV 30 E Installation Manual UAV 1004234 001 Rev C Section 13 2 2 To perform the calibration the aircraft must be completely motionless and on the ground It should be located in a hangar and must not be affected by wind or other sources of aircraft move...

Page 23: ...ter knob until GYRO CAL is displayed Push the center button to enter calibration mode Confirm by pushing the right button 3 Calibration in progress will be displayed with a percentage complete AV 30 will indicate Calibration successfully completed Press DONE Push the left button under DONE and the calibration will be complete If an error is shown repeat the calibration process ...

Page 24: ...on feature can be accessed by selecting MAG CAL from the Installation Menu Follow the procedure in Section 9 to access the Installation Menu 1 The Mag Calibration must take place in flight It cannot be performed on the ground Ensure the Installation Menu is accessible before departure 2 Once established in flight access the Installation Menu and rotate the center knob until MAG CAL is displayed Pu...

Page 25: ...calibration failed please complete again The AV 30 will retain all calibration unless a hard reset is accomplished 10 System Checkout Perform the System Checkout procedure as described in AV 30 E Installation Manual UAV 1004234 001 Section 13 2 prior to returning to service 11 Support For additional questions or support please visit http www uavionix com support ...

Page 26: ...ook Maintenance Record Service Bulletin UAV 1005757 001 to install software v2 1 1 for AV 30 E UAV 1004035 has been complied with A copy of this form must be submitted by visiting https uavionix com logbook Date By Aircraft Information Make Model Serial Number Registration Number AV 30 E Information Serial Number Hardware Part Number UAV 1004035 _____ Customer Information Name Email Telephone ...

Reviews: