background image

1

year/an

warranty

garantie

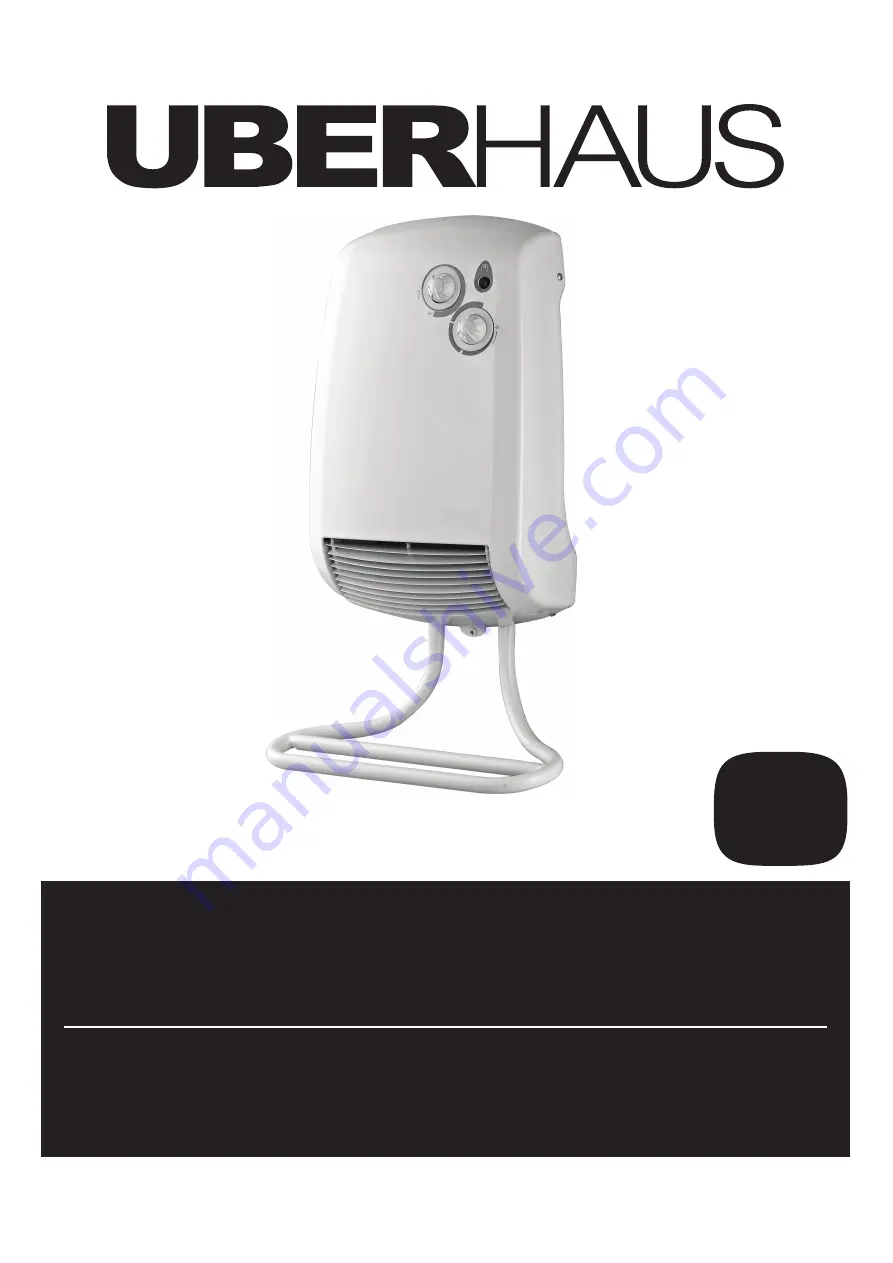
BATHROOM WALL-MOUNTED FAN HEATER
1,200 / 2,000 W

Operators’ Manual p. 1

AÉROCONVECTEUR MURAL POUR

SALLE DE BAINS
1 200 / 2 000 W

Guide de l'utilisateur p. 11

Customer Service / Service à la clientèle : 1-866-206-0888

Our Customer service staff is available to help you. For help with product assembly, to report damaged or 

missing parts, or for any other information about this product, please call our toll-free number.

SAVE THIS MANUAL

Keep this manual and the original sales invoice in a safe, dry place for future reference.

Notre personnel du service à la clientèle est disponible pour vous aider. Pour obtenir de l’aide pour le montage 

de votre produit, pour signaler des pièces endommagées ou manquantes, ou pour toute autre information à 

propos de ce produit, veuillez composer notre numéro sans frais.

CONSERVEZ CE GUIDE

Conservez ce guide avec la facture d'origine dans un endroit sûr et sec pour référence future.

Modèle/Model: 

68125108

ECH108

Summary of Contents for 68125108

Page 1: ...on about this product please call our toll free number SAVE THIS MANUAL Keep this manual and the original sales invoice in a safe dry place for future reference Notre personnel du service à la clientèle est disponible pour vous aider Pour obtenir de l aide pour le montage de votre produit pour signaler des pièces endommagées ou manquantes ou pour toute autre information à propos de ce produit veui...

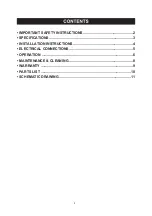
Page 2: ... 2 3 4 5 6 8 9 10 11 IMPORTANT SAFETY INSTRUCTIONS SPECIFICATIONS INSTALLATION INSTRUCTIONS ELECTRICAL CONNECTIONS OPERATION MAINTENANCE CLEANING WARRANTY PARTS LIST SCHEMATIC DRAWING 1 ...

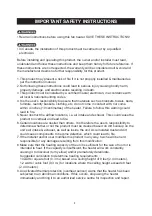
Page 3: ...s warning could lead to fire 5 Never obstruct the airflow locations i e air intake and exhaust This could cause the product to overheat and lead to fire 6 Certain locations are dustier than others It is therefore the user s responsibility to determine whether or not the product must be cleaned based on dirt build up on the unit s air intake exhaust as well as inside the unit Accumulated dust and d...

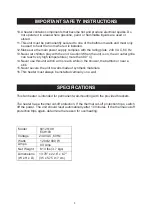
Page 4: ...ures more than 80 C 14 Never use this unit within arm s reach while in the shower the bathtub or near a sink 15 Never secure the unit to walls made of synthetic materials 16 This heater must always be installed vertically on a wall SPECIFICATIONS 240V AC 60Hz 8 14 lbs 3 7 kgs 13 78 x 22 6 x 6 7 35 x 57 5 x17 cm This fan heater is intended for permanent wall mounting with the provided brackets The ...

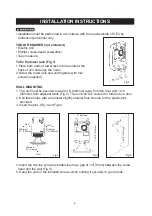
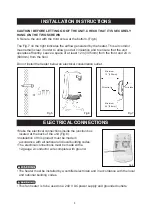
Page 5: ... diameter slightly smaller than the one for the plastic pins provided 3 Insert the pins Fig 3 and Fig 4 TOOLS REQUIRED not included Electric drill Phillips cross head screwdriver Tape measure To fix the towel rack Fig 1 1 Place both ends of towel rack into the slots at the back of unit and align the holes 2 Screw the towel rack and unit together with four screws supplied Fig 2 Fig 1 Fig 3 Fig 4 Mi...

Page 6: ...with the third screw at the bottom Fig 6 The Fig 7 on the right indicates the airflow generated by the heater This air corridor must remain clear in order to allow good air circulation and to ensure that the unit operates efficently Leave a space of at least 12 in 305mm from the front and 24 in 600mm from the floor Do not install the heater below an electrical convenience outlet The heater must be...

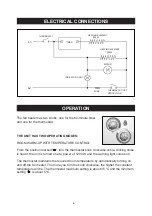
Page 7: ... is heard the unit is turned on at a power of 1200 W and the warning light comes on The thermostat maintains the required room temperature by automatically turning on and off the fan heater The more you turn the knob clockwise the higher the constant temperature will be The thermostat maximum setting is about 35 C and the minimum setting is about 5 C THERMOSTAT TIMER HEATING ELEMENT 800W 1 200W HE...

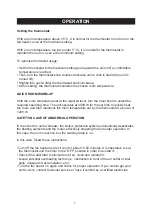
Page 8: ...nit operates at 2000 W for the set time to quickly heat the room and then maintains the room temperature set by the thermostat at a power of 1200 W SAFETY IN CASE OF ABNORMAL OPERATION In the event the unit overheats the built in protection system automatically deactivates the heating elements and the motor effectively stopping the fan heater operation In this case the unit is inactive but the war...

Page 9: ...p cloth Do not use abrasive cleaners or spray liquids on the unit surfaces Your unit has a filter protecting the heating elements against dust and dirt The filter can be removed and inserted from the right or the left side For optimal operation we recommend cleaning the filter once every 2 months and making sure to reinstall it properly on the unit Regularly vacuum the front grille to remove the d...

Page 10: ...canair net A proof of purchase original sales receipt from the original purchaser of the product must be provided with any warranty claim This product is guaranteed if used for normal trade purposes and remains valid for the original purchaser only Any guarantee will be deemed invalid if the product has been misused or neglected RONA cannot be held responsible for any labour costs injuries or dama...

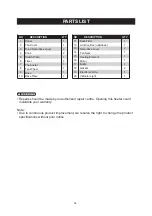
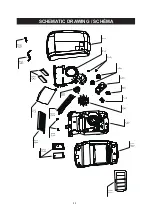
Page 11: ...fications without prior notice PARTS LIST NO DESCRIPTION QTY 1 2 3 4 5 6 7 8 9 10 1 1 2 2 1 1 1 1 1 1 Panel Fan Cover Knob Decorative cover Knob Switch Plate Timer Thernostat Fan Wheel Base Base Plate NO DESCRIPTION 11 12 13 14 15 16 17 18 19 20 1 1 2 1 1 1 1 2 1 1 Back Filter Junction Box up down Decorative cover Fan Nets Heating Element Motor Baffle Gasket Electronic Wire Indicator Light QTY 10 ...

Page 12: ...11 SCHEMATIC DRAWING SCHÉMA ...

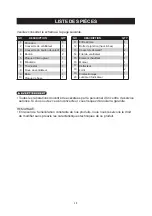
Page 13: ... de jonction haut bas Couvercle décoratif Filet de ventilateur Élément chauffant Moteur Déflecteur Joint Fil électronique Lumière d indicateur QTY Veuillez consulter le schéma à la page suivante Toutes les réparations doivent être exécutées par le personnel d un centre de service autorisé Si vous ouvrez ce aéroconvecteur vous risquez d annuler la garantie REMARQUE En raison de l amélioration const...

Page 14: ...12 14 15 16 17 18 20 21 SCHÉMA LISTE DES PIÈCES RÈGLES DE SÉCURITÉ IMPORTANTES CARACTÉRISTIQUES TECHNIQUES INSTRUCTIONS D INSTALLATION CÂBLAGE FONCTIONNEMENT ENTRETIEN ET NETTOYAGE GARANTIE TABLE DES MATIÈRES ...

Page 15: ...causer un incendie 5 Ne jamais bloquer l entrée et la sortie d air de l appareil Ceci ferait surchauffer l appareil et pourrait créer un incendie 6 Certains endroits sont plus poussiéreux que d autres C est donc de la responsabilité de l utilisateur d évaluer s il doit nettoyer l appareil selon le niveau de saleté accumulée sur les entrées et sorties d air ainsi qu à l intérieur de l appareil La s...

Page 16: ...0 C 14 N utilisez pas cet appareil à portée de main à partir d une douche d une baignoire ou d un lavabo 15 Ne pas installer le produit sur des murs faits de matériaux synthétiques 16 Ce convecteur doit uniquement être installé au mur à la verticale CARACTÉRISTIQUES TECHNIQUES 240V AC 60Hz 8 14 lb 3 7 kg 13 78 x 22 6 x 6 7 po 35 x 57 5 x 17 cm Ce aéroconvecteur est conçu pour être monté de façon p...

Page 17: ... 305 mm des murs adjacents Fig 2 Aucune porte ne doit pouvoir se refermer sur l appareil 2 Faire 3 trous de diamètre légèrement inférieur aux chevilles en plastique incluses dans l emballage 3 Insérez les chevilles Fig 3 4 Fig 1 Fig 2 Minimum 12 305mm Minimum 12 305mm Minimum 24 0 6mm Mur Mur Plancher Fig 3 Fig 4 6 153mm 15 3 8 319mm 15 3 8 319mm 6 153mm Fixez le porte serviettes Fig 1 1 Placez de...

Page 18: ...l et national du bâtiment Le aéroconvecteur doit être utilisé avec une alimentation de CA 240 V et une mise à la terre ATTENTION Avant de lâcher le produit vérifiez qu il est bien accroché aux 2 vis 6 Fixez enfin le produit avec la troisième vis en bas Fig 6 La figure 7 indique le mouvement de l air généré par le aéroconvecteur Ce corridor doit rester dégagé afin de permettre une bonne circulation...

Page 19: ... sens horaire jusqu à entendre un clic le produit commence alors à fonctionner à 1200 W et le témoin lumineux s allume Le thermostat maintient la température ambiante requise en allumant et éteignant automatiquement le aéroconvecteur Plus la poignée est tournée loin dans le sens horaire plus la température garantie sera élevée La position maximale du thermostat correspond à environ 35 C la minimal...

Page 20: ...ps de fonctionnement requis Le produit fonctionne à 2000 W de puissance pour le temps réglé en produisant un réchauffement rapide de la pièce et ensuite en maintenant la température ambiante réglée par le thermostat à une puissance de 1200 W SÉCURITÉ EN CAS DE FONCTIONNEMENT ANORMAL En cas de surchauffe le système de protection de l appareil désactive automatiquement les éléments chauffants et le ...

Page 21: ...ilisé pour nettoyer l appareil Notez que la fumée de cigarette peut jaunir l appareil malgré un nettoyage régulier REMARQUE Il est possible que les surfaces de l appareil jaunissent avec le temps à cause de la poussière ou la fumée de cigarette Ceci constitue une usure normale et n est pas un défaut de fabrication Entretien 1 Arrêtez toujours l appareil avant de le nettoyer ou le réparer 2 Ne cogn...

Page 22: ...eçu original d achat du consommateur qui a fait l achat du produit doit accompagner toute réclamation de garantie Ce produit est garanti si utilisé de façon normale et est valide pour le premier acheteur seulement Toute garantie est invalide si le produit a été utilisé de façon non recommandée ou a fait l objet de négligence RONA n est pas responsable des frais de main d œuvre des blessures ou tou...

Reviews: