2IN1 GARDEN LIGHT
INTRODUCTION & WARRANTY
Thank you for selecting and buying V-TAC product. V-TAC will serve you the best. Please read these instructions
carefully before starting the installation and keep this manual handy for future reference. If you have any
another query, please contact our dealer or local vendor from whom you have purchased the product. They are
trained and ready to serve you at the best. The warranty is valid for 3 years from the date of purchase. The
warranty does not apply to damage caused by incorrect installation or abnormal wear and tear. The company
gives no warranty against damage to any surface due to incorrect removal and installation of the product. The
products are suitable for 10-12 Hours Daily operation. Usage of product for 24 Hours a day would void the
warranty. This product is warranted for manufacturing defects only.
1. Please make sure to turn off the power before starting the installation.
2. Installation must be performed by a qualified electrician.
3. The light source of this luminaire is not replaceable, when the light source reaches its end of life the whole
luminaire should be replaced.
4. If the external flexible cable or cord of this luminaire is damaged, it shall be exclusively replaced by the
manufacturer or his service agent or a similar qualified person in order to avoid a hazard.
5. Proper grounding should be ensured throughout the installation.
6. To comply with all safely standards, the product must be used only for the purpose described in this instruc-
tion and must be installed in accordance with the wiring rules and regulation in the location where it is installed.
7. Check whether the product has been damaged during transport. Do not operate/install any product which
appears damaged in any way. Return the complete product to the place of purchase for inspection, repair space
between or replacement
8. During and after use, the product may be hot. Do not touch the product before it has completely cooled down.
9. Failure to follow these instructions can result in minor injuries, or equipment damage.
10. Take care not to pull any electrical wires during unpacking as this may damage the connections.
TECHNICAL DATA
3
YEA
RS
WARRANTY
*
WARNING!
IN CASE OF ANY QUERY/ISSUE WITH THE PRODUCT, PLEASE REACH OUT TO US AT: SUPPORT@V-TAC.EU
FOR MORE PRODUCTS RANGE, INQUIRY PLEASE CONTACT OUR DISTRIBUTOR OR NEAREST DEALERS.
V-TAC EUROPE LTD. BULGARIA, PLOVDIV 4000, BUL.L.KARAVELOW 9B
Caution, risk of electric shock.
This marking indicates that this
product should not be disposed
of with other household wastes.
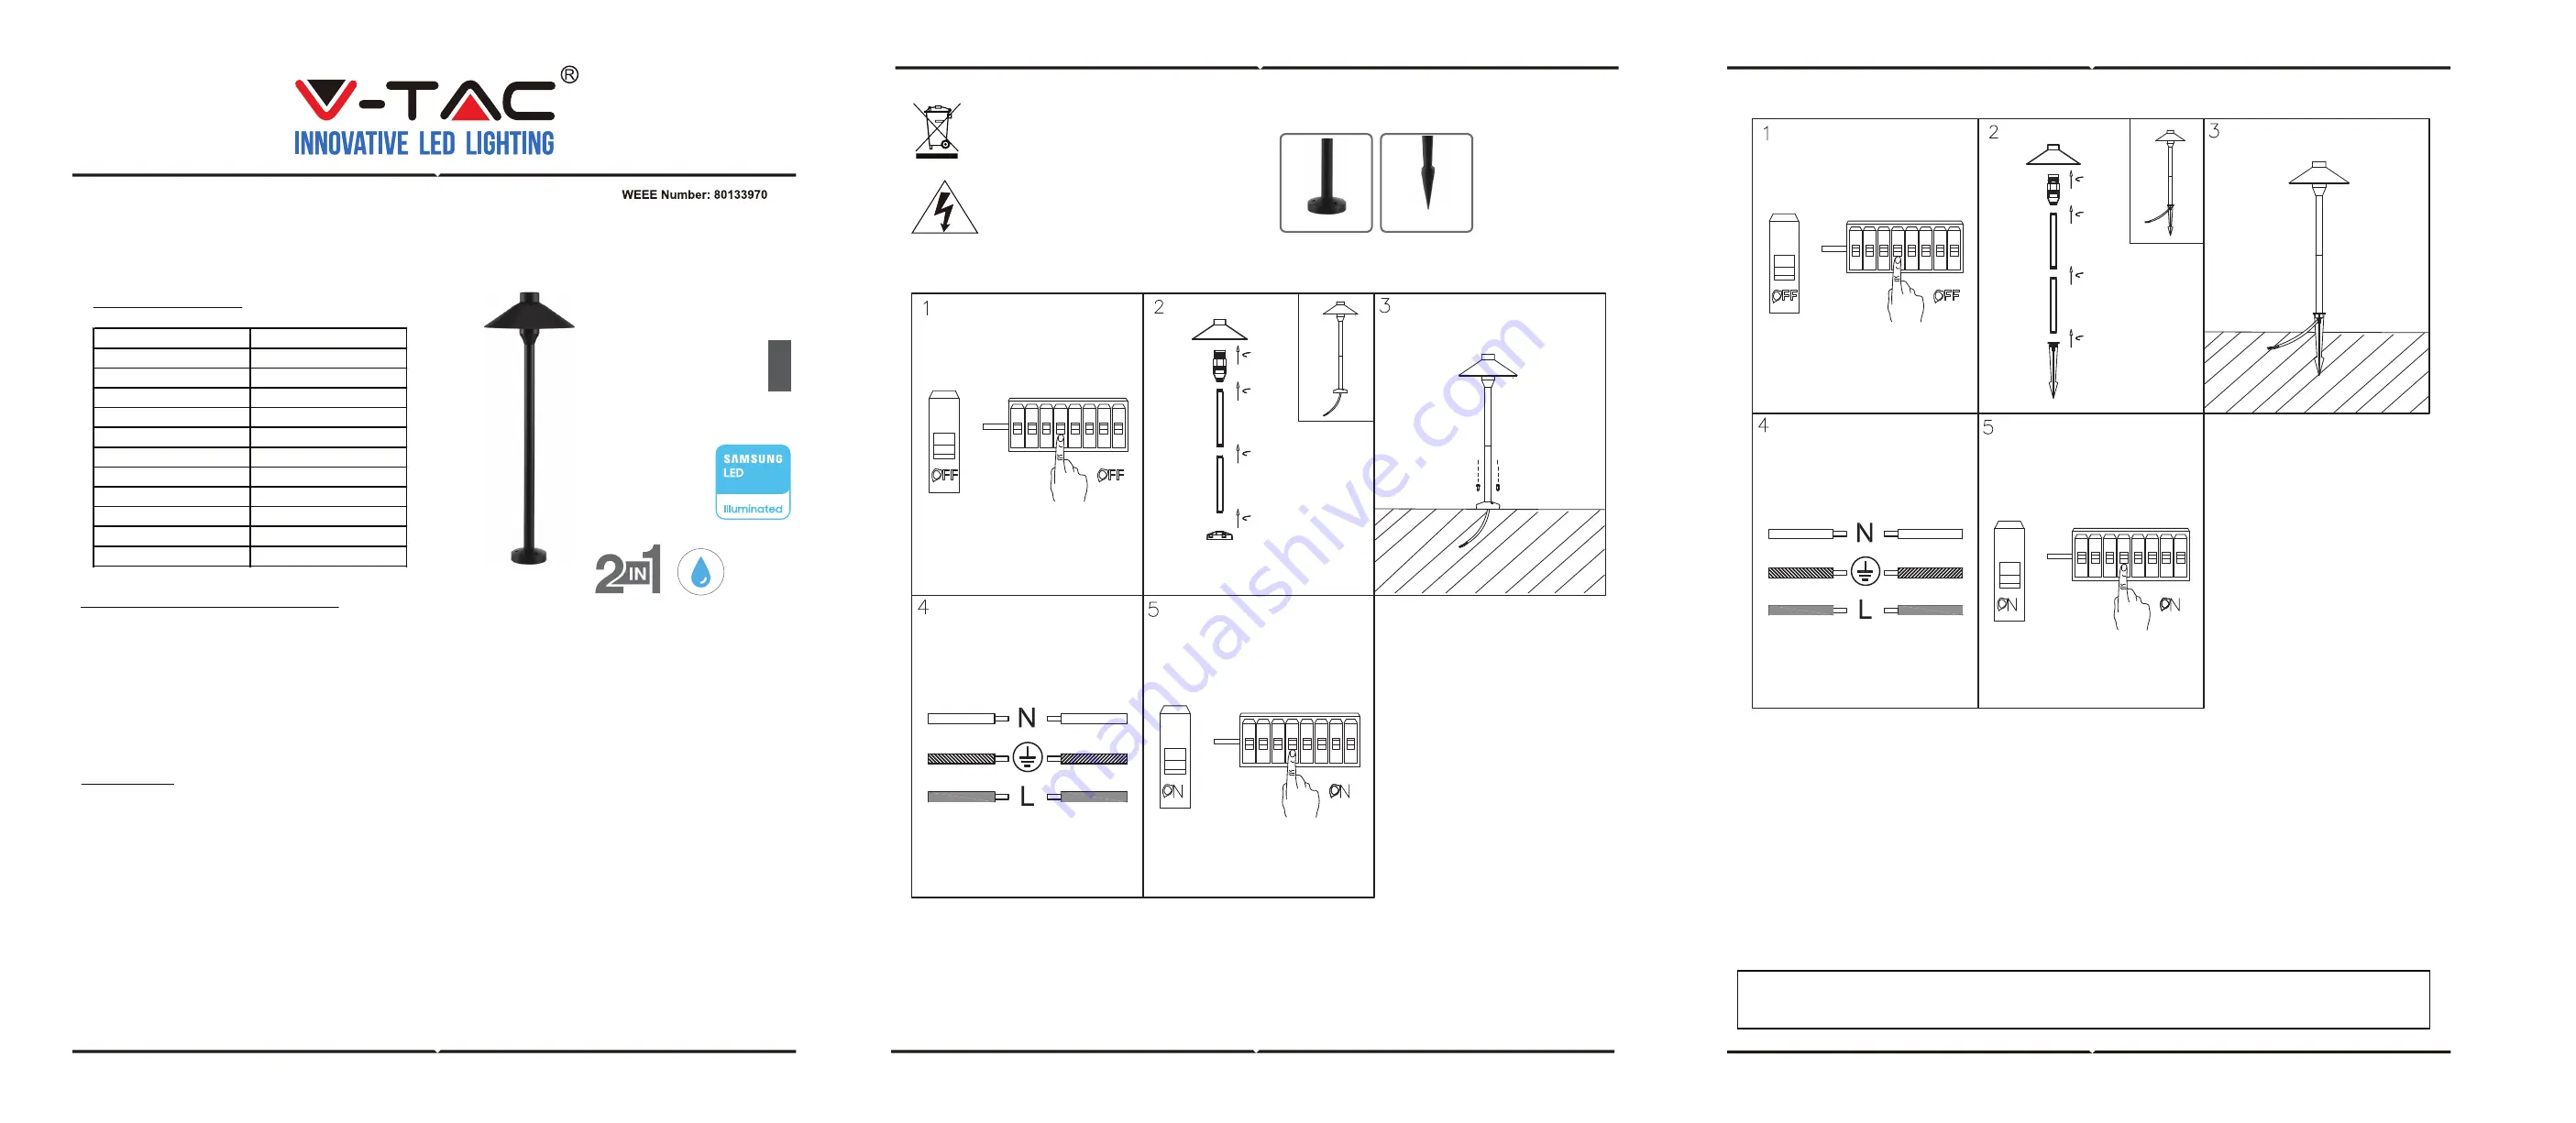
LAMP POST INSTALLATION INSTRUCTIONS
1. Switch off the power before starting the installation.
2. Install the lamp according to the diagram.
3. Place the light fixture on a concrete lawn.
4. Connect the wires as per the wiring diagram.
5. After checking, switch on the power and test the light.
LAMP POST INSTALLATION DIAGRAM
INSTALLATION INSTRUCTION
ACCESSORIES INCLUDED
IP65
RATING
SPIKE INSTALLATION INSTRUCTIONS
1. Switch off the power before starting the installation.
2. Install the lamp according to the diagram.
3. Place the light fixture a grass lawn.
4. Connect the wires as per the wiring diagram.
5. After checking, switch on the power and test the light.
SPIKE INSTALLATION DIAGRAM
LAMP POST
SPIKE
MODEL
VT-907
WATTS
7W
LUMENS
420LM
LED TYPE
COB LED (SAMSUNG LED)
BEAM ANGLE
100°
CRI
>80
PF
0.5
Input Voltage
AC 220~240
,
50Hz
Output Voltage
DC 30-42V
LIFE SPAN
20,000 Hours
ON/OFF TIME:
>15000
DIMENSION
714mm*
∅
200mm
ENGLISH


