background image

Technical manual

Model : PHT-35LHS

Version : 1.16


English


Summary of Contents for Smart Plus PHT-35LHS

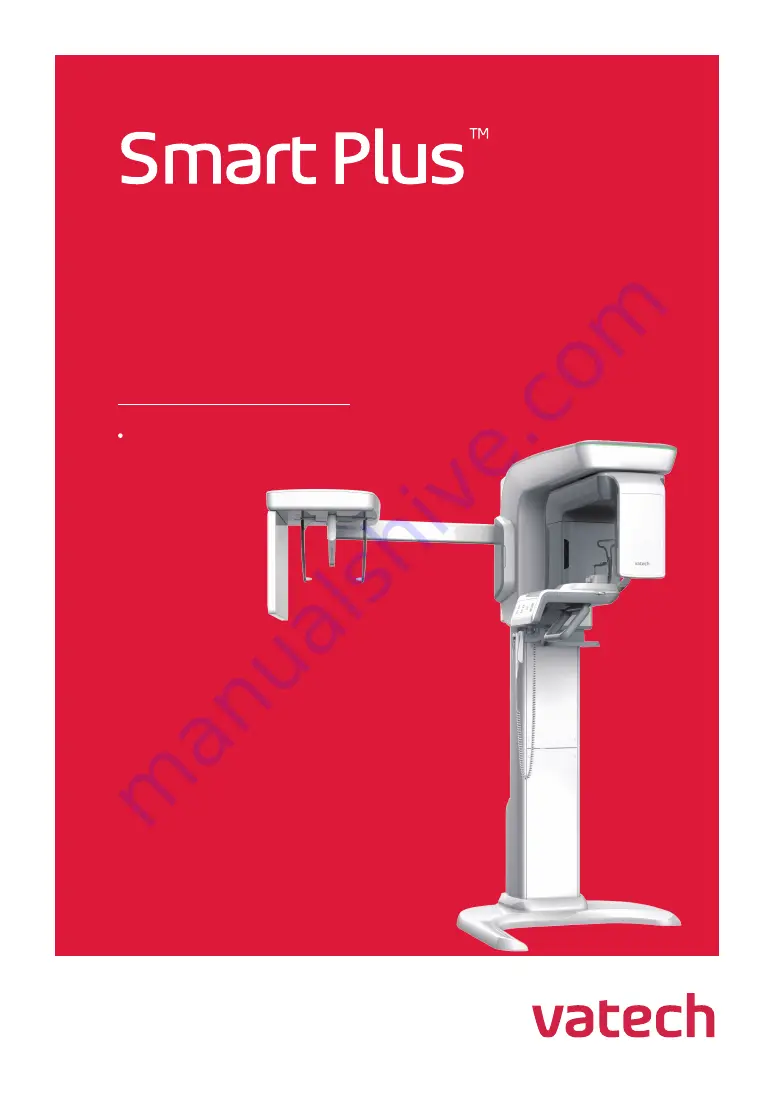
Page 1: ...Technical manual Model PHT 35LHS Version 1 16 English...

Page 2: ......

Page 3: ...you to read and follow the technical manual before providing a service As our products continue to improve the contents in this manual are subject to change without prior notice To inquire about the l...

Page 4: ...sassembly of PHT 35LHS Covers 21 4 1 Vertical Frame Part 21 4 2 Rotating Unit Part 22 4 3 Handle Frame Unit Part 27 4 4 CEPH Unit Part 28 Chapter 2 Image Optimization 30 1 Sensor Calibration 30 1 1 CB...

Page 5: ...ard 111 1 2 Before PANO sensor calibration 111 1 3 Configuring PANO Sensor Settings 112 1 4 Performing PANO Sensor Dark Calibration 113 1 5 Performing PANO Sensor Bright Calibration 115 2 Aligning PAN...

Page 6: ...erforming Firmware Upgrade 157 3 Checking Firmware Version 161 4 Appendix 162 4 1 Terminal 1 9b Overview 162 4 2 Main MCU Board Parameters 164 Chapter 6 Command List Guide 171 1 Communication Protocol...

Page 7: ...bility for the problems caused by unauthorized engineers The following signs are used in this manual to highlight safety information and warnings Useful information or possible harmful situations are...

Page 8: ...ipment with enough experience Only Vatech Inc authorized operator can handle the electrical circuit board and an understanding of the electric and electrical system is required be able to recognize op...

Page 9: ...e electrically sensitive that operators need to wear shielding gloves during operation The only part that can be replaced by the users is the input fuses Check if the fuses comply with the manufacture...

Page 10: ...mergency stop button to stop the operation when the equipment shows errors or malfunction during the image capturing Have patients wear a lead apron with a collar to protect the thyroid from X ray exp...

Page 11: ...sor Partial mode setting Sensor size 0000 0032 SPM_FISM_0001 Sensor Internal External mode setting 0000 Internal 0001 External SPM_FOVO Open all 4 axis collimators SPM_COLM_0009 Collimator Position se...

Page 12: ...PHT 35LHS Technical Manual VT TECH Smart Plus 001 10 188 COPYRIGHT 2018 VATECH ALL RIGHTS RESERVED Chapter 1 Hardware Service Guide 1 Smart Plus PHT 35LHS Block Diagrams System Block Diagram Power Blo...

Page 13: ...HT 35LHS Technical Manual VT TECH Smart Plus 001 11 188 COPYRIGHT 2018 VATECH ALL RIGHTS RESERVED 2 Smart Plus Board Configuration 2 1 Vertical Frame Part MAIN MCU BOARD MCU018 POWER BOARD VT PWR 010...

Page 14: ...r control signal output Generator tilting motor Column Up Down motor Generator Inverter Board control and CAN communication Sensor Inverter B D Keypad Collimator X Ray Detector CT PANO CEPH Scan contr...

Page 15: ...nical Manual VT TECH Smart Plus 001 13 188 COPYRIGHT 2018 VATECH ALL RIGHTS RESERVED POWER BOARD VT PWR 010 24VDC Output System Motor Sensor Inverter 380VDC Output Generator Emergency Switch Input Pow...

Page 16: ...ual VT TECH Smart Plus 001 14 188 COPYRIGHT 2018 VATECH ALL RIGHTS RESERVED 2 2 Rotating Unit Part DC POWER BOARD DC 04 SUB015 BOARD LASER CT PANO SENSOR Xmaru1404CF Plus COLLIMATOR MCU BOARD MCU006 I...

Page 17: ...ALL RIGHTS RESERVED DC POWER BOARD DC 04 Control signal interfacing of Sensor moving the motor Rotator motor Sensor Power interfacing of Sensor SUB015 BOARD Laser Laser and Laser motor control signal...

Page 18: ...2018 VATECH ALL RIGHTS RESERVED CT PANO SENSOR Xmaru1404CF Plus SUB027 BOARD Control signal interfacing of Generator Generator tilting motor Laser Laser motor Collimator Fan Sensor CT PANO Power inte...

Page 19: ...RESERVED 2 3 Handle Frame Part SUB029 BOARD Control signal interfacing of LCD Module Keypad Laser Column Up Down Temple support Signal interfacing of Sound source Emergency switch input Canine VR SUB...

Page 20: ...18 188 COPYRIGHT 2018 VATECH ALL RIGHTS RESERVED 2 4 Cephalometric Unit Part SUB040 BOARD The interface between MCU018 Board and CEPH motors Communication with CEPH sensors Sensor Power Regulation 24...

Page 21: ...35LHS Technical Manual VT TECH Smart Plus 001 19 188 COPYRIGHT 2018 VATECH ALL RIGHTS RESERVED 3 Smart Plus PHT 35LHS Connection Diagrams Power and Ground Connection Diagram Main MCU and ROTATOR Conn...

Page 22: ...W20 0 02 P24VS GND_SYS 2 1 CN1 S MAW2 00 02 LED018 P5VS P5VS GND_SYS VR C ANL CANH R X_LCD TX_LCD STEREO_R STEREO_R TSMO_OUT2A U P_SW D N_SW Option VR LASER1 P5VS LASER2 GND_SYS TSMO_OUT1A TSMO_ORG2 T...

Page 23: ...ng illustrations may look different from actual products depending on the options Truss head screws on each cover are covered with rubber caps Remove rubber caps first to unscrew the truss head screws...

Page 24: ...s PHT 35LHS Technical Manual VT TECH Smart Plus 001 22 188 COPYRIGHT 2018 VATECH ALL RIGHTS RESERVED 4 2 Rotating Unit Part DISASSEMBLY OF THE ROTATOR TUBE TOP COVER DISASSEMBLY OF THE ROTATOR TUBE RE...

Page 25: ...PYRIGHT 2018 VATECH ALL RIGHTS RESERVED DISASSEMBLY OF THE ROTATOR TUBE FRONT COVER By doing this you can access TUBE COLLIMATOR ASS Y COLLIMATOR MCU BOARD MCU006 SUB015 BOAR DISASSEMBLY OF THE ROTATO...

Page 26: ...Smart Plus PHT 35LHS Technical Manual VT TECH Smart Plus 001 24 188 COPYRIGHT 2018 VATECH ALL RIGHTS RESERVED DISASSEMBLY OF THE ROTATOR SENSOR FRONT COVER By doing this you can access SENSOR PANO CT...

Page 27: ...Smart Plus PHT 35LHS Technical Manual VT TECH Smart Plus 001 25 188 COPYRIGHT 2018 VATECH ALL RIGHTS RESERVED DISASSEMBLY OF THE ROTATOR UPPER R L COVER RIGHT LEFT...

Page 28: ...l VT TECH Smart Plus 001 26 188 COPYRIGHT 2018 VATECH ALL RIGHTS RESERVED DISASSEMBLY OF THE ROTATOR LOWER COVER By doing this you can access INVERTER BOARD SUB029 BOARD Disassemble the ROTATOR LOWER...

Page 29: ...t Plus 001 27 188 COPYRIGHT 2018 VATECH ALL RIGHTS RESERVED 4 3 Handle Frame Unit Part DISASSEMBLY OF THE HANDLE FRAME TOP COVER By doing this you can access SUB027 BOARD DISASSEMBLY OF THE CHINREST T...

Page 30: ...Smart Plus PHT 35LHS Technical Manual VT TECH Smart Plus 001 28 188 COPYRIGHT 2018 VATECH ALL RIGHTS RESERVED 4 4 CEPH Unit Part DISASSEMBLY OF THE CEPH TOP COVER By doing this you can access SUB040...

Page 31: ...Smart Plus PHT 35LHS Technical Manual VT TECH Smart Plus 001 29 188 COPYRIGHT 2018 VATECH ALL RIGHTS RESERVED DISASSEMBLY OF THE CEPH BOTTOM COVER By doing this you can access CEPH SENSOR Xmaru2602CF...

Page 32: ...unit for CBCT Geometry Calibration and Collimator Alignment Only preliminary sensor calibration is required if a new sensor is installed in the system For your usual CBCT Geometry Calibration skip th...

Page 33: ...wing commands in the command field and click Send Commands Description SPM_FISS_0001 Sensor Sensitivity Binning mode setting SPM_FIPM_0001 Sensor Partial mode setting Sensor size 0000 0032 SPM_FISM_00...

Page 34: ...Calib tab and type SPM_ARCT Then click Send to initiate the system into CT mode 7 When the equipment stops operating type SPM_CSON and click Send to supply power to the CT Sensor 8 Click the Soft Cali...

Page 35: ...ab and ensure that the bright calibration s kVp and mA are set as the picture below Change the parameters if kVp and mA values are different from the example in the note BrightCalibration kVp mA Param...

Page 36: ...ws up on the status window press the X ray Exposure switch button Release the button when you see RELEASE THE BUTTON command on the window 18 Repeat step 17 repeatedly until 2 point bright calibration...

Page 37: ...16 and ensure that the Median value meets the standard If the median value does not meet the requirement do the following steps Click the Settings tab Adjust kVp1 value by 10 in the BrightCalibration...

Page 38: ...600 940 830 25 Click the Bright button to acquire the Bright Calibration Data of 4Point and confirm that the following criteria are met Bright Standard Value Copper 1mm Filter Bright Min Max Median C...

Page 39: ...le to C VCaptureSW Acquisition CBCT WidePano CAL Open 27 Copy all 6 files in C VCaptureSW Acquisition CBCT WidePano CAL Col to C VCaptureSW Acquisition CBCT WidePano CAL folder 28 Once you have succes...

Page 40: ...l with 30 response variation relative to the neighboring pixel Bad line Definition A continuous lousy pixel that effective area width height size is more than 50 1x343 or 92x1 or higher Total max 7 li...

Page 41: ...sensor do not use the factory default sensor calibration data Instead go to 1 1 CBCT Preliminary Sensor Calibration and follow the instructions 1 Go to C VCaptureSW Acquisition CBCT WidePano 2 Rename...

Page 42: ...PHANTOM JIG ASS Y to the tripod as shown below 3 Make the PHANTOM JIG ASS Y level by using BUBBLE LEVEL and three ALIGN PINs 4 Put the cone shaped phantom on the PHANTOM JIG ASS Y 5 Move the Vertical...

Page 43: ...tab and type SPM_FOVO click Send to initiate the system into CT mode then type SPM_COLM_0009 to provide the power 9 Type SPM_AAMS and click Send to go into CT capture mode A at 15 secs 360 degrees 10...

Page 44: ...2 188 COPYRIGHT 2018 VATECH ALL RIGHTS RESERVED 13 When the system stops X ray exposure click Pano to open Pano utils 14 Click Process to create a file named _average Raw Click Close after the file is...

Page 45: ...and read the ofs value Be sure to click the horizontal center of the cone image like the image below 18 If the ofs value is within the permitted range 1 1 do the following steps Close View 16 Click t...

Page 46: ...mitted range 1 1 do the steps that follow Disassemble the sensor cases Loosen the four wrench bolts and move the sensor left or right a little move right ofs move left ofs Tighten the four wrench bolt...

Page 47: ...ruction settings file for Geometry Calibration 1 Open APsetting vxm and change GPUMODE 4 to GPUMODE 3 and save exit the file Angle bin RCP bin Uoffset bin Voffset bin Angle_DBP bin RCP_DBP bin RCPX_DB...

Page 48: ...age Acquisition 1 Put the tripod on the floor near the equipment 2 Assemble the PHANTOM JIG ASS Y to the tripod as shown below 3 Make the PHANTOM JIG ASS Y level by using BUBBLE LEVEL and three ALIGN...

Page 49: ...Plus PHT 35LHS Technical Manual VT TECH Smart Plus 001 47 188 COPYRIGHT 2018 VATECH ALL RIGHTS RESERVED 5 Move the Vertical Frame to the bottom position by using the Vertical Frame Up Down button or s...

Page 50: ...ht and put the tripod and the BEAD PHANTOM in position as shown in the figure 7 Run VAKCAP exe and input the following commands SPM_FIPM_0001 SPM_FISM_0001 SPM_FOVO SPM_COLM_0009 clicking Send after e...

Page 51: ...PYRIGHT 2018 VATECH ALL RIGHTS RESERVED 9 Click the Capture Recon tab and set the parameters and then click Capture CTB 10 When the VAKPAR screen shows press the X ray exposure switch button 11 Releas...

Page 52: ...he standards are met then continue from 16 To recapture the image make sure to do the steps thru 8 to 12 over again 15 Click Soft Calib tab type and send the following commands NOTE These commands sho...

Page 53: ...Smart Plus PHT 35LHS Technical Manual VT TECH Smart Plus 001 51 188 COPYRIGHT 2018 VATECH ALL RIGHTS RESERVED 19 Click Capture and make the exposure by pressing the X ray exposure switch button...

Page 54: ...mage 2 When the reconstruction is completed click V Vol to open the reconstructed image 3 Make sure that the following criteria are met while examining the image The phantom bead image is aligned with...

Page 55: ...PYRIGHT 2018 VATECH ALL RIGHTS RESERVED 5 Close the V Vol window and click the Settings tab and then double click reconstruction_GEO vxm 6 Make sure that BEADTHRES 0 7 Click Properties to open Cone Be...

Page 56: ...p up window appears click OK 10 When the window which shows current geometry information pops up make sure the following information is correct and click OK The total number of groups is 5 The point n...

Page 57: ...a are met while examining the graphs The line graphs in Angle bin RCPx bin RCPy bin and RCPz bin are recognized To open bin files click When Geometry Calibration is completed do the following Type SPM...

Page 58: ...should perform the Collimator Alignment operation according to the following procedures The result of Collimator Alignment can be different depending on Geometry Data Therefore Geometry Calibration sh...

Page 59: ...right CBCT collimator alignment Add 0 1 mm to the left and right collimator positions and capture the image again after you finished alignment When there is no air calibration data add 0 4 mm to the...

Page 60: ...TS RESERVED 6 When Align Sequence window appears press the X ray exposure switch button Stay outside of the X ray shielding room to avoid unnecessary X ray radiation during exposure 7 When the Raw Vie...

Page 61: ...T 2018 VATECH ALL RIGHTS RESERVED 9 Type 95 in the T box Select S in the M box 10 Make sure that the result meets the CBCT Left Right collimator alignment standard values Position Alignment Standards...

Page 62: ...collimator decrease the collimator position values To open the 4 axis collimator increase the collimator position values 12 Do steps 4 through 11 until the left right red pixel count is within the pe...

Page 63: ...ator Alignment FOV 100 x 85 100 x 70 50x50 1 Run CollimatorAlign exe 2 Type 95 kVp 8 mA in the kVp mA field 3 Select 100 x 85 in the FOV Selection 4 Type 3 3 in the Top and 10 4 in the Bottom field 5...

Page 64: ...TS RESERVED 7 When Align Sequence window appears press the X ray exposure switch button Stay outside of the X ray shielding room to avoid unnecessary X ray radiation during exposure 8 When the Raw Vie...

Page 65: ...IGHT 2018 VATECH ALL RIGHTS RESERVED 10 Type 75 in the T box Select S in the M box 11 Make sure that the result meets the CBCT Top Bottom collimator alignment standard Position Permitted value Red pix...

Page 66: ...ose the 4 axis collimator decrease the collimator position values To open the 4 axis collimator increase the collimator position values 13 Do the steps 3 through 10 until the top bottom red pixel coun...

Page 67: ...CBCT image quality in Smart Plus PHT 35LHS the operator should perform the Chinrest Position Alignment operation according to the following standards and procedures Make sure that the operator should...

Page 68: ...PHANTOM JIG ASS Y as shown in the figure 2 Align the PHANTOM FIXING BOLTs to the PHANTOM JIG BOTTOM baseline as shown below and turn the bolts clockwise to tighten them 3 Put the PHANTOM JIG ASS Y BOT...

Page 69: ...RESERVED 4 Put the PHANTOM JIG ASS Y TOP on the PHANTOM JIG ASS Y BOTTOM as shown below 5 Make the PHANTOM JIG ASS Y level by using BUBBLE LEVEL and three ALIGN PINs 6 Put CT NUMBER CHECK PHANTOM on...

Page 70: ...L RIGHTS RESERVED 7 Run VACAP exe VAKCAP exe Path C VCaptureSW Acquisition CBCT WidePano folder 8 Click the Settings tab and double click Reconstruction vxm to open 9 Change the parameters as shown be...

Page 71: ...parameters as shown below and click CONFIRM 3 Click READY when enabled and acquire the image according to the Console Software guidance 4 After the image acquisition is complete exit the capture softw...

Page 72: ...188 COPYRIGHT 2018 VATECH ALL RIGHTS RESERVED 7 Click the center of the cross line and make sure that the following standard is met X value should be within the permitted range 270 280 Y value should...

Page 73: ...just the Y value Type SPM_AY _ and click Send to read the current Y axis position Type SPM_AYST_ and click Send to adjust Y axis position When you change AXST AYST value by 10 it will be changed by ap...

Page 74: ...und Calibration according to the following standards and procedures 5 1 CBCT Background Calibration Standard CBCT Background Level Standard Green mode Mode Exposure Condition Background Level Man 80 k...

Page 75: ...e and click CBCT to go into CBCT mode 2 Set the parameters as shown below and click CONFIRM 3 Click READY when enabled and acquire the image according to the Console Software guidance 4 After the imag...

Page 76: ...6 Select 50 in the M box and make sure that the Background level ave meets the standard values 7 If the Background Level does not meet the standard adjust the mA value to meet the standard values 8 O...

Page 77: ...e Green section For Woman subtract 0 3mA from the mA in Man mode and for Child subtract 0 6mA from the mA in Man mode and type the value in the section Do not change the kVps Make sure that each FOV F...

Page 78: ...to go into CBCT mode 2 Set the parameters as shown below and click CONFIRM 3 Click Ready when enabled and acquire the image according to the Console Software guidance 4 After the image acquisition is...

Page 79: ...VED 6 Select 50 in the M box and make sure that the Background level ave meets the standard 7 If the Background Level does not meet the standard values adjust the mA value to meet the standard 8 Open...

Page 80: ...h Resolution section For Woman subtract 0 3mA from the mA in Man mode and for Child subtract 0 6mA from the mA in Man mode and type the value in the section Do not change the kVps Make sure that each...

Page 81: ...HT 35LHS model the operator should perform the CBCT CT Number Calibration according to the following procedures Make sure that the operator should use TYPE A as CT PHANTOM JIG during the Smart Plus PH...

Page 82: ...re CBCT CT Number Calibration 1 Put the PHANTOM JIG ASS Y BOTTOM on the unit as shown below 2 Put the PHANTOM JIG ASS Y TOP on the PHANTOM JIG ASS Y BOTTOM as shown below 3 Make the PHANTOM JIG ASS Y...

Page 83: ...HANTOM JIG ASS Y 5 Run VACAP exe VAKCAP exe Path C VCaptureSW Acquisition CBCT WidePano folder 6 Click the Settings tab and double click Reconstruction vxm to open 7 Change the parameters as shown bel...

Page 84: ...lick CBCT to go into CBCT mode 2 Set the parameters as shown below and click CONFIRM 3 Click READY when enabled and acquire the image according to the Console Software guidance 4 After the image acqui...

Page 85: ...ertical center position Slice XY Z of CT Number Phantom between the bottom position value and the top position value If Slice XY Z is 145 at TOP 23 at BOTTOM the median Slice XY Z value is 84 Median S...

Page 86: ...e the median slice number If the median Slice XY Z value is 84 and the last number of slice files is 449 the median slice file number is 365 449 84 10 Click each material Bone Water Air to read the av...

Page 87: ...IGH RESOLUTION Click Save to keep the changes then click Close Do not measure the Metal value and use the fixed value of 2300 for every FOV 14 Do steps 2 through 14 for other modes as follows Count FO...

Page 88: ...L RIGHTS RESERVED 15 When CT Number Calibration is completed open Reconstruction xv VAKCAP exe Settings tab Double click Reconstruction vxm 16 Recover the parameters as shown below and save exit the f...

Page 89: ...Hard 3 Click CONFIRM then READY When the system is ready make the exposure by pressing an X ray exposure switch Release the switch when you see the Please release the X Ray exposure switch message on...

Page 90: ...ection S C Check Phantom M R Check Phantom Uniformity Check Phantom Geometry Check Phantom CT Number Check Phantom High Contrast Resolution Low Contrast Resolution Standard Value Parameters USL Upper...

Page 91: ...econstruction vxm VAKCAP exe Settings tab Double click reconstruction vxm 2 Make sure that POSTPROCESSING and UseCTNumCal values are as follows POSTPROCESSING 50 UseCTNumCal 1 If not change the value...

Page 92: ...GHTS RESERVED 4 Put the PHANTOM JIG ASS Y TOP on the PHANTOM JIG ASS Y BOTTOM as shown below 5 Make the PHANTOM JIG ASS Y level by using BUBBLE LEVEL and three ALIGN PINs 6 Put the S C CHECK PHANTOM o...

Page 93: ...t up in the settings Otherwise you will be asked to save the acquired image At this moment save the image to a 2D Viewer EzDent I or EasyDent 4 10 Open the saved Phantom image in the 2D Viewer To run...

Page 94: ...1000 1500 WIDTH brightness 12 Make sure that you can see the minimum size of the Airhole and PE Polyethylene cylinder at the distance of 50 cm 20 inches from the monitor Parameters Material Minimum v...

Page 95: ...gs tab Double click reconstruction vxm 2 Make sure that POSTPROCESSING and UseCTNumCal values are as follows POSTPROCESSING 0 UseCTNumCal 0 UseArcCut 0 If not change the value save the file and exit C...

Page 96: ...4 Make the PHANTOM JIG ASS Y level by using BUBBLE LEVEL and three ALIGN PINs 5 Put the UNIFORMITY CHECK PHANTOM on the PHANTOM JIG ASS Y 6 Put the M R CHECK PHANTOM on the UNIFORMITY CHECK PHANTOM B...

Page 97: ...s shown below and click CONFIRM 9 Click READY when enabled and acquire the image according to the Console Software guidance and save the image in a 2D Viewer EzDent I or EasyDent 4 10 Click the Settin...

Page 98: ...valuation tab EzEval exe path C VCaptureSW Util EzEval_Phantom 14 Click brw browse a captured slice image and open it Slice image path C VCaptureSW Acquisition CBCT WidePano SLICE 15 Select XMARU0808...

Page 99: ...where its center line comes into view as shown in the figure 18 Clear Geometry Check Input check box 19 Click the Upper Slice button under Contrast Resolution Slice checkpoints M R CHECK PHANTOM UNIF...

Page 100: ...ce image of the Uniformity Check Phantom where its center line comes into view as shown in the figure 21 Select R in the M box 22 Click the center of the image and click the Center circle crd button 2...

Page 101: ...SERVED 25 Select a top slice image of the Phantom Jig where its center line comes into view as shown in the figure 26 Click the Lower slice button under Noise Homogeneity 27 Click and specify the path...

Page 102: ...18 VATECH ALL RIGHTS RESERVED Contrast Noise Homogeneity Standard Value Parameters LSL Lower Specification Limit USL Upper Specification Limit Contrast 1000HU 1 50 3 50 Noise 0 00 200 00 Homogeneity 0...

Page 103: ...ings tab Double click reconstruction vxm 2 Make sure that POSTPROCESSING and UseCTNumCal values are as follows POSTPROCESSING 0 UseCTNumCal 0 UseArcCut 0 If not change the value save the file and exit...

Page 104: ...8 VATECH ALL RIGHTS RESERVED 4 Make the PHANTOM JIG ASS Y level by using BUBBLE LEVEL and three ALIGN PINs 5 Put the UNIFORMITY CHECK PHANTOM on the PHANTOM JIG ASS Y 6 Run Console Software and click...

Page 105: ...Click READY when enabled and acquire the image according to the Console Software guidance and save the image in a 2D Viewer EzDent I or EasyDent 4 9 Run EzEval exe and click the CT Image Evaluation ta...

Page 106: ...HT 2018 VATECH ALL RIGHTS RESERVED 11 Select a top slice image of the Geometry Check Phantom where its center line comes into view as shown in the figure 12 Clear Contrast Resolution and Noise Homogen...

Page 107: ...TS RESERVED 14 Select a slice image between the top and bottom of the Geometry Check Phantom as shown in the figure 15 Select R in the M box 16 Click the center of the center circle and click the Cent...

Page 108: ...es into view as shown in the below image 19 Click the Lower slice button under Noise Homogeneity 20 Click Generate to get the result and compare it with the standard Geometry Standard Value Parameters...

Page 109: ...xm VAKCAP exe Settings tab Double click reconstruction vxm 2 Make sure that POSTPROCESSING and UseCTNumCal values are as follows POSTPROCESSING 50 UseCTNumCal 1 If not change the value save the file a...

Page 110: ...VATECH ALL RIGHTS RESERVED 4 Adjust the PHANTOM JIG ASS Y level by using BUBBLE LEVEL and three ALIGN PINs 5 Put the CT NUMBER CHECK PHANTOM on the PHANTOM JIG ASS Y 6 Run Console Software and click...

Page 111: ...n enabled and acquire the image according to the Console Software guidance and save the image in a 2D Viewer EzDent I or EasyDent 4 9 Open the saved Phantom image in the 2D Viewer to run the 3D Viewer...

Page 112: ...ers LSL Lower Specification Limit USL Upper Specification Limit Air CT Number 1030 900 Water CT Number 20 20 Teflon CT Number 900 1100 14 Record the mean CT Number of each material 15 Click Ez3D plus...

Page 113: ...Value With 1 mm Copper Filter 1 Point Bright data file median value 60 80 2 Point Bright data file median value 80 200 3 Point Bright data file median value 200 600 4 Point Bright data file median va...

Page 114: ...lder PANO Sensor Calibration file folder C VCaptureSW Acquisition Pano WidePano CAL folder 1 Run VAKCAP exe 2 Click the Capture Recon tab and type the following commands in the command field and click...

Page 115: ...LL RIGHTS RESERVED 1 4 Performing PANO Sensor Dark Calibration 1 Run VAKCAP exe 2 Click Settings In the Serial port box select a COM Port Number in use Then click OK and restart the program 3 Click th...

Page 116: ...the equipment stops operating type SPM_PSON and click Send to supply power to the PANO Sensor 5 Wait 20 seconds and click Dark to achieve the Dark Calibration data file 6 Select 30x686d raw and click...

Page 117: ...thout the Copper Filter Stay outside of the X ray shielding room during Bright Calibration data achievement Follow the procedure below to perform PANO Sensor Bright Calibraiton 1 Click Settings tab an...

Page 118: ...not cover X Ray Tube Focal Spot 4 Attach 1 mm Copper Filter on X Ray Tube as shown below 5 Type SPM_PSON and click Send to supply power to the PANO Sensor 6 Click Dark to acquire Dark Calibration Data...

Page 119: ...ENA_0001 SPM_FISS_0001 SPM_FIPM_0004 SPM_FISM_0001 SPM_COLM_0008 SPM_FOVO SPM_PSON Acquire Bright calibration data again 12 Click the 5 Point Bright Calibration data file on View16 and make sure that...

Page 120: ...general image quality in Smart Plus PHT 35LHS the operator should perform the 1st Collimator Alignment operation according to the following procedures 1st Collimator Assy 2 1 PANO Collimator Alignmen...

Page 121: ...ensor Effective Area during the 1st Collimator Alignment operation 2 Run CollimatorAlign exe C VCaptureSW Util CollimatorAlign CollimatorAlign exe 3 Type 60 kVp 5 0 mA in the KVp mA filed 4 Click Init...

Page 122: ...s release the X ray exposure switch 8 Select 0009 raw in the raw file list 9 Type 70 in the T box 10 Select S in the M box 11 Make sure that the result meets the PANO collimator alignment standard Pos...

Page 123: ...and click the Capture tab to save the changes 0 1 mm is approximately 3 pixels To close the 4 axis collimator decrease the collimator position values To open the 4 axis collimator increase the collim...

Page 124: ...alize and wait until the system is initialized 3 Click Capture when it is enabled 4 When Align Sequence window appears press the X ray exposure switch Stay outside of the X ray shielding room to avoid...

Page 125: ...ollowing procedures 3 1 PANO Geometry Calibration Standard To perform the PANO Geometry Calibration PANO BALLPHANTOM should be prepared in advance During PANO BALLPHANTOM Geometry operation the measur...

Page 126: ...n PXST 1 Run Console Software and click Phantom Capture Mode 2 Select the Pano checkbox and click OK 3 Click CONFIRM 4 Attach PANO BALLPHANTOM Assay on Chinrest as shown below 5 Adjust Canine Laser Be...

Page 127: ...image acquisition is complete run VAKCAP exe VAKCAP exe path C VCaptureSW Acquisition Pano WidePano 9 Click the Panorama tab and click V Pan to open View 16 10 Click and select Capture raw to open the...

Page 128: ...eet the standard do the steps that follow Close the Viewer In the Panorama tab type SPM_PX _ and click Send to read the current PXST value Correct the PXST value and type SPM_PXST_ and click Send Corr...

Page 129: ...gh 9 for the image acquisition procedure 2 In the Z box type 5 Then use the mouse to drag the image to show Center Pin Click Center Pin to check the Pixel Number 3 Make sure that the Center Pin pixel...

Page 130: ...el shift value is not an absolute measure If the Pixel Number of Center Pin meets the standard but the ghost image doesn t have bilateral symmetry change PLST Value to adjust the ghost image symmetry...

Page 131: ...ixel 4 Click the end of the Right Center Ball and read the X value by pixel 5 Subtract the starting point value from the endpoint value to measure Right Center Ball size 6 Make sure that Right Center...

Page 132: ...Inspection Standard PANO BALLPHANTOM and Quart Phantom digitest2 0 must be prepared in advance to perform PANO image inspection Line Pair and Low Contrast Resolution Line Pair Resolution Low Contrast...

Page 133: ...ATECH ALL RIGHTS RESERVED 4 2 Performing PANO Image Inspection Line Pair and Low Contrast Resolution 1 Run Console Software and click PANO to go into the Panoramic mode 2 Click CONFIRM 3 Attach PANO B...

Page 134: ...eam to the baseline of Quart Phantom as shown below Canine Laser Beam must be aligned with the center of the Quart Phantom AL filter as shown in the figure 5 Attach 1 8 mm or 1 0mm 0 8mm Copper Filter...

Page 135: ...RIGHTNESS and CONTRAST bar to show the line pair well 9 Line Pair Resolution Make sure that the lines can be seen clearly at 2 5 lp mm 10 Low Contrast Resolution Make sure that a 2 0mm hole can be see...

Page 136: ...r 2 Click the Panorama tab and click V Pan to open View 16 3 Click and select Capture raw to open the captured image Capture raw path C VCaptureSW Acquisition Pano WidePano PAN 4 Select 1 in the Z box...

Page 137: ...er 30 Homogeneity ave Over 600 The difference between the two values should be less than 10 Over 1200 If the noise level doesn t meet the standard calculate Homogeneity ave Noise dev ratio at each ROI...

Page 138: ...h as temperature and humidity to acquire the best quality image Follow the procedure below to configure the CEPH sensor for image optimization 1 Run the C VCaptureSW Acquisition CEPH WideCEPH Norm VAC...

Page 139: ...imator Fast Send SPM_CEPH SPM_HSON SPM_FREQ_0313 SPM_FOVO SPM_COLM_0005 commands to the Command window and set the CEPH sensor and collimator Commands Description SPM_CEPH CEPH mode SPM_HSON CEPH sens...

Page 140: ...bright calibration 1 Sensor Bright Calibration is acquired in Norm same as Fast mode 2 Attach Cu 1mm Filter to obtain 5 points bright Cal 3 Run the C VCaptureSW Acquisition CEPH WideCEPH Norm Fast VA...

Page 141: ...pen SPM_COLM_0005 AL filter open For fast folder enter SPM_FREQ_0313 Instead of SPM_FREQ_0160 Acquisition Conditions 5 Point exposure condition kVp0 680 mA0 650 kVp1 900 mA1 1400 7 When the final valu...

Page 142: ...e deviation from neighboring pixel Bad Line Definition Bad Pixels over 50 of effective area and width and height are defined as bad lines Ex When having an effective area of M x N 1 x M or N x 1 or mo...

Page 143: ...RESERVED 2 Performing CEPH Geometry Calibration 1 Follow the procedure below to perform the CEPH geometry calibration 2 Run Console Software 3 Click CEPH High Resolution PA CONFIRM and wait until READ...

Page 144: ...Acquisition Ceph WideCeph Norm PAN folder 10 Select R in the M box and click the center of the PHANTOM image 11 Make sure that X value pixel number meets the standard 1160 1180 pixels 12 If the X val...

Page 145: ...ALL RIGHTS RESERVED Exit VAKCAP Acquire the PHANTOM image again and measure the Pixel Number at the center of PHANTOM Repeat the procedures until the X value at the center of PHANTOM meets the standa...

Page 146: ...the EzAlign Follow the procedure below to align the CEPH collimator with EzAlign 1 When EzAlgin s first window appears click Image Calibration 2 EzAlign has four tabs PANO CEPH CBCT Insight Choose the...

Page 147: ...llimator capture position completed appears in the status window Ensure to wait until you see the message then click 2 Auto Align When the bite or temple supports are still mounted on the equipment th...

Page 148: ...ECH ALL RIGHTS RESERVED 3 2 CEPH Ear Rod Alignment 1 Run Console Software 2 Click CEPH High Resolution Lateral CONFIRM and wait until READY button is enabled 3 Turn CEPH Ear Rod to the Lateral Mode po...

Page 149: ...ion according to the Console Software guidance 7 When the image acquisition is completed run VAKCAP exe 8 Click the Panorama tab V Pan to open View16 9 Click Brw and select Capture raw to open the cap...

Page 150: ...Calibration standard Follow the procedure below to use V I P S CEPH Bright Calibration Standards 1 Run the C VCaptureSW Util VIPS exe file 2 Set options for each mode as shown in the picture below 1 C...

Page 151: ...t Plus PHT 35LHS Technical Manual VT TECH Smart Plus 001 149 188 COPYRIGHT 2018 VATECH ALL RIGHTS RESERVED 7 Click the button 8 Click the button 9 Click the button 10 Choose the image 11 Click the but...

Page 152: ...teral mode 1 The Row Guideline sets the lower part without the influence of the collimator 2 Use the Histogram of the column guideline to set within the range before the curve descends rapidly 3 Click...

Page 153: ...position as shown in 6 Each point s position must reflect the histogram s trend 7 Set the parts in the histogram where the curve increases and decreases 8 As shown in 7 if the intersections between t...

Page 154: ...t due to the difference in contrast 13 Select the O mark on the far right of which is an image of Level 3 among the created images 14 When the Simulation button is selected an image of O marked in red...

Page 155: ...IGHTS RESERVED Point Setting Method for Frontal Mode Image Follow the procedure below to set the point for the frontal mode 1 The values set in Frontal Mode are the same as SMV Carpus and Waters View...

Page 156: ...Smart Plus PHT 35LHS Technical Manual VT TECH Smart Plus 001 154 188 COPYRIGHT 2018 VATECH ALL RIGHTS RESERVED CEPH Ear Rod Alignment Standard...

Page 157: ...ware program for Smart Plus You must update the firmware program when a new function or patch is released to keep the system up to date 1 Installing Firmware Upgrade Software Follow the procedure belo...

Page 158: ...Smart Plus PHT 35LHS Technical Manual VT TECH Smart Plus 001 156 188 COPYRIGHT 2018 VATECH ALL RIGHTS RESERVED...

Page 159: ...w to upgrade your firmware If there is a problem with a firmware upgrade install reinstall Inform Grabber Virtual Driver v1 5 or later ex VirtualSerialSetup_jungo12_V1 5 exe 1 Run STMFlashLoader Demo...

Page 160: ...mart Plus 001 158 188 COPYRIGHT 2018 VATECH ALL RIGHTS RESERVED 4 Make sure that the Port Name is COM1 and click Next 5 When the connection between PC and MCU 018 is established successfully a green l...

Page 161: ...rt Plus PHT 35LHS Technical Manual VT TECH Smart Plus 001 159 188 COPYRIGHT 2018 VATECH ALL RIGHTS RESERVED 6 Click Next 7 Select Download to the device and browse a firmware to upgrade and open the f...

Page 162: ...Plus 001 160 188 COPYRIGHT 2018 VATECH ALL RIGHTS RESERVED 8 Click Next to continue with a firmware upgrade 9 When the firmware upgrade is completed the Download operation finished successfully messa...

Page 163: ...mart Plus 001 161 188 COPYRIGHT 2018 VATECH ALL RIGHTS RESERVED 3 Checking Firmware Version Follow the procedure below to check the firmware version 1 Run Terminal v1 9b 2 Type SPM_TVER and click Send...

Page 164: ...b is a simple serial port COM terminal emulation program It communicates with the equipment through Serial Port Communication Parameter setting window Parameter setting window to communicate with the...

Page 165: ...1 Run Terminal v1 9b 2 In the COM Port box select the connected Serial Port 3 In the Baud rate area select 19200 4 In the Data bit area select 8 5 In the Parity area select none 6 Click Connect to com...

Page 166: ...aved Parameter value in MAIN MCU BOARD type SPM_PVER in the Terminal 1 9b program The Parameter values in this manual are random numbers only for explanation Thus do not refer to the Parameter Values...

Page 167: ...Reference Location Value in ARCT Mode Initial Value 1200 1 9999 0830 spm_CPHF_xxxx CEPH_HALF_COUNT Rotator Unit Position Reference Location Value in CEPH Mode Initial Value 3900 1 9999 00001 spm_POFS...

Page 168: ...alue E mode 0240 spm_UFTT_xxxx CEPH_TABLE_F_START_OFFSET_COUNT 0165 16 5cm CEPH sensor Start Offset Value F mode 1800 spm_UGTT_xxxx CEPH_TABLE_G_START_OFFSET_COUNT 0165 16 5cm CEPH sensor Start Offset...

Page 169: ...ser Beam Option 0 Disable 1 8cm Smart Smart plus 2 14cm G2 3 14cm JB Laser Beam 0400 SPM_CTBM_0001 CT_BEAM_REF_CNT CT Beam Offset Value Set 2714 spm_CHST_xxxx CANINE_CNT_REF canine enable spm_cena_1 C...

Page 170: ...nction Setting 0000 No Use Door Lock Function 0001 Use Door Lock Function 0001 spm_TITY_000x TILT_TYPE 0 NO tube tilting Mode for only Pano Model 1 Using tube tilting mode Tube Tilting Function Settin...

Page 171: ...iptive audio OFF 1 Green CT descriptive audio ON Green CT deactiptive audio on off setting 0003 spm_MPOP_000x MP3 MUSIC Option SET 0 Different music played each capture mode 1 Same music played each c...

Page 172: ...en SPM_CEPH command is sent 0001 X Y R axis will not be reset when SPM_CEPH command is sent default us spm_L_XX NATION CODE Mp3 Board Voice Message Language Setting Order Language Code 1 Italian IT 2...

Page 173: ...4 Parity Not applied 5 Flow Control Not applied Baud The number of signal changes made to the transmission medium per second Each symbol can represent or convey several bits of data Data bit The numb...

Page 174: ...LCD to PC SMO Send MCU to OPTIC EPM Echo SPM ELP Echo SLP EPO Echo SPO Command 4 letters arrangement If it is less than 4 letters the command should be filled up with _ Ex SPM_CT__ Parameter only whe...

Page 175: ...ll areas SPM_CAFT Capture Front area SPM_CALT Capture Left area SPM_CART Capture Right area SPM_SSB_ PANO Bright calibration capture CEPH mode command Command Description SPM_CEPH Initialize into CEPH...

Page 176: ..._CTB_ Arch CT mode bright calibration Common command Command Description SPM_RET_ Move to Capture position for PANO CEPH CT mode SPM_ERDY Set preparation of X Ray Exposure Switch SPM_ERDC Set to cance...

Page 177: ...nd Command Description SPM_DROP_000 Set Door Lock mode 0 Door Lock mode Disable 1 Door Lock mode Enable default SPM_ISDR Request a state of Door Lock mode Temple Support Control command Command Descri...

Page 178: ...lity SPM_CPOF Turn off Sensor Power for current modality SPM_PSON Turn on PANO Sensor Power SPM_PSOF Turn off PANO Sensor Power SPM_HSON Turn on CEPH Sensor Power SPM_HSOF Turn off CEPH Sensor Power S...

Page 179: ...e Laser Beam Initial Value 0380 1 999 SPM_CHV Request Current reference position value of Canine Laser Beam SPM_CENA_000 Set to enable disable Canine Laser Beam 0 Disable Canine Laser Beam 1 Enable Ca...

Page 180: ...T Descriptive audio ON SPM_VOLU_00 Set Volume of MP3 voice message 0 82 SPM_MPOP_000 MP3 Music option 0 Varied music plays by each PANO CEPH CBCT mode 1 Same music plays for all PANO CEPH CBCT mode 2...

Page 181: ...er SPM_SNUM_0470123 SPM_SNU Request Serial Number PANO Align Calibration Setting Command Command Description SPM_HFST_ Set Lamp position of PANO mode Initial Value 1200 1 9999 SPM_HF _ Request current...

Page 182: ...solution Initial Value 0165 1 9999 Ex 0165 16 5cm SPM_UBT Request current UBTT Parameter value SPM_UCTT_ CEPH sensor Motor Capture starting position in the following mode Full Lateral High Quality SPM...

Page 183: ...tating Unit in CT mode If the first digit is 1 it means clockwise and 0 means counter clockwise Initial Value 00001 1 19999 SPM_CO _ Request current COFS Parameter value SPM_ACHF_ Set CT Alignment Hal...

Page 184: ...018 VATECH ALL RIGHTS RESERVED X ray remote exposure Command Command Description SPM_XRES X ray remote exposure start SPM_XREE X ray remote exposure end SPM_XRET X ray remote exposure time set ex 0500...

Page 185: ...nt during X Ray exposure SMP_ERRR_0010 Although X Ray Switch is turned on X Ray On Command is not entered in the System SMP_ERRR_0011 Although X Ray Switch is turned off X Ray Off Command is not enter...

Page 186: ...on of 1st Collimator 4 axis left the movement Check 1st Collimator Right Left motor and Photo Sensor operation SMP_ERRR_0031 Error in the operation of 1st Collimator 4 axis right movement Check 1st Co...

Page 187: ...TECH ALL RIGHTS RESERVED Exposure Switch Error Message sent from MCU to PC Command Description SMP_ERRR_0060 X ray Exposure Switch was pressed when the system power is turned on Misc Error Message sen...

Page 188: ...Console Software 6 Automatically start the exposure 3 seconds after Dark acquisition 4 2 Remote exposure sequence when acquiring the Bright Calibration 1 Open the VAKCAP of the applicable mode 2 Move...

Page 189: ...PYRIGHT 2018 VATECH ALL RIGHTS RESERVED 4 4 XTST Test 1 Run the Terminal or the VAKCAP 2 Activate the remote exposure mode by entering the SPM_XRES command 3 Set and input the desired exposure time us...

Page 190: ...www vatech com...

Reviews: