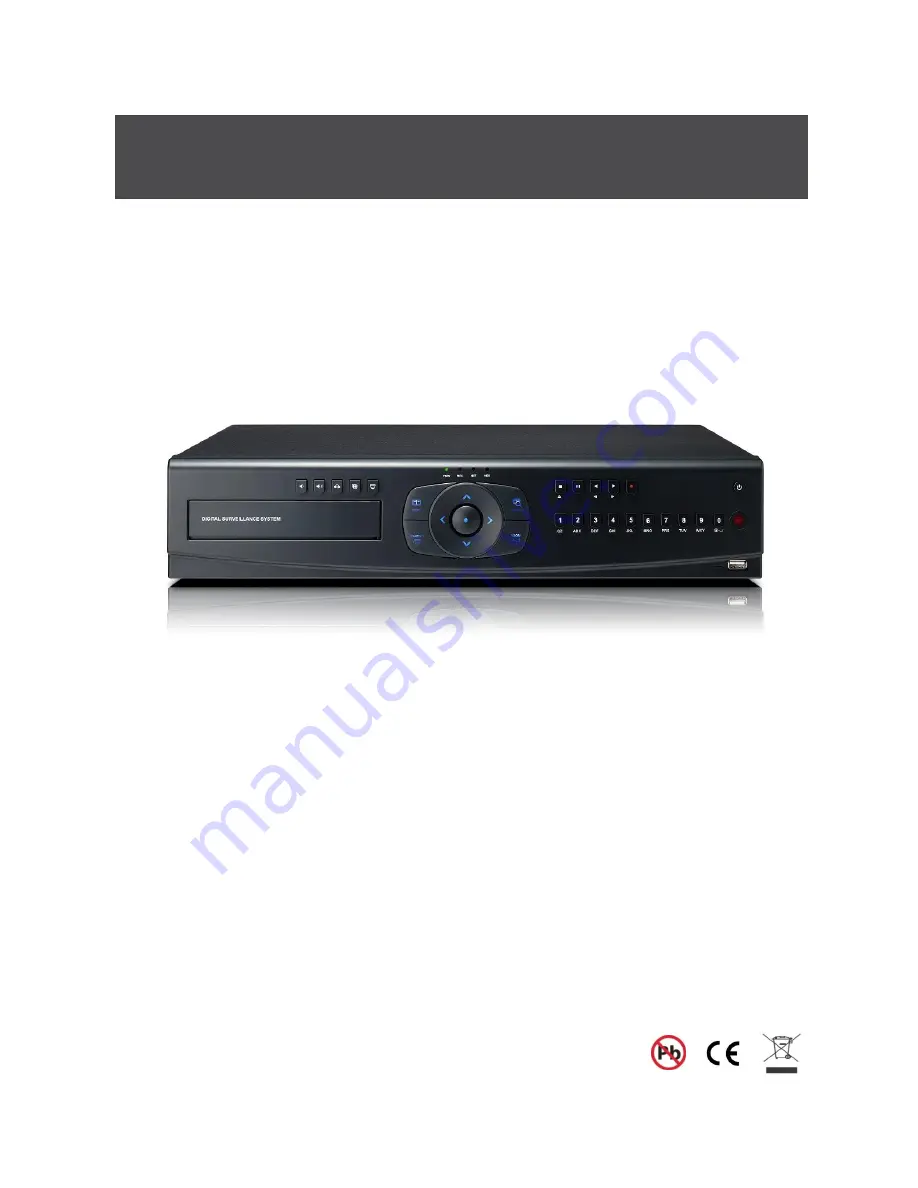
background image


Installation and User manual 

Quantum 960H DVR Range 

Real time 960H DVRs 

QP960H and QX960H models 

Summary of Contents for QP960H

Page 1: ...Installation and User manual Quantum 960H DVR Range Real time 960H DVRs QP960H and QX960H models ...

Page 2: ...2 Quantum 960H DVR range manual V1 2 ...

Page 3: ...ote statements identify potential hazards that can occur if the equipment is not handled properly WARNING Improper use of this equipment can cause severe bodily injury or equipment damage Caution Improper use of this equipment can cause equipment damage Note Notes contain important information about a product or procedure This apparatus is manufactured to comply with the radio interference A Decla...

Page 4: ...ce WARNINGS AND CAUTIONS To reduce the risk of fire or electric shock do not insert any metallic objects through the ventilation grills or other openings on the equipment CAUTION WARNING TO REDUCE THE RISK OF ELECTRIC SHOCK DO NOT REMOVE COVER OR BACK NO USER SERVICABLE PARTS INSIDE REFER SERVICING TO QUALIFIED SERVICE PERSONNEL RISK OF ELECTRIC SHOCK DO NOT OPEN CAUTION ...

Page 5: ... 3 Playback Search 22 4 PTZ CONTROL 22 4 1 PTZ Control by mouse 22 4 2 PTZ Control by remote keyboard 24 4 3 PTZ Control by remote controller 24 4 4 PTZ Control by Client software 25 SETUP MENU 25 1 DISPLAY 25 2 RECORDING 30 3 SYSTEM 36 4 NETWORK 45 5 EVENT 49 SEARCH MENU 53 1 SEARCHING RECORDED DATA 53 1 1 Date Time Search 53 1 2 Event Search 54 1 3 Calendar Search 54 1 4 Bookmark Search 56 1 5 T...

Page 6: ...5 2 Opacity 90 5 3 Audio Buffer 91 5 4 Camera Name 91 6 TELEMETRY CONTROL PAN TILT ZOOM FOCUS 92 6 1 Pan Tilt Zoom Focus 92 6 2 Preset Learn 93 7 SCREEN POSITION SAVE LOAD 94 7 1 Screen Position Save 94 7 2 Screen Position Load 94 8 FIRMWARE UPGRADE 95 APPENDIX 1 96 DYNAMIC IP SUPPORTING DDNS SERVER 96 APPENDIX 2 98 SETUP FOR DVR PORT WEB SERVER PORT USING IP SHARING ROUTER 98 APPENDIX 3 99 SPECIF...

Page 7: ...7 Quantum 960H DVR range manual V1 2 Overview 1 Contents of Packing Mouse Power Cable User Manual Remote Controller Battery AAA x2 Installation CD ...

Page 8: ...mote DVR s can be controlled using the supplied software client viewer Technology Embedded LINUX OS Maximum record rate 400fps 960H PAL High resolution high quality H 264 algorithm Uses watermarking scrambling technologies Functionality Variable recording function normal alarm motion schedule duration Time Lapse RS485 and FSK Telemetry Full channel real time monitoring Live monitoring recording pl...

Page 9: ...single 4 9 16 way PTZ Channel Selection Used to select the PTZ channel on multi screen Menu Displays the menu on the screen Indicator REC Recording status When recording is on the red light will flash POWER System Power On Off When power is on the green light will be illuminated NET Network status When network is connected the light will lash HDD HDD status When the system is reading or writing to...

Page 10: ...ed data When in play mode press again to enter fast rewind mode Rec It starts stop manual recording password protected Power System Power On Off Pan Tilt To control the pan tilt of PTZ camera press this button to browse virtual key on screen Arrow Buttons Moves the cursor while in menu mode Select Menu selection Zoom To control the zoom in out of PTZ camera Numeric Character Input for numbers lett...

Page 11: ...t Video Output Composite Video Video Inputs 16 camera inputs Video Outputs 16 camera loop outputs Audio Input QX960H Audio per channel QP960H 16way 4 Audio inputs 4 and 8 way 1 Audio input AC Power Input AC 100 240V 50 60Hz Audio Output Audio output HDMI Output HDMI output port 1080p 16 ...

Page 12: ...gh Internet or LAN USB Port USB 2 0 port for mouse RS232 Serial Communication for service PTZ Camera Controller Serial Communication for Pan Tilt Camera Keyboard Controller Serial Communication for P T Z Control Keyboard Alarm Output Alarm relay output port Sensor Input 16 Sensor input E SATA Port Only on the QX960H models Port for e SATA HDD 16 ...

Page 13: ...ring ID set mode MUTE Audio Mute AUDIO Switches through Audio channels MENU Entering system menu SEARCH Entering search ARROW Left Right Up and Down SEL Select Enter VOL Up down volume CH Up down channel Reverse play Play or fast forward I I Pause Stop playback OSD On Screen Display ON OFF SEQ Sequence operation LOG Direct access Log list CAM Changing PTZ icon P T Pan Tilt Z F Zoom Focus DIS Chann...

Page 14: ...HDMI port of the HD monitor HDTV VGA output Connect to the VGA port of the VGA monitor 2v Video Composite Spot outputs Connecting cameras This unit comes with 16 video inputs Each video input has a corresponding looping output beneath it for passing the video signal to another monitoring recording device Video input Connect to the video out of the camera ...

Page 15: ...ork Connecting to a sensor input There are 16 individual alarm inputs marked as Sensor In 1 16 Sensor inputs Connect to terminal of a sensor Common GND Connect to terminals of sensors Connecting to a alarm output The DVR can activate external devices such as buzzers or lights using the relay There are 4 relay outputs marked as Alarm out A1 A2 A3 A4 Connect to terminal of buzzer or light B1 B2 B3 B...

Page 16: ...S485 Tx of the keyboard Connecting to a mouse USB 2 0 Connect to the mouse Connecting to a external HDD To expand the HDD capacity connect the external storage e SATA Connect to the e Sata HDD storage 5 Turning on the DVR 1 Connect the power cable 2 Connect camera cables 3 Connect a network cable and a monitor cable 4 Press the POWER button on the front panel and wait until the main screen is disp...

Page 17: ...isplay Button Channel Up Down Button 1 2 Menu Navigation To enter the Setup menu the user has to have the required access rights and be logged on Press the Menu button or right click with mouse on screen and select the menu icon The following screen will be displayed asking for password Select the user ID Enter the password The default password is 00000000 8 zeros Press OK the setup menu will be d...

Page 18: ...HDD capacity Used capacity Total capacity USB memory connection Network connection It is shown that admin or user is connected Archiving Mouse connection Current Date Time 2 2 Select Channel Use the Multiscreen display button on the popup menu to select the display mode Single Channel 4 Channel 9 Channel Live 1ch Live 4ch Live 9ch 16 Channel Live 16ch ...

Page 19: ...ive or playback mo de It is available in single screen mode Click the left button on the mouse The screen will change to the zoomed image with a small image displayed in the upper right hand corner of the screen The red box on the small picture indicates the position of the magnified image You can change the magnification of image and move the position of the magnified Image by rotating the mouse ...

Page 20: ... popup menu 3 1 OSD Description The Control Bar on screen shows Playback control buttons Progress bar Display mode buttons Playback time etc Previous Next time buttons Reverse Slow Play button Time Bar Slow Play button Playback Speed Display Replay button Display mode buttons 1 4 9 16ch Add Bookmark button Stop button Search Bookmark button Pause button Quick Archive button ...

Page 21: ... the pause mode press the Play button to view the frame directly after the frame displayed on screen Single Frame Rewind During the pause mode press the Reverse Play button to view the frame directly before the frame displayed on screen Fast Forward In playback mode press the Play button to switch between various fast play modes such as x2 x4 x8 x16 x32 play Fast Backward In reverse playback mode ...

Page 22: ...e the Previous Next time buttons to view if there are more recorded data Click the mouse at the desired point of the colour bar you can view the recorded data 4 PTZ Control The user can control PTZ cameras via RS485 communication The PTZ domes can be wired in a Daisy chain Daisy Chain configuration The telemetry function of DVR can be controlled via 4 different methods 1 Mouse 2 Remote keyboard 3 ...

Page 23: ...de is toggled between Pan Tilt and Zoom Focus mode whenever this button is pressed Pan Left Focus Near Pan Right Focus Far Tilt Up Zoom In Tilt Down Zoom Out Camera selection The PTZ cameras can be controlled in either full screen or split screen mode If in split screen mode press the PTZ Camera Selection button the PTZ camera icon will step from one camera to the next on the split screen Pan and ...

Page 24: ...rd 1 Select Dome from the keyboard ensure the keyboard is in Pan and Tilt mode 2 Use the joystick to move the camera For more detail please refer to your keyboard manual 4 3 PTZ Control by remote controller Camera selection The PTZ cameras can be controlled in either full screen or split screen mode If in split screen mode press the camera selection button the PTZ camera icon will step from one ca...

Page 25: ...ge to the Zoom Focus mode The Zoom Focus control window will appear 4 To zoom or focus use the arrows buttons Left Focus near Right Focus far Up Zoom in Down Zoom out Setup Menu 1 Display 1 1 Camera Setting Brightness Saturation Contrast Hue and default The picture displayed from each camera can be individually adjusted to balance the multi screen view Use UP DOWN keys to select the cell to be alt...

Page 26: ...ach camera can be titled using the alphanumeric buttons on the front panel or the mouse Each title can have up to 32 characters if there are too many characters to display in 1 line it will be shown as _ For example FIRST MEETING ROOM FIRST MEETIN Use the Up and Down arrows to select the title to be altered press the select key to turn the title green Use the left and right arrows to select the ch...

Page 27: ...to green use the up and down arrows to select the mode between multi screen options Alarms Motion or Audio Once the mode has been selected you can select either a duration or On Off option Mode dependant Use the Select button to turn the box from blue to green then use the Up and Down keys to alter value Press select to turn back to blue Alternatively use the mouse to select mode by repeatedly cli...

Page 28: ...le can be displayed or not On Off PTZ display When in telemetry mode the on screen telemetry display can be set to be Always on or to disappear after a set period of inactivity 5 or 10 second or Off PTZ Timeout The PTZ operation can be set to time out after a period of time PTZ Mode The PTZ control can be limited by the PTZ mode Menu The menu display can be set to time out after either 1 or 5 minu...

Page 29: ...elect key to turn the cell green and then the Up and Down keys to change the values Use the right button to move to Start press select the main monitor output will display this sequence Alternatively use the mouse to select the sequence required then select the duration Click Start to turn the sequence on To interrupt the sequence simply select any camera 1 7 Camera Status Select which cameras wil...

Page 30: ...ecording when the hard drives are full Quality The amount of compression applied to the recording can be changed between Best Good and Standard Alarm Mode Exclusive Will only record the cameras in Alarm Normal Alarmed cameras will record at the settings in the Alarms Motion or Audio Events record set up pages in the RECORD section of the main menu Non Alarmed Resolution This is the resolution that...

Page 31: ...aximum FPS will vary dependant on the Pre Alarm Resolution setting Pre Alarm Duration This is the time for which the DVR will buffer recordings to use as pre alarm events It can be set to 0 5 10 15 or 20 seconds 2 2 Normal TL This configures the continuous recording settings per channel Record rates available In CIF 360x288 25 fps is available to each channel total 400fps In 2CIF 720x288 25 fps is...

Page 32: ...e the Alarm record mode The Alarm recording Quality FPS and Audio are set up in the same way as Normal Recording A Single Alarm input can be used to drive up to 4 PTZ cameras to preset positions or Preset tours Click on the Set Icons Note this function is only available when RS485 telemetry formats are being used Not coax control ...

Page 33: ...t the Sel button The detection area is divided into a grid of 16x12 cells Default is all cells in active mode Use the Left right up down to move cursor and the Select key to toggle between active and inactive The mouse can also be used to select cells and toggle them on and off Care must be taken in setting of the motion sensitivity It is recommended that each level is tested to find out which one...

Page 34: ... and the sensitivity set to either Low Middle or High 2 6 Duration The Duration mode allows the user to set the number of days that they require to record for The resolution whether cameras are active or not and whether audio is being recorded can each be set per channel The user then sets the number of days of recording required then the Quantum will automatically calculate best record rate to ac...

Page 35: ...o can be configured per channel To allocate the hourly blocks in the schedule to individual profiles tick the square box to the right of each profile then click and drag over the desired hourly segments To allocate the priority of recording types with in each profile double click the box immediately to the right of the profile number e g Al M N1 then the priority of each recording typye can be all...

Page 36: ...panese Danish and Polish are available Auto Delete Mode Auto Delete Mode can be set to automatically erase recorded older than a certain number of days This can be set between 0 and 99 days Date Format The default is dd mm yyyy Other date formats available are mm dd yyyy yyyy mm dd Time DST Setting The DVRs time can be set by clicking on the time and date displayed in this section the on screen ke...

Page 37: ...here will be more than one recording with the same time stamp Such as during the October Daylight Saving Time changeover if you try to search for video between 1 am and 2 am the recorder may not operate properly because there will be two hours of recorded video during this time period To view video during this overlapping time period you must start playback before 1 am then recorder will play both...

Page 38: ...oximity The default is 11 Repeated click on the ID value to change to the required number To select a unit on the remote control press the ID button followed by the number followed by the ID button again The LED will flash slowly VGA resolution The VGA resolution can be set from 1024x768 to 1920x1080 Initialization All the menu settings will be returned to the factory default To carry out this fun...

Page 39: ...health of the Hard disk The parameters which can be monitored are 1 Read Write errors on the drive 2 Drive temperature To set enable these features click on Set three options will be presented Smart Turn to on to enable feature Temperature Using the on screen keyboard set the temperature at which the warning is to be reported recommended setting 45 Message Box The message box can be turned on or o...

Page 40: ...er rights Click on the box beside Level this will step through the 27 Operator set up pages chose the operator required The operator ID can be changed using the on screen keyboard The operators Password can be changed The operators user rights can be amended Menu Allows access to the menu Play Search Allows access to the Playing back and Searching Archive Allows the ability to download information...

Page 41: ...will change to show the following Click on the boxes adjacent to Local for the time out period for operation form the front panel Click on the box adjacent to Client for the time out period for operation form the client software This can be set to either Off 15 mins 30 mins or 1 Hour Archive log access Click on the icon at the bottom of the menu page the screen will change to show the following Ac...

Page 42: ...tatus bar of the screen Enter Menu System Program Update If the system recognizes the new firmware then New program found will be displayed on the screen Next press the SELECT button Processing percentage will be displayed NOTE 1 If the system doesn t recognize the new firmware New program not found will be displayed 2 For system stability please turn off 1 recording 2 playback 3 network connectio...

Page 43: ... of Vista Coax Vista PD Pelco P or Pelco D The Baud rate can also be selected 3 6 PTZ Controller The Quantum DVR needs to be setup to accept the VKBD3im or VKBD4 keyboard as a default this will be set to the correct Protocol and Baud rate the ID RS485 Address my need to be adjusted dependant on the number of PTZ cameras on the system The Keyboard ID should not be the same as any of the domes on th...

Page 44: ...re Replay Time This is the amount of time that the DVR jumps back from the current time when the play button is pressed it can be set between 1 minutes and60 minutes Key Beep The DVR beeps whenever the button on the front panel is pressed On Off ...

Page 45: ... is DDNS DDNS is a service that maps Internet domain names to IP addresses DDNS serves a similar purpose to DNS DDNS allows anyone hosting a Web or FTP server to advertise a public name to prospective users Unlike DNS that only works with static IP addresses DDNS works with dynamic IP addresses such as those assigned by an ISP or other DHCP server What this means is that the DVR does not need a St...

Page 46: ...mic IP should be set to NO The IP Address Gateway and Subnet Mask need to be set these will generally be given by the Network Manager DSL refers to all types of Digital Subscriber Line such as ADSL and SDSL The DVR Port and WEB Port can both be changed if required default are 2000 and 80 respectively ...

Page 47: ... an external time server The default is NTP OFF Ensure that port 37 TCP time is opened on the router When turned on the Type of service can be selected options are Default time bora net Domain and IP The Time zone can also be chosen within the City selection use the right arrow on the front panel to change the city settings ...

Page 48: ...rate Live viewing resolution and Quality regardless of System Recording and Quality to be set for remote viewing this helps optimise the network streaming 4 5 Bandwidth It is possible to set maximum limits for the bandwidth utilisation on the network port of the unit ...

Page 49: ...ent such as Video Loss Alarm Motion or Power Loss An E mail will only be sent if the DVR is sitting on a network with access to the Internet e g through a router The e mail addresses are set via the alphanumeric buttons on the front panel or from the on screen keyboard via the mouse The Sender Address is the address that will appear on the E mail received by the user this should be set logically t...

Page 50: ...il to the addresses so allowing the installer to verify if the setup is correct 5 2 SMTP Mode The SMTP Simple Mail Transfer Protocol function allows e mails to be sent over a LAN The default is SMTP Mode OFF In order to activate SMTP Mode choose SMTP Mode either IP or Domain first Then put ID Password IP address and port Finally press SMTP Status Check to test Please see the screen shots that foll...

Page 51: ...the following occurrences Video Loss Alarm Motion Power Loss and Smart Hard disk monitoring Attach Image On Off Enable to send a picture of the event 5 4 Beep Out The buzzer can be set to sound on the following occurrences Video Loss Alarm input Motion detection Power Loss Smart Hard disk monitoring The duration of the beep can be set ...

Page 52: ...ange manual V1 2 5 5 Alarm Out The Alarm out relay can be set to activate on the following occurrences Video Loss Alarm input Motion detection Power Loss Smart Hard disk monitoring The duration of the activation can be set ...

Page 53: ... the popup menu To access the search option press the SEARCH button on the front panel or right click the mouse and select Search A password may have to be entered after which the following screen will be displayed 1 1 Date Time Search If you select date time search the following will be shown Use the numerical number on the front panel or the mouse to select the time and date required then select...

Page 54: ...pressing the right arrow or selecting with the mouse ALARM The search is for any alarm activation within the times defined MOTION The search is for any motion events within the times defined AUDIO The search is for any audio activations within the times defined 1 3 Calendar Search Following screen is displayed when Calendar search is selected ...

Page 55: ...ed number in white Move to the desired day by using the up down left right buttons Select the day by pressing SEL The following screen will be displayed The hours which have recorded data are displayed as a coloured bar Select the hour which you want to review the following screen will be displayed The minutes which have recorded data will be displayed as a coloured bar click on the time required ...

Page 56: ...ess the bookmark icon at the point you want during playback 1 5 Thumbnail Search The Thumbnail search displays a single camera over either a 24 hour or single hour period as a number of time lapse still images on screen By clicking on the image the video from that point in time is played Operation 1 Select Thumbnail option from search menu ...

Page 57: ...the relevant camera the 24 hour period will be displayed as shown below in hourly segments click on hour segment required 4 Thumbnail images from that hour will be displayed the hour is split into 20 even time periods click on the correct time period the video will play back ...

Page 58: ...CD DVD R is not needed When using a USB pen the format should be done first Type EXCLUSIVE file type If evidence is downloaded as an Exclusive file the DVR will download bespoke player software on to the CD DVD or USB device along with the evidence This means that no special software is required by the reviewing PC This format is secure and watermarked LOG The Log file can be downloaded from this ...

Page 59: ...file created will not exceed the size of memory available on the disk or USB device Move to Calculated Archive size and press SEL The DVR will then calculate storage space required for download file This will be displayed in the Required Size section As long as the Required Size is smaller than the Free total space then move to Transfer and select it Transfer When Transfer is highlighted press SEL...

Page 60: ...Play start Play stop HDD format Menu set Client Login Logout Log fail Play Transfer Rec on Rec off F W Upgrade Event Alarm Motion Audio Video loss Email fail Archive This lists the USER time date when Archive was done and time range of archived section A total of 2500 events can be recorded the oldest being overwritten when a new one occurs they can be viewed all together or as individual types ...

Page 61: ...n for the PC is as follows Minimum PC specification CPU Core 2 Duo 3 16GHz Graphic Memory 512MB Installing software When you put Quantum Network installation CD into your PC it will auto run and lead you through an installation wizard Follow the instructions Once the software is loaded it will automatically run Connection To connect to the Unit open the Viewer Software and click the connection but...

Page 62: ...onitoring Description field is the name of area Building location of the DVR this should be typed in he first time the unit is connected to this will store it in the address book Address book Click on the Arrow to the left of the IP address the following box will appear This lists the last 22 units that have been accessed To reconnect to one of these units simply double click then add the ID and P...

Page 63: ...63 Quantum 960H DVR range manual V1 2 Explanation of Screen Buttons ...

Page 64: ...e manual V1 2 1 Live Monitoring Split Screen options 1 4 6 7 8 9 10 13 6 Spilt Screens can be viewed during both live and playback The splits screens available are full screen 4 6 7 8 9 10 13 and 16 way 1 Full Screen 2 10 Way ...

Page 65: ...creen options and the Exit key will be displayed at the bottom of the screen OSD on off Smart Arrange On Off If cameras are being displayed in segments that are not logical the Smart button will rearrange and put camera input 1 into segment 1 Top Left etc The OSD button will toggle between the on screen titles etc being shown or hidden ...

Page 66: ...ed folder as a Jpeg image using the date and time as the file name LOAD This icon is used to retrieve and view a saved still image when selected a list of available images will be shown Select to one required it will be displayed along with data information Status Live Playback IP address CH No Playback Step Backward Backward Playback Pause Recording Stop Step Forward Audio Mute Volume Select Audi...

Page 67: ... There are 3 options for as follows 1 Date Time 2 Event 3 Calendar Date Time Search Event Search When the cursor is placed over a part of the time and date a drop down arrow will appear use this to set the required value When set Click Play button this window disappears and Remote Playback will start To stop playing back press Stop the search screen will appear to allow another search to be carrie...

Page 68: ...ar then the red line will move to this point 3 Hover over the time box a drop down arrow will appear allowing the manual selection of Hours mins and seconds Next click the Play button for Remote Playback Or click Prev to go back to previous stage Click on the Event button on the right hand side the software will search for all event types This may take a short while A list of the available events ...

Page 69: ...and times by hovering over the selections a drop down box will appear Once selection is made then click calculate the file size will be displayed Finally click Archive the file will be transferred to C HE4000 Download Channels can be included or excluded dependent on query This is available within Search Backup and Logs ...

Page 70: ... reached 2 Click on the required time for playback on the blue bar then the red line will move to this point 3 Hover over the time box a drop down arrow will appear allowing the manual selection of hours minutes and seconds Select either Alarm Motion or Audio from the top of the screen A list of events will appear Click on the event required it will be come highlighted Click on Calculate the file ...

Page 71: ...on the PC and Play back 2 3 Remote Log The log list can be viewed as a whole or filtered by the following types Power Power on Power off Record Rec fail Rec start Rec stop Rec error Rec full Operation Play start Play stop HDD format Menu set Client R_Login R_Logout R_Logfail R_Play R_Transfer R_Rec on R_Rec off R_Upgrade Event Alarm Motion Audio Video loss Email fail Archive This is a Password pro...

Page 72: ...e manual V1 2 2 4 Information System Information Status Information The system info displays the Mac address and software version information This shows the status of both the Hard disk and the recording modes of each channel ...

Page 73: ...ing the Display Menu of DVR Camera Setting Camera Covert Camera Name Within this setting the Hue Saturation Contrast and Brightness can be adjusted on a camera by camera basis Cameras can be remotely set into Covert Mode they are still being recorded but cannot be viewed local to the system or by any remote user apart from the Administrator on line ...

Page 74: ...s bar can be set to be off Always on or be on for 5 or 10 seconds after a key press 2 The Event symbols such as Motion Audio Pan Tilt can be displayed or turned off 3 The camera name can be displayed or turned off 4 The PTZ display can be made to time out 5 The Password entry box can be made to time out 6 The darkness of the status bar can be varied The selected cameras will be connected ...

Page 75: ...that non alarmed cameras are recorded in during an alarm event 6 Non Alarmed FPS this is the rate that non alarmed cameras are recorded in during an alarm event 7 Post Alarm duration the period alarm record settings continue for after an event finishes 8 Pre Alarm Resolution Picture quality for pre event recording 9 Pre Alarm FPS Picture rate for pre event recording 10 Pre Alarm Duration Length of...

Page 76: ...t recording when it detects an Audio event The sensitivity of motion detection can be set on a per camera basis the sensitivity will have to be adjusted to suit the individual scenes and may require several adjustments to achieve optimum performance The detection region setup screen is displayed by clicking the Region button Each cameras motion detection grid can be individually tailored for the c...

Page 77: ...in the same manner as Normal Time lapse The only difference is to setup the sensitivity of the audio Duration The duration setting allows the user to choose the Resolution and length of time the unit records for then the DVR will automatically adjust the rate at which it records to achieve this time period ...

Page 78: ...elect the resolution required for each camera Next select whether the camera is connected to the DVR Next select if Audio is being recorded on that channel Finally select the number of days the DVR should record for The choice is between 5 10 20 30 40 50 60 70 80 or 90 Days ...

Page 79: ...ime lapse The only addition is the setting up of Schedule grid click on the SET button to display the following screen 3 3 System Basic This section is used to select Language Date format Video type System ID Live viewing resolution over the network Live Quality over the network A timetable can be set in hourly blocks throughout the whole week ...

Page 80: ...he 27 log on accounts can be given individual passwords and user rights To amend the Name and password click on the name beside the Client Account box This will display the name in the ID box and it can be edited and passwords changed and confirmed User rights can be applied Live CH A camera can be hidden from an operator of client PC if required ...

Page 81: ...d This allows the DVR to comply with data protection laws in certain countries such as France Auto Log out After a certain amount of time 15mins 30mins or 1 hour of inactivity The users can be automatically logged off both the Local front panel control and the Client viewer Archive Log password A password is required in order to access the Archive Log ...

Page 82: ...l Each camera output can have an individual protocol associated with it Baud rate The Baud rate of each PTZ camera can be set the choices are ID Each Keyboard can be allocated an RS485 ID between 1 and 255 Protocol Each keyboard can have an RS485 protocol associated with it the choices are Baud rate The Baud rate of each PTZ camera can be set the choices are ...

Page 83: ...ur Region Select the required country Then click Ok NTP setup allows the DVR to have its internal clock synchronised with an External clock The default setting is Off To set up hover on the Off a drop down arrow will appear giving the option to turn On Once On two other options will appear Type allows selection between Default Time server is time bora net Domain Where another time server name can ...

Page 84: ...re in This will allow it to offset any time differences if the time server you contact is in a different zone Select City the map screen will appear Hover over the city selection box a drop down arrow will appear click on the arrow A list of time zones will be displayed Select the time zone where the Quantum is located Then click OK Smart can be turned on or off to monitor the Disk sectors The tem...

Page 85: ...defined addresses under certain conditions such as Alarms or video loss The screen is where you setup the receiving address and address that the DVR will send from The mails can be set to be sent immediately an event occurs Daily or Weekly The actions which cause an e mail response can be defined within this screen ...

Page 86: ...on the following occurrences Video Loss Alarm activation Motion Detection Power loss The duration of the buzzer can be set The Alarm output relay can be set to activate on the following occurrences Video Loss Alarm activation Motion Detection Power loss The duration of the relay closure can be set ...

Page 87: ...y Date Time Even and Calendar Date Time Search Event Search Hovering over the Date and Time bars will allow drop down boxes to select the required time and Date Once set click Play Choose the Event search box then choose the type of Event you are searching for options are Alarms Motion or Audio Once the selection is made a list will appear choose the Event required and click Play ...

Page 88: ...appear any day with recording available will be highlighted in Blue Select the required day Any downloaded event s will be shown click on the event the red line will move to that event Then click Play to review the recording The files with a bookmark will be shown select one of them Then click Play to review the recording ...

Page 89: ...g on Log will display the log file from the unit This file can be printed by clicking Print Click on Info This will display the version of the software client being used The archive list will be shown in order of file name select the file you wish to review Then click Play button ...

Page 90: ...creen allows the following Draw mode to be set to YUV or RGB Date Format to be set to DD MM YYY MM DD YYYY or YYYY MM DD Save Format for the saving of stills as either JPEG Bit Map or TIF Location for where stills are saved The opacity or boldness of the OSD can be individually set per function The lower the number the more see through the box ...

Page 91: ...r the network this will compensate for different network speeds LANs WANs etc This can only be adjusted if the LIVE video is switched off Adjust each variable to achieve best quality video for Network bandwidth available this is best done through trial and error Each camera can be titled each title can have up to 32 characters ...

Page 92: ...pop up on the live image 6 1 Pan Tilt Zoom Focus When PAN TILT button is clicked the Pan Tilt control appears this allows Left Right Up and Down Control of PTZ cameras When Zoom Focus button is clicked the control changes to Zoom in on the up arrow Zoom out on the down arrow Focus near on the left button and focus far on the right arrow ...

Page 93: ...licking on the centre of the control icon the preset symbol will appear and the Preset selection box will appear To save a preset move the camera to the desired position then click Set followed by the desired number To recall the preset click Call followed by the desired number Preset Learn icon ...

Page 94: ... Screen Position Load The positions of each channel on screen are saved into the registry and then restored the next time you open the client viewer software It is possible to edit restore the screen position which is stored in the registry Select one of the screen positions then click OK button ...

Page 95: ...ew program not found message will be displayed To proceed with upgrading press the OK button and select each firmware files to upgrade it to the system by ticking the boxes Once the upgrade has been completed the following message will appear Next press the OK button to reboot the DVR the firmware will only be applied completely once the system is rebooted Quit Exiting Client program To exit the C...

Page 96: ...connect to the unit remotely without the need for a fixed IP address Please register your ID Domain at www ddns dvr com in which you can use their DDNS server as free of charge 1 Visit www ddns dvr com to get the DDNS user ID PW as well as Host name 2 Click to create set account of Dynamic DNS 3 Select Create Account menu ...

Page 97: ...ctly Once the DDns Dvr account has been setup it is necessary to add the details in the Network menu of DVR Set up DDNS 1 Change DDNS to ON 2 Input User ID 3 Input User PW 4 Input Domain 5 Click DDNS Status Check If it is ok click Apply NOTE In DDNS Setup The Domain Name has to be filled in In DDNS environment need to be changed DVR Web server port please refer to IP set ...

Page 98: ...ward IP which is allotted to DVR For example DVR 1 IP 192 168 10 107 DVR Port 7000 Web Server Port 7001 If DVR 1 is configured as above the virtual server on IP sharing router is as follows PC Server Name DVR 1 IP 192 168 10 107 Protocol TCP Internal Port 7000 External Port 7000 PC Server Name DVR 1 IP 192 168 10 107 Protocol TCP Internal Port 7001 External Port 7001 For more detail please refer t...

Page 99: ...99 Quantum 960H DVR range manual V1 2 Appendix 3 Specification ...

Page 100: ...100 Quantum 960H DVR range manual V1 2 Norbain SD Ltd 210 Wharefdale road IQ Winnersh Wokingham Berkshire RG41 5TP 01189 125 000 ...

Reviews: