background image


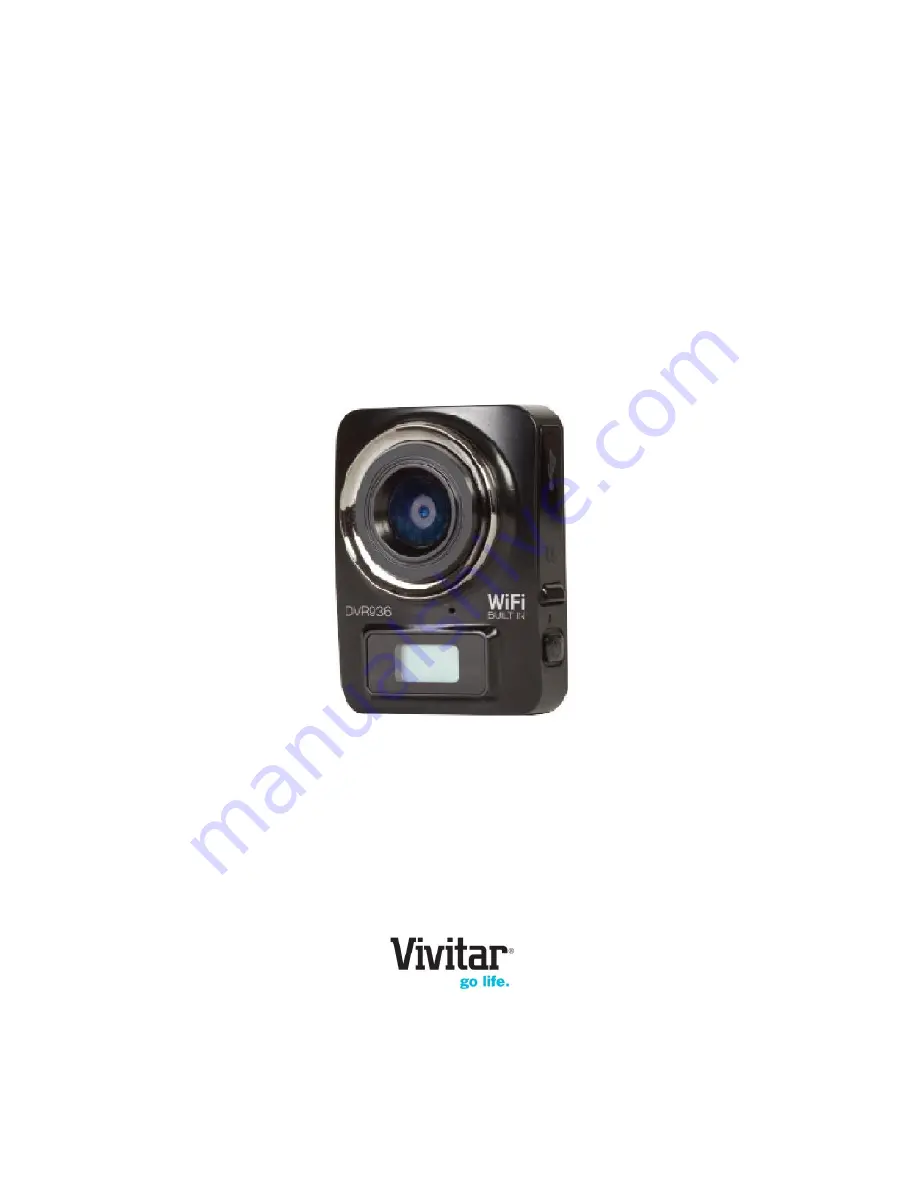
DVR 936 

Wi-Fi LifeCam 

Wearable Camcorder 


User Manual 


© 2009-2015 Sakar International, Inc. All rights reserved. 

Windows and the Windows logo are registered trademarks of Microsoft Corporation. 

All other trademarks are the property of their respective companies. 


Summary of Contents for DVR 936

Page 1: ...ble Camcorder User Manual 2009 2015 Sakar International Inc All rights reserved Windows and the Windows logo are registered trademarks of Microsoft Corporation All other trademarks are the property of...

Page 2: ...E MAIN MODES 15 SWITCHING MODES 15 MODE INDICATOR LIGHTS 15 Video Capture Mode 16 TAKING A VIDEO 16 TIME LAPSE MODE 17 Photo Capture Mode 18 TAKING A PHOTO 18 Playback Mode 19 PLAYBACK MODE COMPUTER 1...

Page 3: ...OS FROM THE CAMCORDER TO THE COMPUTER 50 GETTING STARTED 51 TRANSFERRING IMAGES MANUALLY FROM THE CAMCORDER TO THE COMPUTER 51 CAMCORDER MAINTENANCE 52 TROUBLESHOOTING 54 Sakar Warranty Card 55 Techni...

Page 4: ...ost out of your digital camcorder NOTE Your digital action camcorder supports a Class 4 or higher Micro SD card with a capacity expansion up to 32GB In order to use your digital LifeCam camcorder norm...

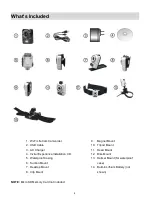
Page 5: ...10 Tripod Mount 3 AC Charger 11 Head Mount 4 Vivitar Experience Installation CD 12 Bike Mount 5 Waterproof Casing 6 Suction Mount 7 Desktop Mount 8 Clip Mount 13 Helmet Mount for waterproof case 14 Bu...

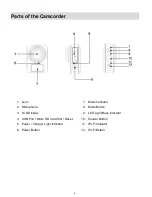
Page 6: ...Lens 7 Mode Indicator 2 Microphone 8 Mode Button 3 LCD Display 9 LED Light Busy Indicator 4 USB Port Micro SD Card Slot Reset 10 Shutter Button 5 Power Charger Light Indicator 11 Wi Fi Indicator 6 Po...

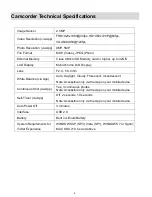
Page 7: ...0mm White Balance via App Auto Daylight Cloudy Florescent Incandescent Note Accessible only via the App on your mobile device Continuous Shot via App Yes 3 continuous photos Note Accessible only via t...

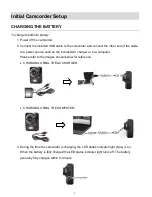
Page 8: ...to a power source such as the included AC charger or to a computer Please refer to the images shown below for reference CHARGING USING THE AC CHARGER CHARGING USING THE COMPUTER 3 During the time the...

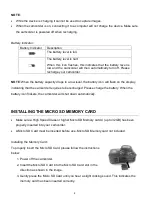
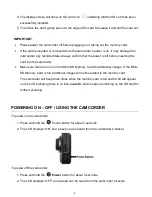
Page 9: ...splay indicating that the camcorder requires to be recharged Please charge the battery When the battery icon flickers the camcorder will shut down automatically INSTALLING THE MICRO SD MEMORY CARD Mak...

Page 10: ...re there is room on the Micro SD Memory Card for additional images If the Micro SD Memory Card is full additional images will not be added to the memory card The camcorder will beep three times when t...

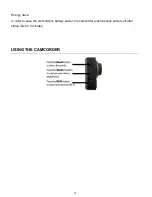
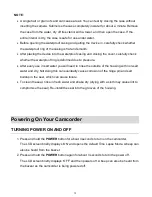
Page 11: ...10 Energy Save In order to save the camcorder s battery power the camcorder automatically powers off after sitting idle for 3 minutes USING THE CAMCORDER...

Page 12: ...hoto Mode If the photo icon is not displayed on the LCD screen press the Mode button repeatedly until it appears Press the Shutter button to capture your photo Time Lapse Mode Use this mode to capture...

Page 13: ...the case Insert a finger at the half circle of the latch by prying the latch up away from the case 2 Insert the camera lens forward into the case 3 Before sealing the waterproof case make sure the cam...

Page 14: ...in salt water you will need to rinse the outside of the housing with non salt water and dry Not doing this can eventually cause corrosion of the hinge pin and salt buildup in the seal which can cause...

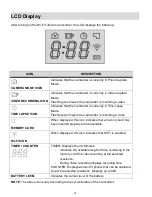
Page 15: ...is recording a video MEMORY CARD When displayed this icon indicates that a memory card has been inserted properly and is available WI FI ICON When displayed this icon indicates that Wi Fi is enabled T...

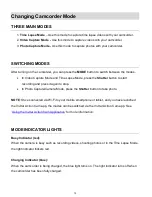
Page 16: ...ing and press it again to stop In Photo Capture Camera Mode press the Shutter button to take photo NOTE Once connected via Wi Fi to your mobile smartphone or tablet and you have launched the Vivitar A...

Page 17: ...hutter button flashes red and the elapsed time appears on the LCD ATTENTION Due to limited characters displayed on the screen video recording time can be displayed in minimum unit minute For example 0...

Page 18: ...pse Mode will be active The Time Lapse icon appears on the LCD 3 Capture Your Time Lapse Video Press the Shutter button to begin recording and again to stop recording The video is automatically saved...

Page 19: ...the Shutter button to capture your photo The photo is automatically saved to the camcorder s Micro SD Memory card NOTE You can also enter Photo Capture Mode using the Vivitar Action Cam mobile app On...

Page 20: ...tically opens Select Open folder to view files Alternatively in the window of Computer or My Computer there will be a portable disc added named Removable Disk Click to open Your captured photos are st...

Page 21: ...r image files select the file s that you would like to delete 2 Drag them to the Trash Can icon on your computer desktop or press the Delete key to delete the files Caution Please use the Delete featu...

Page 22: ...MOBILE DEVICE REQUIREMENTS iPhone iPad with iOS 7 or above Android phone tablet with OS 4 3 or above INSTALLING THE VIVITAR ACTION CAM APPLICATION To install Vivitar Action Cam application on your mob...

Page 23: ...name to select your action camcorder s Wi Fi network connection You will be prompted for the first time to join the network and enter a password see below When connected successfully a check appears b...

Page 24: ...you the option to connect three Vivitar Action Camcorders Only one Action Cam can be connected at a time The Home screen allows you to connect your camera s and enter the Video and Photo live capture...

Page 25: ...ng your images remotely When your camera status appears as Disconnected on the Home screen you need to reconnect your camera to the app CAMERA OPTIONS To add another camera pair the additional camera...

Page 26: ...d returns to the Home screen NOTE The Cancel option appears on iOS devices only 2 Mobile Device Media Media on My Phone The bottom section of the Home Screen displays the photos and videos you have al...

Page 27: ...then please open your mobile device s Wi Fi settings and disconnect your mobile device from the camera s Wi Fi network by selecting a Wi Fi network with an Internet connection from the list of availa...

Page 28: ...ideos in Portrait and Landscape views No ICON DESCRIPTION 1 BACK iPhone Tap the Back icon to return to the Home screen Android Tap the back button on the phone to return to the apps Home screen 2 TIME...

Page 29: ...he icon to toggle between the options The Video Flip options include Normal Flip The Video Flip can also be accessed via Camera Settings 10 VIDEO MODE REGULAR VIDEO TIME LAPSE VIDEO Tap the icon to di...

Page 30: ...in Live Camera Mode and you can now begin capturing your images No ICON DESCRIPTION 1 BACK iPhone Tap the Back icon to return to the Home screen Android Tap the back button on the phone to return to...

Page 31: ...level of the camera 9 SELF TIMER Displays the current self timer selection Tap to change selection The options include OFF 2 seconds 10 seconds 10 CONTINUOUS SHOOTING BURST Displays the current burst...

Page 32: ...e Camera Mode Screen White Balance allows your camera to adjust the coloring of the captured images depending on the type of light source in the current environment Properly adjusting the White Balanc...

Page 33: ...me lapse video capture The Time lapse options include Time lapse type Time Lapse Frames Video Time lapse interval 5s 10s 30s 1m Time lapse duration 5m 10m 15m 20m 30m 1hr FORMAT STORAGE Accessed via S...

Page 34: ...e AUTO CLOUDY DAYLIGHT FLUORESCENT INCANDESCENT CONTINUOUS SHOOTING BURST Accessed from the Live Camera Mode Screen The Continuous Shooting Burst setting allows you to take rapid snapshots in a row wi...

Page 35: ...deo capture The Time lapse options include Time lapse type Time Lapse Frames Video Time lapse interval 5s 10s 30s 1m Time lapse duration 5m 10m 15m 20m 30m 1hr FORMAT CAMERA Accessed via Settings You...

Page 36: ...camera s memory card Media on Your Mobile Device Media captured using your smartphone tablet and saved to your mobile device Media on My Camera The photos and videos that you captured using the Vivit...

Page 37: ...on the bottom of the screen Short tap the screen to view the full screen without the display of image information and icons Tap again to redisplay the onscreen icons and information 3 DELETE Single Ph...

Page 38: ...on the Confirm Delete Confirm option to delete the selected photo s or tap Cancel to exit the menu without deleting 3 To Download Photos DOWNLOAD single or multiple photos Select the desired thumbnail...

Page 39: ...NOTE On iOS you can also swipe your finger to the right when the video is not playing to return to the Thumbnail view IMPROTANT NOTE On Android Only Playing MOV files The MOV files are streamed from y...

Page 40: ...Delete Confirm option to delete the selected video s or tap Cancel to keep the exit the menu without deleting 3 To Download Videos DOWNLOAD single or multiple videos Select the desired thumbnail imag...

Page 41: ...nloaded video saved to your mobile device may not playback using the Vivitar Action Cam app or the current native Android video player If this is the case with your mobile device you can use a third p...

Page 42: ...lideshow icon to run a slideshow of the selected photos SHARE Tap hold and select photo s then tap Share to view share options Select one of the options and follow the prompts to share photos NOTE You...

Page 43: ...of the social networks options such as Facebook Twitter Flickr and Google Tap one of the applications options to select it and then tap OK iOS or Upload Android to continue or Cancel to exit the Share...

Page 44: ...b to view and playback the videos on your mobile device The following options appear in the Thumbnail view THUMBS VIEW Tap Thumbs to view thumbnails of the videos on your mobile device PLAYLIST VIEW T...

Page 45: ...o select a video tap and hold the thumbnail image The thumbnail appears with a blue box around it indicating that the image is selected Only one image can be selected The Share and X iOS or Android Ca...

Page 46: ...or Android PLAYLISTS VIEW Videos Tap Playlists to open the Playlists view A list of albums appears Each Playlist is shown with a thumbnail photo image playlist name and number of videos in the playli...

Page 47: ...RAM 250 MB available hard disk space 16 bit Color monitor 1024 X 768 recommended screen resolution CD ROM Drive QuickTime 6 or higher MICROSOFT Internet Explorer 7 or higher Windows Media Player 10 o...

Page 48: ...ow does not appear open the application s CD DVD drive and click on Setup exe to launch the installer 3 On MACINTOSH OS Click the icon that appears on the desktop to install the Vivitar Experience Ima...

Page 49: ...ivitar Experience Image Manager installer create the folder to where the program will be installed and then click Install 11 Please wait while the application continues the installation process on you...

Page 50: ...ur computer s Downloads folder once the download is complete On WINDOWS OS the file name is vivitargeneric_win exe ON MAC OS in file name is vivitargeneric_mac pkg 4 Double click on the downloaded app...

Page 51: ...device connected then it will be selected automatically 5 Select a location on the computer where to place the new video files 6 Add the new video files to albums if desired 7 Select to remove the med...

Page 52: ...MAGES MANUALLY FROM THE CAMCORDER TO THE COMPUTER WINDOWS OS 1 Use the supplied USB cable to connect your camcorder to your computer s USB port 2 Power on the camcorder PCU appears on the camera s scr...

Page 53: ...of any files on their way to your computer CAMCORDER MAINTENANCE Please read the information below carefully before using your camcorder for proper and safe operation so as to use the camcorder to it...

Page 54: ...ng 7 Do not touch the metal contact surface of the memory card with fingers or metal materials 8 The service life of the memory card has expired please replace the memory card regularly DEVICE MAINTEN...

Page 55: ...images were successfully transferred but the photos do not appear on my computer What do I do First ensure that you have in fact taken photos Press the Shutter button to take some sample photos or vi...

Page 56: ...tten description of the problem 3 Your return address and telephone number Daytime MAIL TO ADDRESS BELOW Technical Support For technical support issues please visit our website at www vivitar com You...

Reviews: