background image

Operator’s Manual

Hydronic Surface Heater

E1100

E1100 DG

Type

E1100, E1100 DG

Document

5200003474

Date

1115

Version

02

Language

EN

5 2 0 0 0 0 3 4 7 4

Summary of Contents for E1100

Page 1: ...Operator s Manual Hydronic Surface Heater E1100 E1100 DG Type E1100 E1100 DG Document 5200003474 Date 1115 Version 02 Language EN 5 2 0 0 0 0 3 4 7 4...

Page 2: ...distribution not authorized by Wacker Neuson Production Americas LLC represents an infringement of valid copyrights Violators will be prosecuted Trademarks All trademarks referenced in this manual are...

Page 3: ...ctions described in this manual Wacker Neuson expressly reserves the right to make technical modifications even without notice which improve the performance or safety standards of its machines The inf...

Page 4: ...son service center according to written instructions published by Wacker Neuson Unapproved parts attachments and modifications are those that do not meet the approved criteria Unapproved parts attachm...

Page 5: ...21 3 Lifting and Transporting 29 3 1 Lifting the Machine 29 3 2 Preparing the Machine for Transport on a Truck or Trailer 30 3 3 Transporting the Machine on a Truck or Trailer 31 3 4 Before Towing Che...

Page 6: ...ies 68 5 1 Accessories 68 5 2 Expanding the Surface Heating Capacity 69 5 3 Expanded Operation using One SPP and One HHS 1101 71 5 4 Expanded Operation using One DPP and One HHS 2202 72 5 5 Using Heat...

Page 7: ...ance 106 8 1 Periodic Maintenance Schedule 106 8 2 Checking the Engine Oil 107 8 3 Cleaning the Air Intake 108 8 4 Servicing the Air Cleaner 109 8 5 Replacing the Fuel Filter 111 8 6 Checking and Adju...

Page 8: ...r System Circuit 151 11 4 Circulation System Circuit 152 11 5 Rewind System Circuit 153 11 6 Trailer Plug Wiring Diagram 154 11 7 Trailer Junction Box Wiring Diagram 155 11 8 Trailer Lights and Brakes...

Page 9: ...ersonal hazards f Obey all safety messages that follow this symbol DANGER DANGER indicates a hazardous situation which if not avoided will result in death or serious injury f To avoid death or serious...

Page 10: ...manently damage the machine or seriously injure the operator or other persons in the area Machine damage caused by misuse is not covered under warranty The following are some examples of misuse Using...

Page 11: ...hazards associated with it Operator qualifications Only trained personnel are permitted to start operate and shut down the machine They also must meet the following qualifications have received instru...

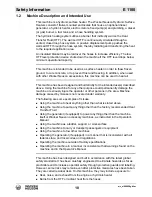
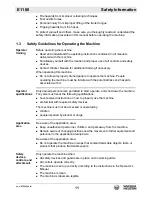
Page 12: ...nt PPE while operating this machine Close fitting work clothes that do not hinder movement Safety glasses with side shields Hearing protection Safety toed footwear 1 4 Safety Guidelines for Lifting an...

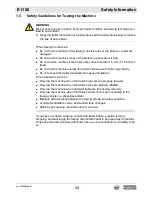
Page 13: ...perly inflated Only tow the machine when all trailer lights are functioning correctly Only tow the machine when the trailer s safety chains are connected to the towing vehicle in a crisscross pattern...

Page 14: ...l tank in a well ventilated area When using the machine Do not fill or drain the fuel tank near an open flame while smoking or while the machine is running Do not smoke when refueling the machine Do n...

Page 15: ...u cannot see or smell If you can smell the generator exhaust you are breathing CO But even if you cannot smell the exhaust you could be breathing CO WARNING Electrocution hazard Generators present spe...

Page 16: ...e of the tools and equipment attached to the genset must not exceed the load rating of the genset Do not operate the genset with wet hands Do not remove the radiator cap when the genset is running or...

Page 17: ...ents shall be completed by a qualified technician Turn off the machine before performing maintenance or making repairs Remain aware of the machine s moving parts Keep hands feet and loose clothing awa...

Page 18: ...this machine Close fitting work clothes that do not hinder movement Safety glasses with side shields Hearing protection Safety toed footwear In addition before servicing or maintaining the machine Tie...

Page 19: ...E 1100 Safety Information wc_si000628gb fm 19 Notes...

Page 20: ...Labels E 1100 20 wc_si000629gb fm 2 Labels 2 1 Label Locations wc_gr009588...

Page 21: ...cation 405 Fuel blend guide This label indicates the proper fuel blending requirements based upon power source and ambient temperature ranges Consult the Operator s Manual for more information 407 Tur...

Page 22: ...securing the machine during transport or storage 413 Heat Transfer Fluid level This label indicates the minimum and maximum levels for the Heat Transfer Fluid This label is located adjacent to the sig...

Page 23: ...rd Using a Hydronic Surface Heater indoors CAN KILL YOU IN MINUTES Generator and burner exhaust contains carbon monoxide This is a poison you cannot see or smell Never use inside an enclosed area even...

Page 24: ...ve the pump switch to the ON position 7 Unlock the hose reel by turning the T handle counterclockwise 8 Unwind the hose and position it on the surface to be heated To shut down the machine O 1 Move th...

Page 25: ...427 Do not reset Refer to Operator s Manual 428 429 VIN and Tire and Loading Information labels These manufacturer s labels display vehicle identification numbers and tire and loading information for...

Page 26: ...RNING Electric shock hazard inside Disconnect electrical connections and read the Opera tor s Manual before opening this box 439 WARNING Electric shock hazard 445 WARNING The E stop button on the gens...

Page 27: ...nerator 3 1 Turn the key to the ON position I In cold conditions the glow plug lamp will illuminate Wait until this lamp goes off before continuing 3 2 Turn the key to the CRANK position II Release th...

Page 28: ...umber is attached to each unit Please record the information found on this plate so it will be available should the nameplate become lost or damaged When ordering parts or requesting service informati...

Page 29: ...ne of the lifting eyes a on the machine using hooks shackles and chains 2 Lift the machine a small distance 3 Check for stability If necessary lower the machine reposition the lifting device and lift...

Page 30: ...trailer are chocked during the loading process Check that the transport vehicle or trailer is clean and free of grease oil ice and other loose material If the machine is mounted to a trailer check th...

Page 31: ...perly rated ramps or docks NOTICE Do not use the trailer jack to support the machine during transport 2 If desired remove the bolts a and pull out the trailer tongue c 3 Rotate the tongue to a vertica...

Page 32: ...ls Check that all lug nuts are in place and are properly torqued Check the tread wear of the tires Check that the tires are inflated to the proper air pressure Trailer operation Test the function of b...

Page 33: ...ic Stopping and Packing Up the Machine 3 Adjust the amount of fuel in the machine to approximately 70 capacity to avoid fuel spillage 4 Complete the Before Towing Checklist See topic Before Towing Che...

Page 34: ...hine trailer to the tow vehicle 2 Disconnect the trailer wiring plug a from the tow vehicle 3 Pull the breakaway pin b out of the brake switch c to activate the brakes and attempt to tow the machine t...

Page 35: ...or recharge the breakaway battery 6 If 12 14 VDC was measured but the brakes did not function there is a wiring or mechanical fault with the brakes Repair any faults before towing 7 If the brakes func...

Page 36: ...Attach component parts not already attached 5 Add fluids as needed and applicable such as fuel and engine oil 6 Move the machine to its operating location 7 Break in the engine according to the manufa...

Page 37: ...g terminal 10 Burner access door 2 Tie down 11 Genset access door 3 Fuel tank 12 Junction box 4 Fuel cap 13 Trailer brake battery 5 Performance monitoring light 14 Genset fresh air intake 6 Hose reel...

Page 38: ...r008711 a b c f j k l m h g n i d e Ref Description Ref Description a Duplex receptacle h Pressure gauge b Control panel i Temperature gauge c Low level shut down device j Hose reel d Fuel filter k Op...

Page 39: ...ult indicator Indicates burner faults e HTF fill ON OFF switch Overrides the Low Level Fault mode to enable HTF filling procedures f Pump ON OFF switch Controls power to the pump g Hose rewind ON OFF...

Page 40: ...tion 4 5 2 Check fuel level 4 6 4 7 3 Position the machine At the job site 4 9 4 Start the genset engine OR 4 Connect power 4 12 4 13 5 Perform pre starting checks 4 11 6 Power up the machine 4 14 7 R...

Page 41: ...hine is cool Procedure The Heat Transfer Fluid HTF level must be between the marks on the sightglass c If low If the HTF level is low HTF must be added Filling the HTF reservoir requires electric powe...

Page 42: ...ining water or dirt will damage the fuel system Consult the engine owner s manual for complete fuel specifications Fuel Blend Guide Lowest expected ambient temperature F C Generator powered Shore powe...

Page 43: ...chine s fuel tank 1 Lift the lever a on the fuel cap 2 Rotate the lever counterclockwise until it stops 3 Remove the fuel cap from the tank 4 Fill the tank with the appropriate grade of fuel for the w...

Page 44: ...lose to any combustible material or flammable vapor So that all of the machine s access doors panels may be accessed So that HTF hoses do not pose tripping hazards and so the HTF hoses cannot be damag...

Page 45: ...Procedure Perform the following procedure to position the machine 1 Place the machine near the application area a on solid stable and level ground 2 For machines with trailers install chocks b under t...

Page 46: ...gauge a f Check the fuel level Fuel quick connects b f Check that the quick con nect couplings are secure Heat Transfer Fluid HTF System HTF sight gauge c f Check that there is an ade quate amount of...

Page 47: ...red up Hydronic heater f f Inspect for signs of exhaust leaks See topic Inspecting Replacing the Rope Gasket Suction valve 2 f Check that suction valve 2 is opened Genset Engine Engine oil f Check the...

Page 48: ...ey to the ON position I The following will occur The battery charge lamp d will illuminate The oil pressure warning lamp e will illuminate The engine temperature lamp f will illuminate if the engine i...

Page 49: ...CRANK position II Release the key as soon as the engine starts The following will occur The key will return to the ON position I The battery charge lamp d will turn off The oil pressure warning lamp e...

Page 50: ...10 gauge extension cords for lengths up to 30 m 100 ft Procedure Follow the procedure below to connect power to the machine 1 Move the circuit breaker switch a to the OFF position 2 Connect the main...

Page 51: ...at the indicator light of the GFCI e is off Press the RESET button of the GFCI if its indicator light is ON 5 Check that the low level fault indicator light c is OFF If this light is ON add Heat Trans...

Page 52: ...100 F 40 C This is the set point temperature 2 Move the burner ON OFF switch b to the ON position The following sequence occurs a The burner motor starts after a 5 second delay b The burner fires aft...

Page 53: ...bar after only a second or two of operation there is a problem Shut down the machine and rectify the problem before continuing Once flow is established pressure should be 125 140 psi 8 6 9 6 bar When...

Page 54: ...pplication area See topic Hose Spacing Guidelines for hose spacing recommendations based on application Result The hose is now positioned and the machine is operating NOTICE The machine must be period...

Page 55: ...n cover the hoses with a plastic vapor barrier and two layers of Red Wave insulated blankets For concrete curing cover the concrete with plastic place the hoses on top of the plastic then cover the ho...

Page 56: ...operating pressure Operating pressure 90 110 psi If operating pressure is higher than 110 psi check for kinked hoses If operating pressure is less that 90 psi check HTF level HTF return temperature T...

Page 57: ...place it on a firm flat and dry surface 3 Move the hose rewind ON OFF switch c to the ON position Note The rewind motor will start but will not rotate the hose reel until the clutch is engaged 4 Press...

Page 58: ...foot pedal to disengage the clutch before reaching the hose end 7 Manually wind the remainder of the hose onto the reel 8 Engage the hose reel brake by turning the T handle a clockwise 9 Return the fo...

Page 59: ...es 3 Move the burner ON OFF switch a to the OFF position 4 Move the pump ON OFF switch b to the OFF position 5 Move the circuit breaker ON OFF switches c to the OFF position The machine is now shut do...

Page 60: ...both the male a and female b couplings before and after each use 2 Push and hold the locking collar c on the female coupling b down 3 Insert the male coupling a 4 Release the locking collar to lock C...

Page 61: ...t will trigger the low level shut down device to stop the machine s function if the HTF falls below the minimum operational capacity During a low HTF level condition the following occurs The control p...

Page 62: ...ds the LOW WATER light will go out the POWER light will stay on The low HTF level indicator will go out Power will be returned to the pumps Power will be returned to the burner 8 Move the pump ON OFF...

Page 63: ...circuit between the two terminals labeled T of the burner control This is the call for heat The burner control enters the valve on delay state The valve on delay state lasts 15 seconds During this sta...

Page 64: ...sed During this state The fuel shut off valve is open energized Pressurized fuel atomizes at the burner nozzle The flame is monitored by the cad cell When the setpoint is reached call for heat satisfi...

Page 65: ...clear the soft lockout fault so a restart can be attempted press and release the reset button Note After the third attempt to manually clear the lockout fault the burner control will enter the hard lo...

Page 66: ...ve Use a suitable container to collect the purged oil 2 Set the temperature controller so there is a call for heat 3 After the burner starts press and hold the reset button for 15 seconds until the ye...

Page 67: ...cedure below to reduce the load on the generator when operating at or above elevations of 1524 m 5000 ft asl 1 Remove the bolts a on the E stop panel 2 Carefully pull the panel away from the enclosure...

Page 68: ...following Wacker Neuson accessories are available For compatibiltiy and configuration information continue reading Ref Description Ref Description a Hose Handling System Models 1101 and 2202 f 1 2 Ada...

Page 69: ...uson Single Pump Pack SPP is used with the HHS 1101 The Wacker Neuson Dual Pump Pack DPP is used with the HHS 2202 The typical configurations are shown below Estimated capacities The E 1100 is capable...

Page 70: ...ories E 1100 70 wc_tx001844gb fm Option 2 E 1100 combined with one HHS 2202 a one DPP b and one 1 2 Adapter c For detailed information see topic Expanded Operation Using One DPP and One HHS 2202 wc_gr...

Page 71: ...the hose a from the E 1100 hose reel within the application area 3 Unwind and position the hose b from the HHS 1101 c within the application area Place the HHS 1101 frame in a safe place 4 Connect the...

Page 72: ...within the application area 3 Unwind and position the hose loops b and c from the HHS 2202 d within the application area Place the HHS 2202 frame in a safe place 4 Connect the female quick connects QC...

Page 73: ...more information contact Wacker Neuson Application Support Configuration requirements In order to connect Heat Exchangers to the machine additional accessories are required to support the additional...

Page 74: ...250 ft Maximum run at maximum rise 215 m 707 ft Note The farther the HX is positioned from the parent machine the more heat will be lost through the hose This may affect HX performance Procedure Perf...

Page 75: ...nd return hoses 7 Connect the Heat Exchanger to the appropriate electrical source NOTICE Only turn on the pump when the Heat Exchanger is connected Turning on the pump when the Heat Exchanger is not c...

Page 76: ...ove machine 76 m 250 ft Maximum run at maximum rise 215 m 707 ft Note The farther the HX is positioned from the parent machine the more heat will be lost through the hose This may affect HX performanc...

Page 77: ...eturn hoses e to the 2 1 adapter f 8 Insulate the supply and return hoses 9 Connect the Heat Exchangers to the appropriate electrical source NOTICE Only turn on the pump when the Heat Exchangers are c...

Page 78: ...eral hand tools Mandates Adjustments must be made so that the machine conforms to the requirements of local state and federal codes and authorities Adjustments shall be made at the job site This proce...

Page 79: ...Setting Checking the Electrodes 3 Check the burner nozzle See topic 6 2 Checking Replacing the Nozzle 4 Check set the Z distance See topic 6 3 Setting the Z Distance 5 Set the air settings See topic...

Page 80: ...nes below Use the access hole in the exhaust stack Take several samples as the heater warms Take the final sample just before the heater reaches 71 C 160 F 10 Re adjust the air setting s if necessary...

Page 81: ...r supplies feeding the machine 2 Loosen the copper fuel line a between the fuel pump and the burner housing 3 Remove the spline nut b that is seated against the escutcheon plate 4 Loosen tabs c and op...

Page 82: ...es 9 After the electrodes are set reinstall the turbulator assembly 10 Reconnect the preheater wiring 11 Reinstall the nozzle assembly into the burner Result The electrodes have now been checked adjus...

Page 83: ...the power supplies feeding the machine 2 Loosen the copper fuel line a from the burner housing 3 Remove the spline nut b that is seated against the escutcheon plate 4 Loosen tabs c and open the ignite...

Page 84: ...urner nozzle from the burner tube and install a new burner nozzle Note Do not use thread sealant on the threads of the nozzle 9 After the nozzle is installed reinstall the turbulator assembly 10 Recon...

Page 85: ...x head screw e 4 Butt up the T501 gauge or a ruler to the leading edge of the head d 5 Slide the head in or out as needed so that the C mark c of the T501 gauge aligns with the outside edge of the con...

Page 86: ...settings increases efficiency and lowers stack temperature but may cause soot build up rich mixture Procedure Follow the procedure below to adjust the air settings 1 Initial setting of the air damper...

Page 87: ...he bleeder valve a from the fuel pump 3 Insert the gauge in place of the bleeder valve 4 If your machine has a generator start it 5 Move the Burner ON OFF switch to the ON position The burner will go...

Page 88: ...assist in reconnecting 4 Disconnect all wires coming from the snap switch cable c Note The snap switch cable is a large black insulated wire that enters the electri cal enclosure from the rear 5 Disc...

Page 89: ...to install the burner 1 Position the burner inside the machine and secure it to the hydronic heater 2 Connect fuel lines a at the quick connects 3 Connect all wires coming from the burner cable d 4 Co...

Page 90: ...d tagged 7 2 Periodic Maintenance Schedule The table below lists basic machine maintenance Tasks designated with check marks may be performed by the operator Tasks designated with square bullet points...

Page 91: ...and drain if necessary See Checking Draining the Containment Skid Remove rags containers or other debris from the cabinet Nothing should be stored inside the machine Inspect electrical cords connectio...

Page 92: ...s Fluid leaks Restricted air flow in the exhaust compartment Problems with the trailer refer to topic Maintaining the Trailer Internal inspection Open the access doors on both sides of the machine Che...

Page 93: ...e any damaged components 4 Repair any leaks Fuel System Burner 1 Inspect all fuel hoses and connections for leaks and or damage 2 Inspect the fuel filter and associated fuel hoses for leaks and or dam...

Page 94: ...tion of the hose and clamp locking pliers on either side of the damaged portion 3 Cut away the damaged portion of the hose a using a utility knife or similar tool 4 Install a ferrule b on each end of...

Page 95: ...fm 95 E 1100 Maintenance Continued from the previous page 7 Use a Wacker Neuson brand hose crimper e to crimp both ferrules 8 Rotate the hose 90 degrees and crimp both ferrules again The procedure is...

Page 96: ...ll access covers 2 Inspect control panel and associated electrical cords for wear and or damage 3 Inspect pump and associated electrical cords for wear and or damage 4 Inspect hose reel and associated...

Page 97: ...3 Locate the fill hose under the hose reel 4 Clean the fill hose and place the open end into a container full of HTF 5 Move valve 2 to the fill position valve handle pointing up 6 Move the HTF fill s...

Page 98: ...environmental protection laws 1 Loosen but do not remove the top screw a Note There is a second screw b under the canister c Hold this screw while loosening the screw a 2 Tap on screw a with a hammer...

Page 99: ...eplace it if it is damaged 2 To ensure strainer gasket f placement install the canister b over the strainer basket c 3 Install the gasket d to the canister 4 Install the strainer housing including str...

Page 100: ...spills Dispose of this fuel in accordance with local environmental regulations 4 Remove the bolt d from the top of the canister cap and remove the canister cap 5 Remove the fuel filter e and the gaske...

Page 101: ...Perform the procedure below to lubricate the hose reel system 1 Disconnect electric power from the machine 2 Apply low temperature bearing grease with several pumps from a grease gun to each bearing...

Page 102: ...torage 1 Fill fuel tank with stabilized fuel and operate the burner for at least fifteen minutes to ensure circulation through entire fuel system Any brand of fuel stabilizer is acceptable 2 Allow hea...

Page 103: ...Clean all outside surfaces Heater and burner Remove protective coverings from chimney and burner Remove any carbon buildup from the heater and burner assemblies Replace the burner nozzle or orifice Ve...

Page 104: ...to improve cold weather starting Precautions Observe the following precautions to prevent serious damage to the electrical system Do not disconnect the battery while the machine is running Do not atte...

Page 105: ...ghi_tx001153gb fm 105 E 1100 Maintenance...

Page 106: ...e special training and equipment Refer to the genset manufacturer s manual for additional information Task Interval hours of service Daily Monthly Quarterly 8 15 250 500 Check oil 3 Check clean air in...

Page 107: ...stick 3 If necessary add oil so that the oil level reaches the max mark 4 Reinstall the dipstick Result The engine oil level has been checked WARNING Most used oil contains small amounts of materials...

Page 108: ...ntenance E 1100 HSH 350 8 3 Cleaning the Air Intake Requirements Engine stopped Engine cooled Procedure 1 Open the generator access door 2 Clean the area around the air intake a Result The air intake...

Page 109: ...off air cleaner element c 3 Clean the filter compartment and the cover Dirt and other foreign debris must not be allowed to enter the engine s air inlet points 4 The filter element should either be r...

Page 110: ...element s gasket surface d for damage 6 Check the filter element for damage by holding it inclined towards the light or by shining a light source through it NOTICE If there is the slightest damage to...

Page 111: ...e injection system Procedure Perform the procedure below to replace the fuel filter 1 Open the generator access door 2 Loosen the Allen head bolt a and remove the filter from the mount 3 Loosen the ho...

Page 112: ...ontamination adhering to the cylinder head cover c 3 Remove the screws d and take off the cylinder head cover c with gasket e 4 Remove the rubber cap f from the inspection hole cover 5 Turn the engine...

Page 113: ...en screw h and turn the hexagon nut i until the feeler gauge can be pulled through with just slight resistance when the screw h is retightened 9 Install a new gasket e 10 Reinstall the cylinder head c...

Page 114: ...stop the engine 2 Place a collection container below the oil drain a 3 Open the generator access door 4 Open the drain valve b and allow the oil to drain completely 5 Close the drain valve b 6 Add en...

Page 115: ...dure Perform the procedure below to clean the oil filter 1 Loosen the filter screw a and pull the oil filter b out of its housing This procedure continues on the next page WARNING Most used oil contai...

Page 116: ...Replace any gaskets that are worn or damaged Note Lightly oil new gaskets before installing 4 Lightly oil the gaskets b and reinstall the oil filter press until limit stop 5 Inspect the outer edge of...

Page 117: ...oes not ignite There is no fuel Fill fuel tank The burner nozzle is dam aged or worn Replace the burner nozzle The electrodes are defec tive Replace the electrodes The cadmium cell is mal functioning...

Page 118: ...w level cutoff control is reset low level indicator light must be OFF The HTF temperature is below 26 C 15 F Warm the HTF and hoses before starting machine see topic Preheating the Heat Transfer Fluid...

Page 119: ...stroke air cooled diesel engine Engine Make Hatz Engine Model 1B 30 Max rated power at rated speed kW Hp 5 0 6 8 3600 rpm Displacement cm in 347 21 2 Operating speed rpm 3500 Engine Speed idle rpm 160...

Page 120: ...28 Excitation type Capacitor brushless Insulation type Class H Drive type Belt Breaker size A 30 Speed no load rpm 3600 GAWR Gross Axle Weight Rating kg lb 1588 3500 Wheel diameter mm in 330 13 Tire c...

Page 121: ...75 X 80 A Burner nozzle SN 1537 and above gph X deg 0 65 X 60 A Burner fuel pressure kPa psi 1241 180 Fuel input kW 36 Heater efficiency 87 Pump L hr gph 1003 265 Run time hr 115 Hose pressure bar psi...

Page 122: ...Technical Data E 1100 122 wc_td000476gb fm 10 5 Dimensions cm in wc_gr008706...

Page 123: ...nd MI 48674 USA Customer Information Number 800 258 2436 SDSQuestion dow com EMERGENCY TELEPHONE NUMBER 24 Hour Emergency Contact 989 636 4400 Local Emergency Contact 989 636 4400 2 Hazards Identifica...

Page 124: ...fer to Section 8 for specific personal protective equipment 5 Fire Fighting Measures Extinguishing Media To extinguish combustible residues of this product use water fog carbon dioxide dry chemical or...

Page 125: ...erred glove barrier materials include Butyl rubber Natural rubber latex Neoprene Nitrile butadiene rubber nitrile or NBR Polyethylene Ethyl vinyl alcohol laminate EVAL Polyvinyl alcohol PVA Polyvinyl...

Page 126: ...n Temperature No test data available Partition coefficient n octanol water log Pow No data available for this product Evaporation Rate Butyl Acetate 1 0 5 Estimated Kinematic Viscosity 6 3 cSt Literat...

Page 127: ...l Information ENVIRONMENTAL FATE Movement Partitioning For the major component s Bioconcentration potential is low BCF less than 100 or log Pow less than 3 Potential for mobility in soil is very high...

Page 128: ...Reactive Hazard No Sudden Release of Pressure Hazard No Superfund Amendments and Reauthorization Act of 1986 Title III Emergency Planning and Community Right to Know Act of 1986 Section 313 To the bes...

Page 129: ...vironmental Exposure Level HAZ_DES Hazard Designation Action Level A value set by OSHA that is lower than the PEL which will trigger the need for activities such as exposure monitoring and medical sur...

Page 130: ...TAP TWICE THE VALUE OF THE GREEN NUMBER SHOULD READ ZERO X 2 PRESS HOLD UNTIL THE NORMAL DISPLAY APPEARS 4 5 PRESS AND HOLD RELEASE WHEN P IS DISPLAYED 1 PRESS AND HOLD RELEASE WHEN LoC IS DISPLAYED...

Page 131: ...eat 50 Arctic Bear XHD HD models 50 FUJI PXR 4 LOW TEMPERATURE LIMIT ADJUSTING 2 TAP ONCE THE GREEN NUMBER WILL BEGIN FLASHING X 1 3 TAP TWICE THE VALUE OF THE GREEN NUMBER SHOULD READ ZERO X 2 PRESS...

Page 132: ...200 S3000 E3000 Pureheat 180 Arctic Bear XHD HD models 210 FUJI PXR 4 HIGH TEMPERATURE LIMIT ADJUSTING 2 TAP ONCE THE GREEN NUMBER WILL BEGIN FLASHING X 1 3 TAP TWICE THE VALUE OF THE GREEN NUMBER SHO...

Page 133: ...wc_tx001673gb fm 133 Fuji Temperature Controller...

Page 134: ...wc_tx001673gb fm 134 Fuji Temperature Controller...

Page 135: ...ulation 49 CFR 575 requires trailer manufacturers to include certain tire information in the Owner s Manuals for the trailers they manufacture This regulation requires that the information be in the E...

Page 136: ...orward half of the left road side of the unit This FHUWLILFDWLRQ 9 1 ODEHO ZLOO LQGLFDWH WKH WUDLOHU V URVV 9HKLFOH HLJKW 5DWLQJ 9 5 7KLV LV WKH PRVW ZHLJKW WKH IXOO loaded trailer can weigh It will a...

Page 137: ...FOH HLJKW 5DWLQJ RI WKH WUDLOHU RQ RXU WUDLOHU V 9 1 HUWLILFDWLRQ ODEHO 3 Subtract the empty weight of your trailer from the GVWR stated on the VIN label That weight is the maximum available cargo cap...

Page 138: ...im in a manner that encloses the rim flanges inside the air cavity of the tire Curb weight The weight of a motor vehicle with standard equipment including the maximum capacity of fuel oil and coolant...

Page 139: ...heel supports the tire and attaches either integrally or separably to the wheel center member and upon which the tire is attached Non pneumatic spare tire assembly A non pneumatic tire assembly intend...

Page 140: ...ormation label and on the Certification VIN tag Reinforced tire A tire designed to operate at higher loads and at higher inflation pressures than the corresponding standard tire Rim A metal support fo...

Page 141: ...a mechanical device which attaches either integrally or separably to the non pneumatic tire and provides the connection between tire and the vehicle Wheel holding fixture The fixture used to hold the...

Page 142: ...ill also find this number on the vehicle information placard expressed in kilopascals kpa which is the metric measure used internationally Manufacturers of passenger vehicles and light trucks determin...

Page 143: ...ny doubt about the correct size to choose consult with the tire dealer 1 5 6 TIRE TREAD The tire tread provides the gripping action and traction that prevent your vehicle from slipping or sliding espe...

Page 144: ...ber is the wheel or rim diameter in inches If you change your wheel size you will have to purchase new tires to match the new wheel diameter Next number This two or three digit number is the tire s lo...

Page 145: ...facturers also must indicate the materials in the tire which include steel nylon polyester and others Maximum Load Rating This number indicates the maximum load in kilograms and pounds that can be car...

Page 146: ...as a single Load Range This information identifies the tire s load carrying capabilities and its inflation limits 1 6 TIRE SAFETY TIPS Preventing Tire Damage Slow down if you have to go over a pothole...

Page 147: ...E 1100 Schematics wc_tx001908gb fm 147 11 Schematics 11 1 E 1100 Composite Schematic ghi_gr005662...

Page 148: ...Interrupt FU1 Fuse 1 HOSE REWIND Hose rewind Off On switch MTR Rewind motor Pump motor Burner motor FU2 Fuse 2 n a Rewind transformer n a n a To line 14 n a n a To line 16 n a n a To line 24 RECT1 Rec...

Page 149: ...pen contacts K2 n a n a 1 phase PL1 Pilot light 1 Low level fault PL2 Pilot light 2 Burner fault DUPLEX Duplex receptacle HOUR METER Hour meter n a Ignition transformer n a n a Limit n a n a Alarm n a...

Page 150: ...TS1 Thermal switch 1 snap disc HTR1 Heater fuel prewarmer CAD Cad cell LOW LEVEL OVERRIDE MOMENTARY Low level shut down device momentary override Off On switch BURNER Burner Off On switch REWIND Rewin...

Page 151: ...E 1100 Schematics wc_tx001908gb fm 151 11 3 Burner System Circuit...

Page 152: ...Schematics E 1100 152 wc_tx001908gb fm 11 4 Circulation System Circuit ghi_gr005662...

Page 153: ...E 1100 Schematics wc_tx001908gb fm 153 11 5 Rewind System Circuit...

Page 154: ...lots on the trailer plug receptacle are each designated for specific components The designations are as follows Ref Designation Wire color a Battery 12V Black b Running lights Green c Left hand turn s...

Page 155: ...for specific components The designations are as follows Note The colors used on your vehicle s plug may vary from those used in the trailer junction box CHARGER BREAKAWAY SWITCH B black R red G green...

Page 156: ...d2 e1 f e2 a2 wc_gr008464 b1 b2 d2 G G R L W Br Br G Ref Description Ref Description a1 Right side light amber a2 Left side light amber b1 Right side tail light b2 Left side tail light c License plat...

Page 157: ...Black Green Yellow Black White Black NEMA 5 20R Green Green To Enclosure White Orange Orange Black White Ground 1 2 3 4 5 8 7 6 9 wc_gr008766 Ref Description Ref Description 1 Current sensor 6 Capaci...

Page 158: ...Schematics E 1100 158 wc_tx001908gb fm 11 10 Genset DC Wiring Diagram...

Page 159: ...Emergency stop button 60 Hz 7 Emergency stop connection 50 Hz 2 Hour meter 8 Voltage regulator 3 Engine control panel 9 Terminal strip 4 Emergency stop connection 60 Hz 10 Engine compartment 5 Control...

Page 160: ......

Page 161: ......

Page 162: ...rveonderdelen Importante Para obter informa es sobre as pe as sobresselentes consulte o seu fornecedor da Wacker Neuson ou aceda ao site Web da Wacker Neuson em http www wackerneuson com Wa ne W celu...

Reviews: