Navigation
Contents
Index
USER’S MANUAL FOR MACINTOSH
®
Page 1: ...Navigation Contents Index USER S MANUAL FOR MACINTOSH USER S MANUAL FOR MACINTOSH...
Page 2: ...s manual TRADEMARKS Wacom is a registered trademark Intuos Tool ID QuickPoint DuoSwitch and DualTrack are trademarks of Wacom Company Limited Acrobat Reader Copyright 1987 2000 Adobe Systems Incorpora...
Page 3: ...mful interference to radio communications However there is no guarantee that interference will not occur in a particular installation You can determine whether the tablet is causing interference by po...
Page 4: ...and found to comply to the following harmonized European Norms EN 50082 1 or EN 55104 electromagnetic immunity EN 50081 1 or EN 55014 electromagnetic emissions EN 60742 safety of low voltage devices B...
Page 5: ...47 Opening the Control Panel 48 Control Panel Features 49 Tabs 50 Control Panel Lists 52 Control Panel Buttons 53 Trademarks 2 Radio and Television Interference 3 FCC Notice 3 CE Declaration 4 About t...
Page 6: ...up Menu Options 82 Customizing Tablet Buttons 83 Working with Multiple Tools 85 Adding a New Tool 86 Using More Than One Tool 87 Working with Application Specific Settings 88 Creating an Application S...
Page 7: ...t Specifications 140 General Specifications for All Intuos Tablets 140 Intuos 4x5 Tablet Models GD 0405 A GD 0405 U 141 Intuos 6x8 Tablet Models GD 0608 A GD 0608 U 141 Intuos 9x12 Tablet Models GD 09...
Page 8: ...s section also includes exercises for new users Customizing describes how you can change the control panel settings to optimize Intuos tablets and tools for your personal work style Advanced Features...
Page 9: ...s manual Information about your specific computer hardware Information about your operating system Information about other Wacom tablets Information about application software Many graphics applicatio...
Page 10: ...o Table of Contents Go to Index Go back to previous view Page back or page forward Go to beginning of section Go to topic Topic continued The Acrobat Reader provides you with additional tools for usin...
Page 11: ...equipped with a USB port and with all applications that support a mouse If you have an iMac you will need Mac OS 8 5 or greater Refer to the iMac Requirements for information on running the iMac Updat...
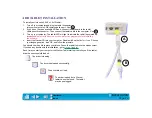
Page 12: ...Temporarily disable any virus protection programs before installing the software 4 Insert the Wacom CD into your computer Double click on the INSTALL icon Choose your language option click OK and fol...
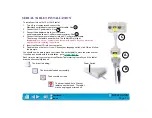
Page 13: ...er and temporarily disable any virus protection programs before installing the software 5 Insert the Wacom CD into your computer 6 Double click on the INSTALL icon Choose your language option click OK...
Page 14: ...is not a powered USB hub 2 If your computer is off turn it on now The tablet LED will light to indicate Intuos has registered as a USB device If the LED does not light your USB port may not be functi...
Page 15: ...Firmware Update In the APPLE IMAC UPDATES folder located on the Intuos CD ROM double click on the IMAC FIRMWARE UPDATE icon This will decompress the file Within the open folder that appears on the de...
Page 16: ...let may come with a Registration Card that you should complete and mail or you may be prompted to register online during the installation process PRODUCT INFORMATION To learn more about which software...
Page 17: ...using a graphics tablet and tablet input tools read the following sections They describe your Intuos tools and explain how to use them with the tablet APPEARANCE AND FEATURES SETTING UP YOUR WORK AREA...
Page 18: ...ments a graphics tablet that serves as your work area and the Intuos Tools you use with the tablet For a complete listing of Intuos tablets refer to Parts and Accessories INTUOS 4X5 TABLET Note To lea...
Page 19: ...ETS Note The Intuos 9x12 tablet is shown To learn more about your tablet see Working with the Tablet Menu Strip removable Active Area Incline Bar shown attached QuickPoint Area Markings not available...
Page 20: ...AND 12X18 TABLETS Note The Intuos 12x12 tablet is shown To learn more about your tablet see Working with the Tablet Menu Strip removable Active Area Pen Stand QuickPoint Area Markings Power Switch ser...
Page 21: ...each tool differently Note The tool s included with your tablet will vary depending on which tablet model and configuration you purchased The Intuos Pen and Airbrush are pressure sensitive freehand to...
Page 22: ...des four degrees of control x and y position thumbwheel position and positional rotation The thumbwheel can be used for up and down scrolling in the active window and for application specific tasks in...
Page 23: ...coordinate position information Use the Lens Cursor with graphics and CAD applications for very accurate tracing or for digitizing images For information on these and other available Intuos tools refe...
Page 24: ...rtably with a minimum of eyestrain For some tablet models you can adjust the tablet incline and attach the pen stand to better fit your work style Refer to Adjusting Tablet Incline and Adjusting the P...
Page 25: ...erlay ADJUSTING THE PEN STAND Position the pen stand near the tablet The triple pen stand can also be attached to the larger tablets 4x5 6x8 and 9x12 tablets The stand is free standing Place it within...
Page 26: ...apply the incline bar For desktop use you may find an inclined tablet position more comfortable To attach the incline bar 1 First turn the tablet upside down and locate the incline bar recess 2 Remove...
Page 27: ...n a button with your Intuos tool the function assigned to that button will occur To remove the menu strip carefully lift the overlay sheet from the left side and gently slide the menu strip out You ca...
Page 28: ...N Open a new document open Command O Open an existing document close Command W Close a document save Command S Save work print Command P Print document exit Command Q Quit application cut Command X Cu...
Page 29: ...uld a normal pen Make sure the DuoSwitch is in a convenient location where you can toggle it with your thumb or forefinger but not accidently press the switch while drawing You can tilt the pen in any...
Page 30: ...his is the default setting for the Intuos Pen and Airbrush and makes tracing possible something you cannot do with a mouse In Mouse Mode you move the cursor with a pick up and roll action similar to u...
Page 31: ...n cursor over the icon and pressing down on the pen tip The icon should highlight when you press Double Clicking To double click quickly tap the tablet twice in the same place with the pen tip This is...
Page 32: ...Switch whenever the pen tip is in Proximity of the tablet You do not have to touch the pen tip to the tablet in order to use the switch To assign new switch functions refer to Customizing Tool Buttons...
Page 33: ...the tablet and slide it across the tablet The selected object will move across the screen To select text move the screen cursor to the beginning of a text line then drag the Intuos Pen across the tabl...
Page 34: ...tive area This allows you to position the screen cursor or use the side switch without touching the pen tip to the tablet You can also trace a drawing or photograph as long as the pen tip remains with...
Page 35: ...an be controlled much better by the Intuos Pen s pressure sensitivity You can vary line width blend colors and change opacity with the pressure you exert upon the pen To draw with pressure sensitivity...
Page 36: ...a curve in a graphics application such as Painter that supports tilt Be sure that the tilt function in your application is active then change the tilt of the pen as you draw to vary the shape and thic...
Page 37: ...applications The eraser will not be pressure sensitive but you can use it to select and delete text or spreadsheet cells Try your eraser by opening Simple Text and typing a few words Use the eraser to...
Page 38: ...oordination for using the Intuos Pen 1 Open any graphics application Use the line tool to draw a rectangular grid with line spacings of about 20 25 mm 3 4 to 1 inch You can use your traditional mouse...
Page 39: ...can adjust the spray intensity and pressure on the tip can control the brush size Pointing Clicking Erasing and Proximity are similar to the pen For additional information refer to Holding the Airbru...
Page 40: ...ows you to paint and draw with pressure sensitivity To customize the fingerwheel see Airbrush Settings Visit Wacom s web site to learn which applications currently support the airbrush fingerwheel See...
Page 41: ...at support device rotation simply turn the 4D Mouse on the tablet to control the rotation parameter The front button nearest the thumbwheel is set to click by default The front button opposite the thu...
Page 42: ...2 3 4 Grasp the upper portion of the 4D Mouse in one hand and face the bottom portion toward you Viewed from the bottom a thumbwheel is visible at both sides of the body A pair of handling edges are...
Page 43: ...for most applications move the thumbwheel forward to scroll up and back to scroll down Scrolling stops when you release the thumbwheel For applications that have built in support for the thumbwheel y...
Page 44: ...et to MOUSE MODE which means you can position the screen cursor like you do with a regular mouse When using the Lens Cursor to digitize a drawing the Lens Cursor must be set to PEN MODE Refer to Custo...
Page 45: ...ile liquids such as paint thinner or benzene because they may damage the plastic case Keep your tablet and tools in a clean dry place and avoid extremes in temperature Room temperature is best Also yo...
Page 46: ...u can replace it with the extra nib that came with your tool 1 Clasp the old nib with a tweezer needle nosed plier or similar instrument and pull it straight out of the pen or airbrush 2 Slide the end...
Page 47: ...just your Intuos tool and tablet settings Advanced users can learn how to further optimize Intuos by creating application specific settings OPENING THE CONTROL PANEL CONTROL PANEL FEATURES CUSTOMIZING...
Page 48: ...L Open the control panel with the Intuos tool you wish to customize 1 Using your Intuos tool open the Apple menu and choose CONTROL PANELS 2 Double click on the tablet icon To open the Wacom control p...
Page 49: ...ed application and selected tool The Help button displays online Help The information is the same as in the Customizing and Advanced Features chapters in this manual Tab buttons apply only to the sele...
Page 50: ...ent tool to customize and the appropriate tabs will display for that tool Note The APPLICATION LIST is for advanced users it is not necessary to select or add applications to customize your Intuos too...
Page 51: ...ick To copy settings from one tool or application to another click This will display the Copy Settings To dialog box As you explore the control panel tabs experiment with different settings to find wh...
Page 52: ...an installed application to the APPLICATION LIST You can customize tool settings for the selected application Click to add an Intuos tool to the TOOL LIST You can customize the tool for the above sel...
Page 53: ...ion When you are ready to create custom settings for individual applications see Working with Application Specific Settings CONTROL PANEL BUTTONS The control panel buttons are common to the entire con...
Page 54: ...he appropriate tabs will be displayed To customize settings for a different tool select it from the TOOL LIST by clicking on its icon PEN AND AIRBRUSH TABS If the selected tool is an Intuos Pen or Air...
Page 55: ...l is a 4D Mouse or Lens Cursor the following control panel tabs are displayed This tab available only for the 4D Mouse Settings on these tabs are independent of the selected tool Displayed if you are...
Page 56: ...um control while drawing thin lines use a firm tip setting Drag the slider to a softer or firmer setting Make several pen strokes to test the current pressure sensitivity setting Click here with your...
Page 57: ...ing the lower side switch to double click Use custom double click settings when checked Note DOUBLE CLICK ASSIST can be enabled for some applications and disabled for others See Working with Applicati...
Page 58: ...fingerwheel sensitivity For each tool button a pull down menu enables you to choose the function that will be performed Select the function to perform when using the eraser Select the function to per...
Page 59: ...ton click Be sure at least one button performs this function so you can always navigate and click DOUBLE CLICK Default setting for the lower position of the side switch When this option is selected pr...
Page 60: ...ter a keystroke or keystroke sequence to play back Keystroke combinations can include letters numbers function keys such as F3 and modifier keys such as SHIFT OPTION COMMAND and CTRL After defining a...
Page 61: ...any applications use modifier keys to constrain the size or placement of objects If you select this option the DEFINE MODIFIERS dialog box appears There you select the modifier key s to simulate You c...
Page 62: ...lect this option the SELECT MACRO dialog box appears There you can select a predefined macro to play back After selecting a macro click OK Choose the macro type Note Before you can add macros you must...
Page 63: ...E Toggles between Pen Mode and Mouse Mode POP UP MENU Displays a Pop up Menu on your screen See Customizing the Pop up Menu for more information ERASE Default setting for the eraser Refer to Erasing f...
Page 64: ...h size opacity or other variables Reducing the fingerwheel range allows you to achieve the same effect with less finger movement Move the wheel forward for less effect and move it back for more effect...
Page 65: ...use a soft tip setting For maximum control while erasing use a firm eraser setting Drag the slider to a softer or firmer setting Using your eraser test the current eraser pressure sensitivity setting...
Page 66: ...eristics Your tilt setting applies to both the tip and eraser of your pen or airbrush Visit Wacom s web site for a list of applications that currently support tilt See Product Information Drag the sli...
Page 67: ...ike this Positioning Mode In Pen Mode the screen cursor moves with absolute positioning Select the Tablet Area for drawing QuickPoint Mode Splits tablet into two independent areas a large area for dra...
Page 68: ...ouse and Lens Cursor is MOUSE MODE With MOUSE MODE selected the MAPPING tab looks like this Positioning Mode In Mouse Mode the screen cursor moves with relative positioning Select the Orientation of y...
Page 69: ...cursor is positioned like a mouse requiring a pick up and roll action to move the cursor on the screen This is the default setting for the 4D Mouse and Lens Cursor If you are working with multiple to...
Page 70: ...entation will be vertical with the tablet buttons on the right side LANDSCAPE FLIPPED Rotate the tablet 180 degrees from landscape orientation The tablet will be upside down with the tablet buttons ne...
Page 71: ...DPI is used in calculations If your monitor is set to use a different screen resolution a 1 1 scale will not be maintained PROPORTIONAL Maintains correct vertical and horizontal proportions between t...
Page 72: ...a smaller PORTION OF TABLET for fast pointing and navigation with the 4D Mouse Sets the QuickPoint area to the lower left corner of the tablet Sets the QuickPoint area to the lower right corner of th...
Page 73: ...the displayed values A count equals one line of tablet resolution Enter values for the TOP LEFT BOTTOM and RIGHT boundary of the tablet area Values are measured from the top left corner of the tablet...
Page 74: ...tion The QuickPoint area is always mapped to the entire display area to all monitors on multiple monitor systems The drawing area is set to Pen Mode and mapped according to the DISPLAY AREA and ASPECT...
Page 75: ...DISPLAY dialog box Drag corners of the foreground graphic to select the screen area The background graphic represents the entire screen area Values in the ENTER COORDINATES text boxes will change acc...
Page 76: ...to Setting Right or Left Handed Operation Lens Cursor button configuration is based on settings you choose in the PREFERENCES dialog box accessed from the Edit pull down menu When checked the 4D Mous...
Page 77: ...ch button can be customized to perform three different functions depending on the thumbwheel position To program the additional button settings 1 Choose the THUMBWHEEL tab and select 15 BUTTON 4D MOUS...
Page 78: ...assigning these functions Depending on the thumbwheel position the following button numbers are reported to the application when a button is set to APPLICATION DEFINED For information on other uses fo...
Page 79: ...you use your 4D Mouse or Lens Cursor as a Button Box it must remain on the tablet s active area to function To configure your 4D Mouse or Lens Cursor as a Button Box open the TOOL BUTTONS tab and sele...
Page 80: ...See Using Your 4D Mouse as a 15 Button Mouse Provides thumbwheel information to a supporting application Simulates pressure Move the thumbwheel forward or backwards to increase pressure Requires the l...
Page 81: ...them To close the Pop up Menu without making a selection just click outside the Pop up Menu Displays a list of functions that will appear in the Pop up Menu To change the order of an item drag it to...
Page 82: ...TROKE button A dialog box will appear where you can specify and name the keystroke function You can also create different keystroke functions for different applications See Working with Application Sp...
Page 83: ...ected in their pull down menu The settings of other tablet buttons are set to IGNORED See Using The Tablet Menu Strip for the default tablet button settings To customize tablet button functions 1 Sele...
Page 84: ...a This option is only available for Intuos 9x12 or larger tablets IGNORED Leaves the tablet button undefined When a tablet button is set to IGNORED the button number does not appear on the display scr...
Page 85: ...for that tool are displayed Tab settings apply only to the selected tool and application If application specific settings have not been added the ALL APPLICATIONS icon is displayed and the tool setti...
Page 86: ...you close the control panel If you use a second Intuos tool on the tablet a new tool discovered message box appears This reminds you to open the Wacom control panel to permanently add the new tool to...
Page 87: ...xample you might name one Drawing Pen and the other Paint Brush To change the tool names select RENAME TOOL from the EDIT pull down menu Note If you have two or more Intuos pens use the colored decals...
Page 88: ...and tool settings for individual applications Tab settings apply only to the selected tool and application The APPLICATION LIST displays icons for applications with customized settings Your current se...
Page 89: ...your changes will apply to all applications except the specific one s you have added to the list If you select the icon for a specific application and make changes to the tab settings your changes wi...
Page 90: ...ST Only applications that are currently running and that have not previously been added to the APPLICATION LIST are displayed Displays the name of the selected application If you have more than one ta...
Page 91: ...onfirm your selection After you have added an application its icon appears in the APPLICATION LIST When you select the application icon the TOOL LIST displays only the tool s that have application spe...
Page 92: ...to create settings for Click OK to confirm your selection The dialog box will close and the tool will appear in the TOOL LIST for the chosen application First select ADD EXISTING TOOL TO APPLICATION I...
Page 93: ...SPECIFIC SETTINGS To remove application specific settings 1 Open the REMOVE menu and select CUSTOM SETTINGS FOR APPLICATION 2 In the REMOVE CUSTOM SETTINGS FOR APPLICATION dialog box select the appli...
Page 94: ...E tab to check the mode your tablet is operating in Recommended for graphics applications Single tool mode at maximum data rate Required by some handwriting recognition software The SINGLE MODE option...
Page 95: ...for graphics applications Single tool mode at maximum data rate Required by some handwriting recognition software Displays messages about your selected communication port CONNECTED The tablet is conne...
Page 96: ...the control panel and saves any changes QUIT Closes the control panel and saves any changes EDIT The EDIT menu contains the following options COPY SETTINGS TO Opens a dialog box where you can copy you...
Page 97: ...Opens a dialog box where you can add a tool to the control panel TOOL LIST This is also accessed by clicking on the ADD TOOL TO LIST button Refer to Adding a New Tool for more information REMOVE The R...
Page 98: ...is installed when you install the driver but other languages can be specified during a custom install HELP The HELP menu contains the following options HELP Displays online Help USER S MANUAL Displays...
Page 99: ...can use advanced features to further customize your Intuos Graphics Tablet System for the way you like to work ADVANCED TIP PRESSURE SETTINGS ADVANCED ERASER PRESSURE SETTINGS COPYING SETTINGS USING...
Page 100: ...URE FEEL slider overrides the advanced pressure settings If you customize advanced settings then drag the TIP PRESSURE FEEL slider your advanced settings will be removed Test the results of your chang...
Page 101: ...red to generate a button click Enter a value from 1 to 50 or drag the CLICK FORCE bar to set the force at which a click occurs The CLICK FORCE bar graphically displays the force level at which a click...
Page 102: ...ond to If you have a soft touch and want to achieve full pressure without having to apply full force to your pen decrease the maximum force level You can apply less force to your pen and still have th...
Page 103: ...MAXIMUM TIP FORCE control moves and the value in the edit box changes to reflect the peak pressure registered by your hand movements To start over click the START OVER button and begin a new drawing...
Page 104: ...tab and click on the MORE OPTIONS button You work with the advanced eraser settings in the same manner as with the Advanced Tip Pressure Settings Important The ERASER PRESSURE FEEL slider overrides t...
Page 105: ...another within the same application or between different applications You can also copy settings between different types of Intuos tools Note For dissimilar tools such as a pen and a 4D Mouse only tho...
Page 106: ...n cursor and the second tool will function as a Button Box If you are using a graphics program for example you can set one of the 4D Mouse buttons to simulate the SHIFT key to constrain lines while dr...
Page 107: ...ING dialog box Here you can define multiple different tablet to screen mappings Changes units origin and range or size displayed in the status bar Creates a new mapping Removes the active map Be sure...
Page 108: ...from each pull down menu Click OK to confirm your selections 2 Select the tablet mapping to define The mapping numbers are displayed in the top left corner of each tablet area graphic If multiple tabl...
Page 109: ...select an option These options work similarly to normal mapping If you choose PROPORTIONAL or TO FIT you can set an exact scale factor One to One A 1 1 scale is maintained between the selected tablet...
Page 110: ...display area by dragging the handles of the selected display area Then click and drag the display area to the desired position For more precise control in selecting the display area click the SET DISP...
Page 111: ...the DELETE MAPPING button To quickly remove all advanced mappings from a tool in the MAPPING tab click RESET TAB TO DEFAULT for that particular application and tool This also resets all MAPPING tab s...
Page 112: ...ng information 4 If you are having a compatibility conflict between Intuos and a new hardware or software product it may be helpful to download a new Wacom tablet software driver Wacom periodically up...
Page 113: ...ADB TABLETS Make sure your computer is turned on and your Intuos tablet is properly connected Then try the following tests 1 Check power to the tablet You should see the tablet s orange status LED whe...
Page 114: ...er and tablet Then try the following tests 1 Check power to the tablet You should see the tablet s orange status LED whenever the tablet cable is connected to AC power the power switch is turned on an...
Page 115: ...ontacting Technical Support TESTING USB TABLETS Make sure your computer is turned on the operating system has finished loading and Intuos is properly connected to an active USB port Then try the follo...
Page 116: ...efective pen or tablet See Contacting Technical Support Verifying Your Macintosh is USB Ready If the tablet LED does not light your computer may not have the necessary USB software installed or may no...
Page 117: ...conflict 1 Restart your computer with the SHIFT key held down When the system has fully booted release the SHIFT key Then from the Apple menu choose CONTROL PANELS and EXTENSIONS MANAGER 2 From the SE...
Page 118: ...Wacom Technical Support Manually Resolving a Conflict If you have an earlier version of the Mac OS without the Extensions Manager follow the instructions below 1 From the SYSTEM FOLDER open the CONTRO...
Page 119: ...u see the Wacom Tablet successful startup icon you have a conflict with one of the extensions If the Wacom Tablet driver still does not load drag your third party extensions back to the EXTENSIONS fol...
Page 120: ...CONTROL PANELS folder and delete the DISABLED CONTROL PANELS folder See Contacting Technical Support Start moving the control panels a few at a time from the DISABLED CONTROL PANELS folder back into t...
Page 121: ...e The X and Y DATA values should change to reflect the tool position 3 Test your Intuos Pen or Airbrush buttons The tablet s status LED should change color from orange to green each time you click wit...
Page 122: ...tilt for the x axis by moving the Intuos Pen or Airbrush from a vertical position toward the right the X TILT value should change from approximately 0 to 60 0 to 50 for Intuos 4x5 tablets Now move th...
Page 123: ...are testing a 4D Mouse move the thumbwheel to the front center and rear positions The WHEEL status should change from approximately 1000 front position to 1000 rear position with a center value of zer...
Page 124: ...omputer does not have an available ADB port Connect the keyboard to the tablet cable pass thru connector Then connect the tablet cable to the computer The tablet status LED is off The keyboard does no...
Page 125: ...witch on If the tablet s status LED still does not turn on you may have a defective tablet or power adaptor see Contacting Technical Support A Wacom serial tablet connected to the modem port will not...
Page 126: ...e is turned off or disabled Check your Wacom cable connector for bent or missing pins Serial tablets should have 8 pins and ADB tablets should have 4 metal pins and a plastic guide Note If you are sha...
Page 127: ...ssage appears indicating that the USB device needs more power than is available Verify that the tablet s USB cable is plugged into a primary USB port directly into your computer or into a powered USB...
Page 128: ...RATOR SERIAL PORT ARBITRATOR and SUITCASE EXTENSION see Note These extensions have had problems which have prevented the Wacom Tablet from loading properly at startup If any of these extensions are pr...
Page 129: ...cing the double click speed see Adjusting Double Click Try using a lighter TIP PRESSURE FEEL see Adjusting Tip Feel The 4D Mouse or Lens Cursor buttons work but the screen cursor will not move Open th...
Page 130: ...tab and verify that the tip is assigned to a CLICK function The side switch does not work Be sure you press the side switch when the pen tip is in proximity do this without pressing down on the pen ti...
Page 131: ...a different frequency by selecting SINGLE MODE For serial tablets this option is located on the CONNECTION tab For USB tablets it is located on the TABLET MODE tab Cannot move the cursor where you wan...
Page 132: ...DOUBLE CLICK DISTANCE or increasing the double click speed see Adjusting Double Click If that does not work try unchecking the DOUBLE CLICK ASSIST checkbox Within a graphics application you have to pr...
Page 133: ...to frequently asked questions and troubleshooting tips can be found on the appropriate web site for your area in Who to Call PRE CONTACT CHECKLIST You might want to print a copy of this page for refe...
Page 134: ...t is not working properly contact the Wacom support staff for the area where your product was purchased If you have a modem you can download the latest software drivers from the Internet USA CANADA CE...
Page 135: ...er or distributor Worldwide Web http www wacom com productsupport 24 hour Technical Support information FAQs Frequently Asked Questions and answers Software updates Email support Anonymous FTP Site ft...
Page 136: ...Software updates Phone Austria 43 0 1 599 142 001 Technical Support Phone Belgium 32 0 2 713 38 10 Technical Support Phone France 33 0 1 69 32 49 31 Technical Support Phone Germany 49 0 69 66 568 517...
Page 137: ...de Web http tablet wacom co jp Software updates and information Japanese Phone 81 0 3 3371 1583 Technical Support Japanese FAX 81 0 3 3371 1468 Technical Support Japanese Internet Email tablet wacom c...
Page 138: ...s information on working with multiple tablets You will also find product specifications a listing of available parts and accessories and license and warranty information INSTALLING MULTIPLE TABLETS P...
Page 139: ...dd a new tablet connect it to your computer From the ADD menu choose TABLET and follow the prompts For ADB and USB tablets the system searches the ADB and USB ports If the new tablet is found it is au...
Page 140: ...pin mini circular DIN 4x5 6x8 and 9x12 tablets 9 pin D sub female 12x12 and larger tablets USB A all USB tablets Power requirements ADB tablets DC 5V 100mA from ADB port Power requirements USB tablet...
Page 141: ...Physical size W x D x H 225 0 x 210 0 x 7 5 mm 9 0 x 8 4 x 0 29 in Cable length 2 5 m 8 2 ft Weight 520 g 1 14 lb Power consumption 0 5 watts ADB 2 0 watts USB Active area W x D 203 2 x 162 4 mm 8 13...
Page 142: ...m 8 2 ft Weight 1 6 kg 3 52 lb Power consumption 0 5 watts ADB 2 0 watts USB Active area W x D 304 8 x 316 8 mm 12 19 x 12 67 in Physical size W x D x H 444 0 x 435 5 x 37 0 mm 17 76 x 17 42 x 1 48 in...
Page 143: ...No PSI A007 Fingerwheel travel 10 mm 0 39 in Fingerwheel resolution 1024 levels Pen tip travel 0 1 mm 0 04 in or less Pressure levels 1024 levels Eraser tip travel 1 3 mm 0 05 in approximately Physica...
Page 144: ...0 49 in Weight 12 g 0 42 oz approximately Tip refill type Polyacetal Part No PSI A011 Physical size L x D x H 113 5 x 72 6 x 38 5 mm 4 47 x 2 86 x 1 52 in Weight 75 g 2 65 oz approximately Button str...
Page 145: ...et combined with your Intuos Pen and other Intuos tools enables you to paint more intuitively illustrate better and edit imagery faster than ever before Each Intuos Pen and accessory features Tool ID...
Page 146: ...A Intuos 9x12 ADB Tablet GD 0912 A Intuos 9x12 USB Tablet GD 0912 U GD 0912 U0A Intuos 12x12 Serial Tablet GD 1212 R Intuos 12x12 USB Tablet GD 1212 U Intuos 12x18 Serial Tablet GD 1218 R Intuos 12x18...
Page 147: ...is pen was created to provide immediate feedback on what you are drawing at your pen tip as well as on your computer screen The pressure sensitive pen comes with inking cartridges and two polyacetal t...
Page 148: ...or film with a nudge from your thumb or just use it as a supercharged mouse It converts easily to left or right handed use and conforms naturally to the tilt of your hand Lens Cursor Intuos Lens Curs...
Page 149: ...SH A145 PSH A145 02 9x12 tablet PSH A146 PSH A146 03 12x12 tablet PSH A147 12x18 tablet PSH A148 Macintosh Serial Adaptor 9 Pin D to Mini DIN 8 STJ A110 Pen Stand 4x5 6x8 and 9x12 tablets PST A021 PST...
Page 150: ...tware itself You acknowledge that the Software is Wacom s property and contains valuable confidential unpublished information developed or acquired by Wacom at great expense including data processing...
Page 151: ...ation accompanied by the return authorization number your name address and telephone number proof of purchase date and a description of the defect Wacom will pay for return shipping by United Parcel S...
Page 152: ...WHO HAS BEEN INVOLVED IN THE CREATION PRODUCTION OR DELIVERY OF THIS PRODUCT SHALL BE LIABLE FOR ANY DIRECT CONSEQUENTIAL OR INCIDENTAL DAMAGES INCLUDING DAMAGES FOR LOSS OF BUSINESS PROFITS BUSINESS...
Page 153: ...you should notify your local dealer or distributor In all other respects the terms of the warranty as set forth above apply to such sales Should you have any questions about this Agreement or if you d...
Page 154: ...and defines how the tablet area is mapped to the display area This setting determines if the aspect of the tablet and display are the same It also determines if a 1 1 scale will be maintained between...
Page 155: ...ON setting In landscape orientation the tablet buttons are at the top Rectangular tablets will be in a horizontal position See also portrait Lens Cursor An input device with programmable buttons and c...
Page 156: ...ze your tool buttons 4D Mouse buttons or Tablet buttons to display this menu Portrait A tablet ORIENTATION setting In portrait orientation the tablet buttons are on the side Rectangular tablets will b...
Page 157: ...ween the tool and tablet This is used to create natural looking pen brush and eraser strokes in applications that are tilt sensitive Tool ID A feature that makes each Intuos tool unique If you are wor...
Page 158: ...bleshooting 124 tablets testing 113 Add menu 97 Adding a new tool 86 Advanced eraser pressure customizing 104 mapping 107 tip pressure customizing 100 Airbrush holding 40 settings customizing 64 testi...
Page 159: ...vironmental conditions 45 Eraser feel customizing 65 Erasing with pen 37 Eye hand coordination exercise 38 Features 18 12x12 tablet 20 12x18 tablet 20 4x5 tablet 18 6x8 tablet 19 9x12 tablet 19 contro...
Page 160: ...pens 147 tablets 146 tools 146 Pen clicking 31 clicking with 31 double clicking with 31 drawing with pressure 35 with tilt 36 erasing with 37 holding 29 pointing 30 replacing the tip 46 testing 121 u...
Page 161: ...n 144 Tablet buttons customizing 83 connection checking 95 mode checking 94 storing 45 working with 25 Tablet area 72 Tablet to screen mapping customizing 67 Technical Support contacting 133 linking t...
Page 162: ...tablets 113 general problems 128 serial tablet problems 125 serial tablets 114 software 117 tools 121 USB tablet problems 127 tablets 115 Uninstalling software 16 USB tablet problems troubleshooting...
Page 163: ...ourt Hellersbergstrasse 4 Vancouver WA 98683 D 41460 Neuss U S A Germany Telephone Telephone General 1 360 896 9833 General 49 0 2131 12390 Fax 1 360 896 9724 Fax 49 0 2131 101760 WACOM Co Ltd 2 510 1...