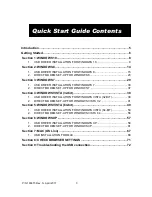
Walchem WebMaster, Quick Start Manual
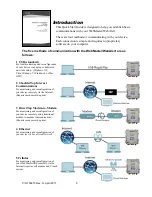
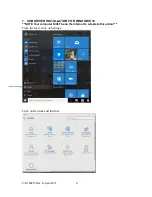
The Walchem WebMaster offers a comprehensive user manual that can be easily downloaded for free from our website. This detailed manual provides step-by-step instructions for seamless installation and operation of the product. Access the manual at 88.208.23.73:8080 to ensure maximum productivity and efficiency with your Walchem WebMaster.
Share
Download


Reviews:
No comments
Related manuals for WebMaster

2112
Brand: Jafar Pages: 9

Beolink 1000
Brand: Bang & Olufsen Pages: 9

Beolink 1000
Brand: Bang & Olufsen Pages: 12

SC1500
Brand: Hach Pages: 86

PA10
Brand: ZKTeco Pages: 8

FT Series
Brand: EasyIO Pages: 18

CF2000
Brand: Eaton Pages: 100

SENTINEL
Brand: Van Air Pages: 4

51099
Brand: L. G. B. Pages: 2

LA4X
Brand: L-Acoustics Pages: 36

xPico 200 Series
Brand: Lantronix Pages: 7

xPico 110
Brand: Lantronix Pages: 3

EDS1100
Brand: Lantronix Pages: 15

TWIN Series
Brand: CAME Pages: 2

PAB-FC2
Brand: Partizan Pages: 7

PS40.3
Brand: cinetto Pages: 56

9160341
Brand: 2N Pages: 107

Micro850 series
Brand: Allen-Bradley Pages: 24


