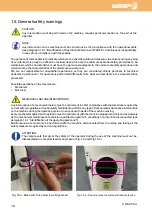
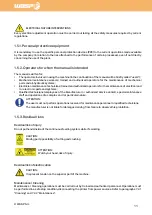
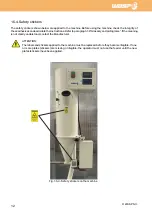
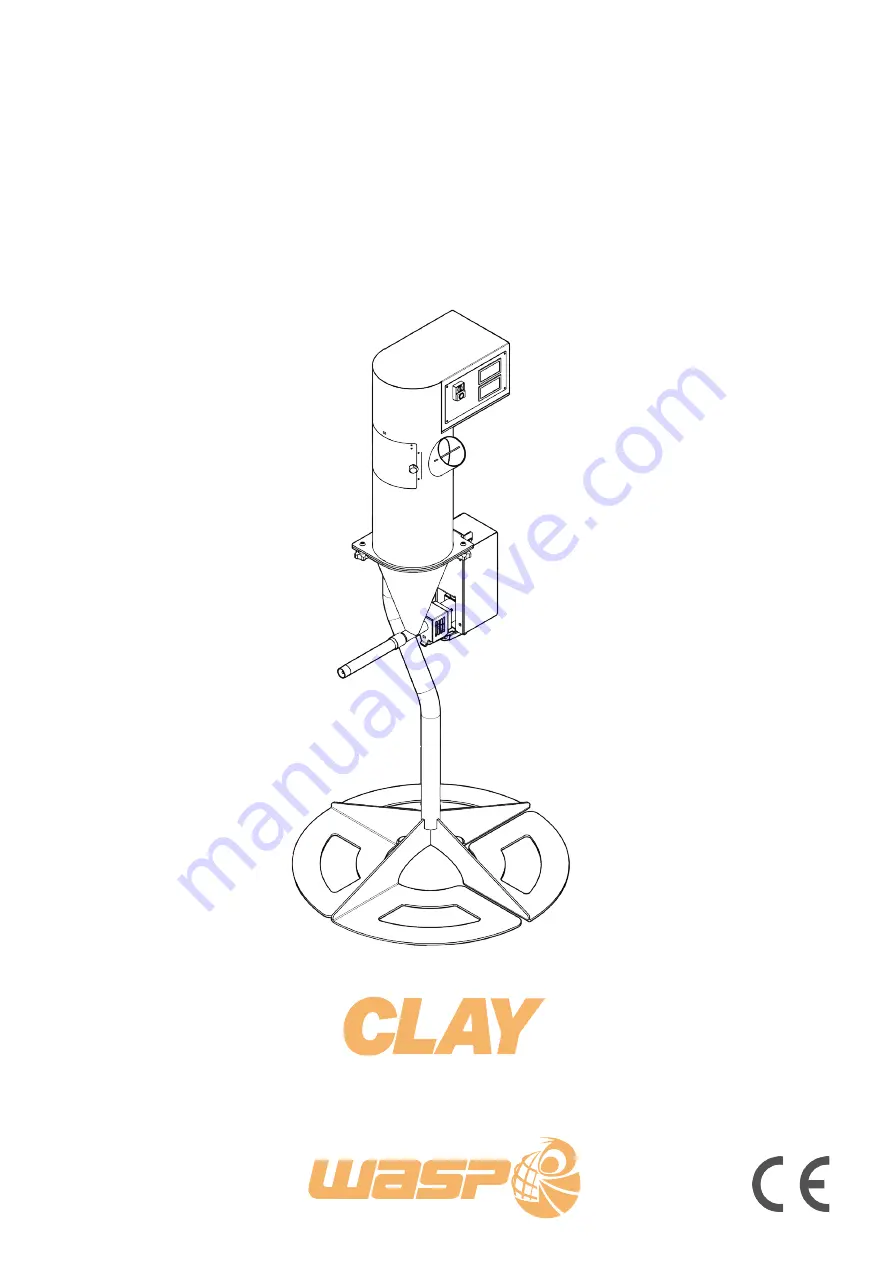
background image

MANUAL OF USE AND MAINTENANCE

ORIGINAL INSTRUCTIONS

CONTINUOUS 

FEEDING SYSTEM

Summary of Contents for Clay Kit

Page 1: ...MANUAL OF USE AND MAINTENANCE ORIGINAL INSTRUCTIONS CONTINUOUS FEEDINGSYSTEM...

Page 2: ...to future modifications and updates Copyright 2022 WASP S r l All rights reserved 1 First edition 23 12 2022 Revision Reason for the revision Revision date Disclaimer IMPORTANT We kindly praise to re...

Page 3: ...ndling 20 3 1 General warnings 20 3 1 1 Delivery of the machine 20 3 2 Unpackaging 21 3 3 Content 22 3 4 Lifting and handling of the printer 22 4 Installation 22 4 1 General warnings 22 4 1 1 Placemen...

Page 4: ...lay hands or other parts of the body in proximity of the moving parts Keep far from the presence of children Make sure every fan is working while the machine is turned on Make sure that the extruder...

Page 5: ...y and by the recupient on the machine itself or in its immediate vicinity In the second case the location of the manual must me indicated on the machine clearly It is susceptible of updates which appr...

Page 6: ...ndatory to keep this manual and all attached documents in an easily accessible place near the machine and known to all users operators and maintenance personnel Operators and maintenance technicians m...

Page 7: ...relevant provisions Machinery Directive 2006 42 EC EMC Directive 2014 30 EU and LVD Directive 2014 35 EU EN 55022 EN 55024 EN 60204 1 ThemarkingcanbeidentifiedbymeansofanidentificationplateoftheManuf...

Page 8: ...8 1 WASP S r l 1 2 1 Position of the label on the machine IMPORTANT The label of identification of the machine is placed on the back of the machine...

Page 9: ...f the Manufacturer s technicians at the Customer s premises for the removal of defects under warranty are the responsibility of the Manufacturer except in cases where the nature of the defect is such...

Page 10: ...ently from what we described in the documentation presented Possible operations on the machine are Mechanics Electrical MECHANICAL NATURE INTERVENTIONS Any intervention of a mechanical nature must be...

Page 11: ...ed operators for the maintenance of electrical and or electronic parts and systems Qualified technicians employees of the Manufacturer or authorized service center special maintenance staff and operat...

Page 12: ...seadhesivesandassimilatetheinstructions Refertoparagraph1 6 Glossaryandpictograms Ifthemeaning is not clearly understood contact the Manufacturer ATTENTION The labels and stickers applied to the machi...

Page 13: ...n in case an alarm condition occurs Mechanical maintenance technician Qualified technician able to conduct the machine under normal conditions to intervene on the mechanical parts to carry out all the...

Page 14: ...ationsinwhichthereisthepossibilityofcausingdamagetotheenvironment NOTE Indicate the notes warnings suggestions and other points on which you want to draw the reader s attention or complete the explana...

Page 15: ...circular inlet hole during the printing phase However it no longer matters that the material is compacted and degassed before being introduced since the continuous movement of the mixer can easily rem...

Page 16: ...l Fig 2 1 Main view 2 1 Main view Legend 1 ON OFF button and user interface view 5 2 User Interface 2 Inspection window 3 Material intake 4 Locking knobs 5 Rotating brushless motor 6 Clamp 7 Output pi...

Page 17: ...17 2 WASP S r l Fig 2 2 Rear view 2 2 Rear view Legend 1 220 110v Current input 2 Signal input 3 Fan filter 4 Security screw 1 3 2 4...

Page 18: ...of a single component Noisiness 70 db A Mechanical features Frame and cover Metal sheet and stainless steel Movement Rotation on thrust bearing and Igus bearings Motors ISV57 brushless Electrical feat...

Page 19: ...constructed described in paragraphs 2 3 Technical Data and 2 5 Intended use of the machine Failure to comply with safety regulations Operation of the machine with procedures other than those described...

Page 20: ...operator must wear all the necessary Personal Protective Equipment PPE 3 1 1 Delivery of the machine Upon receipt make sure that The machine has not been damaged during transport Any packaging has not...

Page 21: ...ntally oriented wooden box After removing the machine from the case you must assemble first the basement and then join the vertical pipe NOTE To perform this procedure it is required the presence of t...

Page 22: ...t of the machine is shown in paragraph 2 3 Technical data It is therefore necessary to use the lifting equipment whose expected flow is adequate for the weight to be lifted ATTENTION As long as the ma...

Page 23: ...callyagainstanycrushingorsourcesofwearaccording to the type of installation made ATTENTION The machine must be powered by a power plant compliant with laws and regulations on safety NOTE All the data...

Page 24: ...tents of paragraph 1 5 General safety warnings Furthermore the specific requirements for safe interaction with the machine related to this chapter are detailed in the following paragraphs ATTENTION Th...

Page 25: ...se the machine is notconnectedbycabletothe3Dprinter Youcanusethisbuttontomanuallyswitchonandoffthemovement of the mixing unit 4 FREQUENCYMIXER Adjustthefrequencyofmovementofthemixingunit Reasonableval...

Page 26: ...26 Preparing to use the continuous feeding 5 WASP S r l...

Page 27: ...h 1 5 General safety warnings Furthermore the specific requirements for safe interaction with the machine related to this chapter are detailed in the following paragraphs ATTENTION The operations rela...

Page 28: ...he joint looks like in Fig 6 2 a Make sure that the set screw and nut are well tightened If this joint is not properly assembled the mixing unit won t work correctly Make sure there are no gaps betwee...

Page 29: ...e machine 29 6 WASP S r l Fig 6 2 a Check bearing and alignment Fig 6 2 c Check joint interpenetration Fig 6 2 b Check tightening and alignment Fig 6 2 Setup and pre operational checks Fig 6 2 d Check...

Page 30: ...htening additional to the one that can be done by hand is required or advised If you have problem in screwing the part they are probably misaligned Try to lift the hose Adding some grease on the threa...

Page 31: ...g 6 3 a Fix the hose to the pipe Fig 6 3 c Insert the signal cable in the socket Fig 6 3 b Fix the hose to the extruder Fig 6 3 Connecting the Continuous feeding System to the 3D printer Fig 6 3 d Ins...

Page 32: ...the system To perform the loading of the material proceed as described 1 Turn on the machine using the green button on the global switch Fig 6 4 a 2 After preparing a suitable mixture produce some cyl...

Page 33: ...rst use of the machine 33 6 WASP S r l Fig 6 4 a Turn on the machine Fig 6 4 c Material pushed through the intake Fig 6 4 b 5cm cylindrical dough Fig 6 4 Loading of material Fig 6 4 d Max material lev...

Page 34: ...layed in paragraph 6 4 Loading the material 3 Turn OFF the 3D printer connected to the machine in case there is one 4 Turn ON the machine using the green button on the global switch of the machine Fig...

Page 35: ...f the machine 35 6 WASP S r l Fig 6 5 c Turn on the machine Fig 6 5 e Cleaning the seat of the thread Fig 6 5 d Check the material getting out Fig 6 5 First extrusion Fig 6 5 f Tighten the hose with t...

Page 36: ...te Consider using it in case you have an excess of extrusion during the printing or material leaks from the upper slots extruder EXTRUDE MATERIAL The Extrude material command accessible in the main me...

Page 37: ...tailed in the next paragraphs ATTENTION The operations related to these activities must be performed by authorized and professionally qualified personnel ATTENTION During operations the operator must...

Page 38: ...In case the machine is not connected to a 3D printer turn ON the extrusion unit using the relative ON OFF button see 5 3 User Interface Wait until there s no more material coming out from the hose 3 T...

Page 39: ...aordinary maintenance 39 6 WASP S r l Fig 7 2 1 a Remove the hose from the extruder Fig 7 2 1 d Unscrew the hose from the pipe Fig 7 2 1 b Purging the material out Fig 7 2 1 Cleaning Fig 7 2 1 c Unplu...

Page 40: ...extraordinary maintenance 6 WASP S r l Fig 7 2 1 f Secure the extrusion motor Fig 7 2 1 e Lift and secure the extrusion motor Fig 7 2 1 g Extract the screw Fig 7 2 1 h Loosen the two black knobs Fig...

Page 41: ...e 41 6 WASP S r l Fig 7 2 1 l Pull down the lower component Fig 7 2 1 m Pull down the mixer together with all the bearing Fig 7 2 1 n Separate the bearing from the mixer Fig 7 2 1 Cleaning Fig 7 2 1 i...

Page 42: ...part with water and sponge or brush Note pay attention to the upper part especially to the LED the microswitch and the cable Do not use current water on the main part Screw Clean the part with water...

Page 43: ...er and 3D printer consult the official Manual of Use and Maintenance of the 3D printer Cleaning the Extruder 1 Separate the body of the extruder blue part from the motor by unscrewing it 2 Clean the b...

Page 44: ...ents and very abrasive tools when cleaning the machine to prevent unwanted damages and wearing Fig 7 3 1 Check the wear of the screw Fig 7 3 2 Check the overall wearing of the mixer Fig 7 3 Maintenanc...

Page 45: ...the filter of the fan placed on the back of the interface of the machine Fig 7 3 3 In case the filter is dirty clean it with compressed air After the check place it back in its place 7 3 4 Mixerbearin...

Page 46: ...and extraordinary maintenance 6 WASP S r l Fig 7 3 3 Fan filter dust check and cleaning Fig 7 3 5 Mixer shaft lubing Fig 7 3 6 Support bearing lubing Fig 7 3 4 Mixer bearing lubing Fig 7 3 Ordinary M...

Page 47: ...ing the dismantling operations it is necessary to create around the machine a sufficiently large and orderly space in order to allow all the necessary movements without risk created by the surrounding...

Page 48: ...2012 19 EU on waste electrical and electronic equipment WEEE ATTENTION The user is obliged to dispose of the equipment in the consortia and collection centers for the treatment and recovery of WEEE 8...

Page 49: ..._______________________________________ __________________________________________________________________________________ _____________________________________________________________________________...

Page 50: ...____________________________________________ __________________________________________________________________________________ ________________________________________________________________________...

Reviews: