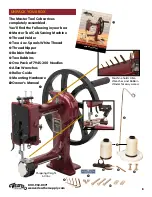
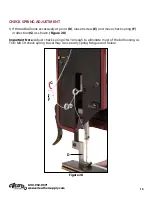
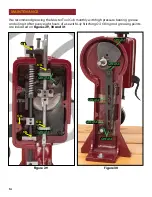
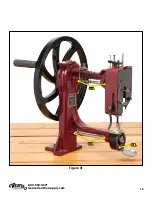
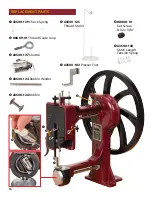
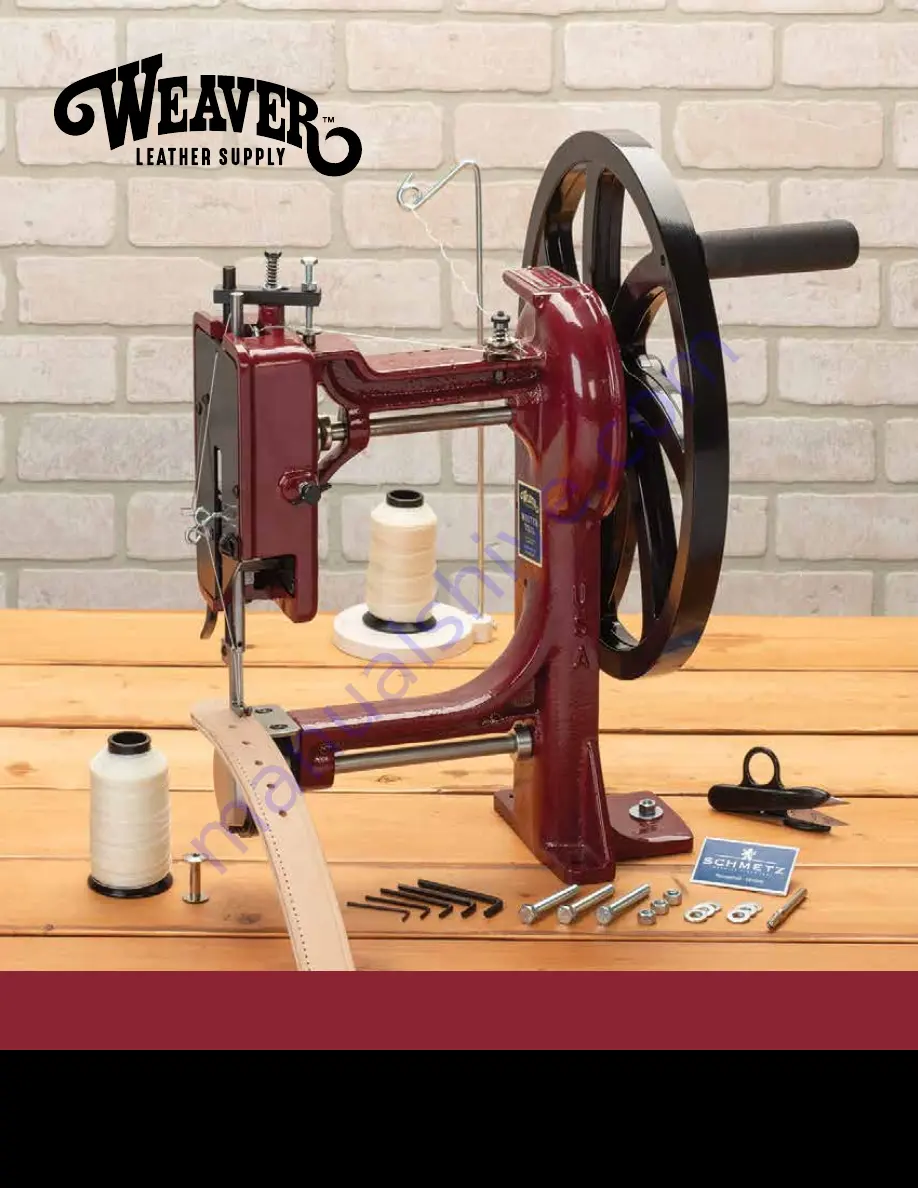
background image

weaverleathersupply.com

800-932-8371

1

MASTER TOOL CUB SEWING MACHINE

OWNER’S MANUAL

U.S. Patent #9,657,418

INSERT-133   7/21

18-2129-SP

Summary of Contents for 63500-01

Page 1: ...weaverleathersupply com 800 932 8371 1 MASTER TOOL CUB SEWING MACHINE OWNER S MANUAL U S Patent 9 657 418 INSERT 133 7 21 18 2129 SP...

Page 2: ...ation that makes it easy to maintain a continuous line of stitching Sews up to 4 stitches per inch with a consistent stitch length no matter the speed Portable design is great for taking to shows Back...

Page 3: ...er Two 4 oz Spools White Thread Thread Nipper Bobbin Winder Two Bobbins One Pack of 794S 200 Needles Allen Wrenches Roller Guide Mounting Hardware Owner s Manual Machine holds Allen Wrenches and Bobbi...

Page 4: ...e Flywheel 1 Locate the flat sides on the Flywheel Shaft Figure 1 2 Slide the Hand Crank Flywheel on the Flywheel Shaft making sure to line up the Bolts with the flat sides on the Flywheel Shaft Figur...

Page 5: ...edle Needle Foot Foot Shuttle Shuttle Thread Thread Cutter Cutter Check Check Spring Spring Needle Needle Bar Bar Stitch Stitch Length Dial Length Dial Limited Lifetime Guarantee Every Master Tool is...

Page 6: ...L L M M Figure 4 Figure 5 Figure 6 C C E E 1 Run thread from spool A on thread stand B Figure 4 to the Tensioner Eyelet 1 C Figure 5 2 Run thread between the Tensioner Discs D making sure the thread...

Page 7: ...d through the bottom of your Needle Bar L and your Needle M Figure 10 FILLING BOBBINS Figure 11 Figure 12 A bobbin winder is included that may be attached to an electric drill to assist you in winding...

Page 8: ...o the tab INSERTING BOBBIN 1 Slip the thread from the bobbin into the slot B at the base of the bobbin case Figure 15 2 Continue pulling thread under the tension spring until it rests in the fork C of...

Page 9: ...s directly above the desired point of entry for your first stitch Figure 20 3 While still holding the thread to the rear lower the foot and turn the crank to complete your first couple stitches After...

Page 10: ...sion TO ADJUST TENSION Figure 25 1 Loosen Lock Screw B Failure to loosen lock screw may result in a broken screw or damage to the bobbin case 2 Turn Adjusting Screw C clockwise to tighten tension or c...

Page 11: ...and frayed thread try changing your needle Bent or dull needles may be responsible Correct Needle Position Wrong Needle Position D D E E Figure 26 Round Round Opening Opening of the of the Needle Bar...

Page 12: ...e the thread by cranking over the machine The spring loaded shuttle hook must be freed first 1 Cut and clean out the misplaced thread The hook A should then snap back into place 2 If the above fails l...

Page 13: ...ns excessively at point D loosen screw E and move check spring F in direction G as shown Figure 28 Important Note Adjust check spring ONLY enough to eliminate most of the ballooning as TOO MUCH check...

Page 14: ...ase and oiling it after every eight hours of use with Lily Stitching Oil Oiling and greasing points are indicated on Figures 29 30 and 31 Figure 29 Figure 30 OIL OIL OIL OIL GREASE GREASE GREASE GREAS...

Page 15: ...weaverleathersupply com 800 932 8371 15 Figure 31 OIL OIL OIL OIL OIL OIL...

Page 16: ...500 129 Check Spring 88009 01 Thread Guide Loop 63500 127 Shuttle 63500 124 Bobbin Winder 63500 126 Bobbin 63500 125 Thread Stand 88008 01 Set Screw 8 32 x 3 16 63500 130 Stitch Length Tension Spring...

Reviews: