1. Getting Started
Kit Contents
●
Speed Master 2.5” SATA III Enclosure
●
eSATA and USB Cable
●
Screws / Screwdriver
●
Carry Pouch
●
QIG (Quick Install Guide)
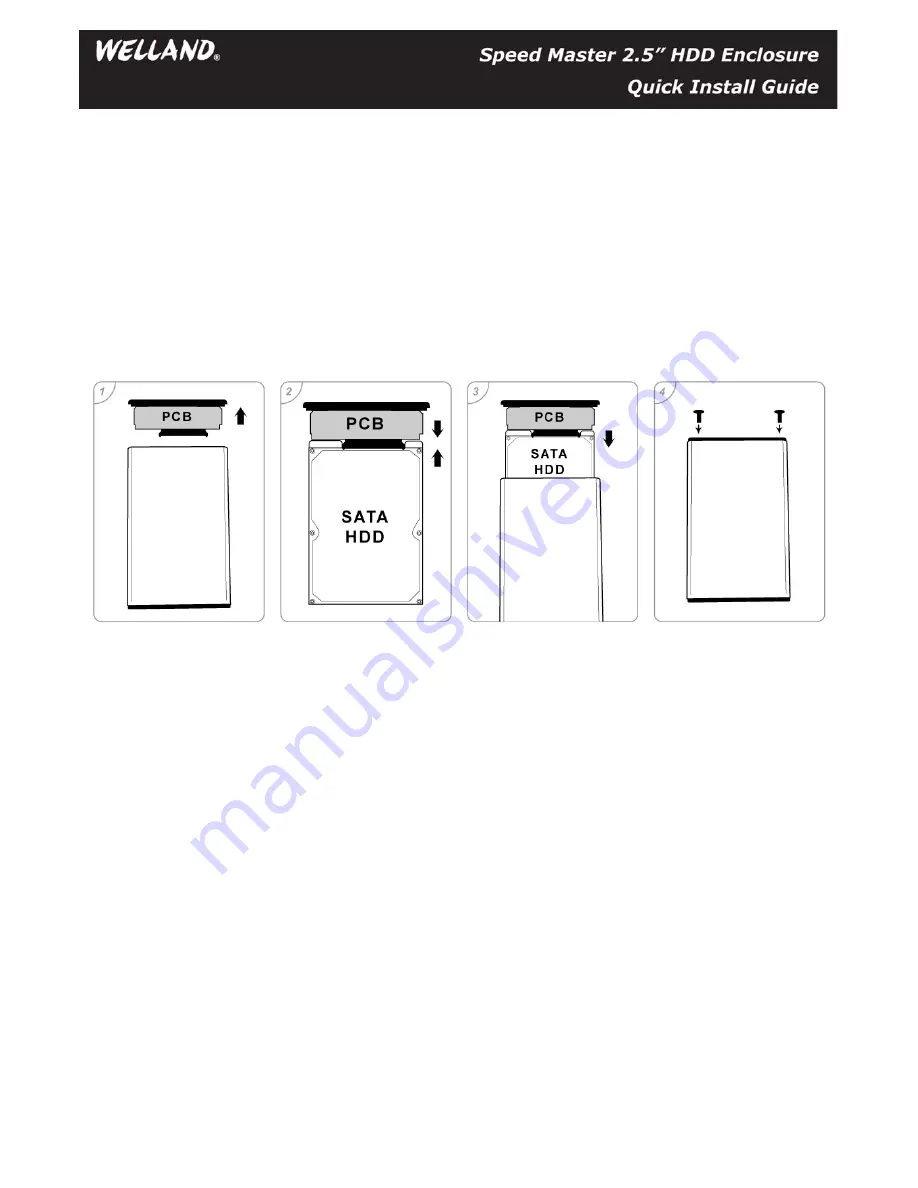
2. Assembling the 2.5" SATA HDD
Step 1 : Pull out the PCB set.
Step 2 : Connect the 2.5” SATA hard drive correctly to the PCB.
Step 3 : Slide the HDD set into the aluminum case.
Step 4 : Put on the screws and tighten them.
3. Formatting Hard Drive
In order to use a hard drive, or a portion of a hard drive, in Windows you need to first partition it and then format it. This process will
then assign a drive letter to the partition allowing you to access it in order to use it to store and retrieve data.
All hard disk management is done in the Disk Management Administrative Tool. Follow these steps to open this tool:
1.
Click on the
Start
button and select the
Control Panel
option.
2.
If in Classic control panel mode, double-click on the
Administrative Tools
icon and then double-click on
Computer Management
icon. If
your control panel is in the Category view, click on
Performance and Maintenance
, then click on
Administrative Tools,
and finally
double-click on the
Computer Management
icon.
3.
When the Computer Management screen opens, click on the
Disk Management
option under the
Storage
category. This will present you with
a screen called
The Disk Management Screen
.
To make a partition from the unused space you would do the following.
1.
Right click on the space listed as unallocated.
2.
At the menu that comes up, click on the
New Partition
option.
3.
You will now be presented with a wizard as to how you would like the partition to be created. At the first screen press
Next
.
4.
At the following screen, determine if you need a primary or extended partition. Most people will be fine selecting
Primary Partition
. Select
Primary Partition
and press
Next
.
5.
At the next screen you will be prompted to type in how much of the unallocated space you would like used for the new partition. Regardless,
of what you decide, you need to enter a size in the
Partition size in MB:
field, or stick with the default size, and press the
Next
button.
Minimum System Requirements
●
USB3.0-Equipped Windows XP, Vista, 7, 8
●
USB3.0-Equipped Mac OS X 10.5 or above


