background image


WS-604 V2.06 

DIGITAL LED CLOCK 

User Guide 


WEST OCEAN 

Summary of Contents for WS-604

Page 1: ...P WS 604 V2 06 DIGITAL LED CLOCK User Guide WEST OCEAN...

Page 2: ...k 10 Set up Wi Fi 11 Optional Access your clock through Static IP 12 Set synchronize the time automatically via Internet 13 Control your Clock remotely via Web Browser 13 Set up Daily Hourly Alarms 14...

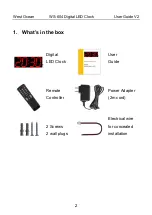
Page 3: ...t Ocean WS 604 Digital LED Clock User Guide V2 2 1 What s in the box Digital LED Clock User Guide Remote Controller Power Adapter 2m cord 2 Screws 2 wall plugs Electrical wire for concealed installati...

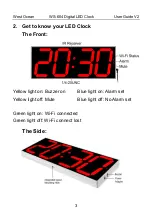
Page 4: ...ck User Guide V2 3 2 Get to know your LED Clock The Front Yellow light on Buzzer on Blue light on Alarm set Yellow light off Mute Blue light off No Alarm set Green light on Wi Fi connected Green light...

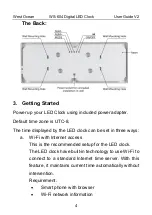
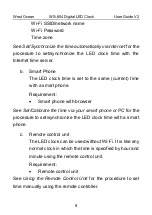
Page 5: ...displayed by the LED clock can be set in three ways a Wi Fi with Internet access This is the recommended setup for the LED clock The LED clock have built in technology to use Wi Fi to connect to a sta...

Page 6: ...rent time with a smart phone Requirement Smart phone with browser See Set Calibrate the time via your smart phone or PC for the procedure to set synchronize the LED clock time with a smart phone c Rem...

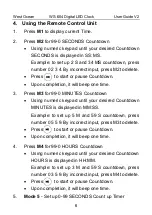
Page 7: ...ss M3 for 99 0 MINUTES Countdown Using numeric keypad until your desired Countdown MINUTES is displayed in MM SS Example to set up 5 M and 59 S countdown press number 0 5 5 9 By incorrect input press...

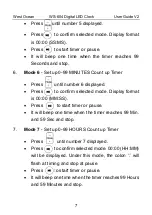
Page 8: ...il number 6 displayed Press to confirm selected mode Display format is 00 00 MM SS Press to start timer or pause It will beep one time when the timer reaches 99 Min and 59 Sec and stop 7 Mode 7 Set up...

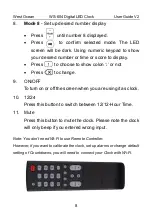
Page 9: ...e to show colon or not Press to change 9 ON OFF To turn on or off the screen when you are using it as clock 10 12 24 Press this button to switch between 12 12 Hour Time 11 Mute Press this button to mu...

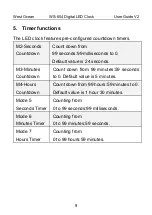
Page 10: ...ault value is 24 seconds M3 Minutes Countdown Count down from 99 minutes 59 seconds to 0 Default value is 5 minutes M4 Hours Countdown Count down from 99 hours 59 minutes to 0 Default value is 1 hour...

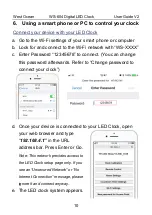
Page 11: ...c Enter Password 12345678 to connect You can change this password afterwards Refer to Change password to connect your clock d Once your device is connected to your LED Clock open your web browser and...

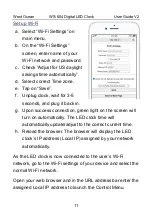
Page 12: ...in g Upon success connection green light on the screen will turn on automatically The LED clock time will automatically update adjust to the correct current time h Reload the browser The browser will...

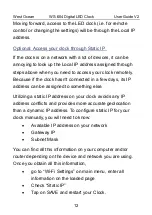
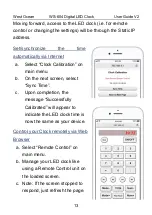
Page 13: ...t connected in a few days its IP address can be assigned to something else Utilizing a static IP address on your clock avoids any IP address conflicts and provides more accurate geolocation than a dyn...

Page 14: ...t a Select Clock Calibration on main menu b On the next screen select Sync Time c Upon completion the message Successfully Calibrated will appear to indicate the LED clock time is now the same as your...

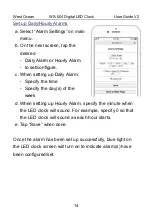
Page 15: ...gure c When setting up Daily Alarm Specify the time Specify the day s of the week d When setting up Hourly Alarm specify the minute when the LED clock will sound For example specify 0 so that the LED...

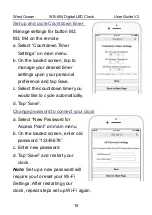
Page 16: ...pon your personal preference and tap Save c Select the countdown timer you would like to cycle automatically d Tap Save Change password to connect your clock a Select New Password for Access Point on...

Page 17: ...k while plug in power adapter Release the MODE button The clock displays 1 indicating Time Setup Mode Follow instructions below we take 17 41 Sunday November 04 2018 as example By incorrect entering i...

Page 18: ...support team Please check name and size of the downloaded file to make sure it is the correct version b Connect your Clock with your device as below Note If you are using static IP just type your sta...

Page 19: ...UL when you are updating the file MAKE SURE you have selected the correct file Uploading WRONG file will lead the clock to malfunction and this is irrevocable g Upon successful updating your LED Clock...

Page 20: ...ace it on tripod through integrated tripod mounting hole 2 Screws and 2 plastic expansion anchors for mounting in wall Electrical wire for concealed installation in wall Note With built in G sensor th...

Page 21: ...ronic wire Red Black provided the black one is ground the red one is 12V 4 You can also see DC12V beside the DC power socket on the back of the clock it is to help you to identify positive and negativ...

Page 22: ...Power adapter DC 9 28V 6 4 Watt Max Working environment Operating Temp 0 to 40 C 32 to 104 F Storage Temp 0 to 60 C 32 to 140 F Operating Humidity 10 to 90 RH 13 Using Tips Before starting the clock c...

Page 23: ...ock wait for 5 10 seconds 2 Press and hold the ON OFF button on the back of the clock 3 Plug in power adapter 4 Release the ON OFF button after the beep The Wi Fi settings have been cleared if the gre...

Page 24: ...smart phone until Wi Fi is available The clock will still work using the remote controller If Wi Fi is available repeat Set synchronize the time automatically via Internet to reconnect the LED clock t...

Reviews: