background image

Summary of Contents for TEDL640DQ0

Page 1: ...ng restarting your dryer 6 Selecting the right cycle and setting 7 End of Cycle signal 6 Using the drying rack 11 Caring for Your Dryer 12 Laundry Tips 16 Troubleshooting 20 Requesting Assistance or Service 22 Warranty 24 1 800 253 l 301 Call our Consumer Assistance Center with questions or comments ELECTRIC AND GAS DRYERS II q5 PART NO 3401102 ...

Page 2: ... notify you about any new information on your appliance Please record your model s information Whenever you call to request service on Model Number your appliance you need to know your complete model number and serial number Serial Number You can find this information on the model Purchase Date and serial number label see diagram on page 5 for location of label Dealer Name Please also record the p...

Page 3: ...r explosion or to prevent property damage personal injury or loss Do not store or use gasoline or other flammable vapors and liquids in the vicinity of this or any other appliance WHAT TO DO IF YOU SMELL GAS l Do not try to light any appliance l Do not touch any electrical switch do not use any phone in your building l Clear the room building or area of all occupants l Immediately call your gas su...

Page 4: ...fire by itself electrical power before attempting to Store flammable solvents or fluids away service your dryer Also shut off gas from your dryer valve if you have a gas dryer l Dry cleaning solvents or fluids should l When removing from service or discard never be put directly into your dryer ing a dryer always remove the door to l Do not let dust lint paper rags chemi prevent accidental entrapme...

Page 5: ... drawings in this book may vary from your dryer model They are designed to show the different features of all models covered by this book Your model may not include all features Cycle control knob may include temperature settings PP 7 8 Start button P 6 Lint screen P 12 Dryer drum Model and serial number label P 2 Full width hamper door Other doors Mlnl hamper door Other features not shown End of ...

Page 6: ...es Guide provides you with more information about your dryer Starting your dryer 1 Load clothes into the dryer and close 3 Push the Start Button the door 2 Turn the Cycle Control Knob to the desired cycle Use the Energy Preferred Automatic Setting to dry most loads see paw 7 NOTE Your I a cycle ends dryer stops automatically when Stopping restarting your dryer You can stop your dryer anytime durin...

Page 7: ...gy Preferred Automatic Setting Your Automatic cycle s shuts off when the selected dryness is reached The Cycle Control Knob will not move until the load is almost dry After the cool down the Knob automati cally turns to an OFF area and tumbling stops l If the load is drier than you like select a setting closer to LESS DRY the next time you dry a similar load l If the load is not as dry as you like...

Page 8: ...t or from items not removed from the dryer at the end of a cycle As soon as the dryer stops fold or put the items on hangers End of Cycle signal on some models The dryer sounds a signal to let you know l On some dryers the end of cycle signal ILI ti when the cycle is finished The can be turned On or Off by a selector The II signal is helpful when you are end of cycle On Off selector is part of the...

Page 9: ...h Low High Low COlTONS AND LINENS Extra Heavy Bedspreads mattress pads quilts Heavyweight Towels jeans corduroys work clothes Mediumweight Sheets cotton underwear diapers Lightweight Batistes organdies lingerie J 70 80 J 50 60 J 40 50 J 20 30 PERMANENT PRESS SYNTHETICS AND BLENDS Heavyweight Work clothes jackets raincoats Mediumweight Shirts play clothes sheets slacks Lightweight Lingerie blouses ...

Page 10: ...ace etc Use No Heat Fluff if low heat is not available See page 9 RUBBER PLASTIC HEAT SENSITIVE FABRICS Foam Rubber Pillows padded bras stuffed toys l Make sure coverings are securely stitched l Shake and fluff pillows by hand several times during the No Heat Fluff cycle l Make sure pillows are completely dry Foam rubber pillows take a long time to dry Plastic Shower curtains tablecloths Rubber ba...

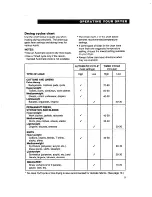
Page 11: ...d or the No Heat Fluff cycle see page 7 5 Push the Start Button a NOTES l See the chart below for suggested cycles and settings for the different types of items that might best be rack dried l The rack must be removed for normal tumbling l Drying time will depend on how much moisture the items hold The following chart suggests drying times l Automatic cycles do not work with the drying rack RACK D...

Page 12: ...ay shed more lint than other towels causing your dryer s lint screen to fill up faster Be sure to remove lint from the lint screen before and after drying new towels As needed cleaning Laundry detergents and fabric softeners can cause a residue buildup on the lint screen Clean the lint screen with a nylon brush every six months or more frequently if it becomes clogged due to a residue buildup Use ...

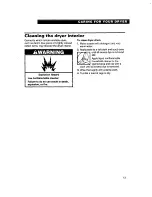
Page 13: ... detergent and very warm water 2 Apply paste to a soft cloth and scrub area _ until all excess dye is removed OR Apply liquid nonflammable household cleaner to the stained area and rub with a Explosion Hazard Use nonflammable cleaner Failure to do so can result In death explosion or fire cloth until all excess dye is removed 3 Wipe thoroughly with a damp cloth 4 Tumble a load of rags to dry 13 ...

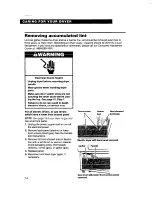
Page 14: ...7 Failure to do so can result in death electrical shock or serious cuts For all electric dryers or gas dryers which have a lower front access panel NOTE See page 15 if your dryer is gas and has a full front panel 1 Unplug the power supply cord or turn off the electrical power 2 Remove back panel electric or lower front access panel gas See the Installa tion Instructions 3 Remove lint from shaded a...

Page 15: ...ng wires View A 6 Remove lint from area shown in gas dryer illustration on page 14 with soft brush or vacuum cleaner Avoid damag ing wires funnel or ignitor 7 Reassemble in reverse order Before closing the top check the following Drum seal must be flared out see drum seal insets of View B and prop erly positioned against panel at back of drum Rotate drum counterclockwise one full turn to check dru...

Page 16: ...ven drying and l For better tumbling action when drying only a few small items add one or two lint free towels This also prevents small lightweight items from blocking airflow wrinkling and can cause items to wear out faster because of pilling l You may need to rearrange large items sheets blankets tablecloths during a cycle to reduce balling or rolling up Drying tips l Close zippers snaps and hoo...

Page 17: ...can clog the lint screen and slow drying Use fabric soften ers labeled as dryer safe Saving energy l Use an Automatic cycle to dry most loads l Dry only full loads without overdrying l Avoid overloading dryer adding wet items to a partly dried load or opening the door unnecessarily l Plan your laundry to dry one load after another A warm dryer shortens drying time l Shorten drying times by exhaust...

Page 18: ... blanket in dryer with warm towels Set control for 20 minutes 3 Check after 10 minutes Remove when still damp Overdrying and long tumbling can cause shrinking and pilling 4 Place blanket on flat surface or over two lines to finish drying Gently stretch to original size and shape 5 When completely dry brush gently to raise nap Press binding with cool iron if needed Curtains drapes Remove drapery we...

Page 19: ...ooth reshape and air dry before putting away Follow care label instructions 1 Dry one at a time 2 Remove from dryer and shake or fluff the item during the drying cycle 3 Smooth and reshape before putting away Snowsuits jackets l Nylon or polyester Check label for fiber content then follow care label instructions 1 Dry garment for about 10 minutes Remove and turn inside out Dry for 10 more minutes ...

Page 20: ...s l Pilling surface fuzz caused by normal wear and laundering attracts lint Shrinking l Overdrying l Fabric type and quality inappropriate for drying l Dryer settings incorrect for fabric type l Manufacturer s care label instructions not followed Slow drying l Full lint screen l Load too large and bulky to dry quickly l Dryer located in room with temperature below 45 F 7 C l Exhaust duct clogged r...

Page 21: ...cord plugged in Have you blown a fuse or tripped the circuit breaker q Is exhaust duct or outside exhaust hood clogged with lint For gas dryers are the valves open on the dryer and the supply line Is the dryer making noise Is there a thumping sound from support rollers indicating dryer has not been used for awhile Is the lint signal sounding If you still have problems see Requesting Assistance or ...

Page 22: ...ASHING MACHINES h MAJOR SERVICE REPAIR DRYERS SERVICE 6 REPAIR Seer Whirlpool Appliances or SW Whirlpool Appliances or Authorized Whirlpool Service Authorized Whirlpool Service Example xYz service CO Examp er XYZ service CO 3 If you need FSP replacement parts FSP is a registered trademark of Whirlpool Corporation for quality parts Look for this symbol of quality whenever you need a replacement par...

Page 23: ...to parts or systems caused by unauthorized modifications made to the appliance 6 94 WHIRLPOOL CORPORATION SHALL NOT BE LIABLE FOR INCIDENTAL OR CONSEQUENTIAL DAMAGES Some states do not allow the exclusion or limitation of incidental or consequential damages so this exclusion or limitation may not apply to you This warranty gives you specific legal rights and you may also have other rights which va...

Reviews: